Makita BHX2501 Instruction Manual
Petrol blower
Hide thumbs
Also See for BHX2501:
- Instruction manual (20 pages) ,
- Instruction manual (144 pages) ,
- Instruction manual (56 pages)
Table of Contents
Available languages
Available languages
PETROL BLOWER
SOUFFLEUR À ESSENCE
BENZIN BLASGERÄT
SOFFIATORE A BENZINA
BENZINE BLADBLAZER
SOPLADOR GASOLINA
BENZINDREVET BLÆSEAPPARAT
SOPRADOR A GASOLINA
BHX2501
INSTRUCTION MANUAL
(P2~P18)
INSTRUCTIONS D'EMPLOI
(P19~P35)
BETRIEBSANLEITUNG
(P36~P52)
MANUALE D'ISTRUZIONI
(P53~P69)
GEBRUIKSAANWIJZING
(P70~P86)
MANUAL DE INSTRUCCIONES
(P87~P103)
BRUGSANVISNING
(P104~P120)
MANUAL DE INSTRUÇÕES
(P121~P137)
Important:
Read this instruction manual carefully before putting the Blower into operation and strictly
observe the safety regulations! Preserve instruction manual carefully!
Importante:
Lisez attentivement ce manuel utilisateur avant de mettre en route le souffleur et respec-
tez scrupuleusement les consignes de sécurité.
Conservez soigneusement ce manuel.
Wichtig:
Lesen Sie diese Betriebsanleitung sorgfältig durch bevor Sie das Blasgerät in Betrieb
nehmen und beachten Sie die Sicherheitsvorschriften genau!
Bewahren Sie diese Betriebsanleitung sorgfältig aul!
Importante:
Leggere con attenzione il manuale prima di mettere in funzione il soffiatore; le norme di
sicurezza vanno rigorosamente rispettate!
Conservare il manuale delle istruzioni per I'uso.
Belangrijk:
Lees altijd eerst de veiligheidsvoorschriften aandachtig door en neem deze in acht voor-
dat u de machine in gebruik neemt. Bewaar deze gebruiksaanwijzing zorgvuldig.
Importante:
Lea bien este manual antes de poner el soplador en funcionamiento, y observe estricta-
mente las medidas de seguridad. Conserve este manual de instrucciones.
Vigtig:
Denne driftsvejledning skal læses omhyggeligt igennem, inden blæseapparatet tages i
drift og man skal være sarlig opmærksom på de enkelte sikkerhedsforskrifter!
Opbevar denne driftsvejledning omhyggeligt!
Importante:
Leia cuidadosamente este manual de instruções antes de colocar o soprador em funcio-
namento e observe estrictamente as normas de segurança. Guarde o manual de
instruções.
English / Français / Deutsch / Italiano
Nederlands / Español / Dansk / Português
Chapters
Table of Contents

Related Manuals for Makita BHX2501


Summary of Contents for Makita BHX2501
- Page 1 BENZIN BLASGERÄT SOFFIATORE A BENZINA BENZINE BLADBLAZER SOPLADOR GASOLINA BENZINDREVET BLÆSEAPPARAT SOPRADOR A GASOLINA BHX2501 INSTRUCTION MANUAL Important: Read this instruction manual carefully before putting the Blower into operation and strictly (P2~P18) observe the safety regulations! Preserve instruction manual carefully! Importante: INSTRUCTIONS D’EMPLOI...
-
Page 2: Table Of Contents
Thank you very much for selecting the Makita blower. We are pleased Table of contents to be able to offer you the Makita blower which is the result of a long Page development programme and many years of knowledge and experi- SYMBOLS.................... -
Page 3: Safety Instructions
SAFETY INSTRUCTIONS General Instructions • To ensure correct and safe operation, the user must read, understand and follow this instruction manual to assure familiarity with the handling of the blower (1). Users insufficiently informed will risk danger to them- selves as well as others due to improper handling. •... -
Page 4: Refuelling
Start the Blower only in accordance with the instructions. Do not use any other methods for starting the engine (6) ! • Use the blower and the tools supplied only for applications specified. • Start the blower engine only after the entire tool has been assembled. Operation of the tool is permitted only after all the appropriate acces- sories are attached. - Page 5 Use only genuine spare parts and accessories supplied by Makita. Use of non-approved accessories and tools means increased risk of accidents and injuries. Makita will not accept any liability for accidents or damage caused by the use of any non-approved attachment or accesso- ries.
-
Page 6: Ec Declaration Of Conformity
PA eq EN15503 Uncertainty K dB(A) dB(A) 103.7 Sound power level average to WA eq EN15503 Uncertainty K dB(A) Notes: 1. Use the oil and spark plug specified by Makita. 2. This specification is subject to change without prior notice. -
Page 7: Designation Of Parts
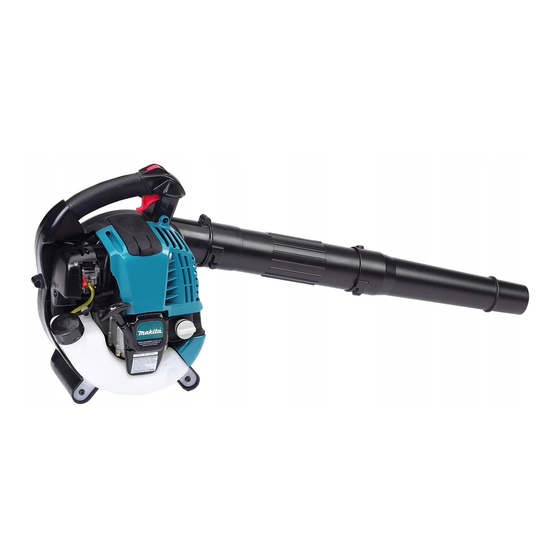
DESIGNATION OF PARTS Vacuum set (Optional) DESIGNATION OF PARTS DESIGNATION OF PARTS DESIGNATION OF PARTS DESIGNATION OF PARTS 1. Stop switch 8. Fuel Tank 15. Plug Cover 22. Vacuum Pipe 2. Main Handle 9. Fuel Tank Cap 16. Spark Plug 23. -
Page 8: Assembly Instructions
ASSEMBLY INSTRUCTIONS CAUTION : Before performing any work on the blower, always stop the engine and pull the spark plug connectors off the spark plug. Always wear protective gloves! CAUTION : Start the blower only after having assembled it com- pletely. -
Page 9: Before Start Of Operation
BEFORE START OF OPERATION 1. Inspection and Refill of Engine Oil (1) Perform the following procedure when the engine is cool. Assure engine is on a flat horizontal surface as shown in Figure 1. • Inspection: Remove the oil cap. Wipe clean the oil level indicator. Reinstall the oil cap (Figure 2) and remove. Confirm if the oil is between the lower or upper limit of the oil indicator. - Page 10 2. Fuel supply WARNING • When refuelling the unit, be sure to observe the following instructions to prevent ignition or fire: - Fuel supply must be made in a place free of fire. Never bring the fire (smoking, etc.) near the place of fuel supply. - Stop the engine and allow the engine to cool down before refuelling.
-
Page 11: Operation
OPERATION 1. Starting WARNING • Never attempt engine start in a place where the fuel has been supplied. - If may cause ignition or fire. When starting the engine, keep a distance of at least 3 m. • Exhaust gas from the engine is toxic. Do not operate the engine in a poorly-ventilated place, such as in a tunnel, building, etc. - Operating the engine in the poorly-ventilated place may cause poisoning by exhaust gas. -
Page 12: Adjustment Of Idling
NOTE • The engine may be damaged if the choke lever is moved further beyond the “CLOSE” position. • If the engine fires and stops, return this lever to the “OPEN” position and pull the starter handle several times to start the engine again. •... -
Page 13: Operation Method
OPERATION METHOD 1. Blower operation • Hold the machine firmly during operation. • Direct the nozzle end toward the object to be dusted and pull the trig- ger lever. • Fully pull the trigger lever, hold down the throttle lock button and release finger from the trigger lever to lock the trigger lever at full throt- tle. -
Page 14: Inspection And Maintenance
INSPECTION AND MAINTENANCE DANGER • Before inspection and maintenance, stop the engine and allow it to cool. Remove the spark plug and plug cap. - If inspection or maintenance is attempted immediately after engine stop or with the plug cap left attached, the operator may suffer burn or an accident due to careless startup. -
Page 15: Checking The Spark Plug
2. Cleaning of air cleaner Plate Element (sponge) Air cleaner cover WARNING: INFLAMMABLES STRICTLY PROHIBITED Interval of Cleaning and Inspection: Daily (every 10 operating Breather Part hours) Element (1) Remove the air cleaner cover-fixing bolts. (felt) (2) Pull the cover lower side and detach the air cleaner cover. (3) Turn the choke lever to the full close side, and keep the carbu- retor off from dust or dirt. -
Page 16: Storage
4. Cleaning the fuel filter • Clogged fuel filter may cause difficulty of startup or failure of engine speed increase. • Check the fuel filter regularly as follows: (1) Remove the fuel tank cap, drain the fuel to empty the tank. Check the tank inside for any foreign materials. -
Page 17: Fault Location
Fault location Fault System Observation Cause Engine not starting or Ignition system Ignition spark O.K. Fault in fuel supply or compression system, mechanical with difficulty defect No ignition spark STOP-switch operated, wiring fault or short circuit, spark plug or connector defective, ignition module faulty Fuel supply Fuel tank filled Incorrect choke position, carburetor defective, fuel supply line... -
Page 18: Troubleshooting
TROUBLESHOOTING Before making a request for repairs, check a trouble for yourself. If any abnormality is found, control your machine according to the description of this manual. Never tamper or dismount any part contrary to the description. For repairs, contact Authorized Service Agent or local dealership. State of abnormality Probable cause (malfunction) Remedy... -
Page 19: Symboles
Page d’expérience-et nous vous en remercions. SYMBOLES ..................19 Les modèles BHX2501 légers, pratiques et compacts, allient les CONSIGNES DE SECURITE ............20 avantages d’une technologie de pointe à une conception ergonomique, DÉCLARATION DE CONFORMITÉ CE ..........23 et sont des outils de professionnels pour de nombreuses applications. -
Page 20: Consignes De Securite
CONSIGNES DE SECURITE Généralités • Pour tirer le meilleur parti de votre machine, vous devez lire, assimiler et respecter les instructions figurant dans ce manuel (1). Les utilisateurs informés risquent, manipulations inappropriées, de se blesser ou de blesser leur entourage. •... - Page 21 Avant de mettre la machine en marche, s’assurer que toutes les instructions sont bien respectées. N’utilisez pas d’autres méthodes de mise en marche de l’appareil. (6) • N’utiliser la machine et les outils fournis que pour les applications spécifiés. • Ne mettre la machine en marche que lorsque tous les accessoires ont été...
- Page 22 N’utiliser-que des pièces et des accessoires d’origine, fournis par Makita. L’utilisation d’outils et d’accessoires non agréés augmente les risques d’accident. Makita décline toute responsabilité en cas d’accident ou de dommage provoqué par l’utilisation d’accessoires ou d’outils non agréés.
-
Page 23: Déclaration De Conformité Ce
EN15503 Incertitude K dB(A) dB(A) 103,7 Moyenne du niveau de puissance WA eq sonore selon EN15503 Incertitude K dB(A) Notes: 1. Utiliser l’huile et la bougie désignés par Makita. 2. La spécification peut être soumise à changement sans avis préalable. -
Page 24: Désignation Des Pièces
DÉSIGNATION DES PIÈCES Kit d’aspiration (Optionnel) DÉSIGNATION DES PIÈCES DÉSIGNATION DES PIÈCES DÉSIGNATION DES PIÈCES DÉSIGNATION DES PIÈCES 1. Interrupteur d’arrêt 8. Réservoir à carburant 15. Capot de bougie 22. Gicleur d’aspiration 9. Bouchon du réservoir à 2. Poignée principale 16. -
Page 25: Instructions De Montage
INSTRUCTIONS DE MONTAGE ATTENTION : Avant toute opération sur le souffleur, couper toujours le moteur et débrancher les connecteurs de bougie. Porter toujours des gants de protection! ATTENTION : Ne mettre le souffleur en marche que lorsqu’il est complètement monté. 1. -
Page 26: Avant Mise En Marche
AVANT MISE EN MARCHE 1. Inspection et ravitaillement de l’huile moteur (1) Suivre la procédure ci-dessous lorsque le moteur est froid. S’assurer que le moteur est sur une surface horizontale et plane, tel qu’illustré à la Figure 1. • Inspection : Retirer le bouchon du réservoir d’huile. - Page 27 2. Alimentation en carburant AVERTISSEMENT • Lors du remplissage, respecter rigoureusement les instructions suivantes pour éviter les risques d’explosion ou d’incendie : - L’alimentation en carburant doit être effectuée à l’endroit où il n’y a pas de feu. Ne jamais apporter du feu (tabac, etc.) près de l’endroit de l’alimentation en carburant.
-
Page 28: Fonctionnement
FONCTIONNEMENT 1. Mise en marche AVERTISSEMENT • Ne jamais tenter de démarrer le moteur dans l’endroit où le carburant a été alimenté. - Cela comporte un risque d’explosion ou d’incendie. S’éloigner d’au moins 3 mètres pour faire démarrer le moteur. •... -
Page 29: Réglage Du Ralenti
NOTE • Le moteur pourra être endommagé si le levier de réglage est déplacé au-delà de la position “CLOSE”. • Si le moteur s’allume puis s’arrête, remettre ce levier en position ouverte (“OPEN”) et tirer à quelques reprises sur la poignée de démarreur pour faire redémarrer le moteur. -
Page 30: Mode Operatoire
MODE OPERATOIRE 1. Manœuvre du souffleur • Retenir fermement la machine pendant la manœuvre. • Orienter le bout de l’embout vers les objets à épousseter et tirer le déclencheur. • Tirer complètement sur le déclencheur, maintenir le bouton de verrouillage de l’étrangleur enfoncé et retirer le doigt du déclencheur pour verrouiller ce dernier en position de puissance maximale. -
Page 31: Inspection Et Maintenance
INSPECTION ET MAINTENANCE DANGER • Avant l’inspection et la maintenance, arrêter le moteur et le laisser refroidir. Retirer la bougie d’allumage et le capot de bougie. - Si l’inspection ou la maintenance est effectuée immédiatement après l’arrêt du moteur ou avec le capot en place, l’opérateur a un risque d’être brûlé... - Page 32 2. Nettoyage du filtre à air Plaque Elément (éponge) Couvercle du filtre à air AVERTISSEMENT: DEFENSE DE FAIRE DU FEU Intervalle de nettoyage et de contrôle : Quotidien (toutes les 10 Partie heures de marche) reniflard Elément (1) Déposer les boulons de fixation du couvercle de filtre à air. (feutre) (2) Tirer le côté...
-
Page 33: Remisage
4. Nettoyage du filtre à carburant • Le filtre à carburant colmaté peut causer un démarrage difficile ou une défaillance de la montée de vitesse du moteur. • Vérifier régulièrement le filtre à carburant comme ce qui suit: (1) Démonter le bouchon du réservoir de carburant, évacuer le carburant pour vider le réservoir. - Page 34 Localisation des défauts Défaut Système Observation Cause Pas de démarrage du Système d’allumage Étincelle d’allumage Défaut dans l’alimentation en carburant ou dans le système moteur ou démarrage présente de compression. Défaut mécanique difficile Pas d’étincelle Interrupteur d’arrêt actionné, défaut du fil ou court-circuit, d’allumage bougie d’allumage ou connecteur défectueux, module d’allumage défectueux...
-
Page 35: Depannage
DEPANNAGE Avant de faire une demande de réparations, vérifier un inconvénient par soi-même. S’il y a aucune anomalie, régler votre machine suivant la description de ce manuel. Ne jamais manipuler ou déposer aucune partie contrairement à la description. Pour les réparations, s’adresser à l’agent du service après-vente habilité. -
Page 36: Symbolen
Pagina jarenlange research en onze know-how en ervaring. SYMBOLEN ..................70 De MAKITA BHX2501 kombineert de voordelen van de huidige stand VEILIGHEIDSVOORSCHRIFTEN ............. 71 dertechniek met ergonomisch design; zij zijn licht in gewicht, handig, EU-VERKLARING VAN CONFORMITEIT ......... 74 compacte en staan voor professionele inzet van tal van verschillende TECHNISCHE GEGEVENS .............. -
Page 37: Veiligheidsvoorschriften
VEILIGHEIDSVOORSCHRIFTEN Algemene instructies • Om verzekerd te zijn van een correcte en veilige bediening moet de gebruiker de gebruiksaanwijzing lezen, begrijpen en opvolgen om vertrouwd te raken met de blazer (1). Niet volledig geïnstrueerde gebruikers riskeren ongelukken voor zichzelf en voor anderen door niet correct gebruik. - Page 38 Start de blazer enkel volgens de instructies. Probeer de machine niet op een andere manier te starten (6) ! • Gebruik de blazer en de toebehoren enkel waarvoor zij bedoeld zijn. • Start de motor alleen nadat de machine op de juiste wijze is gemonteerd.
- Page 39 Gebruik enkel originele Makita-onderdelen. Gebruik van niet originele onderdelen of toebehoren verhoogt de kans op verwondingen en ongelukken. Makita accepteert geen enkele claim die voortvloeit uit het gebruik van niet-originele onderdelen of toebehoren. Eerste Hulp In geval van ongelukken dient een goed gevulde Eerste hulp-koffer volgens DIN 13164 aanwezig te zijn.
-
Page 40: Eu-Verklaring Van Conformiteit
PA eq Gem. Geluidsdruk volgens EN15503 Onzekerheid K dB(A) dB(A) 103,7 WA eq Gem. Geluidsniveau volgens EN15503 Onzekerheid K dB(A) Opmerkingen: 1. Gebruik uitsluitend de door MAKITA gespecificeerde olie en bougie. 2. Deze technische gegevens kunnen zonder kennisgeving vooraf gewijzigd worden. -
Page 41: Benaming Van Onderdelen
BENAMING VAN ONDERDELEN Stofkit (Los verkrijgbaar) BENAMING VAN ONDERDELEN BENAMING VAN ONDERDELEN BENAMING VAN ONDERDELEN BENAMING VAN ONDERDELEN 1. Stopschakelaar 8. Benzinetank 15. Bougiekap 22. Zuigmond 2. Hoofdgreep 9. Benzinetankdop 16. Bougie 23. Pijlteken 3. Trekker 10. Uitlaat 17. Oliedop 24. -
Page 42: Opbouwinstructies
OPBOUWINSTRUCTIES LET OP: Altijd voordat u werkzaamheden aan de blazer uitvoert, de motor uitschakelen en de bougiedop lostrekken. Draag altijd beschermende handschoenen. LET OP: Start de blazer enkel wanneer deze volledig is opgebouwd. 1. Bevestiging van de pijpen 1) Lijn de groeven van de blazerpijpen uit met de nokken op het ventilatorhuis en plaats deze over elkaar. -
Page 43: Voor Gebruik
VOOR GEBRUIK 1. Inspectie en bijvullen van motorolie (1) Volg de onderstaande procedure wanneer de motor koud is. Zorg ervoor dat de motor op een vlakke, horizontale ondergrond staat, zoals aangegeven in afbeelding 1. • Inspectie: Verwijder de oliedop. Veeg de oliepeilstok af. Plaats de oliedop terug (afbeelding 2) en verwijder hem weer. Controleer of het oliepeil tussen de onderste en bovenste merktekens staat. - Page 44 2. Brandstofvoorziening WAARSCHUWING • Let bij het bijvullen van brandstof op de volgende punten om te voorkomen dat brand uitbreekt: - Werk met brandstof en tank op een plek waar geen vuur of hittebron in de buurt is. Breng in geen geval vuur of hittebronnen (door te roken bijvoorbeeld) in de buurt van de brandstof.
-
Page 45: Bediening
BEDIENING 1. Starten WAARSCHUWING • Start de motor in geen geval op dezelfde plek als waar u getankt heeft. - Hierdoor kan ontbranding of brand ontstaan. Blijf bij het starten van de motor op een afstand van ten minste 3 meter. •... -
Page 46: Afstellingen
OPMERKING • De motor kan beschadigd raken als de chokehendel verder gezet wordt dan de “CLOSE” (Dicht) stand. • Als de motor aanslaat en afslaat, zet u deze hendel terug in de stand “OPEN” en trekt u meerdere keren aan de trekstarter om de motor opnieuw te starten. -
Page 47: Bedieningsmethode
BEDIENINGSMETHODE 1. Gebruik als blazer • Houd de machine stevig vast tijdens gebruik. • Richt het uiteinde van het mondstuk op de plek waar u wilt blazen en haal de trekker over. • Knijp de trekker helemaal in, houdt de throttle vergrendelknop ingedrukt en laat met uw vinger de trekker los zodat de trekker is vergrendeld op volledig geopend gas. -
Page 48: Inspectie En Onderhoud
INSPECTIE EN ONDERHOUD GEVAAR • Stop de motor en laat deze afkoelen voor u inspectie en onderhoud gaat uitvoeren. Verwijder de bougie en de bougiekap. - Als u inspectie of onderhoud uitvoert direct nadat de motor gestopt is of wanneer de bougiekap nog op zijn plaats zit, kunt u zich branden of een ongeval oplopen omdat de motor onverwacht opstart. - Page 49 2. Reinigen van het luchtfilter Plaat Element (spons) Afdekking luchtfilter WAARSCHUWING: ONTVLAMBARE MATERIALEN TEN STRENGSTE VERBODEN Interval voor reiniging en inspectie: Dagelijks (om de 10 Luchtinlaat bedrijfsuren) Element (1) Verwijder de bevestigingsbout(en) van het deksel van het (vilt) luchtfilter. (2) Trek het deksel naar beneden en haal het los. (3) Doe de chokehendel helemaal dicht en zorg ervoor dat er Bevestigingsbout verder geen stof en vuil in de carburateur terecht kan komen.
-
Page 50: Machine-Opslag
4. Schoonmaken van het brandstoffilter • Een verstopt filter kan leiden tot startproblemen of de onmogelijkheid het toerental te verhogen. • Controleer het brandstoffilter regelmatig op de volgende wijze: (1) Verwijder de tankdop en tap de brandstof af zodat de tank helemaal leeg is. - Page 51 Storing lokaliseren Storing Onderdeel Observatie Oorzaak Motor start niet of Ontsteking Bougie vonkt Oorzaak in benzinetoevoer of compressiesysteem, of nauwelijks mechanische oorzaak Vonkt niet Stopschakelaar, kabelbreuk, kortsluiting, bougie of aansluiting defect, ontstekingsspoel defect Benzinetoevoer Tank gevuld Onjuiste chokepositie, carburateur defect, vervuilde zuigkop, breuk, knik of vuil in benzineleiding Compressie Geen compressie bij start Voetpakking stuk, krukaskeerringen defect, zuigerveren...
-
Page 52: Oplossen Van Problemen
OPLOSSEN VAN PROBLEMEN Ga eerst zelf na wat er aan de hand zou kunnen zijn voor u om een reparatie gaat verzoeken. Als u iets abnormaals vindt, voer dan de handelingen beschreven in deze handleiding uit. Knoei niet met onderdelen en demonteer geen onderdelen als dat niet in de handleiding beschreven wordt. - Page 53 Makita Corporation Anjo, Aichi, Japan 884857C853 www.makita.com...