Table of Contents
Quick Links
TM
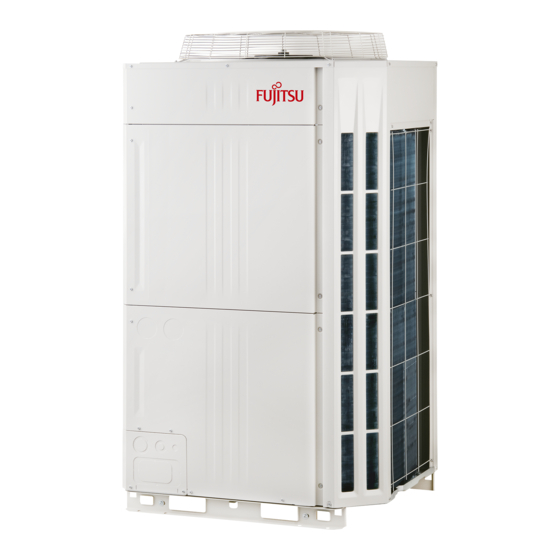
AJYA72LALH
AJYA90LALH
AJY108LALH
AJY126LALH
AJY144LALH
AJHA72LALH
AJHA90LALH
AJH108LALH
AJH126LALH
AJH144LALH
INSTALLATION MANUAL
OUTDOOR UNIT
For authorized service personnel only.
INSTALLATIONSANLEITUNG
AUßENGERÄT
Nur für autorisiertes Fachpersonal.
MANUEL D’INSTALLATION
UNITÉ EXTÉRIEURE
Pour le personnel agréé uniquement.
MANUAL DE INSTALACIÓN
UNIDAD EXTERIOR
Únicamente para personal de servicio autorizado.
MANUALE DI INSTALLAZIONE
UNITÀ ESTERNA
A uso esclusivo del personale tecnico autorizzato.
ΕΓΧΕΙΡΙΔΙΟ ΕΓΚΑΤΑΣΤΑΣΗΣ
ΕΞΩΤΕΡΙΚΉ ΜΟΝΆΔΑ
Μόνο για εξουσιοδοτημένο τεχνικό προσωπικό.
MANUAL DE INSTALAÇÃO
UNIDADE EXTERIOR
Apenas para técnicos autorizados.
РУКОВОДСТВО ПО УСТАНОВКЕ
ВНЕШНИЙ МОДУЛЬ
Только для авторизованного обслуживающего персонала.
MONTAJ KILAVUZU
DIŞ ÜNİTE
Yalnızca yetkili servis personeli için.
安装说明书
室外机
仅针对授权的专业维修人员。
PART NO. 9378945104
Table of Contents

Related Manuals for Fujitsu Airstage AJYA72LALH


Summary of Contents for Fujitsu Airstage AJYA72LALH
-
Page 1: Installation Manual
OUTDOOR UNIT For authorized service personnel only. INSTALLATIONSANLEITUNG AUßENGERÄT Nur für autorisiertes Fachpersonal. MANUEL D’INSTALLATION UNITÉ EXTÉRIEURE Pour le personnel agréé uniquement. AJYA72LALH MANUAL DE INSTALACIÓN AJYA90LALH AJY108LALH UNIDAD EXTERIOR AJY126LALH Únicamente para personal de servicio autorizado. AJY144LALH MANUALE DI INSTALLAZIONE UNITÀ... -
Page 2: Table Of Contents
INSTALLATION MANUAL To install a unit that uses the R410A refrigerant, use dedicated tools and piping materials that have been manufactured specifi cally for R410A use. PART NO. 9378945104 Because the pressure of the R410A refrigerant is approximately 1.6 times higher VRF system outdoor unit than the R22, failure to use dedicated piping material or improper installation can cause rupture or injury. -
Page 3: About The Unit
Do not install the unit in the following areas: Tool name Contents of change for R22 tool • Area with high salt content, such as at the seaside. It will deteriorate metal parts, causing the parts to fall or the unit to leak water. A conventional (R22) vacuum pump can be used by install- •... -
Page 4: Optional Parts
Energy-saving combination CAUTION Combination (HP) Outdoor Unit 1 (HP) – – – – – – Install the unit in an area that has no heat sources, vapors, or the risk of the leakage of fl ammable gas in the vicinity. Outdoor Unit 2 (HP) –... -
Page 5
Fig. Fig.
800mm or more 800mm or more Wall Wall Fig. Single installation 20mm or 20mm or more more Fig. 30mm or more 10mm or more Fig. Multiple installations 500mm ... -
Page 6: Transportation The Outdoor Unit
3. 3. 3. When there are obstacles above the product 800mm or more When there are obstacles above the product, keep the minimum installation height as shown in the fi gure and install the outlet duct. When installing the outlet duct, you must set the high Outlet duct static pressure mode with the push-button switch. -
Page 7: Installation The Unit
SYSTEM CONFIGURATION 4. 1. System confi guration CAUTION• When connecting multiple outdoor units, set the nearest outdoor unit to the indoor unit on the refrigerant pipe as the master unit. • When connecting multiple outdoor units, install the outdoor unit with the largest nominal system capacity nearest to the indoor unit on the refrigerant pipe, fol- lowed by those with less nominal system capacities. -
Page 8: Pipe Selection
• Allowable height difference (Wall thickness and pipe material for each diameter) Outside Diameter mm 6.35 9.52 12.70 15.88 19.05 22.22 28.58 34.92 41.27 Between outdoor unit and indoor unit (When 50 m or less indoor unit is installed below) Wall Thickness 1.43 Between outdoor unit and indoor unit (When... -
Page 9: Protection Of Pipes
• Header Header Gas pipe Header Total cooling capacity of indoor unit (kW) Horizontal line Outdoor Horizontal 3-6 Branches 3-8 Branches unit side line 28.0 or less UTR-H0906L UTR-H0908L VIEW C 28.1 to 56.0 UTR-H1806L UTR-H1808L Liquid pipe Vertical line Horizontal line Outdoor For the installation method, refer to the section on "Indoor unit pipe connections"... -
Page 10: Multiple Connections
Fig. Detail of knockout position (bottom) After all the gas is vented, melt the brazing fi ller metal on connecting part using a torch and remove the pinch pipe. (Unit: mm) Knockout hole Fig. Detail of knockout position (front) (Unit: mm) 5. - Page 11 CAUTION Outdoor Capacity 2 Units : Unit 1 ≥ Unit 2 To prevent the oil from settling in the stopped unit, install the pipes between the 3 Units : Unit 1 ≥ Unit 2 ≥ Unit 3 outdoor units so that they are level or are tilted upward to the outdoor units. Examples of multiple unit installation are shown below.
-
Page 12: Electrical Wiring
ELECTRICAL WIRING 6. 2. Wiring method The wiring example for outdoor units and indoor units is shown in the fi gure. 6. 1. The precautions of electrical wiring To other refrigerant cricuit WARNING outdoor unit Wiring connections must be performed by a qualifi ed person in accordance with specifi... -
Page 13: Selecting Power Supply Cable And Breaker
Fig. In case of connected 3 outdoor unit GOOD breaker Main breaker 400 V 3ø 50 Hz < Left view > < Front view > Outdoor unit power supply cable Ø 50 Ø 50 Example of bad breaker wiring Ø 34.5 Ø... -
Page 14: Wiring Procedure
Fig. 6. 6. Wiring procedure Outdoor unit • Remove the cover of the electrical compartment and follow the terminal plate to con- Transmission line System nect the electric cables to the terminal. Controller • After connecting the cables, secure them with the cable ties. •... -
Page 15: External Input And External Output
(1) Connecting the power supply cable 6. 7. External input and external output Caution when wiring cable 6. 7. 1. Terminal position 1) Use crimp-type terminals with insulating sleeves as shown in the fi gure to con- nect to the terminal block. 2) Securely clamp the crimp-type terminals to the cables using an appropriate tool Output 2 so that the cables do not come loose. -
Page 16: Field Setting
Input 1 Input 2 Input 3 Input 4 Input 5 P.C.B DC power supply CN131 CN132 CN133 CN135 CN134 (External) 12 to 24 V (Yellow) (Orange) (Green) (White) (Red) CN136 P.C.B (Black) or CN137 (Blue) Connected load (Operation Indicator or Error Indicator) connected unit connected unit connected unit connected unit connected unit connected unit... -
Page 17: Rotary Switch Setting
Confi gure the setting (DIP switch SET5) of the terminal resistor of the outdoor units as 7 Segment LED lamp shown below from conditions 1 to 3. LED indicator Rotary switch SET5 Terminal resistor Remarks Disable (Factory setting) X 10 Enable Figure: Terminal resistor setting Push button... -
Page 18: Push Button Setting
Standard 7. 4. Push button setting High static pressure 1 Various functions can be set when necessary. (equivalent to 30Pa) High static pressure Perform settings after all indoor units have stopped operation. mode High static pressure 2 (equivalent to 80Pa) Table. - Page 19 Setting number (00xx) 1: FUNCTION Setting Setting number (01xx) Electricity meter First 2 digits Last 2 digits ······ ··· ··· 7 segment LED indicator pulse setting 2 *3 (LED105, LED104) Setting number (98xx) Setting number (99xx) MODE/EXIT Set the hundreds digit and thousands digit of the electricity meter pulse setting connected to CN135.
-
Page 20: Signal Amplifi Er Address Setting
Fig. Wiring example for automatic address setting (1) Signal amplifi er wiring example (2)(3)(4) Indoor unit wiring example 7. 5. 1. Signal amplifi er address setting (Connect the indoor and outdoor units of the same refrigerant system as shown below.) When using signal amplifi... -
Page 21: Resistance Measurement Of Transmission Cable (Measure With Breaker Off)
Fig. B 7. 7. Resistance measurement of transmission cable Charging cap (Measure with breaker OFF) Valve Spindle CAUTION Open Open Do not turn on the power if the resistance between the terminals of the transmis- sion cable is abnormal. Otherwise, the circuit board may be damaged. Hexagon wrench Measure the resistance between 2 terminals of a transmission cable. -
Page 22: Additional Charging
8. 3. Additional charging Total length of Total length ø12.70 mm liquid of ø9.52 mm b × 0.114 b × 0.058 CAUTION pipe liquid pipe (kg/m) (kg/m) Do not turn on the power unless all operations are complete. After evacuating the system, add refrigerant. Do not charge the system with a refrigerant other than R410A. -
Page 23: Installing Insulation
Perform test operation for each refrigerant system. 8. 4. Installing insulation You can set “cooling test run" or “heating test run” with the push button on the outdoor unit PC board. • Install insulation material after conducting the “8.1 Sealing Test”. •... -
Page 24: Checklist
9. 3. Checklist E 9 2. 1 Outdoor unit compressor 2 error E 9 2. 2 Outdoor unit compressor 2 current value error E 9 3. 1 Outdoor unit inverter compressor start up error Check description Check method Criteria E 9 4. 1 Outdoor unit trip detection Cooling: low pressure ap- High and low pressure Check it with a... -
Page 25: Information
INFORMATION Main contents of label Item Detail Model name Model name Serial number Serial number Electric characteristics Phase, rated voltage, and frequency Weight Product weight Cooling/heating capacity under cooling/ Capacity heating condition (refer to item 15) Electric current during cooling/heating operation under cooling/heating condi- Current tion...