
Related Manuals for JVC 2B00401C


Summary of Contents for JVC 2B00401C
-
Page 1: Video Cassette
DVD/CD PLAYER Hi-Fi STEREO VIDEO CASSETTE RECORDER USER'S GUIDE For model: HR-XVC1U POWER TV VOL For Customer Use: LPT0719-001A... - Page 2 THIS DIGITAL VIDEO PLAYER EMPLOYS A LASER SYSTEM. TO ENSURE PROPER USE OF THIS PRODUCT, PLEASE READ THIS USER'S GUIDE CAREFULLY AND RETAIN FOR FUTURE REFERENCE. SHOULD THE UNIT REQUIRE MAINTENANCE, CONTACT A JVC AUTHORIZED SERVICE CENTER. USE OF CONTROLS, ADJUSTMENTS OR THE PERFORMANCE OF PROCEDURES OTHER THAN THOSE SPECIFIED HEREIN MAY RESULT IN HAZARDOUS RADIATION EXPOSURE.
-
Page 3: Important Safeguards
1. READ INSTRUCTIONS All the safety and operating instructions should be read before the unit is operated. 2. RETAIN INSTRUCTIONS The safety and operating instructions should be retained for future reference. 3. HEED WARNINGS All warnings on the unit and in the operating instructions should be adhered to. 4. - Page 4 IMPORTANT SAFEGUARDS 13. LIGHTNING To protect your unit from a lightning storm, or when it is left unattended and unused for long periods of time, unplug it from the wall outlet and disconnect the antenna or cable system. This will prevent damage to the unit due to lightning and power line surges.
-
Page 5: Power Source
IMPORTANT SAFEGUARDS 25. LASER BEAM Do not look into the opening of the disc tray or ventilation opening of the product to see the source of the laser beam. It may cause sight damage. 26. DISC Do not use a cracked, deformed, or repaired disc. These discs are easily broken and may cause serious personal injury and product malfunction. -
Page 6: Features
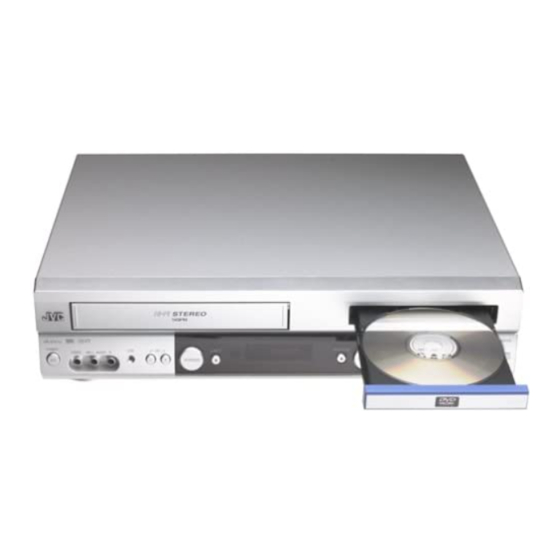
Features DVD/CD Player/Video Cassette Recorder • DVD/CD player with Video Cassette Recorder - Unique space saving design combines a DVD/CD player and a Hi-Fi Video cassette recorder. The DVD disc has much more capacity, but is the same size as the audio CD disc. Picture quality is higher than Super VHS. -
Page 7: Table Of Contents
Status display of Disc ... 52 Dynamic Range Control ... 53 Language Code List ... 54 Additional information Problems and troubleshooting ... 55 Video head cleaning ... 56 Specifications ... 57 HOW TO LOCATE YOUR JVC SERVICE CENTER ... 58 LIMITED WARRANTY ... 59 Contents... -
Page 8: Parts And Functions
Parts and functions Front VCR/DVD mode selector button Cassette Loading Slot POWER VIDEO (M) L - AUDIO - R POWER button CHANNEL +/– buttons AUDIO (L/R)/ VCR indicator VIDEO IN jacks Rear AC power cord DIGITAL AUDIO OPTICAL DVD OPTICAL DIGITAL AUDIO OUT jack DVD COAXIAL DIGITAL... -
Page 9: Display
Display window Display VCR mode Playback (lights) / Auto resume (flashes) Still picture DVD disc is inserted. CD is inserted. Display for afternoon (lights out in the morning) Clock display (colon[ : ] flashes) 10 : 00 01 : 00 Counter display by hour/minute at VCR/DVD / by minute/second at CD Track number display for CD TV channel display for VCR... -
Page 10: Remote Control
• It’s not possible to operate a unit not equipped with a remote sensor. • This Remote can control a JVC TV only. • When you operate the VCR or DVD, the TV/VCR/DVD switch must be slided to VCR/DVD again. Otherwise the DVD/ VCR may not operate properly. - Page 11 Change the custom code for remote control If you operate this DVD/VCR with another JVC’s VCR simultaneously arranging them side by side, the both recorders will react to this remote control. In this case, you can change the remote control and DVD/VCR to other frequency (“...
-
Page 12: Basic Connections
Basic connections If you are using an antenna system, follow these instructions. If you are a cable (CATV) subscriber,skip ahead to page 14 for the proper connections. ANTENNA TO DVD/VCR CONNECTION The DVD/VCR must be connected "between" the antenna and the TV. First, disconnect the antenna from the TV and connect it to the DVD/VCR. - Page 13 DVD/VCR TO TV CONNECTION After you have connected the antenna to the DVD/VCR, you must connect the DVD/VCR to the TV. Below are 3 common methods of connecting your DVD/VCR to a TV. Find the type of TV you are using and follow the connection diagram.
-
Page 14: Catv (Cable Tv) Connections
CATV (CABLE TV) connections Many cable companies offer services permitting reception of extra channels including pay or subscription channels. This DVD/VCR has an extended tuning range and can be tuned to most cable channels without using a cable company supplied converter box, except for those channels which are intentionally scrambled. If you subscribe to a special channel which is scrambled, you must have a descrambler box for proper reception. - Page 15 IMPORTANT: Make sure the TV/CATV menu option is set to the "CATV" mode. This DVD/VCR cannot receive scrambled programs since it does not contain a descrambler. In order to receive scrambled programs, your existing descrambler must be used. Descrambler boxes are available from cable companies. Consult your local cable company for more information concerning connection to their descrambler equipment.
-
Page 16: Playback Connection
Playback Connection The exact arrangement you use to interconnect various video and audio components to the DVD/VCR is dependent on the model and features of each component. Check the Owner's Manual provided with each component for the location of video and audio inputs and outputs. Connect to a TV with Audio/Video Output Use the supplied AUDIO/VIDEO Cord. - Page 17 Connect to a Stereo Amplifier with Audio Output If your TV has a COMPONENT VIDEO IN jack, you can connect the DVD/VCR to the TV with a COMPONENT cable (not supplied) as shown below. COMPONENT VIDEO output jack can send higher-quality video signal to a TV than S-Video output.
-
Page 18: Setting The Video Channel
Setting the Video Channel / Setting the language Setting the Video Channel To view playback of a recorded tape, or to watch a program selected by the VCR's channel selector, the TV must be set to channel 3 or 4 (video channel). -
Page 19: Tuner Setting
This DVD/VCR is equipped with a channel memory feature which allows channels to skip up or down to the next channel set into memory, skipping over unwanted channels. Before selecting channels, they must be programmed into the DVD/VCR’s memory. In addition to normal VHF and UHF channels, this DVD/ VCR can receive up to 113 Cable TV channels. -
Page 20: To Add/Delete Channels
To ADD/DELETE channels / Noise elimination To ADD/DELETE channels You can add the channels you want or delete the channels you do not want manually. POWER OPEN/ DVD MENU MARKER RETURN CLOSE DISPLAY A.TRK C.RESET ZERO RETURN SEARCH SUB TITLE ANGLE MODE SP/EP... -
Page 21: Auto Clock Setting
The Auto Clock feature enables the automatic clock setting and updating, and also to set the Time Zone and Daylight Saving Time by receiving XDS (Extended Data Service) information carried on the channel signal. POWER OPEN/ DVD MENU MARKER RETURN CLOSE DISPLAY A.TRK... - Page 22 Auto clock setting Daylight saving time setting You can set the Daylight saving time automatically or manually. POWER OPEN/ DVD MENU MARKER RETURN CLOSE C.RESET ZERO RETURN DISPLAY A.TRK SEARCH SUB TITLE ANGLE MODE SP/EP PLAY REPEAT ZOOM TITLE MODE POWER INPUT TV VOL...
-
Page 23: Manual Clock Setting
You must set the date and time manually for timer recordings and Daylight Saving Time if the Auto Clock process did not set them correctly. POWER OPEN/ DVD MENU MARKER RETURN CLOSE DISPLAY A.TRK C.RESET ZERO RETURN SEARCH SUB TITLE ANGLE MODE SP/EP... -
Page 24: Loading And Unloading A Cassette Tape
Loading and Unloading a Cassette Tape Use only video cassette tapes marked • Cassettes marked “VHS” (or “S-VHS”) can be used with this video cassette recorder. However, S-VHS recording is not possible with this model. • This model is equipped with SQPB (S-VHS QUASI PLAYBACK) that makes it possible to play back S-VHS recordings with regular VHS resolution. -
Page 25: Cassette Tape Playback
POWER OPEN/ DVD MENU MARKER RETURN CLOSE DISPLAY A.TRK C.RESET ZERO RETURN SEARCH SUB TITLE ANGLE MODE SP/EP PLAY REPEAT ZOOM TITLE MODE POWER INPUT TV VOL TIMER TV/VCR PLAY STOP SKIP SKIP /INDEX /INDEX ENTER/ SELECT SET UP CANCEL MENU VCR/DVD/TV NOTES:... -
Page 26: Special Playback
Special playback Picture Search Reverse picture search function Press REW x 1 or x 2 during the playback. Forward picture search function Press FF x 1 or x 2 during the playback. To return to playback: Press PLAY. Still Picture Press PAUSE during playback. -
Page 27: Zero Return Function
ZERO RETURN function / Video Index Search system ZERO RETURN function This function makes tape-rewinding stop at the counter 00:00:00 position automatically. OPEN/ MARKER RETURN DVD MENU CLOSE DISPLAY A.TRK C.RESET ZERO RETURN SEARCH SUB TITLE ANGLE MODE SP/EP PLAY REPEAT ZOOM TITLE... -
Page 28: Recording A Tv Program
Recording a TV program Recording and viewing the same TV program POWER OPEN/ DVD MENU MARKER RETURN CLOSE DISPLAY A.TRK C.RESET ZERO RETURN SEARCH SUB TITLE ANGLE MODE SP/EP PLAY REPEAT ZOOM TITLE MODE POWER INPUT TV VOL TIMER TV/VCR PLAY STOP SKIP... -
Page 29: To Display Vcr Operation Status
The “VCR” will go off and recording will continue. Select the TV channel you want to watch by using the TV channel selector. If the connected TV is JVC’s, use TV CH +/– after slide TV/ VCR/DVD switch to TV. -
Page 30: Instant Timer Recording (Itr)
Instant Timer Recording (ITR) The Instant Timer Recording feature provides a simple and convenient way to make a timed recording. POWER OPEN/ DVD MENU MARKER RETURN CLOSE C.RESET ZERO RETURN DISPLAY A.TRK SEARCH SUB TITLE ANGLE MODE SP/EP PLAY REPEAT ZOOM TITLE MODE... -
Page 31: Timer Recording
Timer recording can be programmed on-screen with the remote control. The built-in timer allows automatic unattended recording of up to 8 programs within 1 month. OPEN/ MARKER RETURN DVD MENU CLOSE DISPLAY A.TRK C.RESET ZERO RETURN SEARCH SUB TITLE ANGLE MODE SP/EP PLAY... - Page 32 Timer-Recording Timer Recording Special case Weekly (e.g. WKL-TU: each Tuesday) or daily (e.g. MO-SA: Monday to Saturday) Timer recording Follow the procedure of timer recording on the previous page. At picture 3 press SET + or – repeatedly until the desired setting appears.
-
Page 33: Stereo Recording And Playback
Stereo Recording and Playback / Separate Audio Program (SAP) Stereo Recording and Playback The VHS Hi-Fi audio system permits high fidelity recording of MTS STEREO TV broadcasts. POWER OPEN/ DVD MENU MARKER RETURN CLOSE DISPLAY A.TRK C.RESET ZERO RETURN SEARCH SUB TITLE ANGLE MODE... -
Page 34: Duplicating A Video Tape
Duplicating a video tape/Duplicating a disc material onto a video tape Duplicating a video tape If you connect the VCR to another VCR or camcorder, you can duplicate a previously recorded tape. Make all connections before turning on the power. Load a blank cassette tape with the erase preven- tion tab intact into the recording VCR. -
Page 35: Disc
This unit applies to DVD discs from Region 1 only. The loaded Disc (DVD, Video-CD, Audio-CD and MP3-CD) will be recognized automatically. The suitable Disc-formats are: DVD, CD-R and CD-RW. Do not play DVD-ROM, DVD-Audio, CDV, CD-G or Photo CD to prevent accidental erasure of prerecorded material. Some DVDs are played back with a Copy guard system. -
Page 36: Setting Setup Language
Setting setup language The setup language can be selected. POWER OPEN/ DVD MENU MARKER RETURN CLOSE DISPLAY A.TRK C.RESET ZERO RETURN SEARCH SUB TITLE ANGLE MODE SP/EP PLAY REPEAT ZOOM TITLE MODE POWER INPUT TV VOL TIMER TV/VCR PLAY STOP SKIP SKIP /INDEX... -
Page 37: Playback Procedure
POWER OPEN/ DVD MENU MARKER RETURN CLOSE DISPLAY A.TRK C.RESET ZERO RETURN SEARCH SUB TITLE ANGLE MODE SP/EP PLAY REPEAT ZOOM TITLE MODE POWER INPUT TV VOL TIMER TV/VCR PLAY STOP SKIP SKIP /INDEX /INDEX ENTER/ SELECT SET UP CANCEL MENU VCR/DVD/TV Notes:... -
Page 38: Special Playback
Special playback Note: There may be a slight delay be- tween pressing the button and the function activation. POWER OPEN/ DVD MENU MARKER RETURN CLOSE DISPLAY A.TRK C.RESET ZERO RETURN SEARCH SUB TITLE ANGLE MODE SP/EP PLAY REPEAT ZOOM TITLE MODE POWER INPUT... -
Page 39: Zooming
POWER OPEN/ DVD MENU MARKER RETURN CLOSE DISPLAY A.TRK C.RESET ZERO RETURN SEARCH SUB TITLE ANGLE MODE SP/EP PLAY REPEAT ZOOM TITLE MODE POWER INPUT TV VOL TIMER TV/VCR PLAY STOP SKIP SKIP /INDEX /INDEX ENTER/ SELECT SET UP CANCEL MENU VCR/DVD/TV Notes:... -
Page 40: Repeat Playback
Repeat playback POWER OPEN/ DVD MENU MARKER RETURN CLOSE C.RESET ZERO RETURN DISPLAY A.TRK SEARCH SUB TITLE ANGLE MODE SP/EP PLAY REPEAT ZOOM TITLE MODE POWER INPUT TV VOL TIMER TV/VCR PLAY STOP SKIP SKIP /INDEX /INDEX ENTER/ SELECT SET UP CANCEL MENU VCR/DVD/TV... -
Page 41: Program Playback (Cd)
Program playback/Random playback (CD) POWER OPEN/ DVD MENU MARKER RETURN CLOSE DISPLAY A.TRK C.RESET ZERO RETURN SEARCH SUB TITLE ANGLE MODE SP/EP PLAY REPEAT ZOOM TITLE MODE POWER INPUT TV VOL TIMER TV/VCR PLAY STOP SKIP SKIP /INDEX /INDEX ENTER/ SELECT SET UP CANCEL... -
Page 42: Mp3 Playback
MP3 Playback This player can play back the MP3-data which has been recorded on CD-R or CD- RW. To produce the MP3-data, you need a Windows-PC with CD-ROM drive and a MP3- encoding Software (not supplied). The Apple-HFS-System can not be played. MP3 CD Information Limitations on MP3 CD playback •... -
Page 43: Marking Desired Scenes
The unit stores the points that you want to watch again up to 3 points. You can resume playback from each scene. POWER OPEN/ DVD MENU MARKER RETURN CLOSE DISPLAY A.TRK C.RESET ZERO RETURN SEARCH SUB TITLE ANGLE MODE SP/EP PLAY REPEAT ZOOM... -
Page 44: Changing Soundtrack Language
Changing soundtrack language / Subtitles OPEN/ DVD MENU MARKER RETURN CLOSE DISPLAY A.TRK C.RESET ZERO RETURN SEARCH SUB TITLE ANGLE MODE SP/EP PLAY REPEAT ZOOM TITLE MODE POWER INPUT TV VOL TIMER TV/VCR PLAY STOP SKIP SKIP /INDEX /INDEX ENTER/ SELECT SET UP CANCEL... -
Page 45: Changing Angles
Changing angles / Title selection / DVD menu POWER OPEN/ MARKER RETURN DVD MENU CLOSE DISPLAY A.TRK C.RESET ZERO RETURN SEARCH SUB TITLE ANGLE MODE SP/EP PLAY REPEAT ZOOM TITLE MODE POWER INPUT TV VOL TIMER TV/VCR PLAY STOP SKIP SKIP /INDEX /INDEX... -
Page 46: Parental Control
Parental control Some discs are specified not suitable for children. Such discs can be prevented from play back with the unit. POWER OPEN/ DVD MENU MARKER RETURN CLOSE DISPLAY A.TRK C.RESET ZERO RETURN SEARCH SUB TITLE ANGLE MODE SP/EP PLAY REPEAT ZOOM TITLE... -
Page 47: Temporary Disabling Of Rating Level By Dvd Disc
Temporary disabling of rating level by DVD disc Depending on the DVD disc, the disc may try to temporarily cancel the rating level that you have set. It is up to you to decide whether to cancel the rating level or not. POWER OPEN/ DVD MENU... -
Page 48: Setting Menu Language
Setting menu language You can select the language of the disc menu messages of DVDs. POWER OPEN/ DVD MENU MARKER RETURN CLOSE DISPLAY A.TRK C.RESET ZERO RETURN SEARCH SUB TITLE ANGLE MODE SP/EP PLAY REPEAT ZOOM TITLE MODE POWER INPUT TV VOL TIMER TV/VCR... -
Page 49: Setting Subtitle Language
The same subtitle language can always be selected even if you replace the disc or turn the power off. POWER OPEN/ DVD MENU MARKER RETURN CLOSE DISPLAY A.TRK C.RESET ZERO RETURN SEARCH SUB TITLE ANGLE MODE SP/EP PLAY REPEAT ZOOM TITLE MODE POWER... -
Page 50: Setting Audio Soundtrack Language
Setting audio soundtrack language / Setting surround sound Setting audio soundtrack language The same audio soundtrack language can always be selected by your unit even if you replace the disc or turn the power off. OPEN/ DVD MENU MARKER RETURN CLOSE DISPLAY A.TRK... -
Page 51: Setting The Aspect Ratio Of Tv Screen
You can select the aspect ratio for your TV. POWER OPEN/ DVD MENU MARKER RETURN CLOSE DISPLAY A.TRK C.RESET ZERO RETURN SEARCH SUB TITLE ANGLE MODE SP/EP PLAY REPEAT ZOOM TITLE MODE POWER INPUT TV VOL TIMER TV/VCR PLAY STOP SKIP SKIP /INDEX... -
Page 52: Setting On Screen Display
Setting on Screen display / Status display of Disc On screen display can be switched on or off when you press the buttons. POWER OPEN/ DVD MENU MARKER RETURN CLOSE DISPLAY A.TRK C.RESET ZERO RETURN SEARCH SUB TITLE ANGLE MODE SP/EP PLAY REPEAT... -
Page 53: Dynamic Range Control
DRC (Dynamic Range Control) enables you to control the dynamic range so as to achieve a suitable sound for your equipment. POWER OPEN/ DVD MENU MARKER RETURN CLOSE DISPLAY A.TRK C.RESET ZERO RETURN SEARCH SUB TITLE ANGLE MODE SP/EP PLAY REPEAT ZOOM TITLE... -
Page 54: Language Code List
Language Code List Enter the appropriate code number for the initial settings "Audio", "Subtitle" and/or "Menu" (see pages 48- 50). Language Name Code Language Name Code Language Name Code Language Name Code Abkhazian 1112 Afar 1111 Afrikaans 1116 Albanian 2927 Amharic 1123 Arabic... -
Page 55: Problems And Troubleshooting
No picture. No sound. The remote control does not function. The DVD-keys on the RCU of the other JVC RECEIVER/TV is not effective. No CATV reception No POWER but a picture appears on the TV screen. TV recording does not work. -
Page 56: Video Head Cleaning
Problems and troubleshooting / Video head cleaning SYMPTOMS Stopping playback, search, slow- motion play, repeat play, or program play, etc. cannot be performed. No 4:3 (16:9) picture No on-screen display No surround sound The unit or remote operation key is not functioning. Playback does not start when the title is selected. -
Page 57: Specifications
GENERAL Power supply: AC 120V 60Hz Power consumption: Operation: 20W Stand by: 3W Weight: 9.9lbs (4.5 kg) Dimensions: Width : 16-15/16 inches (430 mm) Height : Depth : 12-1/4 inches (311 mm) Inputs/Outputs: Video: In: 1Vp-p/75 ohm Out: 1Vp-p/75 ohm In: - 8 dBm/50K ohm Audio: Out: - 8 dBm/1K ohm... -
Page 58: How To Locate Your Jvc Service Center
Sophisticated electronic products may require occasional service. Just as quality is a keyword in the engineering and production of the wide array of JVC products, service is the key to maintaining the high level performance for which JVC is world famous. The JVC service and engineering organization stands behind our products. -
Page 59: Limited Warranty
WHAT WE WILL DO: If this product is found to be defective, JVC will repair or replace defective parts at no charge to the original owner. Such repair and replacement services shall be rendered by JVC during normal business hours at JVC authorized service centers. - Page 60 2B00401C 02/06 VICTOR COMPANY OF JAPAN, LIMITED Printed in Thailand (HR-XVC1U(C)/M)