Cisco Catalyst 2950 Hardware Installation Manual
Desktop switch
Hide thumbs
Also See for Catalyst 2950:
- Configuration manual (710 pages) ,
- Command reference manual (686 pages) ,
- Software configuration manual (674 pages)
Table of Contents
Catalyst 2950 Desktop Switch
Hardware Installation Guide
May 2003
Corporate Headquarters
Cisco Systems, Inc.
170 West Tasman Drive
San Jose, CA 95134-1706
USA
http://www.cisco.com
Tel:
408 526-4000
800 553-NETS (6387)
Fax:
408 526-4100
Customer Order Number: DOC-7811157=
Text Part Number: 78-11157-05
Table of Contents
Troubleshooting

Related Manuals for Cisco Catalyst 2950


Summary of Contents for Cisco Catalyst 2950
- Page 1 Catalyst 2950 Desktop Switch Hardware Installation Guide May 2003 Corporate Headquarters Cisco Systems, Inc. 170 West Tasman Drive San Jose, CA 95134-1706 http://www.cisco.com Tel: 408 526-4000 800 553-NETS (6387) Fax: 408 526-4100 Customer Order Number: DOC-7811157= Text Part Number: 78-11157-05...
- Page 2 You can determine whether your equipment is causing interference by turning it off. If the interference stops, it was probably caused by the Cisco equipment or one of its peripheral devices. If the equipment causes interference to radio or television reception, try to correct the interference by using one or more of the following measures: •...
- Page 3 CCIP, CCSP, the Cisco Arrow logo, the Cisco Powered Network mark, Cisco Unity, Follow Me Browsing, FormShare, and StackWise are trademarks of Cisco Systems, Inc.; Changing the Way We Work, Live, Play, and Learn, and iQuick Study are service marks of Cisco Systems, Inc.; and Aironet, ASIST,...
-
Page 5: Table Of Contents
Obtaining Additional Publications and Information xxix Quick Installation C H A P T E R Taking Out What You Need Connecting to the Console Port Starting the Terminal Emulation Software Connecting to a Power Source Catalyst 2950 Desktop Switch Hardware Installation Guide 78-11157-05... - Page 6 System LED 2-20 RPS LED 2-21 Port Mode and Port Status LEDs 2-21 Rear-Panel Description 2-27 Power Connectors 2-29 Internal Power Supply Connector 2-29 DC Power Connector 2-30 Cisco RPS Connector 2-30 Catalyst 2950 Desktop Switch Hardware Installation Guide 78-11157-05...
- Page 7 Installing the GBIC Modules 3-26 Installing and Removing SFP Modules 3-28 Installing SFP Modules into SFP Module Slots 3-28 Removing SFP Modules from SFP Module Slots 3-30 Connecting to 10/100 and 10/100/1000 Ports 3-32 Catalyst 2950 Desktop Switch Hardware Installation Guide 78-11157-05...
- Page 8 A P P E N D I X Connector Specifications 10/100 Ports 10/100/1000 Ports Connecting to 10BASE-T and 100BASE-TX Devices Connecting to 1000BASE-T Devices LRE Port 100BASE-FX and 1000BASE-SX Ports 1000BASE-X GBIC Module Ports 1000BASE-T GBIC Module Ports Catalyst 2950 Desktop Switch Hardware Installation Guide viii 78-11157-05...
- Page 9 Attaching the Cisco RPS (model PWR675-AC-RPS-N1) Lightning Activity Warning Installation Warning Main Disconnecting Device Chassis Warning—Rack-Mounting and Servicing Overtemperature Warning D-12 No On/Off Switch Warning D-14 Grounded Equipment Warning D-16 Product Disposal Warning D-17 Catalyst 2950 Desktop Switch Hardware Installation Guide 78-11157-05...
- Page 10 Catalyst 2950ST-24 LRE 997 Service Requirement D-34 Restricted Area Warning D-36 Ethernet Cable Shielding in Offices D-38 Chassis Power Connection D-39 Exposed DC Power Wire Warning D-42 Service Personnel Warning D-44 N D E X Catalyst 2950 Desktop Switch Hardware Installation Guide 78-11157-05...
-
Page 11: Cisco Limited Lifetime Hardware Warranty Terms
There are special terms applicable to your hardware warranty and various services that you can use during the warranty period. Follow these steps to access and download the Cisco Information Packet and your warranty document from Cisco.com. Launch your browser, and go to this URL: http://www.cisco.com/univercd/cc/td/doc/es_inpck/cetrans.htm... - Page 12 Duration of Hardware Warranty A Cisco product hardware warranty is supported for as long as the original end user continues to own or use the product, provided that the fan and power supply warranty is limited to five (5) years. In the event of a discontinuance of product manufacture, the Cisco warranty support is limited to five (5) years from the announcement of the discontinuance.
- Page 13 Cisco Limited Lifetime Hardware Warranty Terms Complete the information below, and keep it for reference. Company product purchased from Company telephone number Product model number Product serial number Maintenance contract number Catalyst 2950 Desktop Switch Hardware Installation Guide xiii 78-11157-05...
- Page 14 Cisco Limited Lifetime Hardware Warranty Terms Catalyst 2950 Desktop Switch Hardware Installation Guide 78-11157-05...
-
Page 15: Preface
Audience This guide is for the networking or computer technician responsible for installing a Catalyst 2950 switch, hereafter referred to as the switch. We assume that you are familiar with the concepts and terminology of Ethernet and local area networking. -
Page 16: Conventions
Means reader take note. Notes contain helpful suggestions or references to Note materials not contained in this manual. Caution Means reader be careful. In this situation, you might do something that could result in equipment damage or loss of data. Catalyst 2950 Desktop Switch Hardware Installation Guide 78-11157-05... - Page 17 Opmerking Deze documentatie dient gebruikt te worden in combinatie met de installatiehandleiding voor het specifieke product die bij het product wordt geleverd. Raadpleeg de installatiehandleiding, configuratiehandleiding of andere verdere ingesloten documentatie voor meer informatie. Catalyst 2950 Desktop Switch Hardware Installation Guide xvii 78-11157-05...
- Page 18 Remarque Cette documentation doit être utilisée avec le guide spécifique d'installation du produit qui accompagne ce dernier. Veuillez vous reporter au Guide d'installation, au Guide de configuration, ou à toute autre documentation jointe pour de plus amples renseignements. Catalyst 2950 Desktop Switch Hardware Installation Guide xviii 78-11157-05...
- Page 19 Megjegyzés ÕRIZZE MEG EZEKET AZ UTASÍTÁSOKAT! Megjegyzés Ezt a dokumentációt a készülékhez mellékelt üzembe helyezési útmutatóval együtt kell használni. További tudnivalók a mellékelt Üzembe helyezési útmutatóban (Installation Guide), Konfigurációs útmutatóban (Configuration Guide) vagy más dokumentumban találhatók. Catalyst 2950 Desktop Switch Hardware Installation Guide 78-11157-05...
- Page 20 Merk TA VARE PÅ DISSE INSTRUKSJONENE Merk Denne dokumentasjonen skal brukes i forbindelse med den spesifikke installasjonsveiledningen som fulgte med produktet. Vennligst se installasjonsveiledningen, konfigureringsveiledningen eller annen vedlagt tilleggsdokumentasjon for detaljer. Catalyst 2950 Desktop Switch Hardware Installation Guide 78-11157-05...
- Page 21 Nota Esta documentación está pensada para ser utilizada con la guía de instalación del producto que lo acompaña. Si necesita más detalles, consulte la Guía de instalación, la Guía de configuración o cualquier documentación adicional adjunta. Catalyst 2950 Desktop Switch Hardware Installation Guide 78-11157-05...
- Page 22 OBS! SPARA DESSA ANVISNINGAR OBS! Denna dokumentation ska användas i samband med den specifika produktinstallationshandbok som medföljde produkten. Se installationshandboken, konfigurationshandboken eller annan bifogad ytterligare dokumentation för närmare detaljer. Catalyst 2950 Desktop Switch Hardware Installation Guide xxii 78-11157-05...
-
Page 23: Related Publications
Release Notes for the Catalyst 2950 and Catalyst 2955 Switches (not • orderable but is available on Cisco.com) Release Notes for the Catalyst 2950 LRE Switches (not orderable but is • available on Cisco.com) Catalyst 2950 Desktop Switch Hardware Installation Guide... - Page 24 Cisco.com for the latest information. For hardware information about the switch, refer to the Catalyst 2950 Desktop Switch Hardware Installation Guide (order number DOC-7811157=) For software information about the switch, refer to these documents: Catalyst 2950 and Catalyst 2955 Switch Software Configuration Guide •...
-
Page 25: Obtaining Documentation
These sections explain how to obtain technical information from Cisco Systems. Cisco.com You can access the most current Cisco documentation on the World Wide Web at this URL: http://www.cisco.com/univercd/home/home.htm You can access the Cisco website at this URL: http://www.cisco.com... -
Page 26: Documentation Cd-Rom
Preface Obtaining Documentation Documentation CD-ROM Cisco documentation and additional literature are available in a Cisco Documentation CD-ROM package, which may have shipped with your product. The Documentation CD-ROM is updated monthly and may be more current than printed documentation. The CD-ROM package is available as a single unit or through an annual subscription. -
Page 27: Obtaining Technical Assistance
Cisco.com offers a suite of interactive, networked services that let you access Cisco information, networking solutions, services, programs, and resources at any time, from anywhere in the world. Cisco.com provides a broad range of features and services to help you with these tasks: Streamline business processes and improve productivity •... -
Page 28: Technical Assistance Center
URL to register: http://tools.cisco.com/RPF/register/register.do If you are a Cisco.com registered user, and you cannot resolve your technical issues by using the Cisco TAC website, you can open a case online at this URL: http://www.cisco.com/en/US/support/index.html Catalyst 2950 Desktop Switch Hardware Installation Guide... -
Page 29: Cisco Tac Escalation Center
Obtaining Additional Publications and Information If you have Internet access, we recommend that you open P3 and P4 cases through the Cisco TAC website so that you can describe the situation in your own words and attach any necessary files. - Page 30 Packet magazine at this URL: http://www.cisco.com/en/US/about/ac123/ac114/about_cisco_packet_magaz ine.html iQ Magazine is the Cisco monthly periodical that provides business leaders • and decision makers with the latest information about the networking industry. You can access iQ Magazine at this URL: http://business.cisco.com/prod/tree.taf%3fasset_id=44699&public_view=tru...
-
Page 31: Quick Installation
Starting the Terminal Emulation Software, page 1-4 Connecting to a Power Source, page 1-5 Entering the Initial Configuration Information, page 1-6 Connecting to an Ethernet Port, page 1-10 Accessing the Switch from Your Browser, page 1-11 Catalyst 2950 Desktop Switch Hardware Installation Guide 78-11157-05... -
Page 32: Taking Out What You Need
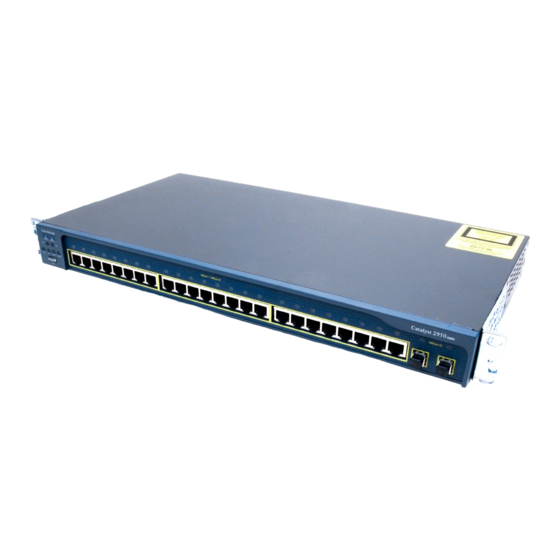
Taking Out What You Need Taking Out What You Need Remove the items shown in Figure 1-1 from the shipping container: Figure 1-1 Catalyst 2950 Switch, Adapter Cable, and AC Power Cord SYS T STAT UTIL DUP LX SPE ED... -
Page 33: Connecting To The Console Port
SP EC IFI 20 0-2 40 ED IN MA @ 0.5 A +1 2V @ NU AL . 4.5 A 50 -60 Hz CO NS OL Catalyst 2950 switch Power cord RJ-45-to-DB-9 adapter cable Catalyst 2950 Desktop Switch Hardware Installation Guide 78-11157-05... -
Page 34: Starting The Terminal Emulation Software
Configure the baud rate and character format of the PC or terminal to match these console port default characteristics: • 9600 baud 8 data bits • 1 stop bit • • No parity None (flow control) • Catalyst 2950 Desktop Switch Hardware Installation Guide 78-11157-05... -
Page 35: Connecting To A Power Source
Step 2 Connect the other end of the power cable to a grounded AC outlet. If you are connecting the switch to a Cisco redundant power system (RPS), refer Note to the documentation that shipped with your RPS. -
Page 36: Entering The Initial Configuration Information
Would you like to enter the initial configuration dialog? [yes/no]: At any point you may enter a question mark '?' for help. Use ctrl-c to abort configuration dialog at any prompt. Default settings are in square brackets '[]'. Catalyst 2950 Desktop Switch Hardware Installation Guide 78-11157-05... - Page 37 [VLAN] name) of the interface that connects to the management network, and press Return. For this release, always use vlan1 as that interface. Enter interface name used to connect to the management network from the above interface summary: vlan1 Catalyst 2950 Desktop Switch Hardware Installation Guide 78-11157-05...
- Page 38 0 15 password my_password snmp-server community public no ip routing interface Vlan1 no shutdown ip address 172.20.139.145 255.255.255.224 interface Vlan2 shutdown no ip address interface FastEthernet0/1 interface FastEthernet0/2 ...
- Page 39 Telnet. For configuration information, refer to the switch software configuration guide or the switch command reference. To use the CMS, go to “Accessing the Switch from Your Browser” section on page 1-11. Catalyst 2950 Desktop Switch Hardware Installation Guide 78-11157-05...
-
Page 40: Connecting To An Ethernet Port
UTIL DUP LX SPE ED 10B AS E-T / 100 BA MOD E SE -TX Ca tal yst 29 SER IES 100 BA SE Catalyst 2950 switch Category 5 straight-through cable Catalyst 2950 Desktop Switch Hardware Installation Guide 1-10 78-11157-05... -
Page 41: Accessing The Switch From Your Browser
Communicator) or Address field (Internet Explorer), and press Return. Enter your username and password when prompted. Step 2 The Cisco Systems Access page appears. For more information about setting passwords and privilege levels, refer to the switch software configuration guide. Step 3 Click Web Console to launch the CMS interface. -
Page 42: Recommended Platform Configuration For Web-Based Management
Second Edition 4.75 or 6.2 5.5 or 6.0 Windows NT 4.0 Service Pack 3 or later 4.75 or 6.2 5.5 or 6.0 Windows 2000 None 4.75 or 6.2 5.5 or 6.0 Catalyst 2950 Desktop Switch Hardware Installation Guide 1-12 78-11157-05... -
Page 43: Guidelines For Installing And Enabling The Java Plug-In
Java plug-in might not be enabled. CMS does not automatically detect if a supported Java plug-in is installed. If you start CMS without the required Java plug-in installed, the CMS splash screen remains open, and CMS does not launch. Catalyst 2950 Desktop Switch Hardware Installation Guide 1-13 78-11157-05... -
Page 44: Installing The Required Java Plug-In
Java Plug-in Control Panel (Start > Programs > Java Plug-in Control Panel), and verify these settings: In the Proxies tab, verify that Use browser settings is checked and that no proxies are enabled. Catalyst 2950 Desktop Switch Hardware Installation Guide 1-14 78-11157-05... - Page 45 • Java plug-in 1.3.1 Java plug-in 1.3.0 • You can download these plug-ins and instructions from this URL: http://www.cisco.com/pcgi-bin/tablebuild.pl/java To install the Java plug-in, follow the instructions in the README_FIRST.txt file. Catalyst 2950 Desktop Switch Hardware Installation Guide 1-15 78-11157-05...
- Page 46 Chapter 1 Quick Installation Accessing the Switch from Your Browser Catalyst 2950 Desktop Switch Hardware Installation Guide 1-16 78-11157-05...
-
Page 47: Overview
Management Options, page 2-32 Features The Catalyst 2950 switches are a family of Ethernet switches that you can use to connect workstations and other network devices, such as servers, routers, and other switches. All models of the switch are cluster-capable, but only some models are stackable. - Page 48 Ethernet ports, and 2 SFP module slots with DC-input power. (Two of the four uplink ports are active at one time.) Refer to the Catalyst 2950 LRE switch release notes for a list of supported Note SFP modules for the Catalyst 2950 LRE switches.
- Page 49 Connection for an optional Cisco RPS 300 redundant power system (RPS) that uses AC input and supplies DC output to the switch – Connection for an optional Cisco RPS 675 that uses AC input and supplies DC output to the switch Catalyst 2950 Desktop Switch Hardware Installation Guide...
-
Page 50: Front-Panel Description
The switch front panel contains the ports, the LEDs, and the Mode button. Other than the Catalyst 2950ST-24 LRE 997 switch, the front panel of the Catalyst 2950 LRE switches also contains the console port and AC power connector. On the Catalyst 2950ST-24 LRE 997 switch, the front panel contains a DC power connector (also referred to as the terminal block header), a DC ground lug, and an RJ-45 console port. - Page 51 17 x 18 x Ca ta ly st 29 19 x 20 x SER IES 21 x 22 x 23 x 10 0B AS 24 x E- FX 10/100 ports 100BASE-FX ports Catalyst 2950 Desktop Switch Hardware Installation Guide 78-11157-05...
- Page 52 GBIC module slots Figure 2-6 Catalyst 2950G-24-EI-DC Switch SYS T STA T UTI L DU PLX SPE ED MO DE Ca ta ly st 29 SER IES 10/100 ports GBIC module slots Catalyst 2950 Desktop Switch Hardware Installation Guide 78-11157-05...
- Page 53 CO NS OL RAT ING 100- 127/ STAT 200- 240V 1.0A /0.5A 50-6 0HZ SPE ED MOD E C at al ys t 29 50 L R E SER IES Console port 10/100/1000 ports Catalyst 2950 Desktop Switch Hardware Installation Guide 78-11157-05...
- Page 54 15 16 17 18 C at al ys 19 20 t 29 50 21 22 SER IES LR E 99 23 24 Console port DC ground lug DC ground lug 10/100/1000 ports Catalyst 2950 Desktop Switch Hardware Installation Guide 78-11157-05...
-
Page 55: 10/100 Ports
You can use Category 3, 4, or 5 cabling. • 100BASE-TX devices, such as high-speed workstations, servers, hubs, routers, and other switches, through standard RJ-45 connectors and two or four twisted-pair, Category 5 cabling. Catalyst 2950 Desktop Switch Hardware Installation Guide 78-11157-05... -
Page 56: 10/100/1000 Ports
10/100/1000 Ports The 10/100/1000 ports on the Catalyst 2950T-24 and the Catalyst 2950 LRE switches use RJ-45 connectors and twisted-pair cabling. The ports can connect to these devices: •... -
Page 57: 100Base-Fx And 1000Base-Sx Ports
10, 100, or 1000 Mbps but only in full-duplex mode. The 10/100/1000 ports on the Catalyst 2950 LRE switches can be explicitly set to operate at 10 or 100 Mbps in full- or half-duplex mode or at 1000 Mbps in full-duplex mode. -
Page 58: Lre Port
Table 2-1 on page 2-4 shows which LRE switches support which CPE devices. You can connect the Cisco 575 LRE CPE and Cisco 585 LRE CPE devices to LRE ports on the same Catalyst 2950ST-8 LRE or 2950ST-24 LRE switch. You can connect the Cisco 576 LRE CPE 997 device only to LRE ports on a Catalyst 2950ST-24 LRE 997 switch. -
Page 59: Gbic Module Ports
If a connection to a telephone network is not required, a splitter is not needed, and the switch can connect directly to the patch panel. For more information about the Cisco LRE CPE devices, refer to the Cisco LRE CPE Hardware Installation Guide. -
Page 60: Sfp Module Slots
SFP Module Slots On the Catalyst 2950 LRE switch, the SFP module slots support the SFP modules listed in the Catalyst 2950 LRE switch release notes. The Catalyst 2950 LRE switch has four physical input ports that are logically bundled as two ports. -
Page 61: Sfp Modules
• 1000BASE-ZX Refer to the Catalyst 2950 LRE switch release notes for the list of supported SFPs. The two SFP modules are inserted into SFP module slots on the front of the Catalyst 2950 LRE switches. These field-replaceable modules provide the uplink optical interfaces, laser send (TX), and laser receive (RX). - Page 62 ID, security code, or CRC is invalid, the switch places the interface in an error-disabled state. If you are using a non-Cisco approved SFP module, remove the module from the Note switch, and replace it with a Cisco-approved module.
-
Page 63: Leds
Cluster Management Suite (CMS). The switch software configuration guide describes how to use CMS to configure and to monitor individual switches and switch clusters. Figure 2-13 LEDs on Catalyst 2950-12, 2950-24, 2950C-24, 2950SX-24, and 2950T-24 Switches Port status LEDs... - Page 64 S T A T U T IL D U P L X Port S P E E D mode 1 5 X LEDs M O D E 1 6 X Mode button Catalyst 2950 Desktop Switch Hardware Installation Guide 2-18 78-11157-05...
- Page 65 S T A T /2 0 0 -2 4 0 1 .0 A /0 .5 A 5 0 -6 0 H S P E E D M O D E Mode button Speed STAT Catalyst 2950 Desktop Switch Hardware Installation Guide 2-19 78-11157-05...
-
Page 66: System Led
System is receiving power but is not functioning properly. For information about the system LED colors during the power-on self-test (POST), see the “Connecting to a Power Source” section on page 1-5. Catalyst 2950 Desktop Switch Hardware Installation Guide 2-20 78-11157-05... -
Page 67: Rps Led
(redundancy has been allocated to this device). For more information about the Cisco RPS 300, refer to the Cisco RPS 300 Redundant Power System Hardware Installation Guide. For more information about the Cisco RPS 675, refer to the Cisco RPS 675 Redundant Power System Hardware Installation Guide. - Page 68 The port operating speed: 10 or 100 Mbps for 10/100 ports and 10, 100, or 1000 Mbps for 10/100/1000 ports. 1. A Catalyst 2950 LRE switch does not have a UTIL LED. 2. A Catalyst 2950 LRE switch does not have a DUPLX LED.
- Page 69 Port is operating at 10 Mbps. Green Port is operating at 100 Mbps. Flashing green Port is operating at 1000 Mbps. 1000BASE-X GBIC module ports Port is not operating. Green Port is operating at 1000 Mbps. Catalyst 2950 Desktop Switch Hardware Installation Guide 2-23 78-11157-05...
- Page 70 1. On an LRE switch, the LEDs for Uplink Port 1 and Uplink Port 2 correspond either to the SFP module port or to the 10/100/1000 port, depending on which is active. 2. If an LRE switch senses connections to both ports, by default, the switch chooses the fiber-optic connection over the copper connection. Catalyst 2950 Desktop Switch Hardware Installation Guide 2-24 78-11157-05...
- Page 71 The Catalyst 2950 LRE switch LEDs do not give utilization status. Note If all LEDs on a Catalyst 2950-12, 2950-24, 2950C-24, 2950SX-24, or 2950T-24 switch are green (no amber showing), the switch is using 50 percent or more of the total bandwidth. If the far-right LED is off, the switch is using more than 25 but less than 50 percent of the total bandwidth, and so on.
- Page 72 2 is off, the switch is using more than 25 but less than 50 percent of the total bandwidth. If LEDs for both GBIC module slots are off, the switch is using less than 25 percent of the total bandwidth, and so on. (See Figure 2-22.) Catalyst 2950 Desktop Switch Hardware Installation Guide 2-26 78-11157-05...
-
Page 73: Rear-Panel Description
50% + Rear-Panel Description Other than the Catalyst 2950G-24-EI-DC switch and the Catalyst 2950 LRE switches, the rear panel of a Catalyst 2950 switch has an AC power connector, an RPS connector, and an RJ-45 console port. (See Figure 2-23 Figure 2-24.) - Page 74 EM O TE SU PP LY SP EC IF IE D IN M AN UA L. +1 2V @ 4. 5A C O N SO DC power connector connector RJ-45 console ground port Catalyst 2950 Desktop Switch Hardware Installation Guide 2-28 78-11157-05...
-
Page 75: Power Connectors
AC power connector to an AC power outlet. Note The AC power connector is on the front panel of the Catalyst 2950ST-8 LRE and Catalyst 2950ST-24 LRE switches. You can order these L-shaped AC power cords from your Cisco sales representative: • CAB-NP1200-AC-AR= •... -
Page 76: Dc Power Connector
Cisco RPS 675 (model PWR675-AC-RPS-N1=) • Cisco RPS 300 The Cisco RPS 300 has two output levels: –48V and 12V with a total maximum output power of 300W. Use the supplied RPS connector cable to connect the RPS to the switch. -
Page 77: Console Port
For more information, refer to the Cisco RPS 300 documentation. Cisco RPS 675 The Cisco RPS 675 has two output levels: –48V and 12V with a total maximum output power of 675W. Use the supplied RPS connector cable to connect the RPS to the switch. -
Page 78: Management Options
Chapter 2 Overview Management Options Management Options Catalyst 2950 switches offer these management options: • Cluster Management Suite (CMS) CMS is made up of three web-based applications that you use to manage switches. You can use Cluster Builder, which includes Cluster View, and Cluster Manager to create, configure, and monitor switch clusters. - Page 79 Management Options • Cisco Intelligence Engine 2100 (IE2100) The Cisco IE200 Series Configuration Registrar is a network management device that works with embedded Cisco Networking Services (CNS) agents in the switch software. You can automate initial configurations and configuration updates by generating switch-specific configuration changes, sending them to the switch, executing the configuration change, and logging the results.
- Page 80 Chapter 2 Overview Management Options Catalyst 2950 Desktop Switch Hardware Installation Guide 2-34 78-11157-05...
-
Page 81: Installation
• Connecting to an LRE Port, page 3-38 • Connecting to GBIC Module Ports, page 3-44 • • Connecting to an SFP Module, page 3-49 Where to Go Next, page 3-50 • Catalyst 2950 Desktop Switch Hardware Installation Guide 78-11157-05... -
Page 82: Preparing For Installation
Read the installation instructions before you connect the system to its power Warning source. Unplug the power cord before you work on a system that does not have an on/off Warning switch. Catalyst 2950 Desktop Switch Hardware Installation Guide 78-11157-05... - Page 83 Before working on equipment that is connected to power lines, remove jewelry (including rings, necklaces, and watches). Metal objects will heat up when connected to power and ground and can cause serious burns or weld the metal object to the terminals. Catalyst 2950 Desktop Switch Hardware Installation Guide 78-11157-05...
-
Page 84: Emc Regulatory Statements
Ultimate disposal of this product should be handled according to all national Warning laws and regulations. Attach only the Cisco RPS (model PWR300-AC-RPS-N1) to the RPS receptacle. Warning Invisible laser radiation may be emitted from disconnected fibers or Warning connectors. -
Page 85: Taiwan
Interference by Information Technology Equipment (VCCI). If this equipment is used in a domestic environment, radio disturbance may arise. When such trouble occurs, the user may be required to take corrective actions. Catalyst 2950 Desktop Switch Hardware Installation Guide 78-11157-05... -
Page 86: Korea
és üzembe helyezésére a magyar EMC "A" osztályú követelményeknek (MSZ EN 55022) megfeleloen kerülhet sor, illetve ezen "A" osztályú berendezések csak megfelelo kereskedelmi forrásból származhatnak, amelyek biztosítják a megfelelo speciális üzembe helyezési körülményeket és biztonságos üzemelési távolságok alkalmazását. Catalyst 2950 Desktop Switch Hardware Installation Guide 78-11157-05... -
Page 87: Installation Guidelines
Front-panel LEDs can be easily read. – Access to ports is sufficient for unrestricted cabling. – – Rear-panel AC power connector on switches other than the LRE switches is within reach of an AC power outlet. Catalyst 2950 Desktop Switch Hardware Installation Guide 78-11157-05... -
Page 88: Verifying Package Contents
Carefully remove the contents from the shipping container, and check each item Note for damage. If any item is missing or damaged, contact your Cisco representative or reseller for support. Return all packing materials to the shipping container and save them. - Page 89 If you want to connect a terminal to the switch console port, you need to provide an RJ-45-to-DB-25 female DTE adapter. You can order a kit (part number ACS-DSBUASYN=) with that adapter from Cisco. Catalyst 2950 Desktop Switch Hardware Installation Guide 78-11157-05...
-
Page 90: Verifying Switch Operation
Figure 3-1 Figure 3-20 show the Catalyst 2950-24, 2950G-24-EI-DC, and Note 2950G-48-EI switches as examples. You can install other Catalyst 2950 switches in a rack as shown in these illustrations. Catalyst 2950 Desktop Switch Hardware Installation Guide 3-10 78-11157-05... -
Page 91: Attaching The Brackets To The Switch
When mounting a Catalyst 2950G-48-EI switch in a 24-inch rack, use three • Phillips flat-head screws to attach the 24-inch bracket (part number RCKMNT-1RU=) to the switch. See Figure 3-13, Figure 3-14, and Figure 3-15. Catalyst 2950 Desktop Switch Hardware Installation Guide 3-11 78-11157-05... - Page 92 S Y S T R P S S TA T U T IL D U P L X S P E E D M O D E Number-8 Phillips flat-head screws Catalyst 2950 Desktop Switch Hardware Installation Guide 3-12 78-11157-05...
- Page 93 Forward) C O N S O Number-8 Phillips flat-head screws Figure 3-3 Attaching Brackets on the Switch in a 19-Inch Telco Rack C O N S O Number-8 Phillips flat-head screws Catalyst 2950 Desktop Switch Hardware Installation Guide 3-13 78-11157-05...
- Page 94 Number-8 Phillips 16 X flat-head screws Figure 3-5 Attaching Brackets on the Catalyst 2950G-48-EI Switch in a 19-Inch Rack (Rear Panel Forward) C O N S O Number-8 Phillips flat-head screws Catalyst 2950 Desktop Switch Hardware Installation Guide 3-14 78-11157-05...
- Page 95 S Y S T R P S S TA T U T IL D U P LX S P E E D 11 X M O D E Number-8 Phillips truss-head 12 X screws Catalyst 2950 Desktop Switch Hardware Installation Guide 3-15 78-11157-05...
- Page 96 Installing the Switch in a Rack Figure 3-8 Attaching Brackets on the Catalyst 2950G-24-EI-DC or 2950ST-24 LRE 997 Switch in a 23-Inch Telco Rack (Rear Panel Forward) C O N S O Number-8 Phillips truss-head screws Catalyst 2950 Desktop Switch Hardware Installation Guide 3-16 78-11157-05...
- Page 97 S Y S T R P S S TA T U T IL D U P LX S P E E D 11 X M O D E Number-8 Phillips 12 X truss-head screws Catalyst 2950 Desktop Switch Hardware Installation Guide 3-17 78-11157-05...
- Page 98 Chapter 3 Installation Installing the Switch in a Rack Figure 3-11 Attaching Brackets on the Switch in a 24-Inch Rack (Rear Panel Forward) C O N S O Number-8 Phillips truss-head screws Catalyst 2950 Desktop Switch Hardware Installation Guide 3-18 78-11157-05...
- Page 99 Figure 3-13 Attaching Brackets on the Catalyst 2950G-48-EI Switch in a 24-Inch Rack (Front Panel Forward) SY ST RP S ST AT UT IL DU PL X SP EE D 15 X Phillips M O DE flat-head screws 16 X Catalyst 2950 Desktop Switch Hardware Installation Guide 3-19 78-11157-05...
- Page 100 Phillips flat-head screws Figure 3-15 Attaching Brackets on the Catalyst 2950G-48-EI Switch in a 24-Inch Telco Rack C at al ys t 29 SE RIE S 24" Configuration Phillips flat-head screws Catalyst 2950 Desktop Switch Hardware Installation Guide 3-20 78-11157-05...
-
Page 101: Mounting The Switch In A Rack
23 x 24 x Number-12 Phillips machine screws After mounting the switch in the rack, start the terminal-emulation software, and provide power to the switch. See Chapter 1, “Quick Installation” for instructions. Catalyst 2950 Desktop Switch Hardware Installation Guide 3-21 78-11157-05... -
Page 102: Attaching The Optional Cable Guide
Phillips machine screw to attach the cable guide to the left or right bracket, as shown in Figure 3-17. You cannot use the cable guide with Catalyst 2950 LRE switches. Note Figure 3-17 Attaching the Cable Guide SYS T... -
Page 103: Installing The Switch On A Wall
Warning connector cover on the back of the switch. You can mount the Catalyst 2950 switch to a wall in a face-up configuration. To attach the switch to a wall, follow the procedures in this section. Attaching the Brackets to the Switch, page 3-23... -
Page 104: Attaching The Rps Connector Cover
Chapter 3 Installation Installing the Switch on a Wall Figure 3-18 Attaching Brackets for Wall-Mounting for the Catalyst 2950 Switch Phillips truss-head screws Attaching the RPS Connector Cover If you are not using a redundant power system (RPS) with your switch, use two number-4 Phillips pan-head screws to install an RPS connector cover to the back of the switch. -
Page 105: Mounting The Switch To A Wall
For the best support of the switch and cables, make sure the switch is attached securely to a wall stud or to a firmly attached plywood mounting backboard, as shown in Figure 3-20. Figure 3-20 Mounting a Catalyst 2950 Switch to a Wall Vertical wall stud Vertical wall stud... -
Page 106: Installing The Gbic Modules
Figure 3-21 Installing a 1000BASE-X GBIC Module in a Switch Metal flap door C at al y st 2 9 5 0 SE RIE S GBIC module slot 1000BASE-X GBIC module Catalyst 2950 Desktop Switch Hardware Installation Guide 3-26 78-11157-05... - Page 107 Figure 3-23 Installing a GigaStack GBIC Module in a Switch Metal flap door C at al y st 2 9 5 0 SE RIE S GBIC module slot GigaStack GBIC module Catalyst 2950 Desktop Switch Hardware Installation Guide 3-27 78-11157-05...
-
Page 108: Installing And Removing Sfp Modules
Catalyst 2950 LRE switches. These field-replaceable modules provide the uplink optical interfaces, laser send (TX) and laser receive (RX). You can use any combination of SFP modules. Refer to the Catalyst 2950 LRE release notes for the list of SFP modules that the Catalyst 2950 LRE switch supports. - Page 109 On some SFP modules, the send and receive (TX and RX) markings might Note be replaced by arrows that show the direction of the connection, either send or receive (TX or RX). Catalyst 2950 Desktop Switch Hardware Installation Guide 3-29 78-11157-05...
-
Page 110: Removing Sfp Modules From Sfp Module Slots
Attach an ESD-preventive wrist strap to your wrist and to a bare metal surface on the chassis. Disconnect the LC from the SFP module. Step 2 For reattachment, note which cable connector plug is send (TX) and which is receive (RX). Catalyst 2950 Desktop Switch Hardware Installation Guide 3-30 78-11157-05... - Page 111 If the bale-clasp latch is obstructed and you cannot use your index finger to open it, use a small, flat-blade screwdriver or other long, narrow instrument to open the bale-clasp latch. Catalyst 2950 Desktop Switch Hardware Installation Guide 3-31 78-11157-05...
-
Page 112: Connecting To 10/100 And 10/100/1000 Ports
The 10/100/1000 ports configure themselves to operate at the speed setting of attached devices. These ports on Catalyst 2950T-24 switches operate at 10, 100, or 1000 Mbps in full-duplex mode. The 10/100/1000 ports on Catalyst 2950 LRE switches operate at 10 or 100 Mbps in either half- or full-duplex mode and at 1000 Mbps only in full-duplex mode. - Page 113 Chapter 3 Installation Connecting to 10/100 and 10/100/1000 Ports On the Catalyst 2950 LRE switches, the four input uplink ports are bundled as two Note logical ports, each consisting of a copper 10/100/1000 port and a fiber-optic SFP module slot, respectively.
- Page 114 Note When connecting to 1000BASE-T devices, be sure to use a four twisted-pair, Category 5 cable. Figure 3-31 Connecting to a Port on Catalyst 2950-12, 2950-24, 2950C-24, 2950SX-24, and 2950T-24 Switches S Y S T R P S...
- Page 115 S Y S T R P S S T A T U T IL D U P L X S P E E D 1 5 X M O D E 1 6 X Catalyst 2950 Desktop Switch Hardware Installation Guide 3-35 78-11157-05...
-
Page 116: Connecting To 100Base-Fx And 1000Base-Sx Ports
Cisco Part Number 1-meter, MT-RJ-to-SC multimode cable CAB-MTRJ-SC-MM-1M 3-meter, MT-RJ-to-SC multimode cable CAB-MTRJ-SC-MM-3M 5-meter, MT-RJ-to-SC multimode cable CAB-MTRJ-SC-MM-5M 1-meter, MT-RJ-to-ST multimode cable CAB-MTRJ-ST-MM-1M 3-meter, MT-RJ-to-ST multimode cable CAB-MTRJ-ST-MM-3M 5-meter, MT-RJ-to-ST multimode cable CAB-MTRJ-ST-MM-5M Catalyst 2950 Desktop Switch Hardware Installation Guide 3-36 78-11157-05... - Page 117 If the LED is off, the target device might not be turned on, there might be a cable problem, or there might be a problem with the adapter installed in the target device. See Chapter 4, “Troubleshooting,” for solutions to cabling problems. Catalyst 2950 Desktop Switch Hardware Installation Guide 3-37 78-11157-05...
-
Page 118: Connecting To An Lre Port
You can connect both Cisco 575 LRE CPE and Cisco 585 LRE CPE devices to your Catalyst 2950ST-8 LRE or Catalyst 2950ST-24 LRE switch. You can connect only the Cisco 576 LRE CPE 997 device to LRE ports on a Catalyst 2950ST-24 LRE 997 switch. -
Page 119: Limitations And Restrictions With Pots Splitters
ISDN telephones that use the 0 to 120 kHz frequency range. We recommend that you do not use a Cisco LRE 48 POTS Splitter with a • Catalyst 2950ST-24 LRE 997 switch and a Cisco 576 LRE 997 CPE as shown Figure 3-35. -
Page 120: Required Cables
Connecting the LRE port to a patch panel or a POTS splitter requires a male-to-male RJ-21 cable, Category 3 or above. You can order RJ-21 cables from your cable vendor, or you can order these cables from your Cisco sales representative: •... -
Page 121: Connecting To A Patch Panel Or Pots Splitter
3-37. • The cable tie is not included with the connector and cable assembly. Note Connect the other end of the cable to the patch panel or POTS splitter. Step 3 Catalyst 2950 Desktop Switch Hardware Installation Guide 3-41 78-11157-05... - Page 122 /20 0-2 40 1.0 A/ 0.5 A 50 -60 HZ SP EE D MO DE 1 4 1 5 Screw RJ-21 0.20 inch (5 mm) connector Cable to Cable tie wiring trunk Catalyst 2950 Desktop Switch Hardware Installation Guide 3-42 78-11157-05...
- Page 123 INP UT : 36 - 72 V CU RR EN T : 2 - 1 A MO DE Screw 0.20 inch RJ-21 (5 mm) Cable to connector Cable tie wiring trunk Catalyst 2950 Desktop Switch Hardware Installation Guide 3-43 78-11157-05...
-
Page 124: Connecting To Gbic Module Ports
Installation Connecting to GBIC Module Ports Each LRE port status LED turns on when it establishes a link with a Cisco LRE CPE device. For more information about the LRE link between the switch LRE port and the CPE and about the configuration and management of CPE devices, refer to the switch software configuration guide. -
Page 125: Connecting To 1000Base-X Gbic Module Ports
Remove the rubber plugs from the GBIC module port, and store them for future Step 1 use. Insert the SC connector in the fiber-optic receptacle (see Figure 3-38). Step 2 Catalyst 2950 Desktop Switch Hardware Installation Guide 3-45 78-11157-05... - Page 126 Chapter 3, “Troubleshooting,” for solutions to cabling problems. Reconfigure and restart the switch or target device if necessary. Step 5 Catalyst 2950 Desktop Switch Hardware Installation Guide 3-46 78-11157-05...
-
Page 127: Connecting To 1000Base-T Gbic Module Ports
When connecting to a 1000BASE-T device, be sure to use a four twisted-pair, Note Category 5 cable. Figure 3-39 Connecting to a 1000BASE-T GBIC Port C a ta ly s t 2 9 5 0 S E R IE S Catalyst 2950 Desktop Switch Hardware Installation Guide 3-47 78-11157-05... -
Page 128: Connecting To Gigastack Gbic Module Ports
Insert the GigaStack cable connector in the GBIC (see Figure 3-40). Figure 3-40 Connecting to a GigaStack GBIC Port C a ta ly s t 2 9 5 0 S E R IE S Catalyst 2950 Desktop Switch Hardware Installation Guide 3-48 78-11157-05... -
Page 129: Connecting To An Sfp Module
2-14. See Appendix B, “Connectors and Cables,” for information about the LC on the SFP module. Refer to the Catalyst 2950 LRE release notes for the list of supported SFP Note modules. Catalyst 2950 Desktop Switch Hardware Installation Guide 3-49... -
Page 130: Where To Go Next
If necessary, reconfigure and restart the switch or target device. Where to Go Next For information about starting up the switch, see Chapter 1, “Quick Installation.” For information about configuring the switch, refer to the switch software configuration guide. Catalyst 2950 Desktop Switch Hardware Installation Guide 3-50 78-11157-05... -
Page 131: Troubleshooting
2-17. You can also get statistics from the Cluster Management Suite (CMS), the command-line interface (CLI), the Cisco Intelligence Engine 2100 (IE2100) Series Configuration Registrar, or a Simple Network Management Protocol (SNMP) workstation. Refer to the switch software configuration guide, the switch command reference, or the documentation that came with your IE2100 or SNMP application for details. -
Page 132: Chapter 4 Troubleshooting
When the switch begins POST, the system LED is off. If POST completes successfully, the LED turns green. If POST fails, the LED turns amber. POST failures are usually fatal. Call Cisco Systems if your switch does not pass Note POST. - Page 133 For SFP module port Table 2-2 on page 2-16 • • connections: The distance for SFP cabling guidelines. between the SFP module port and the attached device exceeds the SFP cabling guidelines. Catalyst 2950 Desktop Switch Hardware Installation Guide 78-11157-05...
- Page 134 System LED is amber, and Corrupted software. Attach a monitor to the serial all port LEDs are off. port to display the switch boot loader. For more information, refer to the switch software configuration guide. Catalyst 2950 Desktop Switch Hardware Installation Guide 78-11157-05...
- Page 135 Refer to the switch software configuration guide for information about the errdisable recovery command. Catalyst 2950 Desktop Switch Hardware Installation Guide 78-11157-05...
- Page 136 2. GBIC = Gigabit Interface Converter 3. SFP = small form-factor pluggable 4. STP = Spanning Tree Protocol 5. CWDM = Coarse Wave Division Multiplexer 6. LRE = Long-Reach Ethernet 7. CPE = customer premises equipment Catalyst 2950 Desktop Switch Hardware Installation Guide 78-11157-05...
-
Page 137: Appendix
Catalyst 2950 Long-Reach Ethernet (LRE) switches. Table A-8 Table A-9 list the regulatory agency approvals for the Catalyst 2950 LRE switches. Table A-10 lists the regulatory agency approval only for the Catalyst 2950G-24-EI-DC switch. Catalyst 2950 Desktop Switch Hardware Installation Guide... - Page 138 Appendix A Technical Specifications Table A-1 Technical Specifications for Catalyst 2950-12, 2950-24, 2950C-24, 2950SX-24, and 2950T-24 Switches Environmental Ranges Operating temperature 32 to 113°F (0 to 45°C) Storage temperature –13 to 158°F (–25 to 70°C) Operating humidity 10 to 85% (noncondensing)
- Page 139 1.72 x 17.5 x 13 in. (H x W x D) (4.36 x 44.45 x 24.18 cm) (4.36 x 44.45 x 33.02 cm) 1. This switch meets ASTM D3332. 2. RPS = redundant power system Catalyst 2950 Desktop Switch Hardware Installation Guide 78-11157-05...
- Page 140 6.5 lb (3 kg) Dimensions 1.72 x 17.5 x 9.52 in. (H x W x D) (4.36 x 44.45 x 24.18 cm) 1. This switch meets ASTM D3332. 2. AWG = American Wire Gauge Catalyst 2950 Desktop Switch Hardware Installation Guide 78-11157-05...
- Page 141 AC input voltage 100 to 127/200 to 240 VAC (autoranging) 50 to 60 Hz DC input voltage for the Cisco RPS +12V DC input voltage for the Cisco RPS 675 +12V Power consumption 50W (maximum) 171 Btus per hour Power rating 0.083 kVA...
- Page 142 8 lb (3.6 kg) Dimensions 1.73 x 17.5 x 9.96 in. (H x W x D) (4.36 x 44.45 x 24.18 cm) 1. This switch meets ASTM D3332. 2. AWG = American Wire Gauge Catalyst 2950 Desktop Switch Hardware Installation Guide 78-11157-05...
- Page 143 FCC Part 15 Class A IEC 60950/EN 60950 EN 55022: 1998 (CISPR22) Class A AS/NZS 3260, TS001 EN 55024: 1998 (CISPR24) VCCI Class A AS/NZS 3548 Class A CNS 13438 Class A Catalyst 2950 Desktop Switch Hardware Installation Guide 78-11157-05...
- Page 144 Transients (Surges) EN61000-4-6/IEC1000-4-6: Immunity to Radio Frequency Induced Conducted Disturbances EN61000-4-11/IEC1000-4-11: Immunity to Voltage Dips, Voltage Variations, and Short Voltage Interruptions AS/NZS 3548, Class A BSMI, Class A VCCI, Class A MIC Mark Catalyst 2950 Desktop Switch Hardware Installation Guide 78-11157-05...
- Page 145 EN61000-4-6/IEC1000-4-6: Immunity to Radio Frequency Induced Conducted Disturbances EN61000-4-11/IEC1000-4-11: Immunity to Voltage Dips, Voltage Variations, and Short Voltage Interruptions Table A-10 Catalyst 2950G-24-EI-DC Switch Agency Approvals NEBS Bellcore GR-1089-CORE Bellcore GR-63-CORE Bellcore SR-3580 Level 3 Catalyst 2950 Desktop Switch Hardware Installation Guide 78-11157-05...
- Page 146 Appendix A Technical Specifications Catalyst 2950 Desktop Switch Hardware Installation Guide A-10 78-11157-05...
-
Page 147: Appendix
This appendix describes the connectors, cables, and adapters that you use to connect the switch to other devices. Connector Specifications These sections describe the connectors used with the Catalyst 2950 switches and contains this information: • 10/100 Ports, page B-2 10/100/1000 Ports, page B-3 •... -
Page 148: Connector Specifications
Use a straight-through cable to connect two ports only when one port is designated with an X. Use a crossover cable to connect two ports when both ports are designated with an X or when both ports do not have an X. Catalyst 2950 Desktop Switch Hardware Installation Guide 78-11157-05... -
Page 149: 10/100/1000 Ports
Long-Reach Ethernet (LRE) switches use standard RJ-45 connectors. Figure B-2 shows the pinout. On the Catalyst 2950 LRE switches, the four input uplink ports are bundled as two Note logical ports, each consisting of a copper 10/100/1000 port and a fiber-optic small form-factor pluggable (SFP) module slot, respectively. -
Page 150: Connecting To 10Base-T And 100Base-Tx Devices
Use a straight-through cable to connect two ports only when one port is Note designated with an X. Use a crossover cable to connect two ports when both ports are designated with an X or when both ports do not have an X. Catalyst 2950 Desktop Switch Hardware Installation Guide 78-11157-05... -
Page 151: Lre Port
The Catalyst 2950ST-8 LRE switch uses only 16 pins. Pins 9 through 25 on the top row and pins 34 through 50 on the bottom row are not used. Figure B-3 RJ-21 Connector Catalyst 2950 Desktop Switch Hardware Installation Guide 78-11157-05... -
Page 152: 100Base-Fx And 1000Base-Sx Ports
Figure B-4 MT-RJ Connector 1000BASE-X GBIC Module Ports 1000BASE-X Gigabit Interface Converter (GBIC) module ports use duplex SC connectors, as shown in Figure B-5. Figure B-5 1000BASE-X SC Connector Catalyst 2950 Desktop Switch Hardware Installation Guide 78-11157-05... -
Page 153: 1000Base-T Gbic Module Ports
Figure B-6 GigaStack Connector SFP Module Ports The Catalyst 2950 LRE switch uses SFP modules for fiber-optic uplink ports. Refer to the Catalyst 2950 LRE switch release notes for a list of supported SFP modules. Figure B-7 SFP Module Connector... -
Page 154: Console Port
Cisco. For console-port and adapter-pinout information, see Table B-3 Table B-4. Cable and Adapter Specifications These sections describe the cables and adapters used with Catalyst 2950 switches. Two Twisted-Pair Cable Pinouts, page B-8 • • Four Twisted-Pair Cable Pinouts for 10/100 Ports, page B-9 Four Twisted-Pair Cable Pinouts for 1000BASE-T Ports, page B-10 •... - Page 155 1 RD+ 1 TD+ 2 RD- 2 TD- 3 TD+ 3 RD+ 6 TD- 6 RD- 4 NC 4 NC 5 NC 5 NC 7 NC 7 NC 8 NC 8 NC Catalyst 2950 Desktop Switch Hardware Installation Guide 78-11157-05...
- Page 156 Figure B-12 Figure B-13 show the schematics of four twisted-pair cables for 10/100/1000 ports on Catalyst 2950T-24 switches, Catalyst 2950 LRE switches, and 1000BASE-T GBIC module ports. Figure B-12 Four Twisted-Pair Straight-Through Cable Schematic for 10/100/1000 and 1000BASE-T GBIC Module Ports...
-
Page 157: Rj-21 Cable Pinouts
Port 4 Ring Port 5 Tip Port 5 Ring Port 6 Tip Port 6 Ring Port 7 Tip Port 7 Ring Port 8 Tip Port 8 Ring Port 9 Tip Port 9 Ring Catalyst 2950 Desktop Switch Hardware Installation Guide B-11 78-11157-05... - Page 158 Port 20 Ring Port 21 Tip Port 21 Ring Port 22 Tip Port 22 Ring Port 23 Tip Port 23 Ring Port 24 Tip Port 24 Ring No connect No connect Catalyst 2950 Desktop Switch Hardware Installation Guide B-12 78-11157-05...
- Page 159 No connect No connect No connect No connect No connect No connect No connect No connect No connect No connect No connect No connect No connect No connect No connect No connect Catalyst 2950 Desktop Switch Hardware Installation Guide B-13 78-11157-05...
-
Page 160: Rollover Cable And Adapter Pinouts
(See Figure B-14.) Figure B-14 Identifying a Rollover Cable Pin 1 on one connector and pin 8 on the other connector should be the same color. Pin 1 Pin 8 Catalyst 2950 Desktop Switch Hardware Installation Guide B-14 78-11157-05... - Page 161 RJ-45-to-DB-25 female DTE adapter, and the console device. The RJ-45-to-DB-25 female DTE adapter is not supplied with the switch. You can Note order a kit (part number ACS-DSBUASYN=) with that adapter from Cisco. Catalyst 2950 Desktop Switch Hardware Installation Guide B-15 78-11157-05...
- Page 162 Table B-4 Console Port Signaling and Cabling Using a DB-25 Adapter Console RJ-45-to-DB-9 RJ-45-to-DB-25 Console Port (DTE) Adapter Cable Terminal Adapter Device Signal RJ-45 Pin DB-9 Pin DB-25 Pin Signal connected connected Catalyst 2950 Desktop Switch Hardware Installation Guide B-16 78-11157-05...
-
Page 163: Appendix
The Catalyst 2950G-24-EI-DC contains no field-replaceable units (FRUs). Do not open the chassis or attempt to remove or replace any components. For information about obtaining service for this unit, contact your reseller or Cisco sales representative. The Catalyst 2950ST-24 LRE 997 contains no field-replaceable units (FRUs). Do Warning not open the chassis or attempt to remove or replace any components. -
Page 164: Preparing For Installation
To make sure that the equipment is reliably connected to earth ground, follow the grounding procedure instructions, and use a UL-listed lug suitable for number-6 AWG wire and two number-10-32 ground-lug screws. Catalyst 2950 Desktop Switch Hardware Installation Guide 78-11157-05... - Page 165 Stripping the Ground Wire 0.5 in. (12.7 mm) ± 0.02 in. (0.5 mm) Wire lead Insulation Step 3 Slide the open end of the ground lug over the exposed area of the 6-gauge wire. Catalyst 2950 Desktop Switch Hardware Installation Guide 78-11157-05...
- Page 166 Using a ratcheting torque screwdriver, torque each ground-lug screw to 15 lbf-in. Step 6 (240 ounce-force inches [ozf-in.]). Figure C-3 shows how to torque the ground screws on a Catalyst 2950G-24-EI-DC switch. Catalyst 2950 Desktop Switch Hardware Installation Guide 78-11157-05...
-
Page 167: Wiring The Dc-Input Power Source
DC circuit. To ensure that all power is OFF, locate the circuit breaker on the panel board that services the DC circuit, switch the circuit breaker to the OFF position, and tape the switch handle of the circuit breaker in the OFF position. Catalyst 2950 Desktop Switch Hardware Installation Guide 78-11157-05... - Page 168 This installation must comply with all applicable codes. To wire the switch to a DC-input power source, follow these steps: Step 1 Locate the terminal block plug (see Figure C-4). Figure C-4 Terminal Block Plug Catalyst 2950 Desktop Switch Hardware Installation Guide 78-11157-05...
- Page 169 Figure C-6 Stripping the DC-Input Power Source Wire 0.25 in. (6.3 mm) ± 0.02 in. (0.5 mm) Catalyst 2950 Desktop Switch Hardware Installation Guide 78-11157-05...
- Page 170 Use a ratcheting torque screwdriver to torque the terminal block captive screw (above the installed wire lead) to 4.5 lbf-in. (72 ozf-in.). (See Figure C-8.) Caution Do not overtorque the terminal-block captive screws. The recommended maximum torque is 4.5 lbf-in. Catalyst 2950 Desktop Switch Hardware Installation Guide 78-11157-05...
- Page 171 Appendix C Connecting to DC Power Wiring the DC-Input Power Source Figure C-8 Torquing the Terminal-Block Captive Screws Torque to 4.5 lbf-in. (72 ozf-in.) Catalyst 2950 Desktop Switch Hardware Installation Guide 78-11157-05...
- Page 172 Secure the wires coming in from the terminal block so that they cannot be Caution disturbed by casual contact. For example, use tie wraps to secure the wires to the rack. Catalyst 2950 Desktop Switch Hardware Installation Guide C-10 78-11157-05...
- Page 173 AN UA L. +1 2V @ 4. 5A C O N SO Tie wrap Remove the tape from the circuit-breaker switch handle, and move the Step 8 circuit-breaker handle to the on position. Catalyst 2950 Desktop Switch Hardware Installation Guide C-11 78-11157-05...
- Page 174 Appendix C Connecting to DC Power Wiring the DC-Input Power Source Catalyst 2950 Desktop Switch Hardware Installation Guide C-12 78-11157-05...
-
Page 175: Appendix
Attaching the Cisco RPS (model PWR300-AC-RPS-N1) Attach only the Cisco RPS (model PWR300-AC-RPS-N1) to the RPS receptacle. Warning Waarschuwing Slechts de Cisco RPS (model PWR300-AC-RPS-N1) aan de RPS contactdoos verbinden. -
Page 176: Attaching The Cisco Rps (Model Pwr675-Ac-Rps-N1
Sólo conecte el Cisco RPS (modelo PWR300-AC-RPS-N1) al receptáculo RPS. Varning! Koppla endast Ciscos RPS (modell PWR300-AC-RPS-N1) till RPS-uttaget. Attaching the Cisco RPS (model PWR675-AC-RPS-N1) Attach only the Cisco RPS (model PWR675-AC-RPS-N1) to the RPS receptacle. Warning Waarschuwing Slechts de Cisco RPS (model PWR675-AC-RPS-N1) aan de RPS contactdoos verbinden. - Page 177 Attaching the Cisco RPS (model PWR675-AC-RPS-N1) Avertissement Raccordez le bloc d’alimentation Cisco RPS (modèle PWR675-AC-RPS-N1) uniquement au connecteur RPS. Warnung An die RPS-Steckhülse darf nur das Cisco RPS (Modell PWR675-AC-RPS-N1) angeschlossen werden. Figyelem! Az RPS csatlakozóhoz csak Cisco RPS (PWR675-AC-RPS-N1 modell) aljzatot csatlakoztasson.
-
Page 178: Lightning Activity Warning
No operar el sistema ni conectar o desconectar cables durante el transcurso de descargas eléctricas en la atmósfera. Varning! Vid åska skall du aldrig utföra arbete på systemet eller ansluta eller koppla loss kablar. Catalyst 2950 Desktop Switch Hardware Installation Guide 78-11157-05... -
Page 179: Installation Warning
Figyelem! Mielõtt áramforráshoz csatlakoztatná a rendszert, olvassa el az üzembe helyezési útmutatót! Avvertenza Consultare le istruzioni di installazione prima di collegare il sistema all'alimentatore. Advarsel Les installasjonsinstruksjonene før systemet kobles til strømkilden. Catalyst 2950 Desktop Switch Hardware Installation Guide 78-11157-05... -
Page 180: Main Disconnecting Device
Varoitus Pistoke/liitinkohta toimii pääkatkaisumekanismina. Pääsy siihen on pidettävä aina esteettömänä. Attention La combinaison de prise de courant doit être accessible à tout moment parce qu'elle fait office de système principal de déconnexion. Catalyst 2950 Desktop Switch Hardware Installation Guide 78-11157-05... - Page 181 El conjunto de clavija y toma ha de encontrarse siempre accesible ya que hace las veces de dispositivo de desconexión principal. Varning! Man måste alltid kunna komma åt stickproppen i uttaget, eftersom denna koppling utgör den huvudsakliga frånkopplingsanordningen. Catalyst 2950 Desktop Switch Hardware Installation Guide 78-11157-05...
-
Page 182: Chassis Warning-Rack-Mounting And Servicing
Jos laite asetetaan osaksi täytettyyn telineeseen, aloita kuormittaminen sen alaosasta kaikkein raskaimmalla esineellä ja siirry sitten sen yläosaan. • Jos telinettä varten on vakaimet, asenna ne ennen laitteen asettamista telineeseen tai sen huoltamista siinä. Catalyst 2950 Desktop Switch Hardware Installation Guide 78-11157-05... - Page 183 úgy, hogy a legnehezebb készülék kerüljön a rack aljába. • Ha stabilizáló eszközök is tartoznak a rackhez, szerelje fel a stabilizátorokat, mielõtt beszerelné az egységet a rackbe, vagy karbantartást végezne rajta. Catalyst 2950 Desktop Switch Hardware Installation Guide 78-11157-05...
- Page 184 Ao montar esta unidade numa estante parcialmente ocupada, coloque os itens mais pesados na parte inferior da estante, arrumando-os de baixo para cima. • Se a estante possuir um dispositivo de estabilização, instale-o antes de montar ou reparar a unidade. Catalyst 2950 Desktop Switch Hardware Installation Guide D-10 78-11157-05...
- Page 185 • Om ställningen är försedd med stabiliseringsdon skall dessa monteras fast innan enheten installeras eller underhålls på ställningen. • • • Catalyst 2950 Desktop Switch Hardware Installation Guide D-11 78-11157-05...
-
Page 186: Overtemperature Warning
113°F (45°C) overschrijdt. Om beperking van de luchtstroom te voorkomen, dient u ten minste 3 inch (7,6 cm) speling te laten rondom de ventilatie-openingen. Catalyst 2950 Desktop Switch Hardware Installation Guide D-12 78-11157-05... - Page 187 Para evitar sobreaquecimento do interruptor, não utilize o equipamento numa àrea que exceda uma temperatura máxima de 45°C. Para evitar o bloqueamento da circulação de ar, deixe pelo menos um espaço de 7.6 cm em volta das aberturas de ventilação. Catalyst 2950 Desktop Switch Hardware Installation Guide D-13 78-11157-05...
-
Page 188: No On/Off Switch Warning
Unplug the power cord before you work on a system that does not have an Warning on/off switch. Waarschuwing Voordat u aan een systeem werkt dat geen aan/uit schakelaar heeft, dient u de stekker van het netsnoer uit het stopcontact te halen. Catalyst 2950 Desktop Switch Hardware Installation Guide D-14 78-11157-05... - Page 189 Antes de trabajar sobre cualquier sistema que carezca de interruptor de Encendido/Apagado (ON/OFF), desenchufar el cable de alimentación. Varning! Dra ur nätsladden innan du utför arbete på ett system utan strömbrytare. Catalyst 2950 Desktop Switch Hardware Installation Guide D-15 78-11157-05...
-
Page 190: Grounded Equipment Warning
Este equipo debe conectarse a tierra. Asegurarse de que el equipo principal esté conectado a tierra durante el uso normal. Varning! Denna utrustning är avsedd att jordas. Se till att värdenheten är jordad vid normal användning. Catalyst 2950 Desktop Switch Hardware Installation Guide D-16 78-11157-05... -
Page 191: Product Disposal Warning
Gesetzen des Landes erfolgen. Figyelem! A készülék végsõ elhelyezésérõl az adott országban érvényes törvények és elõírások szerint kell intézkedni. Avvertenza Lo smaltimento di questo prodotto deve essere eseguito secondo le leggi e regolazioni locali. Catalyst 2950 Desktop Switch Hardware Installation Guide D-17 78-11157-05... -
Page 192: Ground Connection Warning
Bij de installatie van het toestel moet de aardverbinding altijd het eerste worden gemaakt en het laatste worden losgemaakt. Varoitus Laitetta asennettaessa on maahan yhdistäminen aina tehtävä ensiksi ja maadoituksen irti kytkeminen viimeiseksi. Catalyst 2950 Desktop Switch Hardware Installation Guide D-18 78-11157-05... - Page 193 última a ser desligada. ¡Advertencia! Al instalar el equipo, conectar la tierra la primera y desconectarla la última. Varning! Vid installation av enheten måste jordledningen alltid anslutas först och kopplas bort sist. Catalyst 2950 Desktop Switch Hardware Installation Guide D-19 78-11157-05...
-
Page 194: Jewelry Removal Warning
Mielõtt hálózati feszültséghez csatlakozó készülékkel kezd el dolgozni, vegye le magáról az ékszereket (például gyûrût, nyakláncot, órát). A fém tárgyak felmelegszenek, ha hálózati feszültséghez és földhöz érnek, és súlyos égési sérülést okozhatnak, illetve a fém tárgyak hozzáforrhatnak a csatlakozókhoz. Catalyst 2950 Desktop Switch Hardware Installation Guide D-20 78-11157-05... - Page 195 Tag av alla smycken (inklusive ringar, halsband och armbandsur) innan du arbetar på utrustning som är kopplad till kraftledningar. Metallobjekt hettas upp när de kopplas ihop med ström och jord och kan förorsaka allvarliga brännskador; metallobjekt kan också sammansvetsas med kontakterna. Catalyst 2950 Desktop Switch Hardware Installation Guide D-21 78-11157-05...
-
Page 196: Stacking The Chassis Warning
A készüléket ne tegye rá másik készülékre. Ha a készülék leesik, súlyos testi sérülést okozhat, és maga a készülék is megkárosodhat. Avvertenza Non collocare lo chassis su nessun altro apparecchio. Se lo chassis cade, può causare lesioni gravi e danni alle apparecchiature. Catalyst 2950 Desktop Switch Hardware Installation Guide D-22 78-11157-05... -
Page 197: Switch Installation Warning
Waarschuwing Om te voldoen aan de veiligheidsvoorschriften dient u de schakelaars op een muur te monteren met het voorpaneel omhoog. Varoitus Turvallisuusmääräykset edellyttävät, että kytkimet kiinnitetään seinään etupaneeli ylöspäin. Catalyst 2950 Desktop Switch Hardware Installation Guide D-23 78-11157-05... - Page 198 Para cumplir con las reglas de seguridad, instale los interruptores en una pared con el panel del frente hacia arriba. Varning! För att uppfylla säkerhetsföreskrifter skall omkopplarna monteras på en vägg med frampanelen riktad uppåt. Catalyst 2950 Desktop Switch Hardware Installation Guide D-24 78-11157-05...
-
Page 199: Redundant Power Supply Connection Warning
RPS na parte de trás do switch. ¡Advertencia! Si no se conecta un sistema de potencia redundante (RPS) al interruptor, instale una cubierta de conector RPS en la parte posterior del interruptor. Catalyst 2950 Desktop Switch Hardware Installation Guide D-25 78-11157-05... -
Page 200: Installation Warning
Il est vivement recommandé de confier l'installation, le remplacement et la maintenance de ces équipements à des personnels qualifiés et expérimentés. Warnung Das Installieren, Ersetzen oder Bedienen dieser Ausrüstung sollte nur geschultem, qualifiziertem Personal gestattet werden. Catalyst 2950 Desktop Switch Hardware Installation Guide D-26 78-11157-05... -
Page 201: Class 1 Laser Product Warning
Varning! Endast utbildad och kvalificerad personal bör få tillåtelse att installera, byta ut eller reparera denna utrustning. Class 1 Laser Product Warning Class 1 laser product. Warning Waarschuwing Klasse-1 laser produkt. Catalyst 2950 Desktop Switch Hardware Installation Guide D-27 78-11157-05... - Page 202 Class 1 besorolású lézeres termék. Avvertenza Prodotto laser di Classe 1. Advarsel Laserprodukt av klasse 1. Aviso Produto laser de classe 1. ¡Advertencia! Producto láser Clase I. Varning! Laserprodukt av klass 1. Catalyst 2950 Desktop Switch Hardware Installation Guide D-28 78-11157-05...
-
Page 203: Laser Beam Exposure Warning
Evitare l'esposizione diretta al raggio laser. Advarsel Unngå direkte eksponering til laserstrålen. Aviso Evite exposição a raios laser. ¡Advertencia! Evite la exposición directa al haz del láser. Utsätt dig inte för laserstrålning. Varning! Catalyst 2950 Desktop Switch Hardware Installation Guide D-29 78-11157-05... -
Page 204: Laser Radiation Warning
Stirr ikke direkte inn i strålene eller se på dem direkte gjennom et optisk instrument. Aviso Radiação laser invisível pode ser emitida de conectores ou fibras desconectadas. Não olhe diretamente para os feixes ou com instrumentos ópticos. Catalyst 2950 Desktop Switch Hardware Installation Guide D-30 78-11157-05... -
Page 205: Catalyst 2950G-24-Ei-Dc Service Requirement
The Catalyst 2950G-24-EI-DC contains no field-replaceable units (FRUs). Do Warning not open the chassis or attempt to remove or replace any components. For information about obtaining service for this unit, contact your reseller or Cisco sales representative. Waarschuwing De Catalyst 2950G-24-EI-DC bevat geen FRU’s (field-replaceable units ofwel veldvervangbare eenheden). - Page 206 Não abrir o chassis ou tentar remover ou substituir quaisquer componentes. Para mais informações sobre a manutenção desta unidade, contactar o seu revendedor ou um representante de vendas da Cisco. Catalyst 2950 Desktop Switch Hardware Installation Guide...
- Page 207 (Field-Replaceable Units, FRU). No abra el chasis ni intente reemplazar componentes. Para más información sobre cómo reparar este aparato, póngase en contacto con su distribuidor o representante de Cisco. Varning! Catalyst 2950G-24-EI-DC innehåller inte några enheter som kan bytas ut på...
-
Page 208: Catalyst 2950St-24 Lre 997 Service Requirement
Warning The Catalyst 2950ST-24 LRE 997 contains no field-replaceable units (FRUs). Do not open the chassis or attempt to remove or replace any components. For information about obtaining service for this unit, contact your reseller or Cisco sales representative. Waarschuwing De Catalyst 2950ST-24 LRE 997 bevat geen FRU’s (field-replaceable units ofwel... - Page 209 Não abrir o chassis ou tentar remover ou substituir quaisquer componentes. Para mais informações sobre a manutenção desta unidade, contactar o seu revendedor ou um representante de vendas da Cisco. ¡Advertencia! El Catalyst 2950ST-24 LRE 997 no contiene componentes reemplazables en las instalaciones (Field-Replaceable Units, FRU).
-
Page 210: Restricted Area Warning
Warnung Diese Einheit ist zur Installation in Bereichen mit beschränktem Zutritt vorgesehen. Der Zutritt zu derartigen Bereichen ist nur mit einem Spezialwerkzeug, Schloss und Schlüssel oder einer sonstigen Sicherheitsvorkehrung möglich. Catalyst 2950 Desktop Switch Hardware Installation Guide D-36 78-11157-05... - Page 211 Varning! Denna enhet är avsedd för installation i områden med begränsat tillträde. Ett område med begränsat tillträde kan endast tillträdas med hjälp av specialverktyg, lås och nyckel eller annan säkerhetsanordning. Catalyst 2950 Desktop Switch Hardware Installation Guide D-37 78-11157-05...
-
Page 212: Ethernet Cable Shielding In Offices
Os cabos “Ethernet” deverão estar armados quando usados em ambiente de escritório central. ¡Advertencia! Los cables Ethernet deben estar protegidos cuando se usen dentro de una oficina central. Varning! Ethernetkablar måste vara avskärmade vid användning i central kontorsmiljö. Catalyst 2950 Desktop Switch Hardware Installation Guide D-38 78-11157-05... -
Page 213: Chassis Power Connection
(OFF) et, à l'aide d'un ruban adhésif, bloquez sa poignée sur cette position. Catalyst 2950 Desktop Switch Hardware Installation Guide D-39 78-11157-05... - Page 214 DESLIGADA, localize o disjuntor no painel que serve o circuito de corrente contínua e coloque-o na posição OFF (Desligado), segurando nessa posição a manivela do interruptor do disjuntor com fita isoladora. Catalyst 2950 Desktop Switch Hardware Installation Guide D-40 78-11157-05...
- Page 215 Innan du kopplar jord- eller elledningar till eller från chassit måste du kontrollera att strömförsörjningen till likströmskretsen är bruten. Kontrollera att all strömförsörjning är BRUTEN genom att slå AV det överspänningsskydd som skyddar likströmskretsen och tejpa fast överspänningsskyddets omkopplare i FRÅN-läget. Catalyst 2950 Desktop Switch Hardware Installation Guide D-41 78-11157-05...
-
Page 216: Exposed Dc Power Wire Warning
DC-input non presentino punti scoperti. Advarsel En avdekket ledning fra en likestrømskilde kan lede farlig elektrisitet. Kontroller at ingen avdekkede deler av ledningen til likestrømskilden stikker ut av terminalens koblingsblokk. Catalyst 2950 Desktop Switch Hardware Installation Guide D-42 78-11157-05... - Page 217 Varning! En blottad trådledning från en likströmsförsörjningsenhet kan utgöra en ledare för skadliga elektricitetsnivåer. Se till att inte någon blottad ledningsdel från likströmsförsörjningsenheten sticker ut från stiftplinten. Catalyst 2950 Desktop Switch Hardware Installation Guide D-43 78-11157-05...
-
Page 218: Service Personnel Warning
AS/NZS 3260, klausul 1.2.14.3 Service Personnel. Aviso Este equipamento deverá ser instalado e reparado apenas por pessoal de manutenção qualificado, conforme estipulado em AS/NZS 3260 Cláusula 1.2.14.3 Service Personnel. Catalyst 2950 Desktop Switch Hardware Installation Guide D-44 78-11157-05... - Page 219 Este equipo se debe instalar y mantener solamente por personal de servicio, según definido por AS/NZS 3260 Cláusula 1.2.14.3 Service Personnel. Varning! Installation och underhåll av denna utrustning får endast utföras av servicepersonal enligt definition i AS/NZS 3260 klausul 1.2.14.3 Service Personnel. Catalyst 2950 Desktop Switch Hardware Installation Guide D-45 78-11157-05...
- Page 220 Appendix D Translated Safety Warnings Service Personnel Warning Catalyst 2950 Desktop Switch Hardware Installation Guide D-46 78-11157-05...
- Page 221 3-36 to 3-38 connecting to 3-36 to 3-38 connectors and cables connectors and cables described 2-11 described 2-11 illustrated illustrated power levels, fiber-optic power levels, fiber-optic Catalyst 2950 Desktop Switch Hardware Installation Guide IN-1 78-11157-05...
- Page 222 See also connectors and cables cables Catalyst 2950G-24-EI-DC service 10/100/1000 ports 2-10 to 2-11 warning C-1, D-31 to D-33 10/100 ports 2-9 to 2-10 Catalyst 2950ST-24 LRE 997 service warning C-1, D-34 to D-36 Catalyst 2950 Desktop Switch Hardware Installation Guide IN-2 78-11157-05...
- Page 223 3-38 to 3-44 Device Manager 2-32 to SFP modules 3-49 to 3-50 installing Java plug-in 1-13 connecting to the console port Java plug-in for the Solaris platform 1-15 connectivity problems, solving Catalyst 2950 Desktop Switch Hardware Installation Guide IN-3 78-11157-05...
- Page 224 DC power pinouts B-16 connecting to C-1 to C-11 RJ-45-to-DB-9 adapter cable pinouts B-15 connector 2-30 conventions specifications A-4, A-6 command warnings C-1, C-2, C-5 document DC power disconnection warning desk-mounting 3-22 Catalyst 2950 Desktop Switch Hardware Installation Guide IN-4 78-11157-05...
- Page 225 C-8, D-42 3-44 GigaStack connecting to 3-44 to 3-49 connectors 1000BASE-T fan problems, solving 1000BASE-X features 2-1 to 2-3 CWDM 3-44 feedback to Cisco Systems, web xxvi GigaStack fiber-optic port specifications Catalyst 2950 Desktop Switch Hardware Installation Guide IN-5 78-11157-05...
- Page 226 3-2, D-5 installing GBIC modules 3-26 to 3-27 installing SFP modules 3-28 to 3-30 IOS command-line interface HP OpenView 2-32 See CLI humidity A-2 to A-6 IP address procedures 3-50 Catalyst 2950 Desktop Switch Hardware Installation Guide IN-6 78-11157-05...
- Page 227 3-22 system 2-20 table 3-22 utilization (UTIL) 2-22, 2-23 mounting brackets, attaching 3-12 to 3-20, 3-23 to 3-24 lightning activity warning 3-4, D-4 MT-RJ connector Long-Reach Ethernet ports See LRE ports Catalyst 2950 Desktop Switch Hardware Installation Guide IN-7 78-11157-05...
- Page 228 100BASE-FX ports, 1000BASE-SX, 10/100 ports GBIC module ports, LRE, and console 1000BASE-T GBIC port ports console port POST DB-25 adapter problems, solving B-16 RJ-45-to-DB-9 adapter cable B-15 POTS splitters, limitations and restrictions 3-39 Catalyst 2950 Desktop Switch Hardware Installation Guide IN-8 78-11157-05...
- Page 229 A-7, A-8, A-9 safety warnings 3-2 to 3-4, D-1 to D-45 rack-mounting service personnel warning 3-2, D-44 bracket mounting points 3-12 to 3-20 procedures 3-10 to 3-22 warning 3-10, D-8 to D-12 Catalyst 2950 Desktop Switch Hardware Installation Guide IN-9 78-11157-05...
- Page 230 3-3, D-22 troubleshooting status LED 2-22, 2-24 diagnosing problems 4-2 to 4-5 straight-through cable understanding POST results connecting to 10/100/1000 ports 3-34 10/100 ports 3-34 1000BASE-T GBIC module ports 3-47 Catalyst 2950 Desktop Switch Hardware Installation Guide IN-10 78-11157-05...
- Page 231 URLs, Cisco utilization bandwidth 2-23 to 2-27 2-22, 2-23 verifying package contents 3-8 to 3-36 warnings DC power C-1, C-2, C-5 defined xvii installation 3-2 to 3-4 translated D-1 to D-45 Catalyst 2950 Desktop Switch Hardware Installation Guide IN-11 78-11157-05...
- Page 232 Index Catalyst 2950 Desktop Switch Hardware Installation Guide IN-12 78-11157-05...