
Related Manuals for D-Link DSM-600


Summary of Contents for D-Link DSM-600
-
Page 2: Table Of Contents
Checking the IP Address in Windows XP ....47 Network Access ..........24 Assign a Static IP Address (Windows XP/2000) .. 48 ® FTP Server ............26 UPnP AV ............31 Technical Specifications........... 51 Tools ..............32 D-Link DSM-600 User Manual... - Page 3 Table of Contents Contacting Technical Support ......... 52 Warranty ..............56 D-Link DSM-600 User Manual...
-
Page 4: Product Overview
• CD-ROM with Software and Manual • Quick Installation Guide • Mounting Screw Note: Using a power supply with a different voltage rating than the one included with the DSM-600 will cause damage and void the warranty for this product. System Requirements • Windows XP/2000 ®... -
Page 5: Introduction
Backup software is also included on the CD. This software allows you to backup your files from a computer to the DSM-600 manually or by a schedule. Regular backups are a great way to safeguard against unfortunate accidents that may result in the loss of important files. -
Page 6: Features
Internet, making it convenient to access your files, even when you’re away. • Safely Add and Remove USB Drives - The DSM-600 does not require you to reboot the system when adding USB drives to the network, thus eliminating downtime. You can safely remove the USB drives using the Dismount button on the back of the DSM-600. -
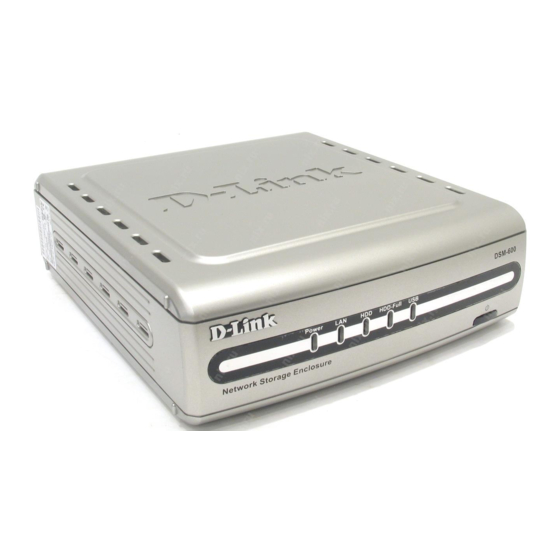
Page 7: Hardware Overview
USB drive is connected. on. To turn off, hold button Blinking indicates the USB HDD LED in until the unit shuts off. drive is being detected when Indicates activity on the first plugged in. internal hard drive. D-Link DSM-600 User Manual... -
Page 8: Rear Panel
LAN Port Press to safely remove USB Connects to your Ethernet USB 2.0 Ports drives from the DSM-600. network. The LAN port supports Use these ports to connect USB 2.0 Auto MDI/MDI-X, allowing you drives. USB 1.1 drives may also be... -
Page 9: Hardware Installation
Internal Hard Drive WARNING: Disconnect the power cord before inserting or removing the internal hard disk drive. A. Unscrew the two screws on the back panel of the DSM-600 to remove the cover. B. Connect the IDE cable to the IDE cable connector on your hard drive. - Page 10 Section - Installation D. While facing the back of the DSM-600, insert the right side of the hard drive into the case. Once in place, snap down the left side. E. Use the mounting screw to secure the hard drive to the DSM-600.Replace the cover and screw the two screws on the back panel of the DSM-600.
- Page 11 Note: When you first power on and access the web-based configuration, the DSM-600 will offer to format your hard drive if it is unformatted. This process may take several minutes depending on the size of your hard drive. During this process, the power LED will blink.
-
Page 12: Mapping A Drive
Section - Installation Mapping a Drive You can use the D-Link Easy Search Utility to map drives to your computer. Insert the DSM-600 CD into your CD-ROM drive. Click Easy Search Utility D-Link DSM-600 User Manual... - Page 13 Section - Installation Highlight an available DSM-600 Available shares will be displayed under Drive Mapping. Highlight the share you want to map. Select an available drive letter from the drop-down menu and click Connect. Click Disconnect to remove the selected mapped drive.
- Page 14 Section - Installation As an alternate method, you can access the DSM-600’s internal/USB drive(s) by mapping the shared folders as drives in Windows. Please see the following instructions for mapping a drive so that it is accessible from the My Computer screen.
- Page 15 Section - Installation Once connected, all mapped drives will appear in My Computer. Double-click the My Computer icon on your desktop Double-click on the mapped drive to access files and folders. D-Link DSM-600 User Manual...
-
Page 16: Using The Configuration Utility
Section - Configuration Using the Configuration Utility Insert the DSM-600 CD into your CD-ROM drive. Click Easy Search Utility Highlight an available DSM-600 and click Configuration to access the web-based utility. D-Link DSM-600 User Manual... -
Page 17: Wizard
Wizard The Home > Wizard screen will appear. Click Run Wizard and the Setup Wizard will guide you through the basic configuration. For a tour of the Wizard, please see the following pages in this section. D-Link DSM-600 User Manual... -
Page 18: Using The Setup Wizard
Section - Configuration Using the Setup Wizard The Wizard will guide you through five steps: • Password • Time Zone • LAN Connection Settings • Additional Settings Click Next Create a new password for your DSM-600. Click Next D-Link DSM-600 User Manual... - Page 19 DNS Address - A Domain Name Server translates Domain names into IP addresses. Select DHCP Client when you have a DHCP server in your network. No other configuration is required on this screen when Dynamic IP address is selected. Click Next D-Link DSM-600 User Manual...
- Page 20 Enter the Workgroup name, a Name for the DSM- 600 (useful if you have multiple storage enclosures on your network), and a Description. Click Next Click Restart You have completed the basic configuration using the setup wizard! D-Link DSM-600 User Manual...
-
Page 21: Home
DNS address. Click Apply to save the changes. Apply: You may also change the LAN IP address using the D-Link Easy Search Utility. Please refer to the appendix at the end of this manual for this process. D-Link DSM-600 User Manual... -
Page 22: Device
E n t e r w o r k g r o u p n a m e o f y o u r network. Name: Enter a name for the DSM-600 device. The default device name of the DSM-600 is dlink - xxxxxx, where xxxxxx is the last six digits of the MAC address. -
Page 23: Advanced
To delete a user, click the icon next to a user listed under User List. Click Apply to save any changes. You will need to create users for assigning permissions, using FTP, and using the download schedule section. D-Link DSM-600 User Manual... -
Page 24: Network Access
By default, all users on your local network will have read/write permissions to all files and folders on the internal/ USB drive(s) that are connected to the DSM-600. This “rule” will be displayed in the list similar to the picture above. - Page 25 User2 will be assigned read only permissions for the Drivers folder. Once the settings are applied, User2 will appear in the network access list. You may edit a rule from the list by clicking on the icon. To delete a rule from the list, click on the icon. D-Link DSM-600 User Manual...
-
Page 26: Ftp Server
21. Select Unlimited or enter a data rate (x10 KB) for restricted data flow. This setting is only necessary where Flow Control: network traffic is significant and can be affected by FTP server activity. D-Link DSM-600 User Manual... - Page 27 Log into the web-based configuration by launching the Easy Search Utility or by opening a web browser and entering http://device name, where device name is the name assigned to the DSM-600. If you did not change the name, the default name is “dlink-xxxxxx” where xxxxxx is the last six digits of the DSM-600’s MAC address. You may also enter the IP address of the device.
- Page 28 Click Open to select the folder you want to allow FTP access to. Check Root to assign access to all the drives at once. If Root is not checked, select the folder and click OK. Click the + sign to expand the folder tree. D-Link DSM-600 User Manual...
- Page 29 Section - Configuration Select Read Only or Read/Write. Click Add. The rule will be listed under Path. The rule shown will allow an anonymous user access to the root folder on the drive with Read-Only permissions. D-Link DSM-600 User Manual...
- Page 30 If you are behind a router, you will need to forward the FTP port to the DSM-600. Additional filtering and firewall settings may need to be modified on your router to allow FTP access to the DSM-600 from the Internet. Once the port is forwarded to the DSM-600, users from the Internet will enter ftp:// followed by the WAN IP address of the router (e.g.
-
Page 31: Upnp Av
Section - Configuration UPnP AV The DSM-600 has a built-in media server that can be used with media streaming devices. Click Open to locate the folder which contains your media files (video, music, and photos). checking “root” will allow UPnPAV access to all drives and all folders. -
Page 32: Tools
The user name is set to admin. You cannot change the user name. Password: Enter the old password. Enter your new password. New Password: Comfirm Enter your new password again. Password: Change Password Apply: Click Apply to save your new password. D-Link DSM-600 User Manual... -
Page 33: Time
Section - Configuration Time This section will set the DSM-600 internal clock. It is important that accurate time is set for scheduled downloading and backup of files and folders. Current Time is displayed in 24-hour format (e.g. 14:00 is 2:00pm). Current Date is displayed in Month/Day/Year format. -
Page 34: System
Section - Configuration System Click Restart to reboot your DSM-600. System Restart: Click Restore to reset the DSM-600 back Restore to Factory to the factory default settings - erasing all Defaults: Restore Settings Configuration File Idle Time changes you have made. -
Page 35: Firmware
Open in the browser window and click Apply in this screen to begin the firmware upgrade. When the “upgrade is complete” message appears, click Restart. After the login screen appears, wait until the power LED stops blinking before logging into the DSM-600. D-Link DSM-600 User Manual... -
Page 36: Disk Utility
Select the hard drive you want to scan for Scan Disk: errors from the drop-down menu. All Disk: Check to select all drives. The DSM-600 will automatically fix any Fix: errors found. You cannot uncheck this option. Click the Scan Disk button to start the... -
Page 37: E-Mail Alerts
Check to send an email when the disk is full. Disk Full: Hard Drive Check to send an email when the hard drive fails. Failure: Check to send an email when the admin password has been changed. Administrator Password Changed: D-Link DSM-600 User Manual... -
Page 38: Status
LAN Info: settings of the DSM-600. Device Info: The workgroup, name, and description of the DSM-600 will be displayed in this section. Displays information about your internal/USB hard Internal HD Info: drive such as total size, space used, and space available. -
Page 39: Help
Section - Configuration Help This section lists all of the available help topics for reference. Click on a topic to view the online help information. D-Link DSM-600 User Manual... -
Page 40: Download Scheduling
This function will allow the user to set up scheduled folder or file downloads and backup jobs. To log into the web-based configuration of the DSM-600, you may run the Easy Search Utility included on your CD or type in http://dsm-600 into a web browser... - Page 41 URL format. · \\192.168.0.100\Test.txt The PC’s internal IP address must be known and be accessible to the DSM-600 on the network. Test: This button is provided to test the given URL to make sure it is valid as well as the user name/password authentication set in login method.
- Page 42 This button will let you set the source file or folder from any internal IDE/external USB drive connected to Local: the DSM-600. When you click on the button, a window will appear with a graphical representation of the folder structure on the internal IDE/external USB drive(s).
-
Page 43: Scheduling Status
The Status Schedule List will show pending or completed download events. Current download statistics, such as % completed and download speed are displayed for each event. The icons below represent the current status of each event. Download Successful Download Failed Download Pending Waiting Link File Download in Progress D-Link DSM-600 User Manual... -
Page 44: Using The Easy Search Utility
Appendix A - Using the Easy Search Utility Using the Easy Search Utility The D-Link Easy Search utility will allow you to connect to the web-based configuration utility, assign IP address settings to the DSM-600, and map drives to your computer. -
Page 45: Storing Non-English Character Files
Storing non-English Character Files If you are storing non-English character files, you will need to change the Language setting from the Easy Search utility to ensure full compatibility with those files. Insert the DSM-600 CD into your CD-ROM drive. Click Easy Search Utility. - Page 46 Select the appropriate language from the drop-down menu and click OK. The DSM-600 will restart. Note : Changing the language setting will NOT change the display language of the user interface. It is only for supporting non-English character file names.
-
Page 47: Networking Basics
• Right-click on the Local Area Connection Icon in the task bar. • Click on Status. This window will appear: • Click the Support tab. This screen will list your IP address, subnet mask, and the default gateway. • Click Close. D-Link DSM-600 User Manual... -
Page 48: Assign A Static Ip Address (Windows ® Xp/2000)
IP address. If you are not using a DHCP capable router, or you need to assign a static IP address, please follow these instructions: Go to Start and double-click on Control Panel. Double-click on Network Connections. D-Link DSM-600 User Manual... - Page 49 • Input your IP address and subnet mask. (The IP addresses on your network must be within the same range. For example, if one computer has an IP address of 192.168.0.3 and 192.168.0.4. The subnet mask must be the same for all the computers on the network.) D-Link DSM-600 User Manual...
- Page 50 • Input your DNS server addresses. (Note: If you are entering a DNS server, you must enter the IP address of the default gateway.) The DNS server information will be shipplied by your ISP (Internet Service Provider.) transmissions bolt up to 3vze engine • Click OK D-Link DSM-600 User Manual...
-
Page 51: Technical Specifications
Weight 1.7 lbs. LEDs • Power • LAN • HDD • HDD Full • USB Temperature • Operating: 32ºF to 131ºF (0ºC to 55ºC) • Storing: -4ºF to 158ºF (-20ºC to 70ºC) Humidity • 5%-90% (non-condensing) D-Link DSM-600 User Manual... -
Page 52: Contacting Technical Support
• Hardware Revision (located on the label on the bottom of the router (e.g. rev B1)) • Serial Number (s/n number located on the label on the bottom of the router). You can find software updates and user documentation on the D-Link website as well as frequently asked questions and answers to technical issues. -
Page 53: Technical Support
You can find software updates and user documentation on the D-Link website. D-Link website. Tech Support for customers within India D-Link provides free technical support for customers for the D-Link Technical Support over the Telephone: duration of the warranty period on this product. +91-22-26526741 +91-22-26526696 –ext 161 to 167... - Page 54 Appendix D - Contacting Technical Support Technical Support Technical Support You can find software updates and user documentation on the D-Link website. You can find software updates and user documentation on the Tech Support for customers within the U.A.E & North D-Link website.
- Page 55 Appendix D - Contacting Technical Support Technical Support You can find software updates and user documentation on the D-Link website. Tech Support for Latin America customers: D-Link Technical Support over the followings Telephones: Argentina: 0800-666 1442 Monday to Friday 09:00am to 22:00pm...
-
Page 56: Limited Warranty
Any repair or replacement will be rendered by D-Link at an Authorized D-Link Service Office. The replacement hardware need not be new or have an identical make, model or part. D-Link may, at its option, replace the defective Hardware or any part thereof with any reconditioned product that D-Link reasonably determines is substantially equivalent (or superior) in all material respects to the defective Hardware. - Page 57 Software. Except as otherwise agreed by DLink in writing, the replacement Software is provided only to the original licensee, and is subject to the terms and conditions of the license granted by D-Link for the Software. Replacement Software will be warranted for the remainder of the original Warranty Period and is subject to the same limitations and exclusions.
- Page 58 • The customer is responsible for all in-bound shipping charges to D-Link. No Cash on Delivery (“COD”) is allowed. Products sent COD will either be rejected by D-Link or become the property of D-Link. Products shall be fully insured by the customer and shipped to D-Link Systems, Inc., 17595 Mt.
-
Page 59: Governing Law
This Limited Warranty provides specific legal rights and you may also have other rights which vary from state to state. Trademarks: D-Link is a registered trademark of D-Link Systems, Inc. Other trademarks or registered trademarks are the property of their respective owners. -
Page 60: Fcc Statement
• Connect the equipment into an outlet on a circuit different from that to which the receiver is connected. • Consult the dealer or an experienced radio/TV technician for help. For detailed warranty information applicable to products purchased outside the United States, please contact the corresponding local D- Link office. D-Link DSM-600 User Manual...