Table of Contents
Quick Links
Table of Contents

Related Manuals for Silvercrest LT 2310


Summary of Contents for Silvercrest LT 2310
- Page 1 H O M E T E C H LCD TV User manual and service information LT 2310...
-
Page 4: Table Of Contents
Table of Contents Important Safety Instructions .................3 Introduction ......................6 Package Contents ....................6 Getting Started ......................7 Connecting the Power Cord ..................... 7 Inserting the Batteries into the Remote Control ..............7 Connectors and Controls ..................8 Front View ..........................8 Rear Panel ..........................8 Right Panel .......................... - Page 5 Table of Contents Signal Source PC....................33 Supported Graphics Modes ....................33 Setup Menu for Signal Source “PC” ..................34 “Picture” Menu ........................34 “Geometry” Menu ........................34 Signal Sources HDMI1 / HDMI2 ................35 Setup Menu for Signal Sources “HDMI1” or “HDMI2” ............35 Signal Source AV ....................35 Setup Menu for Signal Source “AV”...
-
Page 6: Important Safety Instructions
Important Safety Instructions Important Safety Instructions Before you use this device for the first time, please read the following notes in this manual and heed all warnings, even if you are familiar with handling electronic devices. Keep this manual safe for fu- ture reference. - Page 7 Important Safety Instructions Important: Repairs Danger: Never open the housing of the device. By opening the housing you endanger your life through risk of electric shock. Repairs are required when this device has been damaged in any way, for example, when the device housing is damaged, when liquid has been spilled on the product, when objects have fallen into the product, when the product has been exposed to rain or moisture, when the product does not work normally or if the product has been dropped.
- Page 8 Important Safety Instructions may result in these directives no longer being met. The manufacturer is not liable for any damage or interference caused by unauthorized modifications. Only use the accessories recommended by the manufacturer. Do not use this device for purposes other than those indicated and do not modify it in any way.
-
Page 9: Introduction
Introduction Introduction Thank you for choosing this high-end TV set LT 2310. This elegant product with a black piano-gloss finish is like a modern piece of furniture suitable for any living room and offers crystal-clear TV con- tents playback in wide-screen format. Its built-in speakers boost powerful stereo sound, and if you are a PC user you can even use it as PC monitor. -
Page 10: Getting Started
Getting Started Getting Started Connecting the Power Cord 1. Connect one end of the AC power cord to the AC inlet (6) on the back panel (see page 8). 2. Connect the other end to a wall outlet. 3. Toggle the main power switch (5) on the back panel of the device to On (position “I”). Inserting the Batteries into the Remote Control Turn the remote control over with its underside facing upwards and slide the battery compartment cover downwards with your thumb. -
Page 11: Of Connectors And Controls
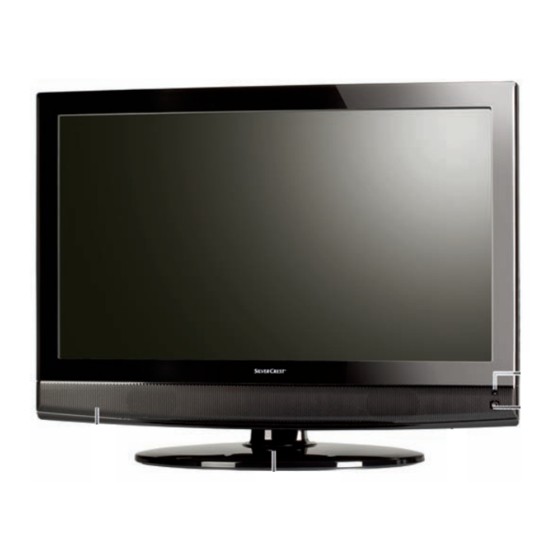
Connectors and Controls Connectors and Controls Front View (1) Status indicator (2) Infrared sensor for remote control (3) Speaker (4) Stand The status indicator (1) lights green when the TV set is powered on. It turns orange when you switch the device to standby mode. - Page 12 Connectors and Controls The following table lists the available terminals: Description Main power switch (On/Off) Use this swivel-type switch to completely power off your TV set so that it fully stops con- suming any energy at all. The power indicator (1) on the front panel stops lighting after you power it off.
- Page 13 Connectors and Controls Video input Here you can connect external devices that also feature an AV connector (for instance a (17) VCR, camcorder etc.). To do this you’ll need an AV cable (not included in the package). This normally has 3 plugs (yellow, red and white). S-Video input Here you can connect external devices that also feature an S-Video connector (for in- (18)
-
Page 14: Right Panel
Connectors and Controls Right Panel On the right panel of the TV set there are several buttons that let you control the most important functions even without the remote control. The following table lists the available controls: Description INPUT/MENU buttons Press the INPUT button to display or hide the signal source selection menu. -
Page 15: Connecting The Devices
Connecting the Devices Connecting the Devices The interface connector panel on the back panel of the housing (see page 8) offers multiple con- nection options for a wide variety of AV and even HDMI equipment. If you only want to watch TV it is sufficient to connect the antenna. -
Page 16: Connecting External Equipment With Scart (Euro Av) Connector
You can use an AV cable (not included) to connect other devices (e.g. a camcorder or a game con- sole) to the LT 2310. The device has the jacks (17) for the video (yellow) and (16) for the audio signal (red, white). -
Page 17: Connecting External Equipment With Components Outputs
LT 2310. Please note that the audio signal must be transmitted to the separate Audio connector (10). To do this you’ll need a Cinch audio cable (not included in the package). -
Page 18: Connecting External Equipment With Hdmi Interface
Use a VGA cable (not included in the package) to connect the graphics adapter output of a PC or notebook with the VGA input (19) of your LT 2310. Please note that only the picture signal will be transferred via this connector. In order to be able to listen to the sound transmitted by the computer, use a 3.5 mm jack-type audio cable (not included) to connect the audio output (Line Out) of your... -
Page 19: Remote Control
Connecting the Devices Remote control An illustration of the remote control can be found on the fold-out page of this User’s Manual cover. Please fold-out the title page and read the following descriptions. This will enable you to have the real-size figure always visible permitting a better understanding of the location and functions of the different buttons. - Page 20 Connecting the Devices Red button During Teletext display: press this button to execute the function currently assigned to it (45) (see the on-screen indication). Green button During Teletext display: press this button to execute the function currently assigned to it (46) (see the on-screen indication).
-
Page 21: Powering The Tv Set On/Off
Powering On Check that the LT 2310 is in Standby mode. The power indicator (1) on the front panel should light orange. If this is not the case, first power the device on by toggling the main power switch (5). -
Page 22: Getting Started
Connecting the Devices Getting Started When powering on the device for the first time, you may not watch TV yet as no channels have been stored for your location. First you have to specify your location and perform an automatic channel search in order for the available channels to be saved. -
Page 23: Signal Source "Tv
TV shows from the cable TV network. To do this, connect the correspond- ing antenna cable to the RF input (see page 8, item 13) on the back panel of your LT 2310. When using the device for the first time you must program the channels or perform an automatic channel search (see page 19 –... -
Page 24: Picture" Menu
Signal Source “TV” “Picture” Menu Select one of the picture settings Standard, Dynamic or Movie. Select “Personal” Picture Mode to customize your settings. Contrast * To adjust the contrast. Brightness * To adjust the brightness. Tint * To adjust the colour hue/tint (available only for the SECAM TV system). Colour * To adjust the colour. -
Page 25: Sound" Menu
Signal Source “TV” “Sound” Menu Select between the default settings for Standard, News and Mu- Sound Mode sic. Select “Personal” to customize your settings. Increases or decreases the volume of the lower frequencies. Bass * Increases or decreases the volume of the higher frequencies. Treble * Balance To adjust the volume balance between the left and right speak-... -
Page 26: Setup" Menu
Signal Source “TV” “Setup” Menu Here you select the menus’ display language. Language OSD duration Select the display time for the OSD menu between 5 and 60 seconds. OSD halftone Select a density for the OSD menu background. Set a lower value to obtain a darker background for the OSD menu. -
Page 27: Function" Menu
TTX language 9 windows Your LT 2310 can show a preview of 9 channels at the same time. Enable this option to enable this preview. During the preview display, press the CH+ or CH- (38) buttons on the remote control to preview more channels. Each press of the buttons will scroll down or up one channel. - Page 28 Signal Source “TV” Time This menu allows you to set the time as well as program a time at which the de- vice will automatically power off or power on. Here you must set the current time otherwise the time-control- Current time led features will not work properly.
-
Page 29: Channel" Menu
Signal Source “TV” “Channel” Menu Auto tuning Starts the automatic channel search. See page 19 - Automatic Channel Search. Press the direction buttons or (35) on the remote control to fine-tune the Fine Tuning frequency. This lets you optimise the picture and sound quality. Press the MENU button (53) to exit the fine tuning. - Page 30 Signal Source “TV” Sound system Choose the correct sound system for your location. Normally the BG sound sys- tem is used. This option lets you determine how the output from the left and right audio chan- nels should be. Stereo: outputs the sound in stereo. Mono: outputs the sound in mono.
-
Page 31: Picture-In-Picture" Menu (Pip)
Signal Source “TV” “Picture-in-Picture” Menu (PIP) Your LT 2310 allows you to display the picture of two different signal sources at the same time. For instance, you can work on the PC while watching the current football game at the same time. -
Page 32: Channel List
Channel List Channel List The channel list is accessible via the “Channel” menu. To display it, select the “Programme edit” op- tion from the “Channel” menu. Delete Insert Rename... -
Page 33: Managing Channels
Managing Channels Managing Channels Your LT 2310 offers multiple features for managing channels. For example, you can change the channel order, delete channels or insert channels. Renaming a Channel You can name a channel with any name containing up to five characters. Proceed as follows: 1. - Page 34 Managing Channels Skipping Channels You can set specific channels to be skipped when switching channels by using the CH+ and CH- buttons (38). For example, this lets you skip commercial-only channels when switching channels. 1. In the channel list, press CH+ or CH- (38) on the remote control to select the channel that you want to skip.
-
Page 35: Signal Source Scart1
Signal Source SCART1 Setup Menu for Signal Source “SCART1” The setup menu lets you perform specific settings to customise the LT 2310 according to technical and personal requirements. Press the MENU button (53) to open the setup menu. The menu is di- vided into five items allowing you to adjust or change picture, sound, system preferences, function and picture-in-picture settings. -
Page 36: Signal Source Ypbpr
Signal Source YPBPR Setup Menu for Signal Source “YPBPR” The setup menu lets you perform specific settings to customise the LT 2310 according to techni- cal and personal requirements. Press the MENU button (53) to open the setup menu. The menu is divided into five items allowing you to adjust or change picture, sound, system, function and picture- in-picture settings. -
Page 37: Setup Menu For Signal Source "Pc
Signal Source PC Setup Menu for Signal Source “PC” The setup menu lets you perform specific settings to customise the LT 2310 according to techni- cal and personal requirements. Press the MENU button (53) to open the setup menu. The menu is divided into six items allowing you to adjust or change picture, sound, system, function, geometry and picture-in-picture settings. -
Page 38: Signal Sources Hdmi1 / Hdmi2
Setup Menu for Signal Sources “HDMI1” or “HDMI2” The setup menu lets you perform specific settings to customise the LT 2310 according to techni- cal and personal requirements. Press the MENU button (53) to open the setup menu. The menu is divided into five items allowing you to adjust or change picture, sound, system, function and picture- in-picture settings. -
Page 39: Signal Source Svideo
Signal Source SVideo Setup Menu for Signal Source “SVIDEO” The setup menu lets you perform specific settings to customise the LT 2310 according to techni- cal and personal requirements. Press the MENU button (53) to open the setup menu. The menu is divided into five items allowing you to adjust or change picture, sound, system, function and picture- in-picture settings. -
Page 40: Remote Control Function Buttons
Remote Control Function Buttons Remote Control Function Buttons Picture and Audio Settings The P.MODE button (56) gives you direct access to the picture settings. Press the P.MODE button several times to directly toggle between Standard, Movie, Personal and Dynamic. The option “Per- sonal”... -
Page 41: Advanced Functions
Advanced Functions Advanced Functions Independently of the selected signal source, the device offers additional features that always guar- antee fast and trouble-free operation. These allow you to access directly the most common options without having to navigate through different menus. Teletext Press TEXT (49) on the remote control several times to display the Teletext, to display it with a trans- parent background or to hide it. -
Page 42: Troubleshooting
Troubleshooting Troubleshooting You can solve the most common problems yourself by using the following table. If the problem per- sists after checking the suggested solutions, please contact our Service Hotline (see page 44). Do not attempt to repair the product yourself. General Problems Unable to power the TV set on. -
Page 43: Problems During Playback From External Devices
Troubleshooting Problems During Playback from External Devices No sound • Please check if the audio cable is firmly connected. • Check if the audio cable is damaged. • Make sure that you have selected the correct signal source on your TV set. Sound is distorted or humming •... -
Page 44: Wall-Mounting
Wall-Mounting Wall-Mounting You can mount your LT 2310 to the wall by using a VESA wall mount of 100 x 100 mm. The VESA wall-mounting kit is not included in the package. To do this, disassemble the base as follows: 1. -
Page 45: Technical Specifications
Technical Specifications Technical Specifications Size: 59.9 cm (23.6”) Aspect ratio: 16:9 1920 x 1080 Resolution: Brightness (cd/m²): 300* Screen Contrast ratio: 1000:1* Response time (ms): Viewing angles (H/V): 170° H /160° V* Colour system: PAL/SECAM-Multi Channel presets ATV/CATV Aspect ratio selectable: Noise reduction: Properties Automatic Sleep Timer:... -
Page 46: Warranty Information
Warranty Information Warranty Information ... - Page 47 Warranty Information ...
-
Page 48: Appendix
(red, green and blue). The Pixel Error Classes are rated from Level I (very good) to Level IV (bad quality). Your LT 2310 belongs to Error Class II and therefore offers a high-quality display. Within the Error Classes a lim- ited number of pixel may present errors. - Page 49 Appendix...
- Page 50 LCD TV product: model: SilverCrest LT 2310 is confirmed to comply with the requirements set out in the Council Directive on the Approximation of the Laws of the Member States relating to Electromagnetic Compatibility 2004/108/EC, the Council Directive relating to Low Voltage 2006/95/EC and the Council Directive relating to Ecodesign 2009/125/EC.
- Page 51 TARGA GmbH Lange Wende 41 D-59494 Soest www.silvercrest.cc...