Panasonic KX TGP-500 User Manual
Dot (digital office technology)
Hide thumbs
Also See for KX TGP-500:
- Administrator's manual (284 pages) ,
- User manual (68 pages) ,
- Quick start manual (30 pages)

Related Manuals for Panasonic KX TGP-500


Summary of Contents for Panasonic KX TGP-500
- Page 1 PANASONIC KX TGP-500 B08 & KX TPA-50 DOT (DIGITAL OFFICE TECHNOLOGY) USER GUIDE...
-
Page 2: Table Of Contents
WHAT’S INSIDE OVERVIEW OF THE KX TGP-500 AND TPA-50 CORDLESS IP PHONES 3 SETTING UP THE KX TGP-500 BASE UNIT CONNECTING ADDITIONAL KX TPA-50 HANDSETS CONNECTING KC TGP-500 AND KX TPA-50 TO YOUR DOT SERVICE USING YOUR PANASONIC KX TGP 500 & TPA 50 PHONES SETTING UP THE PHONEBOOK AND CONTACT LIST Version 1.0... -
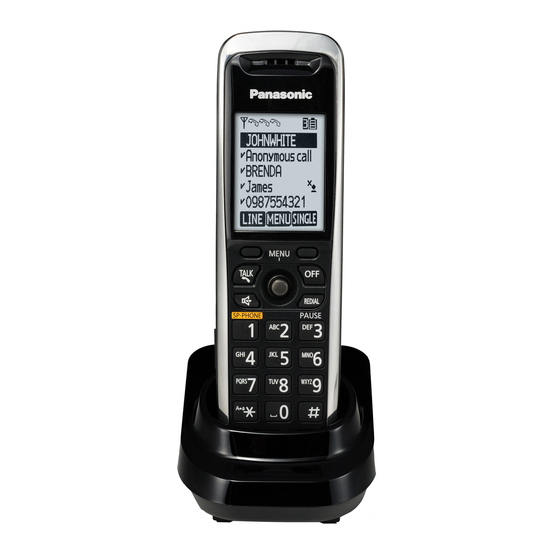
Page 3: Overview Of The Kx Tgp-500 And Tpa-50 Cordless Ip Phones
Navigation button and performing Menu Button TALK button to answer OFF button to end calls, calls or exit Menu Speaker/Handsfree Redial Charging Cradle Figure 2 Panasonic KX TPA-50 /OVERVIEW OF THE KX TGP-500 AND TPA-50 CORDLESS IP PHONES... -
Page 4: Setting Up The Kx Tgp-500 Base Unit
SETTING UP THE KX TGP-500 BASE UNIT Figure 3 Back Panel Panasonic KX TGP-500 Figure 3 above describes how to connect the TGP-500 base unit to the power supply and your DOT gateway/router / SETTING UP THE KX TGP-500 BASE UNIT... -
Page 5: Conneting Additional Kx Tpa-50 Handsets
A successfully connected handset will display a number greater than 1 next to the battery meter located on the top right corner of the screen. The handset supplied with the KX TGP-500 base unit is by default set to number 1. -
Page 6: Connecting Kc Tgp-500 And Kx Tpa-50 To Your Dot Service
CONNECTING KC TGP-500 AND KX TPA-50 TO YOUR DOT SERVICE ACTIVATING THE BASE UNIT AND HANDSETS WITH DOT Press Menu button on a KX TPA-50 that is paired to the base unit Select the toolbox/briefcase icon Select Call Features Select Settings Select Authentication Enter the User ID and Password: ... -
Page 7: Using Your Panasonic Kx Tgp 500 & Tpa 50 Phones
Scroll to search the contact, or use the keypad to search the first alphabet of the contact name Scroll to the contact and press Talk button to place the call. Redial a number Press the REDIAL button to view Call History Scroll to the number USING YOUR PANASONIC KX TGP 500 & TPA 50 PHONES... - Page 8 A maximum of three parties, including the called can be on a conference call. TRANSFER A CALL The Panasonic KX series offers the ability to perform internal call transfer calls as well as calls to other phone numbers. Transfer a call to another handset (Internal Transfer) During active call you can complete a supervised or blind transfer to other handsets within your business, including those that are on the same phone number.
- Page 9 Enter the assigned code * 4 3 # The Call Waiting feature is now turned on. To turn it off, repeat these steps using the code # 4 3 # USING YOUR PANASONIC KX TGP 500 & TPA 50 PHONES...
-
Page 10: Setting Up The Phonebook And Contact List
SETTING UP THE PHONEBOOK AND CONTACT LIST SET UP THE PHONE DIRECTORY (PERSONAL ADDRESS BOOK) Each handset has its own phone directory, and will need to be set-up individually. The phone directory can be enter into the each handset directly by entering each contact one at a time, OR more conveniently by importing your contact list from Microsoft Outlook. - Page 11 On the Text Import Wizard - Step 1 of 3 window, click Next. On the Text Import Wizard - Step 2 of 3 window, select Tab for Delimiters, and then click Next. On the Text Import Wizard - Step 3 of 3 window, select all columns in Data preview, select Text in Column data format, and then click Finish.
- Page 12 Note Phone numbers must be treated as text strings. Otherwise, a "0" at the beginning of a phone number might disappear when exported. Click Office Button, and then Save As. Save the file as Unicode Text. A message warning you about file compatibility will be displayed.
- Page 13 27. Click the Import Phonebook option on the left side of the page to view the Import Phonebook section 28. Select the Handset number for which you would like to import the new Phonebook to. SETTING UP THE PHONEBOOK AND CONTACT LIST...
- Page 14 29. Click on Browse and locate the file phonebook file that was created is step 17 above. Note that this will be a *.txt file 30. Press the Import button. The selected handset’s screen will display the message “Receiving” and when completed in will be sound a beep 31.