Yamaha CRX-330 Owner's Manual
Cd receiver
Hide thumbs
Also See for CRX-330:
- Service manual (82 pages) ,
- Owner's manual (40 pages) ,
- Service manual (70 pages)
Table of Contents
Available languages
Available languages
Chapters
Table of Contents

Related Manuals for Yamaha CRX-330


Summary of Contents for Yamaha CRX-330
- Page 1 CD RECEIVER AMPLI-TUNER CD OWNER'S MANUAL MODE D'EMPLOI...
-
Page 2: Important Safety Instructions
We Want You Listening For A Lifetime Yamaha and the Electronic Industries Association’s Consumer Electronics Group want you to get the most out of your equipment by playing it at a safe level. One that lets the sound come through loud and clear without annoying blaring or distortion –... - Page 3 “OFF” requirements. Modifications not expressly approved by and “ON”, please try to eliminate the problem by using Yamaha may void your authority, granted by the FCC, one of the following measures: to use the product.
- Page 4 SHOCK, DO NOT EXPOSE THIS UNIT TO RAIN fire, damage to this unit, and/or personal injury. Yamaha will not be held responsible for any damage resulting from use of this unit OR MOISTURE.
-
Page 5: Table Of Contents
CONTENTS INTRODUCTION OTHER OPERATIONS FEATURES............. 2 CONTROLLING iPod™........20 SUPPLIED ACCESSORIES ......... 2 Using iPod™ ............20 CONTROLS AND FUNCTIONS ......3 Front panel ..............3 Front panel display ............ 4 ADDITIONAL INFORMATION Remote control............5 TROUBLESHOOTING ........22 General..............22 Radio reception............22 PREPARATION iPod™... -
Page 6: Features
FEATURES FEATURES • Maximum RMS output power per channel • Plays Audio CDs, MP3/WMA discs 20W + 20W (10% THD, 1 kHz, 6Ω) • CD Text data display • 30-station FM preset tuning • MP3/WMA file playability stored on USB •... -
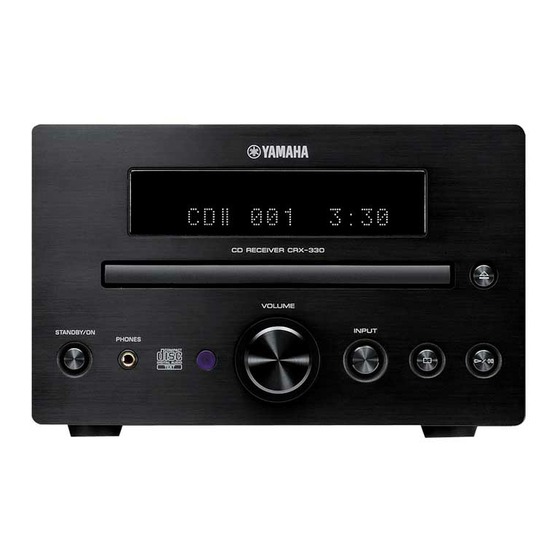
Page 7: Controls And Functions
CONTROLS AND FUNCTIONS Front panel IPod Top view VOLUME INPUT STANDBY ON PHONES Front view 1 STANDBY/ON 7 VOLUME Turns this unit on or sets it to the standby mode. Adjusts the volume level. 2 Disc Tray 8 INPUT Loads a disc to be played back. Selects an input source. -
Page 8: Front Panel Display
CONTROLS AND FUNCTIONS Front panel display SLEEP PRESET STEREO AUTO SHUFFLE REPEAT MUTE TUNED MEMORY PLAYLISTS ARTISTS ALBUMS SONGS GENRES 1 SLEEP indicator 8 Multi information display Lights up when the sleep timer is on (see page 14). Shows the various information such as the tuning frequency. -
Page 9: Remote Control
CONTROLS AND FUNCTIONS Remote control This remote control can operate the system components and an iPod stationed in a terminal on the top panel of this unit. To operate the CD, USB device, tuner functions, or an STANDBY ON iPod using the remote control, you need to set this unit to SLEEP the corresponding input mode. - Page 10 CONTROLS AND FUNCTIONS ■ CD/USB mode Operations available in CD/USB mode The following operations are available for this unit when the CD or USB mode is selected. STANDBY ON SLEEP Skips to the beginning of the current track or next track. iPod Press and hold to fast reverse or fast forward (see PRESET...
- Page 11 CONTROLS AND FUNCTIONS ■ iPod mode Operations available in iPod mode The following operations are available for the iPod STANDBY ON stationed in the terminal. For details on iPod operations, SLEEP see “Using iPod™” on page 20. iPod 1 FUNCTION PRESET Switches between the simple remote mode and menu TUNING...
-
Page 12: Preparing The Remote Control
CONTROLS AND FUNCTIONS ■ Preparing the remote control ■ Using the remote control The remote control comes with the battery already Use the remote control within 6 m (20 feet) of the installed. Before using the remote control for the very first component you want to control and point it toward its time, pull out the insulation sheet, as shown. -
Page 13: Connecting Speakers
CONNECTING SPEAKERS CONNECTING SPEAKERS Follow the procedure below to connect speakers to this unit. For information on your speakers, refer to the owner’s manual supplied for the speakers. CAUTION Do not connect the power cable of this unit until all cable connections are completed. Notes •... -
Page 14: Connecting A Subwoofer
CONNECTING SPEAKERS Connecting a subwoofer Remove approximately 10 mm (3/8 in) of insulation from the end of each speaker The low frequency range of the left channel and the right cable and then twist the exposed wires of the channel are mixed to output at the SUBWOOFER OUT cable together to prevent short circuits. -
Page 15: Connecting Antennas
To enjoy radio on this unit, connect the supplied FM antenna to the designated terminals. If there is a problem of weak radio wave reception in your area or you want to improve radio reception, we recommend that you use commercially available outdoor antennas. For details, consult the nearest authorized Yamaha dealer or service center. Indoor FM... -
Page 16: Connecting External Components
“TROUBLESHOOTING” on page 23. • Yamaha and suppliers accept no liability for the loss of data • Your iPod is automatically charged when your iPod is stationed saved on the USB devices connected to this unit. -
Page 17: Basic Operations
BASIC RECEIVER OPERATIONS BASIC RECEIVER OPERATIONS Follow the procedure below to select an input source and adjust the sound settings on this unit. Press (down) / (up) to adjust the volume to the desired output level. ■ To adjust the audio quality Press FUNCTION to display the function VOLUME menu. -
Page 18: Setting The Sleep Timer
SETTING THE SLEEP TIMER SETTING THE SLEEP TIMER The sleep timer sets this unit to the standby mode after the specified time elapses. STANDBY ON SLEEP SLEEP iPod PRESET TUNING MEMORY FUNCTION MENU DISPLAY FOLDER SHUFFLE REPEAT MUTE VOLUME Press SLEEP repeatedly to select the desired duration. -
Page 19: Basic Playback Operations For Discs And Usb Devices
BASIC PLAYBACK OPERATIONS FOR DISCS AND USB DEVICES BASIC PLAYBACK OPERATIONS FOR DISCS AND USB DEVICES You can enjoy playback your audio CDs, USB devices, and MP3 or WMA files recorded on a disc/USB device. Some operations may be different or restricted depending on the disc/USB device. Before playing back, check the compatibility of your disc/USB device with this unit (see page 25). -
Page 20: Switching The Playback Information Display
BASIC PLAYBACK OPERATIONS FOR DISCS AND USB DEVICES Switching the playback information display You can switch the disc playback information shown in the front panel display of this unit. Available information differs depending on the type of the disc/USB device. Press DISPLAY repeatedly while playing back a PRESET disc/USB device. -
Page 21: Repeating Playback (Repeat Play)
BASIC PLAYBACK OPERATIONS FOR DISCS AND USB DEVICES Repeating playback Playing back randomly (Repeat Play) (Shuffle Play) You can repeat the playback of the selected item in your You can play back tracks in your disc/USB device in disc/USB device. random order. -
Page 22: Fm Tuning
FM TUNING FM TUNING There are 2 tuning methods: automatic and manual. Automatic tuning is effective when station signals are strong and there is no interference. If the signal from the station you want to select is weak, tune into it manually. You can also use the automatic and manual preset tuning features to store up to 30 stations. -
Page 23: Manual Preset Tuning
FM TUNING Manual preset tuning Selecting preset stations You can also store up to 30 stations manually. You can tune into any desired station simply by selecting the preset station under which it was stored (see page 18). STANDBY ON SLEEP STANDBY ON SLEEP... -
Page 24: Controlling Ipod
CONTROLLING iPod™ CONTROLLING iPod™ In addition to controlling this unit, you can operate your iPod stationed in a terminal using the supplied remote control. Using iPod™ Once you have stationed your iPod in a terminal on the top panel of this unit (see page 12), you can enjoy playback of your iPod using the supplied remote control. - Page 25 CONTROLLING iPod™ ■ Menu browse mode In the menu browse mode, you can operate the iPod menu Repeat step 2 until you select the desired using the front panel display. item, and then press Center to start playback of the desired item (group or song). Note There are some characters that cannot be displayed in the front While playing back a track (or group) with the menu browse...
-
Page 26: Troubleshooting
Refer to the table below when this unit does not function properly. If the problem you are experiencing is not listed below or if the instruction below does not help, turn off this unit, disconnect the power cable, and contact the nearest authorized Yamaha dealer or service center. General... -
Page 27: Ipod
TROUBLESHOOTING iPod™ Note In case of a transmission error without a status message appearing in the front panel of this unit, check the connection to your iPod (see page 12). Status message Cause Remedy page iPod Connecting This unit is in the middle of recognizing the connection with your iPod. -
Page 28: Disc Playback
TROUBLESHOOTING Disc Playback Problem Cause Remedy page Power turns on but The power cable is not connected or the Connect the power cable firmly. immediately shuts plug is not completely inserted. off. No sound or The sampling rate of a MP3 or WMA file Check the sampling rate and bit rate of an MP3 or distorted sound may not be compatible with this unit. -
Page 29: Notes About Discs/Mp3, Wma Files
NOTES ABOUT DISCS/MP3, WMA FILES ■ Discs (audio CDs) playable with this unit This player is designed for playing back compact discs MP3 is a standard technology and format for compressing bearing the marks shown below. Never attempt to load an audio sequence into a small-sized file. - Page 30 NOTES ABOUT DISCS/MP3, WMA FILES ■ Notes about handling compact discs To play back an 8-cm (3-inch) CD • Always handle a disc with care so that its surface is not Place it in the inner recessed area of the disc tray. Do not scratched.
-
Page 31: Glossary
GLOSSARY ■ Track Audio information A CD can be divided into a number of segments (tracks). Each division is called a track number. ■ MP3 (MPEG Audio Layer-3) ■ WMA (Windows Media Audio) One of the audio compression methods used by MPEG. It An audio compression method developed by Microsoft employs the irreversible compression method, which Corporation. - Page 32 Comme les sons trop forts causent des lésions auditives qui ne peuvent être détectées qu’à long terme, lorsqu’il est trop tard, Yamaha et le Groupe des Entreprises Électroniques...
- Page 33 être déterminé en Toute modification non approuvée expressément par « ÉTEIGNANT » et en « RALLUMANT » le produit, Yamaha peut invalider l’autorisation, accordée par la l’utilisateur est invité à essayer de corriger le problème FCC, d’utiliser ce produit.
- Page 34 CET APPAREIL À LA PLUIE OU À L’HUMIDITÉ. et peut être responsable d’incendie, de dommage à l’appareil ou de blessure corporelle. Yamaha ne saurait être tenue responsable des dommages résultant de l’alimentation de l’appareil sous une POUR LES CONSOMMATEURS CANADIENS tension autre que celle prescrite.
- Page 35 TABLE DES MATIÈRES INTRODUCTION AUTRES OPERATIONS FONCTIONNALITES ........... 2 COMMANDE DE L’iPod™.........20 ACCESSOIRES FOURNIS ........2 Utilisation de l’iPod™ ..........20 COMMANDES ET FONCTIONS ......3 Face avant ..............3 Afficheur de la face avant.......... 4 INFORMATIONS COMPLEMENTAIRIES Boîtier de télécommande ........... 5 GUIDE DE DÉPANNAGE........22 Généralités ...............
-
Page 36: Fonctionnalites
FONCTIONNALITES FONCTIONNALITES • Puissance de sortie efficace maximale par • Lecture de CD audio et disques MP3/WMA voie 20W + 20W (10% DHT, 1 kHz, 6Ω) • Affichage des données écrites des CD • Mise en mémoire de 30 stations FM •... -
Page 37: Commandes Et Fonctions
COMMANDES ET FONCTIONS Face avant IPod Vue du dessus VOLUME INPUT STANDBY ON PHONES Vue de face 1 STANDBY/ON 7 VOLUME Sert à mettre l’appareil en service ou en veille. Sert à régler le volume. 2 Tiroir pour le disque 8 INPUT Posez le disque à... -
Page 38: Afficheur De La Face Avant
COMMANDES ET FONCTIONS Afficheur de la face avant SLEEP PRESET STEREO AUTO SHUFFLE REPEAT MUTE TUNED MEMORY PLAYLISTS ARTISTS ALBUMS SONGS GENRES 1 Témoin SLEEP 8 Afficheur multifonction Ce témoin s’éclaire lorsque la minuterie de mise hors Affiche diverses informations telles que la fréquence de service est active (voir page 14). -
Page 39: Boîtier De Télécommande
COMMANDES ET FONCTIONS Boîtier de télécommande Ce boîtier de télécommande peut agir sur les composants du système et un iPod raccordé à une borne située sur le haut de l’appareil. Pour agir sur le lecteur de CD, sur le périphérique USB, STANDBY ON sur les fonctions du tuner ou sur un iPod avec le boîtier de SLEEP... - Page 40 COMMANDES ET FONCTIONS ■ Mode CD/USB Opérations disponibles en mode CD/USB Vous pouvez effectuer les opérations suivantes sur l’appareil quand le mode CD ou USB est sélectionné. STANDBY ON SLEEP Pour accéder au début de la plage actuelle ou de la plage iPod suivante.
- Page 41 COMMANDES ET FONCTIONS ■ Mode iPod Opérations disponibles en mode iPod Vous pouvez effectuer les opérations suivantes sur l’iPod STANDBY ON quand il est raccordé à la borne. Pour le détail sur les SLEEP opérations iPod, voir « Utilisation de l’iPod™ » à la iPod page 20.
- Page 42 COMMANDES ET FONCTIONS ■ Préparation du boîtier de télécommande ■ Utilisation du boîtier de télécommande La pile est installée d’origine dans le boîtier de Utilisez le boîtier de télécommande à moins de 6 m de télécommande. Avant d’utiliser la télécommande pour la l’appareil sur lequel vous voulez agir et orientez-le vers le première fois, retirez la carte de protection, comme capteur de télécommande (voir page 3).
-
Page 43: Raccordement Des Enceintes
RACCORDEMENT DES ENCEINTES RACCORDEMENT DES ENCEINTES Procédez de la façon suivante pour raccorder les enceintes à l’appareil. Pour de plus amples informations sur les enceintes, reportez-vous au mode d’emploi qui les accompagne. Avertissement Ne raccordez pas le câble d’alimentation de l’appareil avant d’avoir terminé tous les raccordements. Remarques •... -
Page 44: Raccordement D'un Caisson De Graves
RACCORDEMENT DES ENCEINTES Raccordement d’un caisson de Retirez environ 10 mm de gaine de graves l’extrémité de chaque câble d’enceinte et torsadez les fils nus pour éviter les court- Les basses fréquences des canaux gauche et droit sont circuits. mixés avant d’être reproduits sur la prise SUBWOOFER OUT. -
Page 45: Raccordement Des Antennes
Pour de plus amples détails concernant cette question, veuillez consulter le revendeur Yamaha ou un service après-vente. Antenne Raccordement de l’antenne FM intérieure FM... -
Page 46: Raccordement D'autres Appareils
USB. la borne, même si l’appareil est mis en veille et si ECO MODE • Yamaha et ses fournisseurs refusent toute responsabilité liée à est réglé sur OFF. la perte de données enregistrées sur les périphériques USB qui •... -
Page 47: Fonctionnement De Base De L'ampli-Tuner
FONCTIONNEMENT DE BASE DE L’AMPLI-TUNER FONCTIONNEMENT DE BASE DE L’AMPLI-TUNER Procédez de la façon suivante pour sélectionner une source et régler les paramètres du son sur l’appareil. Appuyez sur (bas) / (haut) pour régler le volume au niveau de sortie souhaité. ■... -
Page 48: Reglage De La Minuterie De Mise Hors Service
REGLAGE DE LA MINUTERIE DE MISE HORS SERVICE REGLAGE DE LA MINUTERIE DE MISE HORS SERVICE La minuterie de mise hors service met l’appareil en veille dans le délai spécifié. STANDBY ON SLEEP SLEEP iPod PRESET TUNING MEMORY FUNCTION MENU DISPLAY FOLDER SHUFFLE... -
Page 49: Operations De Base Pour La Lecture De Disques Et De Peripheriques Usb
OPERATIONS DE BASE POUR LA LECTURE DE DISQUES ET DE PERIPHERIQUES USB OPERATIONS DE BASE POUR LA LECTURE DE DISQUES ET DE PERIPHERIQUES USB Vous pouvez lire des CD audio, des périphériques USB et des fichiers MP3 ou WMA enregistrés sur un disque/ périphérique USB. -
Page 50: Changement Des Informations Concernant La Lecture Sur L'afficheur
OPERATIONS DE BASE POUR LA LECTURE DE DISQUES ET DE PERIPHERIQUES USB Changement des informations concernant la lecture sur l’afficheur Vous pouvez changer les informations relatives à la lecture du disque qui apparaissent sur l’afficheur de la face avant de l’appareil. -
Page 51: Répétition De La Lecture (Repeat Play)
OPERATIONS DE BASE POUR LA LECTURE DE DISQUES ET DE PERIPHERIQUES USB Répétition de la lecture Lecture aléatoire (Repeat Play) (Shuffle Play) La lecture de l’élément sélectionné sur le disque/ Les plages de votre disque/périphérique USB peuvent être périphérique USB peut être répétée. lus dans un ordre aléatoire. -
Page 52: Syntonisation Fm
SYNTONISATION FM SYNTONISATION FM Il existe 2 méthodes de syntonisation : syntonisation automatique et syntonisation manuelle. La syntonisation automatique est efficace lorsque les signaux captés sont puissants et qu’il n’existe aucun brouillage. Si le signal de la station que vous désirez écouter est peu puissant, effectuez une syntonisation manuelle. Vous pouvez aussi utiliser la syntonisation automatique et la syntonisation manuelle pour mettre en mémoire jusqu’à... -
Page 53: Mise En Mémoire Manuelle Des Fréquences
SYNTONISATION FM Mise en mémoire manuelle des Accord des stations fréquences présélectionnées Vous pouvez mémoriser manuellement jusqu’à 30 Vous pouvez accorder n’importe quelle station stations. simplement en sélectionnant la présélection où elle a été préréglée (voir page 18). STANDBY ON SLEEP STANDBY ON SLEEP... -
Page 54: Commande De L'ipod
COMMANDE DE L’iPod™ COMMANDE DE L’iPod™ Le boîtier de télécommande fourni avec l’appareil vous permet de commander non seulement celui-ci, mais aussi votre iPod quand il est connecté à la borne. Utilisation de l’iPod™ Une fois que vous avez connecté votre iPod à la borne située en haut de l’appareil (voir page 12), vous pouvez commander la lecture de l’iPod à... - Page 55 COMMANDE DE L’iPod™ ■ Mode d’utilisation des menus Dans le mode d’utilisation des menus, vous pouvez agir Répétez l’étape 2 de manière à sélectionner sur le menu iPod à l’aide de l’afficheur de la face avant. l’élément souhaité, puis appuyez sur Center pour écouter l’élément souhaité...
-
Page 56: Guide De Dépannage
Reportez-vous au tableau suivant si l’appareil ne fonctionne pas convenablement. Si l’anomalie constatée n’est pas mentionnée, ou encore si les actions correctives suggérées sont sans effet, mettez l’appareil hors service, débranchez la fiche du câble d’alimentation et prenez contact avec le revendeur ou le service après-vente de Yamaha. Généralités... -
Page 57: Ipod
GUIDE DE DÉPANNAGE iPod™ Remarque En cas d’erreur de transmission sans message sur l’afficheur de la face avant de l’appareil, vérifiez les liaisons à votre iPod (voir page 12). Voir la Message d’état Causes possibles Actions correctives page iPod Connecting L’appareil est en train de reconnaître la liaison de votre iPod. -
Page 58: Lecture De Disque
GUIDE DE DÉPANNAGE Lecture de disque Voir la Anomalies Causes possibles Actions correctives page L’alimentation se La fiche du câble d’alimentation n’est pas Branchez soigneusement le câble d’alimentation. coupe convenablement branchée, ou pas immédiatement après branchée du tout. s’être établie. Aucun son ou La fréquence d’échantillonnage du fichier Vérifiez la fréquence d’échantillonnage et le débit... -
Page 59: Remarques Relatives Aux Disques/Fichiers Mp3, Wma
REMARQUES RELATIVES AUX DISQUES/FICHIERS MP3, WMA ■ Disques (CD audio) pris en charge par cet appareil MP3 est une technologie standard et un format de Cet appareil est conçu pour lire des CD qui portent les compression de séquence audio en un fichier de taille mentions ci-après. - Page 60 REMARQUES RELATIVES AUX DISQUES/FICHIERS MP3, WMA ■ Remarques relatives à la manipulation Lecture d’un CD de 8 cm des disques compacts Placez le disque dans la zone évitée à l’intérieur du tiroir de disque. Ne posez pas un CD normal (12 cm) au-dessus •...
-
Page 61: Glossaire
GLOSSAIRE ■ Plage Informations relatives aux signaux Un CD peut être divisé en un certain nombre de segments sonores (plages). A chaque division est attribué un numéro de plage. ■ MP3 (MPEG Audio Layer-3) ■ WMA (Windows Media Audio) Une des méthodes de compression du son utilisée par C’est une méthode de compression audio mise au point MPEG. - Page 62 Printed in Malaysia WQ57120-1 © 2008 Yamaha Corporation All rights reserved.