Table of Contents
Table of Contents

Related Manuals for Silvercrest DV-5100HD


Summary of Contents for Silvercrest DV-5100HD
- Page 1 Digital HD Camcorder User manual and service information DV-5100HD...
-
Page 2: Table Of Contents
DV-5100HD Contents Contents Important Notice Safety Instructions................6 Children and Persons with Disabilities ........... 8 Charger and Rechargeable Battery ..........9 Cables ................... 10 Repair and Maintenance ............... 10 Intended Use................. 11 Conformity..................12 Disposal of Old Devices ..............12 Introduction Package Contents................. - Page 3 Contents DV-5100HD Charging the Battery..............18 Inserting the Battery..............19 Inserting an SD Card ..............20 Write-Protecting the Memory Card ..........21 Switching the Camcorder On and Off .......... 21 Switching the Operating Mode............. 22 Setting the Menu Language............22 Setting Date and Time ..............
- Page 4 DV-5100HD Contents Format..................37 Default..................37 Language ..................37 Frequency ..................37 Date/Time ..................37 Video Menu ................... 38 White Balance (WB)..............38 Resolution ..................39 Effect.................... 39 Night Mode................... 39 Stabilizer ..................40 Capture Mode ................40 Video Playback Menu ..............40 Delete one..................
- Page 5 Contents DV-5100HD Protect ..................45 Autoplay..................45 DPOF................... 45 Connectors and Ports Viewing Recordings on a Television Screen......... 46 Connecting via the HDMI Cable ..........47 Connecting via the USB/AV Cable ..........47 Transferring Recordings to the Computer........48 Using the USB port ..............48 Using a Card Reader ..............
- Page 6 DV-5100HD Contents Toolbar ..................56 Import................... 56 Merge files ................... 56 Creating an AVCHD Disk ............. 57 Cutting Video Clips ..............57 Upload to YouTube ..............58 Upload to Facebook ..............58 Photo Album ................59 Album page.................. 59 Appendix Technical Specifications..............
-
Page 7: Important Notice
Introduction DV-5100HD Important Notice This icon denotes important information for the safe operation of the product and for the user’s safety. This symbol denotes further information on the topic. Safety Instructions Before you use this device for the first time, please read the following notes in this manual and heed all warnings, even if you are familiar with handling electronic devices. - Page 8 DV-5100HD Introduction Switch the device off immediately if you notice it emitting smoke or strange noises. Contact customer service. Never try to repair the device yourself. Only use the supplied charger cradle Scope DJ04V20500A to recharge the product battery. Only use this device with the supplied rechargeable battery (PAC-0040) in order to avoid overheating, deformation of the cover, fire, electric shocks, explosion and other dangers.
-
Page 9: Children And Persons With Disabilities
Introduction DV-5100HD no direct sunlight or bright artificial light reaches the device; contact with spray, dripping water and corrosive liquids must be avoided and the device should never be operated near water, and it must especially never be immersed (do not place any objects filled with liquids such as vases or drinks near the device);... -
Page 10: Charger And Rechargeable Battery
DV-5100HD Introduction Charger and Rechargeable Battery Insert the rechargeable battery with the correct polarity. Never throw a rechargeable battery into fire. Remove the rechargeable battery when the device is not to be used for a long time. Danger of Explosion! Non-intended use may cause explosion and danger to life. -
Page 11: Cables
Introduction DV-5100HD Cables Always hold cables by the plug and never pull on the cable itself. Never hold the power cord with wet hands as this may cause a short circuit or electric shock. Never place the device, heavy objects or furniture on the cable and make sure that the cord does not bend too much, especially at the plug and sockets. -
Page 12: Intended Use
DV-5100HD Introduction Intended Use Your camcorder is a Consumer Electronics device and designed for recording and playing back videos and pictures only. Any use other than that mentioned above does not correspond to the intended use. It may only be used for private use, not industrial or commercial purposes. -
Page 13: Conformity
Introduction DV-5100HD Conformity This device and its supplied accessories have been tested and approved for compliance with the basic and other relevant requirements of the EMC Directive 2004/108/EC, as well as the Low-voltage Directive 2006/95/EC. Disposal of Old Devices Devices marked with this symbol are subject to the European Directive 2002/96/EC. -
Page 14: Introduction
DV-5100HD Introduction Introduction Package Contents Camcorder DV-5100HD SD memory card, 2GB 2x Rechargeable battery PAC-0040 Charger Scope DJ04V20500A Power cord USB/AV cable HDMI cable CD-ROM (not shown) Carrying strap (not shown) User's manual (not shown) English - 13... -
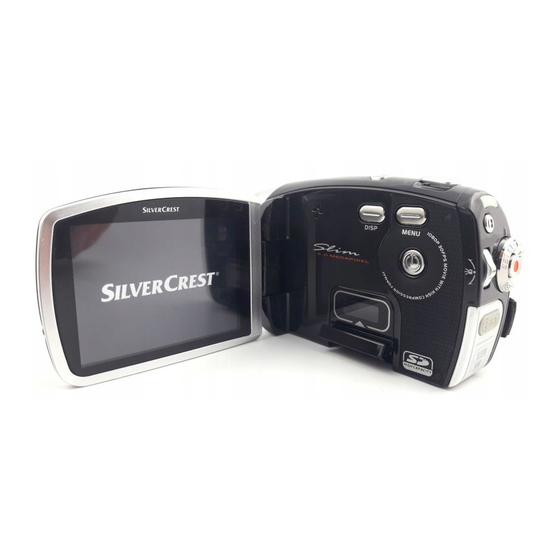
Page 15: Controls And Buttons
Introduction DV-5100HD Controls and buttons Front Panel Lens Self-timer lamp Video lamp Microphone Rear Panel Power indicator PLAY button Menu navigation HDMI, USB and AV port Mode selection switch 10 RECORD button 14 - English... -
Page 16: Left Panel
DV-5100HD Introduction Left Panel 11 Speaker 12 Display button 13 Menu button 14 On/Off button 15 Card reader Right Panel 16 Macro switch English - 15... -
Page 17: Top View
Introduction DV-5100HD Top View 17 Picture (photo) shutter button 18 Zoom swivel button Bottom 19 Tripod mount 20 Battery compartment 16 - English... -
Page 18: Opening The Display
DV-5100HD Introduction Opening the Display Open the display and then rotate it according to your needs. You can also rotate the display so it faces the front. In this case, the picture orientation will be adjusted automatically. The rotated display can be folded completely until it touches the camera housing. -
Page 19: Getting Started
Introduction DV-5100HD Getting Started The camcorder is powered by a rechargeable Lithium-Ion (PAC- 0040) battery. On delivery, the battery is not charged. Please charge the battery before first use of the device. Charging the Battery Insert the rechargeable battery in the charger cradle Scope DJ04V20500A so that the contacts [+] and [-] correspond to the rechargeable battery and charging tray markings. -
Page 20: Inserting The Battery
DV-5100HD Introduction The status indicator of the charging cradle will light orange whilst the battery is charging. When the charging process is completed, the status indicator will light green. Now you can insert the rechargeable battery into the camcorder. Depending on the charge level, the charging cycle can take up to 2 hours. -
Page 21: Inserting An Sd Card
Introduction DV-5100HD Inserting an SD Card Power the device off before you insert or remove the memory card. By using the supplied SD memory card you can increase the camcorder storage capacity for saving your videos and photos.. When a memory card is inserted, all the recorded contents will be saved onto it. -
Page 22: Write-Protecting The Memory Card
DV-5100HD Introduction If the memory card or the internal memory is full, the message Memory full will appear on the display. Write-Protecting the Memory Card The memory card features a write-protection tab. When the write protection is enabled (see the figure right below) you will be able to view existing videos and pictures only, but not be able to delete or edit them. -
Page 23: Switching The Operating Mode
Introduction DV-5100HD When opening the display, the camcorder will power on automatically. As soon as you close the cover, it will power off. Switching the Operating Mode Rotate the mode selector switch [9] to toggle between the modes Movie, Photo and Setup. To do this, position the corresponding icon to the top marking. -
Page 24: Setting Date And Time
DV-5100HD Introduction Setting Date and Time Open camcorder display. device powers automatically. If the display was already open but the device was off, press the On/Off button [14]. Rotate the mode selector switch [9] to the SET position. Use the Down navigation button [7] to move the highlight to the Date / Time option. -
Page 25: Recording
Recording DV-5100HD Recording Recording Video Clips Open the display and then rotate it according to your needs. The device powers on automatically. If the current mode is not set to video recording, select it by using the mode selector switch [9]. - Page 26 DV-5100HD Recording Zoom indicator Exposure Compensation Effect Night mode White balance Remaining memory available Current memory type Video lamp Resolution Battery status Histogram display Macro mode Video mode English - 25...
-
Page 27: Capturing Pictures
Recording DV-5100HD Capturing Pictures Open the display and then rotate it according to your needs. The device powers on automatically. If the current mode is not set to photo capturing, select it by using the mode selector switch [9]. Move the navigation button to adjust exposure compensation to a positive or negative value. - Page 28 DV-5100HD Recording 0003 Remaining number of shots Exposure Compensation Effect Night mode White balance Current memory type Video light on Resolution Battery status Histogram display Macro mode Self timer Photo mode Zoom indicator English - 27...
-
Page 29: The Video Light
Recording DV-5100HD The Video Light In dark environments you can enable the built-in video lamp [3] for video or photo recording. To do this, press the navigation button [7]. Pressing this button again will turn the video lamp off. While the video lamp is enabled, the icon will appear on the display. -
Page 30: Macro Mode
DV-5100HD Recording Macro Mode This device features a macro function allowing you to focus on very close subjects. This allows you to position the lens as close as 20cm (4 inches) from the subject. The macro switch [16] is located on the lateral panel of the device. -
Page 31: Playback
Playback DV-5100HD Playback Depending on the selected mode you can use the Play button [6] to switch to the corresponding playback mode. Playing Back Video Clips In video mode you can use the Play button [6] to switch to playback mode. - Page 32 DV-5100HD Playback During playback you will see further information on the display: 100-0004 Video file name 0001/0001 Current video number/ total number of videos Playback volume with indicator bar (displays only when pressing the zoom adjustment and hides after three seconds)
- Page 33 Playback DV-5100HD During video clip playback you can increase or decrease the playback speed or pause the video. To do this, use the following buttons. The record button [10] pauses the current playback. Pressing the button again resumes playback. You can use the navigation button to fast forward or rewind.
-
Page 34: Playing Back Photos
DV-5100HD Playback Playing Back Photos In Photo mode you can use the Play button [6] to switch to the picture playback mode. Press this button once again to return to capture mode. The icon in the upper-left corner of the display shows the current mode. - Page 35 Playback DV-5100HD During picture playback you will see further information on the display: DPOF 0001/0001 Current picture number/ total number of pictures Current memory type 100-0001 Picture file name Battery status File protection Playback icon 34 - English...
-
Page 36: The Main Menu
DV-5100HD Menus The camcorder uses different menus that offer multiple settings under each operating mode. Furthermore there is a main menu allowing you to set the preferences for your camcorder. The Main Menu Rotate the mode selector switch [9] to the SET position (see also on page 22 - Switching the Operating Mode). -
Page 37: Beep
Menus DV-5100HD Beep Here you can determine if a sound is output when pressing any button. This option enables or disables the power-on sound at the same time. Histogram The histogram offers helpful information about the picture's brightness (see page 28), but it may disturb the view on the screen. -
Page 38: Format
DV-5100HD Menus Format This function lets you delete all contents from your memory card and internal memory and renew the file saving structure (formatting). Warning! All saved videos and pictures will be erased and cannot be restored. Make sure that all recordings that you want to keep have been backed-up on a different medium. -
Page 39: Video Menu
Menus DV-5100HD Video Menu To open the Video menu, press the Menu button [13] while in video mode. Use the navigation button [7] to select one of the settings and then press the navigation button to confirm. Use the navigation button to adjust one of the possible values and press it again to confirm. -
Page 40: Resolution
DV-5100HD Menus Resolution The resolution determines the size of the recording in pixels. As a general rule: The higher the resolution, the more storage space is required. The following settings are available: Designation Resolution in Description pixels 1080P 1440 x 1080... -
Page 41: Stabilizer
Menus DV-5100HD Stabilizer The stabilizer uses smart electronics to smoothen your video recordings. Any abrupt movements of the camcorder will be slowed-down electronically resulting in a smoother scene. While the stabilizer is enabled, DIS will appear on the display. Capture Mode This item allows you to enable the microphone (voice-recording) mode. -
Page 42: Delete One
DV-5100HD Menus Delete one Use this option to delete a single video recording. Use the navigation button [7] to select the video that you want to delete. Press the navigation button to confirm the deletion process. Warning! After a recording has been erased, it cannot be restored. -
Page 43: Autoplay
Menus DV-5100HD Autoplay This function allows you to play all recorded videos in sequence. Confirm the icon to enable auto playback or cancel this process with the icon. When playing a recording from the playback mode, all subsequent recordings will be played back too. To finish playback, press the Menu button [13]. -
Page 44: Resolution
DV-5100HD Menus Resolution The resolution determines the size of the recording in pixels. As a general rule: The higher the resolution, the more storage space is required. The following settings are available: Designation Resolution in Description pixels 2048 x 1536... -
Page 45: Photo Playback Menu
Menus DV-5100HD Point the camcorder at the subject and make sure to position it on a stable surface (or better still, a tripod). Press the shutter button (17). The self-timer indicator [2] on the front panel flashes and a counter will appear on the display. After the preset time, the picture is taken automatically. -
Page 46: Delete All
DV-5100HD Menus Delete All All saved pictures can be deleted at once. Any captured videos will not be erased. This function is operated the same way as the Delete function for video playback (see page 41). Protect This setting is equivalent to the Lock setting for video playback (see page 41). -
Page 47: Connectors And Ports
Connectors and Ports DV-5100HD Connectors and Ports Viewing Recordings on a Television Screen Any recordings that you can view on the camcorder display can also be played back on a regular TV set. For this, your television set must have an appropriate Video In connector. -
Page 48: Connecting Via The Hdmi Cable
DV-5100HD Connectors and Ports Connecting via the HDMI Cable Please make sure that your camcorder is powered off. Open the port cover and insert the smaller connector of the HDMI cable into the HDMI port [4] of your camcorder (see the picture on the previous page). -
Page 49: Transferring Recordings To The Computer
Connectors and Ports DV-5100HD Transferring Recordings to the Computer There are two possible ways to copy recordings from the camcorder to a computer: by connecting the device to a computer via the USB/AV cable by inserting the memory card into a card reader Be careful when renaming any folders and files. -
Page 50: Using A Card Reader
DV-5100HD Connectors and Ports Now you can copy the recorded files from the camcorder into a folder of your choice on the computer’s hard disk. Using a Card Reader If your computer features a card reader supporting SD memory cards, you can read the memory card’s contents directly. To do this, power the camcorder off and remove the memory card (see page 20 - Inserting the SD Card). -
Page 51: Software
Software DV-5100HD Software The supplied software allows you to edit and play your recordings. System Requirements ® ® Operating system: Windows XP or Windows Vista ® Windows CPU: Intel/AMD Dual-Core processor or higher RAM: At least 1GB Graphics Adapter: DirectX 9 or DirectX 10-compatible... -
Page 52: Uninstalling The Software
DV-5100HD Software Uninstalling the Software To uninstall the software, please use the Uninstall Wizard found in the Control Panel of your operating system. The Main Dialog 1 Navigation bar with multiple display options 2 The preview window shows previews and further information. -
Page 53: Select Language
Software DV-5100HD Select language Here you can change the language of the software interface. From the main dialog, click: >Options >Preferences Select the desired language from the list and click “OK” to confirm. The software will prompt you that it will be necessary to restart it. -
Page 54: Editing Recordings
DV-5100HD Software Editing Recordings Viewing Recordings Use the USB cable to connect the camcorder to your computer. Then power the camcorder on. 4 Disk drives display and selection 5 Recordings stored on the selected disk The following options are available: From the navigation (4), select the disk drive for which you want to display the contents. -
Page 55: Importing Recordings
Software DV-5100HD To delete a recording, click the Trash icon . The ensuing prompt needs to be confirmed with “OK” in order to execute the deletion. Importing Recordings To archive your recordings, you can use the Import function. The recordings will be copied to your computer. After you have imported your recordings, you will not need to connect the camcorder to view them. -
Page 56: Selecting The Navigation View
DV-5100HD Software Selecting the Navigation View There are different ways to open your imported recordings. In the libraries, you can sort them by folder name or date. Click on the folder icon to sort by folder name. Click on the calendar icon to sort by folder date. -
Page 57: Toolbar
Software DV-5100HD Toolbar Import Imports all recordings from any connected devices. Merge files Creates movies from your video recordings. Create AVCHD Burns your video files onto an AVCHD disk. Upload to Uploads video recordings to your YouTube YouTube account. Photo album Creates a photo album from your pictures. -
Page 58: Creating An Avchd Disk
DV-5100HD Software Creating an AVCHD Disk AVCHD (Advanced Video Codec High Definition) is an innovative digital standard with high resolution and brilliant picture and sound quality. This format allows you to record onto writeable DVD disks and playback on suitable Blu-ray players. It is a good addition to an HDTV television set. -
Page 59: Upload To Youtube
Software DV-5100HD Navigate to the end of the scene that you want to cut. Then click Start cutting by clicking the confirmation icon The title will be cut and a new clip without the selection will be created. Upload to YouTube... -
Page 60: Photo Album
DV-5100HD Software Photo Album With this option you can create an album consisting of multiple pictures. There are also several templates that you may use. Click the Photo Album icon Drag the desired pictures onto the bar at the bottom of the window. -
Page 61: Appendix
Appendix DV-5100HD Appendix Technical Specifications Capture sensor 5 megapixels CMOS Lens Fixed lens Focus range: f = 7.5 mm Aperture: F = 3.2 Colour LCD Display 7.5cm TFT Shutter speed 2s ~ 1/2000s File format Video: Photo: JPEG White balance... -
Page 62: Troubleshooting
DV-5100HD Appendix Operating temperature 0 °C - 35 °C Operating humidity max. 85 % rel. humidity Microphone Integrated Speaker Integrated Dimensions 41 x 68 x 111 mm (W x H x D) Weight 227g (without battery) Troubleshooting Unable to power the camcorder on. -
Page 63: Details Of Guarantee
Appendix DV-5100HD Details of Guarantee 62 - English... - Page 64 DV-5100HD Appendix English - 63...
-
Page 65: Declaration Of Conformity
Camcorder model: SilverCrest DV-5100HD is confirmed to comply with the requirements set out in the Council Directive on the Approximation of the Laws of the Member States relating to Electromagnetic Compatibility 2004/108/EC and the Council Directive relating to Low Voltage 2006/95/EC. - Page 66 TARGA GmbH Lange Wende 41 D-59494 Soest www.silvercrest.cc...