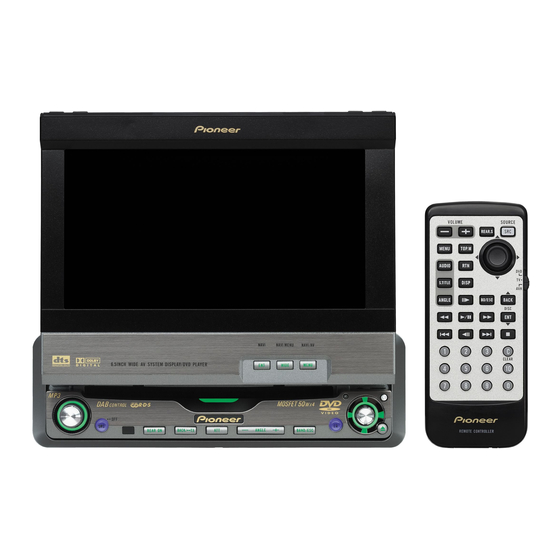
Pioneer AVH-P6500DVD Operation Manual
Av receiver/ dvd player with 6.5 inch wide display
Hide thumbs
Also See for AVH-P6500DVD:
- Service manual (210 pages) ,
- Operation manual (109 pages) ,
- Installation manual (76 pages)

Related Manuals for Pioneer AVH-P6500DVD


Summary of Contents for Pioneer AVH-P6500DVD
-
Page 1: Operation Manual
Operation Manual AV Receiver/DVD Player with 6.5 inch Wide Display AVH-P6500DVD English... -
Page 2: Table Of Contents
Contents Thank you for buying this Pioneer product. Please read through these operating instructions so you will know how to operate your model properly. After you have finished reading the instructions, put them away in a safe place for future reference. - Page 3 Contents Introduction of advanced Video CD Introduction of advanced multi-CD player operation 36 operation 49 Repeating play 36 Repeating play 49 Pausing Video CD playback 37 Playing tracks in a random order 49 Frame-by-frame playback 37 Scanning CDs and tracks 50 Slow motion playback 37 Pausing CD playback 50 Searching for a desired scene, starting...
- Page 4 Contents Audio Adjustments Setting the aspect ratio 79 Introduction of audio adjustments 63 Setting the parental lock 79 Using balance adjustment 63 Setting remote control code type 80 Using the equalizer 64 Initial Settings Adjusting bass and treble 65 Adjusting initial settings 81 Adjusting loudness 65 Switching the warning tone 81 Using subwoofer output 66...
- Page 5 Selecting fine audio equipment such as the unit you’ve just purchased is only the start of your musical enjoyment. Now it’s time to consider how you can maximize the fun and excitement your equipment offers. This manufacturer and the Electronic Industries Association’s Consumer Electronics Group want you to get the most out of your equipment by playing it at a safe level.
-
Page 6: Precautions
Section Precautions IMPORTANT SAFEGUARDS To ensure safe driving Please read all of these instructions regarding WARNING your display and retain them for future refer- ! To avoid the risk of accident and the potential ence. violation of applicable laws, this unit is not for 1 Read this manual fully and carefully before use with a video screen that is visible to the operating your display. -
Page 7: Playable Discs
Playable discs navigation unit DVD, Video CD and CD discs that display the When you use this unit with the Pioneer DVD logos shown below can be played back on this navigation unit, make sure that you use the player. -
Page 8: About This Manual
AV equipment cannot be used. ! Route guidance of the combined Pioneer navigation unit cannot be function properly U.S.A. when some other source image is dis- Pioneer Electronics (USA) Inc. -
Page 9: Product Registration
Section Before You Start Product registration Features Visit us at the following site: Touch panel key operation It is possible to operate this unit by using touch panel key. DVD video playback It is possible to play back DVD video, DVD-R 1 Register your product. -
Page 10: To Protect The Lcd Screen
Section Before You Start Dolby Digital/DTS compatibility Reverse engineering or disassembly is When using this unit with a Pioneer multi- prohibited. channel processor, you can enjoy the atmo- sphere and excitement provided by DVD movie and music software featuring 5.1channel re- To protect the LCD screen cordings. -
Page 11: When An Operation Is Prohibited
Indicates the picture size (aspect ratio: 16 : 9 LB screen width-to-height ratio) type. ! When using with a Pioneer navigation unit, if you press RESET, be sure ACC OFF is se- Indicates the number of the region lected. If ACC ON is selected, correct opera- where playback is possible. -
Page 12: Use And Care Of The Remote Control
About the XM READY mark The XM READY mark printed on the front WARNING panel indicates that the Pioneer XM tuner Keep the battery out of the reach of children. (sold separately) can be controlled by this unit. Should the battery be swallowed, immediately Please inquire to your dealer or nearest consult a doctor. -
Page 13: WhatS What
Section Whats What Head unit 6 ENTERTAINMENT button Press to switch between the background 1 DISPLAY button displays. Press to select different displays. 7 WIDE button 2 PGM button Press to select a desired mode for enlarging Press to operate the preprogrammed func- a 4:3 picture to a 16:9 one. - Page 14 Section Whats What c Joystick Move to do manual seek tuning, fast for- ward, reverse and track search controls. Also used for controlling functions. d EQ button Press to select various equalizer curves. e BAND/ESC button Press to select among three FM and one AM bands and cancel the control mode of functions.
-
Page 15: Remote Control
Section Whats What 2 3 4 Remote control 6 DIRECT button Press to do direct channel select when 1 Remote control selection switch using an XM tuner. Switch to change the setting of the remote control. For details, refer to Setting remote 7 Remote control operation mode switch control code type on page 80. - Page 16 Section Whats What a BAND/ESC button l STEP (r/q) button Press to select among three FM and one Press to move ahead one frame at a time AM bands and cancel the control mode of during DVD/VideoCD playback. Press and functions.
-
Page 17: Dvd Mode Operation
Section Whats What ! 16 can perform the same operations as % When you want to operate the follow- the preset tuning keys P 1P 6 and the ing functions only on the rear display, disc selection keys 0106. switch the mode to TV: If you want to select a disc located at 7 ! When performing manual or seek tuning by to 12 by using 16, press and hold the... - Page 18 The source names are displayed and select- VIDEO (refer to page 84). able ones are highlighted. ! External unit refers to a Pioneer product (such ! DVD Built-in DVD player as one available in the future) that, although ! S-DVD DVD player/multi-DVD player...
-
Page 19: Basic Operations
Section Basic Operations Loading a disc Turning the unit off % Insert a disc into the disc loading slot. % When using the touch panel keys, Playback will automatically start. touch the source icon and then touch SOURCE OFF. # If DVD AUTO is turned off, touch the source icon and then touch DVD to select DVD (refer to # When the source icon is not displayed, you the previous page). -
Page 20: Displaying The Navigation Video
Displaying the navigation video You can display navigation map and naviga- tion menu on this display. ! Only when a Pioneer navigation unit is con- nected to this unit, you can operate these functions. 1 Touch panel keys Touch to do various operations. -
Page 21: Opening And Closing The Lcd Panel
Section Basic Operations Operating the menu Note If you do not operate the function within about 30 seconds, the display is automatically returned to the playback display. Operating the menu by using the joystick You can also perform most of the menu items by using the joystick. -
Page 22: Changing The Wide Screen Mode
FULL (full)JUST (just)CINEMA (cinema) The LCD panel angle continues changing as ZOOM (zoom)NORMAL (normal) long as you press ANGLE (+/) and hold. # When a Pioneer navigation unit is connected to this unit, press WIDE and hold to select the de-... -
Page 23: Adjusting The Picture Adjustment
Section Basic Operations sired setting. Press WIDE and hold repeatedly to on the authors rights protected by the Copy- switch between the settings. right Law. ! Video will appear grainy when viewed in FULL (full) CINEMA or ZOOM mode. ! The navigation map and the back-up camera A 4:3 picture is enlarged in the horizontal direc- picture is always FULL. -
Page 24: Protecting Your Unit From Theft
Section Basic Operations Touch c or d to adjust the brightness. ! SOURCE Return to the picture adjustment display for each source Each time you touch c or d moves yellow to- # You can adjust the picture adjustment for wards the left or the right. -
Page 25: Removing The Front Panel
Section Basic Operations Removing the front panel Press DETACH to remove the front panel. Press DETACH and the right side of the front panel is removed from the head unit. Grip the right side of the front panel and pull it gently outward. Take care not to grip it tightly or to drop it. -
Page 26: Tuner
Section Tuner Listening to the radio Touch the source icon and then touch TUNER to select the tuner. # When the source icon is not displayed, you can display it by touching the screen. Touch the screen to display the touch panel keys. -
Page 27: Introduction Of Advanced Tuner Operation
Section Tuner Introduction of advanced % When you find a frequency that you want to store in memory keep touching a tuner operation preset tuning key P 1P 6 until the preset number stops flashing. The number you have touched will flash in the preset number indicator and then remain lit. -
Page 28: Storing The Strongest Broadcast Frequencies
Section Tuner Touch c or d to set the sensitivity. There are four levels of sensitivity for FM and two levels for AM: FM: 1234 AM: 12 The 4 setting allows reception of only the strongest stations, while lower settings let you receive progressively weaker stations. -
Page 29: Playing Dvd Video Discs
Section Playing DVD video discs Watching a DVD video 8 Audio language indicator Shows what audio language has been se- lected. Touch the source icon and then touch DVD to select the DVD player. # When the source icon is not displayed, you can display it by touching the screen. -
Page 30: Operating The Dvd Menu
Section Playing DVD video discs Skipping back or forward # Fast forward/fast reverse may not be possible at certain locations on some discs. If this hap- to another title pens, normal playback automatically resumes. % To skip back or forward to another title, touch a or b. -
Page 31: Introduction Of Advanced Dvd Video Operation
Section Playing DVD video discs Introduction of advanced Touch A.MENU and FUNCTION and then touch REPEAT. DVD video operation Touch any of the following touch panel keys to select the repeat range. ! TITILE Repeat just the current title ! CHAPTER Repeat just the current chapter ! REPEAT OFF Play throughout the current disc... -
Page 32: Slow Motion Playback
Section Playing DVD video discs Searching for a desired % Touch r during playback. Each time you touch r, you move ahead one scene, starting playback frame. from a specified time # To return to normal playback, touch f. You can use the search function to search for a desired scene by specifying a title or chapter, Notes and the time search function to specify the... -
Page 33: Changing Audio Language During Playback (Multi-Audio)
Section Playing DVD video discs ! With some discs, the icon may be dis- ! You can also switch between languages/audio played, indicating that titles, chapters and systems using DVD SETUP. For details, refer time cannot be specified. to Setting the audio language on page 78. ! Only digital output of DTS audio is possible. -
Page 34: Changing The Viewing Angle During Playback (Multi-Angle)
Section Playing DVD video discs Changing the viewing angle during playback (Multi-angle) With DVDs featuring multi-angle (scenes shot from multiple angles) recordings, you can switch among viewing angles during play- back. ! During playback of a scene shot from mul- tiple angles on this unit, the angle icon is displayed. -
Page 35: Playing Video Cds
Section Playing Video CDs Watching a Video CD # With a Video CD featuring the PBC (playback control) function, a menu is displayed. Switch the remote control operation mode to DVD and then press 010 to select the desired menu item. Playback starts from the selected menu item. -
Page 36: Stopping Playback
Section Playing Video CDs Introduction of advanced To perform fast forward or reverse, keep touching m or n. Video CD operation If you keep touching m or n for five sec- onds, the icon m or n changes into rever- sal indication. -
Page 37: Pausing Video Cd Playback
Section Playing Video CDs ! During PBC playback of Video CDs, this % Touch r during playback. function cannot be operated. Each time you touch r, you move ahead one frame. Touch A.MENU and FUNCTION and then # To return to normal playback, touch f. touch REPEAT. -
Page 38: Searching For A Desired Scene, Starting Playback From A Specified Time
Section Playing Video CDs Searching for a desired Specifying track scene, starting playback You can use the direct search function to search for a desired scene by specifying a from a specified time track. You can use the search function to search for ! Only the remote control can operate this a desired scene by specifying a track, and the function. -
Page 39: Playing Cds
Section Playing CDs Listening a CD # If no disc is loaded in this unit, you cannot se- lect DVD (DVD player). Insert a disc in this unit. (Refer to page 19.) Touch the screen to display the touch panel keys. To skip back or forward to another track, touch o or p. -
Page 40: Stopping Playback
Section Playing CDs Stopping playback Introduction of advanced CD operation % Touch g. # When you stop CD playback by touching g, that location on the disc is memorized enabling playback from that point when you play the disc again. # To play back the disc again, touch f. -
Page 41: Playing Tracks In A Random Order
Section Playing CDs Touch A.MENU and FUNCTION and then When you find the desired track touch touch REPEAT. b to turn scan play off. Touch either of the following touch Note panel keys to select the repeat range. After scanning of a CD is finished, normal play- ! TRACK Repeat just the current track back of the tracks will begin again. -
Page 42: Entering Disc Titles
Section Playing CDs While the input number is displayed, Touch a or b to select a letter of the al- touch ENTER. phabet. This starts playback from the selected track. Each time you touch a will display a letter of the alphabet in A B C ... -
Page 43: Using Cd Text Functions
Section Playing CDs Using CD TEXT functions Touch PREV or NEXT to switch between the lists of titles. Some discs have certain information encoded on the disc during manufacture. These discs Touch your favorite track title. may contain such information as the CD title, That selection will begin to play. -
Page 44: Playing Mp3
Section Playing MP3 Listening MP3 Touch the source icon and then touch DVD to select the DVD player. # When the source icon is not displayed, you can display it by touching the screen. # If no disc is loaded in this unit, you cannot se- lect DVD (DVD player). -
Page 45: Stopping Playback
Section Playing MP3 Introduction of advanced Notes MP3 operation ! When playing discs with MP3 files and audio data (CD-DA) such as CD-EXTRA and MIXED- MODE CDs, both types can be played only by switching mode between MP3 and CD-DA by touching DA·MP3 or pressing BAND/ESC. -
Page 46: Playing Tracks In A Random Order
Section Playing MP3 Scanning folders and tracks Touch A.MENU and FUNCTION and then touch REPEAT. While you are using FOLDER, the beginning of each track in the selected folder plays for Touch any of the following touch panel about 10 seconds. When you are using DISC, keys to select the repeat range. -
Page 47: Searching For A Desired Track In The Current
Section Playing MP3 Searching for a desired # When playing back files recorded as VBR (variable bit rate) files, the bit rate value is not dis- track in the current folder played even after switching to bit rate. (VBR will You can use the search function to specify a be displayed.) track to search for a desired track. -
Page 48: Multi-Cd Player
Section Multi-CD Player Listening a CD Touch any of 0106 to select a disc you want to listen to. If you want to select a disc located at 7 to 12, touch PREV or NEXT to display 0712. # When 0106 and 0712 are not displayed, you can display them by touching DISP. -
Page 49: Introduction Of Advanced Multi-Cd Player Operation
Section Multi-CD Player Introduction of advanced peat), TRACK (one-track repeat) and DISC (disc repeat). multi-CD player operation Touch A.MENU and FUNCTION and then touch REPEAT. Touch j to select the repeat range. Touch j repeatedly until the desired repeat range appears in the display. ! M-CD Repeat all discs in the multi-CD player ! TRACK Repeat just the current track... -
Page 50: Scanning Cds And Tracks
Section Multi-CD Player Scanning CDs and tracks multi-CD player magazine. After you have added your favorite tracks to the playlist you While you are using DISC, the beginning of can turn on ITS play and play just those selec- each track on the selected disc plays for about tions. -
Page 51: Using Disc Title Functions
Section Multi-CD Player Erasing a CD from your ITS playlist Select the repeat range. Refer to Repeating play on page 49. When you want to delete all tracks of a CD from your ITS playlist, you can if ITS play is off. Touch A.MENU and FUNCTION and then touch NEXT. -
Page 52: Using Cd Text Functions
Section Multi-CD Player Touch TITLE EDIT. ! After data for 100 discs has been stored in memory, data for a new disc will overwrite the Touch ABC to select the desired charac- oldest one. ter type. Touch ABC repeatedly to switch between the Displaying disc titles following character type: Alphabet (upper case), numbers and symbols... -
Page 53: Using Compression And Bass Emphasis
Section Multi-CD Player Scrolling titles in the display one that best enhances the playback of the track or CD that you are listening to. This unit can display the first 19 letters only of DiscTitle, DiscArtist, TrackTitle and T.Artist. Touch A.MENU and FUNCTION and then When the recorded information is longer than touch COMP. -
Page 54: Xm Tuner
Section XM tuner Listening to the XM 5 XM channel select setting indicator Shows what channel select setting has been selected. CH·Number is displayed when CH NUMBER is selected, and Category is displayed when CATEGORY is selected. 6 XM channel name Shows the channel name of broadcast channel. -
Page 55: Introduction Of Advanced Xm Tuner Operation
Section XM tuner Introduction of advanced Storing and recalling XM tuner operation broadcast stations If you touch any of the preset tuning keys P 1P 6 you can easily store up to six broad- cast stations for later recall with the touch of a key. -
Page 56: Selecting The Xm Channel Directly
Section XM tuner % Touch MODE to select the desired chan- Touch 09 to input the desired channel nel select setting. number. Touch MODE repeatedly to switch between # To cancel the input numbers, touch C. the following channel select settings: CH NUMBER (channel number select setting) While the input number is displayed, CATEGORY (channel category select... -
Page 57: Tv Tuner
Section TV tuner Watching the TV tuner Touch BAND to select a band. Touch BAND repeatedly until the desired band is displayed, TV1 or TV2. To perform manual tuning, touch c or d shortly. The channels move up or down step by step. # You can also perform manual tuning by mov- ing the joystick left or right. -
Page 58: Introduction Of Advanced Tv Tuner Operation
Section TV tuner Introduction of advanced % When you find a station that you want to store in memory keep touching a preset TV tuner operation tuning key P01P12 until the preset num- ber stops flashing. The number you have touched will flash in the preset number indicator and then remain lit. - Page 59 Section TV tuner Note Storing broadcast stations with BSSM may re- place broadcast stations you have saved using P01P12.
-
Page 60: Dvd Player
Section DVD Player Playing a disc 6 Play time indicator Shows the elapsed playing time of the cur- rent chapter/track. Touch the source icon and then touch S-DVD to select the DVD player. # When the source icon is not displayed, you can display it by touching the screen. -
Page 61: Selecting A Disc
Section DVD Player Introduction of advanced % Press REAR.S to turn the DVD player DVD player operation # To turn the DVD player off, press REAR.S again. Selecting a disc ! Only when a multi-DVD player is connected to this unit, you can operate this function. % Touch a or b to select a disc. -
Page 62: Pausing Disc Playback
Section DVD Player Scanning tracks of a CD Touch c or d to select the repeat range. ! You can operate this function only during During DVD video playback CD playback. ! TITILE Repeat just the current title ! CHAPTER Repeat just the current chapter Touch A.MENU and FUNCTION and then ! DISC Repeat the current disc touch SCAN. -
Page 63: Audio Adjustments
Section Audio Adjustments Introduction of audio # When selecting the FM tuner as the source, you cannot switch to SLA. adjustments # To return to the previous display, touch BACK. # To return to the display of each source, touch ESC. -
Page 64: Using The Equalizer
Section Audio Adjustments Touch c or d to adjust left/right speak- % Press EQ to select the equalizer. er balance. Press EQ repeatedly to switch between the fol- Each time you touch c or d moves the left/ lowing equalizers: right speaker balance towards the left or the SUPER BASSPOWERFULNATURAL right. -
Page 65: Adjusting Bass And Treble
Section Audio Adjustments +6 6 is displayed as the level is increased Touch A.MENU and AUDIO and then or decreased. touch BASS. Touch b and then touch c or d to se- Touch c or d to select the desired fre- lect the desired frequency. -
Page 66: Using Subwoofer Output
Section Audio Adjustments Touch A.MENU and AUDIO and then Touch b and then touch c or d to se- touch LOUDNESS. lect cut-off frequency. Each time you touch c or d selects cut-off fre- Touch a to turn loudness on. quencies in the following order: 5080125 (Hz) # To turn loudness off, touch b. -
Page 67: Adjusting Source Levels
Section Audio Adjustments Touch A.MENU and AUDIO and then Touch a or b to adjust the source vo- touch NEXT. lume. Each time you touch a or b increases or de- Touch HPF. creases the source volume. +4 4 is displayed as the source volume is Touch a to turn high pass filter on. -
Page 68: Setting The Sound Focus Equalizer (Sfeq)
Section Audio Adjustments Setting the sound focus ! If you switch the SFEQ setting, the HPF func- tion is automatically turned off. By turning the equalizer (SFEQ) HPF function on after selecting the SFEQ set- Clarifying the sound image of vocals and in- ting, you can combine HPF function with struments allows the simple staging of a nat- SFEQ function. -
Page 69: Digital Signal Processor
Section Digital Signal Processor Introduction of DSP # When selecting the FM tuner as the source, you cannot switch to SLA. adjustments # When playing other than the DVD disc, you cannot switch to D. R. C or DUAL MONO. # When neither FRONT-L nor FRONT-R is se- lected in POSITION, you cannot switch to TIME ALIGN. -
Page 70: Using The Position Selector
Section Digital Signal Processor Press EQ to select the desired SFC Display Position mode. FRONT-L Front seat left Press EQ repeatedly to switch between the fol- lowing mode: FRONT-R Front seat right MUSICAL (musical)DRAMA (drama) FRONT Front seats ACTION (action)JAZZ (jazz)HALL (hall) All seats CLUB (club)OFF (off) # To cancel the selected listening position,... -
Page 71: Adjusting Source Levels
Section Digital Signal Processor Using the dynamic range LEFT:25 RIGHT:25 is displayed as the left/ right speaker balance moves from left to control right. The dynamic range refers to the difference be- tween the largest and softest sounds. The dy- namic range control compresses this Adjusting source levels difference so that you can clearly hear sounds... -
Page 72: Using The Direct Control
Section Digital Signal Processor Using the direct control ! No audio is output if the center speaker set- ting is SMALL or LARGE and no center speak- You can override audio settings to check for ef- er is installed. fectiveness of your audio settings. ! Audio is heard only over the center speaker if ! All audio functions are locked out during installed and the center speaker setting is... -
Page 73: Selecting A Cut-Off Frequency
Section Digital Signal Processor Touch c or d to select the correct size select reverse phase and REVERSE appears in for the selected speaker. the display. Each time you touch c or d selects the size in the following order: Note OFF (off)SMALL (small)LARGE (large) When playing a 2-channel mono source with Pro... -
Page 74: Adjusting The Speaker Output Levels
Section Digital Signal Processor Adjusting the speaker Touch TEST TONE. output levels Touch START to start the test tone out- You can readjust the speaker output levels put. using a test tone while listening to music. The test tone is output. It rotates from speaker to speaker in the following sequence at inter- Touch A.MENU and AUDIO and then vals of about two seconds. -
Page 75: Adjusting The Time Alignment
Section Digital Signal Processor Adjusting the time alignment Recalling equalizer curves There are seven stored equalizer curves which By adjusting the distance between each you can easily recall at any time. Here is a list speaker and a selected listening position, you of the equalizer curves: can insert delay times into the speaker output to obtain a correct sound image and overall... - Page 76 Section Digital Signal Processor Adjusting 3-band parametric # You cannot select speakers whose size is set OFF. equalizer For CUSTOM1 and CUSTOM2 equalizer Touch b and then touch c or d to se- curves, you can adjust the front, rear and cen- lect the equalizer band to be adjusted.
-
Page 77: Setting Up The Dvd Player
Section Setting up the DVD player Introduction of DVD setup Note adjustments If you do not operate the DVD setup function within about 30 seconds, the display is automati- cally returned to the playback display. Setting the subtitle language You can set a desired subtitle language. If the selected subtitle language is recorded on the DVD, subtitles are displayed in that language. -
Page 78: Setting The Audio Language
Section Setting up the DVD player When you select OTHERS ! Even if you use AUDIO to switch the audio language, this does not affect the settings When you select OTHERS, a language code here. input display is shown. Refer to Language code chart for DVD on page 95 to input the four digit code of the desired language. -
Page 79: Setting Angle Icon Display
Section Setting up the DVD player Touch A SUB TITL. ! PANSCAN The picture is cut short at the right and left of the screen Touch a to turn assist subtitles on. # To turn assist subtitles off, touch b. Notes ! When playing discs that do not specify PANSCAN, playback is with LETTER BOX... -
Page 80: Setting Remote Control Code Type
DVD, changing the remote control code age, included literature or on the disc itself. type enables you to operate the Pioneer DVD With discs that do not feature a recorded par- player by the supplied remote control. There ental lock level, you cannot use parental lock. -
Page 81: Initial Settings
Section Initial Settings Adjusting initial settings Switching the warning tone If the front panel is not detached from the head unit within five seconds of turning off the ignition, a warning tone will sound. You can turn off the warning tone. Touch A.MENU and INITIAL and then touch DT. -
Page 82: Correcting Distorted Sound
! When the voice guidance is output from a PREOUT FULL appears in the display. Pioneer navigation unit connected to this unit. Notes Touch A.MENU and INITIAL and then ! Even if you change this setting, there is no touch TEL/GUIDE. -
Page 83: Switching The Automatic Disc Playback
Switching the automatic or the guidance voice only. disc playback ! Only when a Pioneer navigation unit is con- nected to this unit, you can operate this You can turn automatic disc playback on or off function. -
Page 84: Other Functions
Section Other Functions Introduction of setup Touch A.MENU and SETUP and then touch AV INPUT. adjustments Touch c or d to select the video input setting. Touch c or d until the desired setting appears in the display. ! OFF No video component is connected ! VIDEO External video component ! M-DVD DVD player connected with RCA cable... -
Page 85: Selecting The Video Of Rear Display
! Only when a Pioneer navigation unit is con- Touch c or d to select the display to nected to this unit, you can switch the open/close automatically or manually. -
Page 86: Using The Aux Source
Section Other Functions Selecting AUX as the source Touch c or d to select the segment of the clock display you wish to set. % Touch the source icon and then touch Each time you touch c or d will select one AUX to select AUX as the source. -
Page 87: Switching The Background Display
Touch c to move 19). backwards in the display. When a Pioneer navigation unit is not con- nected to this unit. Touch OK to store the entered title in ! Dolphin movie will not appear when the touch memory. -
Page 88: Additional Information
Appendix Additional Information Troubleshooting Common Symptom Cause Action (See) Power doesnt turn on. Leads and connectors are incor- Confirm once more that all connections are The unit doesnt operate. rectly connected. correct. The fuse is blown. Rectify the reason for the fuse blowing, then replace the fuse. - Page 89 Appendix Additional Information Symptom Cause Action (See) Rear display picture disappears. The source disc being listened to Before ejecting the disc, switch the source. with the head unit has been ejected. This problem may occur when certain con- nection methods are used. When the ignition switch is This unit confirms whether a disc is This is a normal operation.
-
Page 90: Error Messages
When problems occur with disc playback, an error message appears on the display. Refer to the table below to identify the problem, then take the suggested corrective action. If the error persists, contact your dealer or your nearest PIONEER Service Center. Message... -
Page 91: Dvd Player And Care
Appendix Additional Information DVD player and care DVD discs ! Use only normal, round discs. If you insert ! With some DVD video discs, it may not be irregular, non-round, shaped discs they possible to use certain functions. may jam in the DVD player or not play prop- ! It may not be possible to play back some erly. -
Page 92: Mp3 Files
Appendix Additional Information ! Playback of discs recorded on a personal ! The max. number of characters which can computer may not be possible depending be displayed for a folder name is 32 charac- on the application settings and the environ- ters. -
Page 93: Using The Display Correctly
! If moisture or foreign matter should get inside this unit, turn off the power immediately and consult your dealer or the nearest authorized PIONEER Service Station. Using this unit in this condition may result in a fire or electric shock, or other failure. -
Page 94: Small Fluorescent Tube
Appendix Additional Information ! The display should be used within the tem- ! At low temperatures, the LCD screen may perature ranges shown below. be dark for a while after the power is turned Operating temperature range: 10 to +50 °C ! The LCD screen will be difficult to see if it is Storage temperature range: 20 to +80 °C... -
Page 95: Language Code Chart For Dvd
Appendix Additional Information Language code chart for DVD Language (code), input code Language (code), input code Language (code), input code Japanese (ja), 1001 Guarani (gn), 0714 Pashto, Pushto (ps), 1619 English (en), 0514 Gujarati (gu), 0721 Quechua (qu), 1721 French (fr), 0618 Hausa (ha), 0801 Rhaeto-Romance (rm), 1813 Spanish (es), 0519... -
Page 96: Terms
Appendix Additional Information Terms the year of production, comments and other data. The contents can be freely edited using Aspect ratio software with ID3 Tag editing functions. This is the width-to-height ratio of a TV screen. Although the tags are restricted to the number A regular display has an aspect ratio of 4:3. -
Page 97: Region Number
Appendix Additional Information group (MPEG) of the ISO (International Stan- input is designed to transmit and receive digi- dards Organization). MP3 is able to compress tal signals optically. audio data to about 1/10th the level of a con- ventional disc. Packet write This is a general term for a method of writing MPEG... - Page 98 Appendix Additional Information VBR is short for variable bit rate. Generally speaking CBR (constant bit rate) is more widely used. But to flexibly adjust the bit rate according to the needs of audio compression, it is possible to achieve compression priorities sound quality.
-
Page 99: Specifications
Appendix Additional Information Specifications Load impedance ...... 4 W (4 8 W [2 W for 1 ch] al- lowable) General Preout max output level/output impedance ............. 4.0 V/100W Power source ......14.4 V DC (10.8 15.1 V al- Equalizer (3-Band Parametric Equalizer): lowable) Grounding system .... - Page 100 Appendix Additional Information Number of quantization bits ........... 16/20/24; linear Frequency response ....5 44,000 Hz (with DVD, at sampling frequency 96 kHz) Signal-to-noise ratio ....97 dB (1 kHz) (IHF-A net- work) (CD: 96 dB (1 kHz) (IHF-A network)) Dynamic range ......
- Page 101 Index Angle icon ..........34,.79 Subtitle language ..........77 Aspect ratio ..........79,.96 Audio language ..........78 Title ..............97 TV aspect ............79 Brightness ............23 Video CD ............7 Chapter .............96 Code number ...........79 Color ..............23 Wide screen mode ..........22 Condition memory ..........10 Contrast ............23 Direct search ..........33,.38 Dolby Digital ..........10,.96 DTS .............10,.96 Hue ..............23...
- Page 104 TEL: (03) 9586-6300 PIONEER ELECTRONICS OF CANADA, INC. 300 Allstate Parkway, Markham, Ontario L3R OP2, Canada TEL: (905) 479-4411 PIONEER ELECTRONICS DE MEXICO, S.A. de C.V. Blvd.Manuel Avila Camacho 138 10 piso Col.Lomas de Chapultepec, Mexico, D.F. 11000 TEL: 55-9178-4270 HÒ¡ýÉPlø...