Table of Contents
Quick Links
Table of Contents

Related Manuals for Kenwood DNN9350BT


Summary of Contents for Kenwood DNN9350BT
-
Page 1: Quick Start Guide
CONNECTED NAVIGATION SYSTEM DNN9350BT DNN9350BTM CONNECTED MONITOR WITH DVD RECEIVER DNR8035BT DNR8035BTM Quick Start Guide You can update the system by connecting a USB device containing an update file. For updating the system, visit -
Page 2: Table Of Contents
The Instruction Manual is subject to change for modification of specifications and so forth. Be sure to How to Use the Navigation System download the latest edition of the Instruction Manual (DNN9350BT/ DNN9350BTM) ......14 for reference. How to Play Music ...........16 ✎... -
Page 3: Precautions
Kenwood dealer. Ñ Precautions on using this unit • When you purchase optional accessories, check with your Kenwood dealer to make sure that they work with your model and in your area. • 8-cm (3 inch) discs cannot be used. -
Page 4: To Reset Unit
Ñ Acquiring GPS signal Ñ How To Reset Your Unit (DNN9350BT/ DNN9350BTM) If the unit or the connected unit fails to operate properly, reset the unit. The first time you turn on this unit, you must wait while the system acquires satellite signals for the Press the... -
Page 5: Safety Precautions And Important Information
It does not reflect road follow the instructions in this manual. Neither closures or road conditions, weather conditions, or Kenwood nor Garmin shall be liable for problems other factors that may affect safety or timing while or accidents resulting from failure to observe the driving. -
Page 6: Features Of Connected Systems
• Aupeo! • This unit becomes the Wi-Fi access point • Facebook and you can enjoy music and video in a • Twitter smartphone Wi-Fi connected by Kenwood • Gmail (by Google) Wireless Link. • Google calendar (by Google) • Dropbox... -
Page 7: First Step
Touch the corresponding key and set the First Step item. Power on the unit and perform some setup steps before using. Press the <8HOME> button. DNR8035BT/ Language Setup DNR8035BTM Select the language used for the GUI and input methods. Default is “English (United States)”. HOME 1) Touch [Language Setup]. -
Page 8: Create User Account
Types of accounts Touch [Next]. Administrator Touch the corresponding key and set the As Administrator, you can create an owner account item. and perform initial setup. You can log in to the system if you have not created an owner account. Guest An account for guests such as your friends. - Page 9 Ñ How to prepare the remote control Touch [Finish]. Insert two “AAA”/“R03”-size batteries with the ✎ NOTE poles aligned properly, following the illustration • For details on operations of each setting, refer to the inside the case. Instruction Manual. Touch [Administrator] or [Owner]. CAUTION •...
-
Page 10: Functions Of The Buttons On The Front Panel
• When the panel is closed, pressing for • Displays the navigation screen. 1 second fully opens the panel to the • Pressing for 1 second turns the screen off. location of the SD card slot. (DNN9350BT/ APPS (DNR8035BT/ DNR8035BTM) DNN9350BTM) • Displays the APPS screen. -
Page 11: Common Operation
Ñ How to insert an SD card Ñ List screen (DNN9350BT/ DNN9350BTM) There are some common function keys in the list 1) Press < > button for 1 second. screens of most sources. The panel fully opens. 2) Hold the SD card as the illustration in the right and insert it into the slot until it clicks. -
Page 12: Login
Login Operation on the Home Screen Press thebutton to turn the Press the button to display the power on. Home screen. Select the login user. Flick the screen left or right to select the Service panel, Media panel, Source Enter the password. - Page 13 Adding of a shortcut icon to Source Ñ Source launcher panel launcher panel (Shortcut icon) 1) Touch [ ] in Source launcher panel. You can register sources you use frequently so that 2) Touching the icon continuously to display you can start them quickly. the Source launcher panel screen.
-
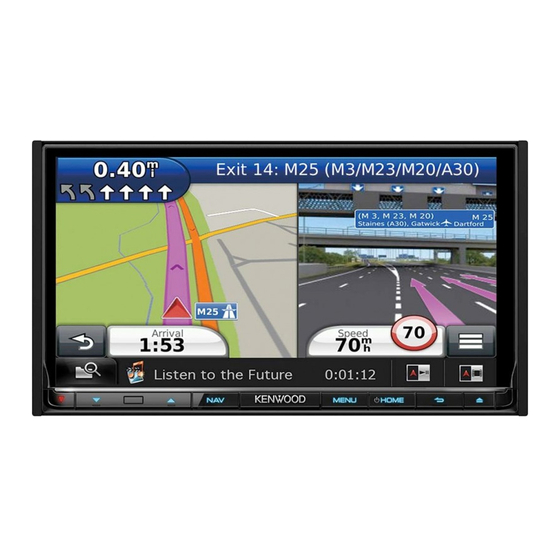
Page 14: How To Use The Navigation System (Dnn9350Bt/ Dnn9350Btm)
Garmin and JVC KENWOOD will not be responsible for any traffic fines or citations that you may receive for failing to follow all applicable traffic laws and signs. -
Page 15: Updating The Software
1) While navigating a route, touch [ ] and You can purchase updated map data from Garmin then touch [Where To?]. or ask your Kenwood dealer or Kenwood service 2) Search for the extra stop. center for details. 1) Go to www.garmin.com/Kenwood. -
Page 16: How To Play Music
Control the music you are listening to on How to Play Music the source control screen. You can play audio files from music CD, disc media, The following symbols indicate the keys on the USB storage device and iPod. screen. The functions of the keys are the same despite the ✎... -
Page 17: How To Play Movie
Control the movie by touching the display. screen. Each area on the screen has a separate function. Refined search 1) Touch [ 2) Touch the desired refinement method. The list is refined by the item you selected. 3) Touch the desired item. Name/Motion 1 Displays the movie control screen. -
Page 18: How To Listen To The Radio
How to Listen to the Radio How to Make a Phone Call You can use your Bluetooth cell-phone when paired Press thebutton twice to the to this unit. Source launcher panel. Register your cell-phone to the unit. Touch [ ] in the Source launcher panel. - Page 19 Call by voice You can make a voice call using the voice recognition function of the cell-phone. 1) Touch [ 2) Pronounce the name registered in the cell- phone. ✎ NOTE When registration of your cell-phone is • For detailed operation, see Using Hands-Free completed, the phone book of the cell- Feature (P.102) in the Instruction Manual.
-
Page 20: Installation
touching to cause a short circuit, then replace the Installation old fuse with one with the same rating. • Insulate unconnected wires with vinyl tape or other Ñ Before Installation similar material. To prevent a short circuit, do not Before installation of this unit, please note the remove the caps on the ends of the unconnected following precautions. - Page 21 Japanese cars 4 or 5 4 or 5 Car Bracket (M5x7mm) 6 ...1 *1 DNN9350BT/ DNN9350BTM only ✎ NOTE • Make sure that the unit is installed securely in place. If the unit is unstable, it may malfunction (eg, the sound may skip).
- Page 22 4) Wire the microphone cable up to the unit with it secured at several positions using tape or other desired method. Ñ GPS antenna (DNN9350BT/ DNN9350BTM) GPS antenna is installed inside of the car. It should be installed as horizontally as possible to allow easy reception of the GPS satellite signals.
- Page 23 Ñ Removing the trim plate Ñ Removing the unit 1) Remove the trim plate by referring to step 1 in 1) Engage the catch pins on the extraction key “Removing the trim plate”. (accessory3) and remove the two locks on the lower level.
- Page 24 Ñ Connecting wires to terminals HDMI/MHL M4 x 8mmMAX iPod/ AV-IN/OUT AV-IN2 AV-OUT REMO AUDIO POWER Ignition key switch Accessory 1 Red (Ignition wire) Speaker impedance: 4-8 Ω White/Black Yellow (Battery wire) To front left speaker Car fuse box Car fuse box White (Main fuse) Black (Ground wire) ¤...
-
Page 25: System Connection
Ñ System connection Accessory 7: GPS Antenna Accessory 9: (DNN9350BT/ DNN9350BTM only) Bluetooth Microphone WI-FI receiver FM/AM antenna input - Reception may drop if there are metal objects near the WiFi Bluetooth antenna and WI-FI Receiver receiver. 5V=500mA - Install the WI-FI receiver... - Page 26 Ñ 3 way speaker system setup Region code 3 area Connect the speaker wires HDMI/MHL M4 x 8mmMAX iPod/ AV-IN/OUT AV-IN2 AV-OUT REMO AUDIO POWER Subwoofer Preout - Red (Audio Right Output) - White (Audio Left Output) Accessory 1 Mid Range Preout - Red (Audio Right Output) Speaker impedance: 4-8 Ω...
- Page 27 Switching between speaker systems Touch [Yes]. Switch to the 3 way speaker system following the The 2 way speaker system is switched to the 3 way procedure below. speaker system. ✎ NOTE • Be sure to set the speaker network correctly. •...
- Page 28 USB terminal (0.8m) iPod/ USB maximum power supply current : Accessory - Steering remote harness Connect to vehicle's steering remote harness. Contact your Kenwood dealer for details. USB terminal (0.8m) (DNN9350BT/ DNN9350BTM only) USB maximum power supply current : 500 mA ñ...
-
Page 29: Ipod/ Iphone/ Android Setup
iPod/ iPhone/ Android setup iPod/iPhone (sold separately) Ñ Android connection To connect the Android device with this unit, the cable (sold separately) and the profile which Lightning to USB Cable your Android device supports are necessary as (accessory of the iPod/iPhone) follows: ... - Page 30 • Do not leave the cable or the adapter made by Made for Type other makers inside the car. It might lead the • iPod with video malfunction caused by heat. • iPod nano (7th generation) A B F • iPod nano (6th generation) iPod/iPhone connection setup •...
- Page 31 Touch [Done]. Select the device installed the apps. ✎ NOTE • When you select “HDMI + BT” or “Bluetooth” in step 5, Bluetooth device selection screen will appear. Select the iPod/iPhone to be connected. Select the way to connect the device with this unit.
-
Page 32: About This Unit
[Search] and do the pairing of the devices. the Bluetooth SIG, Inc. and any use of such marks by • “Application link setup” also appears when the unit JVC KENWOOD Corporation is under license. Other is reset. trademarks and trade names are those of their •... - Page 33 • Adobe, Acrobat and Reader are either registered IN A PERSONAL ACTIVITY AND/OR WAS OBTAINED trademarks or trademarks of Adobe Systems FROM A VIDEO PROVIDER LICENSED TO PROVIDE Incorporated in the United States and/or other AVC VIDEO. NO LICENSE IS GRANTED OR SHALL countries.
- Page 34 Collector” User’s Agreement (“Agreement”) sets forth (4) Should any third parties suffer losses or damages the terms and conditions for use of the KENWOOD as a result of the User’s use of the Service, we shall Route Network Service “Route Collector” provided by assume no responsibility therefor.
- Page 35 (10) Acts that cause or that may likely cause trouble, 9. User Information disadvantages or damages to us or third parties In order to take advantage of the Service, the User (11) Use of the Service for illegal purposes must first register user account name, password, the User’s valid e-mail address and arbitrary (12) Other acts deemed inappropriate by us User’s information via the next page (collectively...
-
Page 36: Laser Product
Sembollü (üzerinde çarpı işareti Netherlands olan çöp kutusu) ürünler ev atıkları English olarak atılamaz. Hereby, JVC KENWOOD declares that this unit Eski elektrik ve elektronik DNN9350BTM/ DNR8035BTM is in compliance ekipmanlar, bu ürünleri ve ürün with the essential requirements and other atıklarını...