NEC SL1000 User Manual
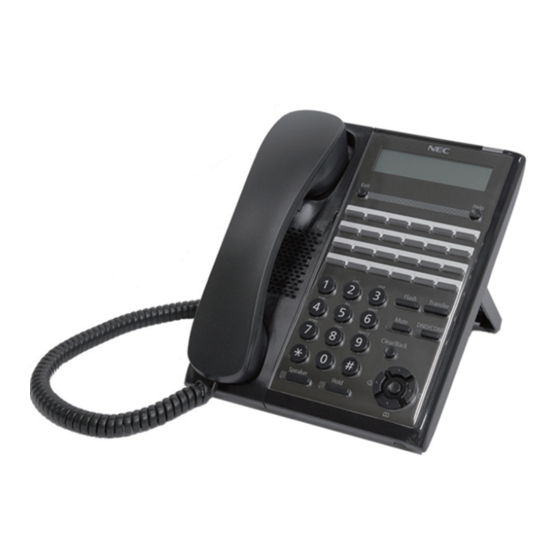
Multi-line telephone
Hide thumbs
Also See for SL1000:
- Features and specifications manual (814 pages) ,
- Programming manual (666 pages) ,
- Hardware manual (150 pages)

Related Manuals for NEC SL1000


Summary of Contents for NEC SL1000
- Page 1 Multi-Line Telephone User Guide Please read this manual carefully before Operating this product and save this manual for future use. A50-031674-001 Issue 1.0 January 2011...
- Page 2 Thank you for purchasing NEC SL1000 system. Due to the flexibility built into the system, your Dialing Codes and Feature Capacities may differ from those in this guide. Check with your NEC Authorized Supplier / System Administrator and make a note of any differences.
-
Page 3: Controls & Functions
Using Your Telephone < Multi-line Telephone> IP4WW-( )*TXH-A TEL Call Indicator Lamp This lamp flashes fast when a call is ringing and flashes slower when a message has been left. Alphanumeric Display The LCD has 2 lines with 16 characters. Exit Key Exit any screen and return the display to “Time &... -
Page 4: Program Function Keys
Telephone Number Extension Number To change Trunk Access Code, Ask your NEC Authorized Supplier for details. In the default setting, Programmable Function Key No. 1 to 12 is assigned as “Trunk” Key. If you want to assign DSS Keys at the unused Trunk Keys, these unused keys shoul d be erased by “ 852 + 000”... -
Page 5: Register Abbreviated Dialing
The digit of Bin No. depends on the system setting. (0-9(Group ABB) / 00-99 / 000-999) System setting is necessary for Group ABB function. Ask your NEC Authorized Supplier for more details. Name can be entered by Dial Pad Keys. (See below) ... -
Page 6: Placing Calls
Trunk Key Listen for Dial Tone before dialing a Telephone Number. You can have function keys for Trunks or Trunk Groups. Ask your NEC Authorized Supplier. Place an Outside CallTrunk Access Code Telephone Number Speaker Trunk Group No. -
Page 7: Placing Calls Quickly
Telephone Numbers shall be pre-registered to the system. System setti ng is nec essary for Group AB B functi on. As k your NEC Authorized S upplier f or more details. One-Touch Call... -
Page 8
If your call doesn’t go through… Set Camp On / Callback
Wait without hanging up (Hear Busy Tone Camp On Key or No Answer) Wait for the system to call you back (851+35) Key In case of Intercom Call, when you hear ringing, wait for the called party to answer. -
Page 9: Repeat Dialing
(851+29) Key (Hear Busy Tone or No answer) The system pe riodically redials the call. Repeat duratio n is progr ammable. Ask your NEC Authorized Supplier. You should lift the handset when the called party answered. - 8 -... -
Page 10: Answering An Outside Call
(851+24) Key Speaker In Other Groups Call Pickup for other Group Key (851+25) Key Extension Number Pickup for Speaker Specified Extension System setting is necessary to make Call Pickup Group. Ask your NEC Authorized Supplier. - 9 -... -
Page 11: Hold / Transferring Calls
Trunk No. you want to retrieve Speaker Transfer (To answer own held Trunk) For the dial digit of Trunk Number, Ask your NEC Authorized Supplier for details. Transferring a Call to the other Extension Extension Number Hold (Talking) -
Page 12: Do Not Disturb (Dnd)
When you set DND function, DND/CONF Key’s lamp is lit and the Internal Dial Tone pattern is changed. For the Room Monitor feature, ask your NEC Authorized supplier for details. Call Forwarding / Follow Me To Call Forward Immediate... -
Page 13: Conference
You can repeat this operation to add more parties. You may be able to have up to 16 parties. (include your extension) May need to adjust the level due to the Environment phones are placed. Ask your NEC Authori zed Supplier for the details. - 12 -... -
Page 14: Menu Structure
Basic Use Menu Structure of the Navigation Keys… Menu Structure The following table shows Basic Use Menu Structure of the Navigation keys. Main Menu 100: Call History 110: Missed Call 111 – 11x: Missed Call Data 120: Received Call 121 –... -
Page 15: Check Call History
Using Navigation Keys… Check Call History Display shows 100:OPRN LST 1/4 >Call History: XX (On-Hook) xx: Received Call Numbers Check Missed Call & Call Back (Example. Receive a call from ABC Ltd./ Phone 0356551234) Display shows 110: Call HTY 1/3 >Missed Call: XX (On-Hook) xx: Missed Call Numbers... -
Page 16: Dialed Number
Using Navigation Keys… Check Dialed Number Data & Call using Dialed number (Example. Dialed data is 0356551234.) Display shows 130:Call HTY 3/3 >Dialed Number (On-Hook) (Twice) (Twice) 0356551234 01/xx 131:OCT-22 16:52 (You can select by Up/Down key.) 0356551234 01/05 You can confirm the >Calling Number or Name. -
Page 17: To Record/Listen To/Erase Vrs Answering Message
Built-In Answering Machine (VRS Message) ☛ System setting is necessary to use Built-In Answering Machine. Ask your NEC Authorized Supplier for details. To Record a VRS Answering Message Message Number Message Record (001-004) (Message Recording) (Message Listening) Stop Recording ... - Page 18 Built-In Answering Machine (Voice Mail Message) When an outside caller left a message…..then… Extension 200 (Multi-line Telephone) shows… VOICE MESSAGE xx MESSAGES ☞ XX shows the number of message left. To Listen to a Voice Mail Message Message Number Message Listen (091-100) (Message Listening)
- Page 19 VRS – Checking Time/Date & Station Number ☛ Optional Units and System setting is necessary to use VRS feature. Ask your NEC Authorized Supplier for details. To Listen to the Time/Date, Station Number Station Number Time&Date (On-Hook) (On-Hook) InMail – Setting the Voice Mail Control Keys ☛...
-
Page 20: Main Menu
InMail – Guidance Message Flow Voice Mail lets callers leave recorded messages for you and lets you leave recorded Main Menu messages for co-workers. Messages get stored in each person’ s mailbox. To listen to your messages or use other Voice Mail features, call your mailbox and access the Main Menu. - Page 21 InMail – Listen to Messages Left for You There are two ways to listen to message in your mailbox; ・Pressing the Voice Mail key to listen to messages. ・Following the voice guidance to listen to Massage. Pressing the Voice Mail Key to Listen to Message Voice Mail Key Voice Mail Key (851+77) Key...
-
Page 22: To Forward Incoming Calls To Your Mailbox When Your Phone Is Busy
InMail – Sending Calls to a MailBox To Forward your phone to Voice Mail To Forward All Incoming Calls to Your Mailbox Voice Mail Pilot Number Speaker Speaker Call Forward Cancel Immediate Key (851+10) Key To Forward Incoming Calls to Your Mailbox When Your Phone is Busy Voice Mail Pilot Number Speaker Speaker... -
Page 23: After You Call An Extension
InMail – Sending Calls to a MailBox An Additional Way to Call Your Mailbox (From Outside) To Call Your Mailbox From Outside Automated Attendant Number Mailbox Number (Hear 1 (Hear 2 (Call to the Greeting ) Greeting ) system from Outside) ☞(Optional) Enter your Security Code if you have set one in mailbox options Additional Ways to Record a Message... - Page 24 NEC Corporation has prepared this document for use by its employees and customers. The information contained herein is the property of NEC Corporation and shall not be reproduced without prior written approval of NEC Corporation. SL1000 is a trademark of NEC Corporation.