Fujitsu LifeBook P Series Manual
Lifebook p series notebook
Hide thumbs
Also See for LifeBook P Series:
- Manual (120 pages) ,
- Easy manual (45 pages) ,
- User manual (120 pages)
Table of Contents
Quick Links
See also:
User Manual
Copyright & Trademark Information
Fujitsu Computer Systems Corporation has made every
effort to ensure the accuracy and completeness of this
document. However, as ongoing development efforts are
continually improving the capabilities of our products,
we cannot guarantee the accuracy of the contents of this
document. We disclaim liability for errors, omissions, or
future changes.
Fujitsu, the Fujitsu logo, and LifeBook are registered
trademarks of Fujitsu Limited.
Microsoft, MS-DOS, and Windows are either registered
trademarks or trademarks of Microsoft Corporation in
the United States and/or other countries.
Atheros and Super AG are registered trademarks of
Atheros Communications, Inc.
Adobe, Acrobat, and Acrobat Reader are either regis-
tered trademarks or trademarks of Adobe Systems
Incorporated in the United States and/or other coun-
tries.
Realtek is a trademark of Realtek Semiconductor Corpo-
ration.
Bluetooth is a registered trademark of Bluetooth SIG,
Inc.
This device complies with Part 15 of the FCC rules. Operations are subject to the following two conditions:
(1) This device must not be allowed to cause harmful interference, (2) This device must accept any interference
received, including interference that may cause undesired operation.
DECLARATION OF CONFORMITY
according to FCC Part 15
Responsible Party Name:
Address:
Telephone:
Declares that product:
C o p y r i g h t
All other trademarks mentioned herein are the property
of their respective owners.
© Copyright 2005 Fujitsu Computer Systems Corpora-
tion. All rights reserved. No part of this publication may
be copied, reproduced, or translated, without prior
written consent of Fujitsu Computer Systems Corpora-
tion. No part of this publication may be stored or trans-
mitted in any electronic form without the written
consent of Fujitsu Computer Systems Corporation.
B6FH-6861-01EN-00
Handling the cord on this product or cords
associated with accessories sold with this
product, will expose you to lead, a
chemical known to the State of California
to cause birth defects or other
reproductive harm.
Wash hands after handling.
Fujitsu Computer Systems Corporation
1250 E. Arques Avenue, MS 122
Sunnyvale, CA 94085
(408) 746-6000
Model Configuration:
LifeBook P1510D Notebook
Complies with Part 15 of the FCC Rules.
WARNING
Chapters
Table of Contents
Troubleshooting

Related Manuals for Fujitsu LifeBook P Series


Summary of Contents for Fujitsu LifeBook P Series
-
Page 1: Declaration Of Conformity
Fujitsu Computer Systems Corpora- future changes. tion. No part of this publication may be stored or trans- Fujitsu, the Fujitsu logo, and LifeBook are registered mitted in any electronic form without the written trademarks of Fujitsu Limited. - Page 2 L i f e B o o k P S e r i e s N o t e b o o k IMPORTANT SAFETY INSTRUCTIONS For Authorized Repair Technicians Only This unit requires an AC adapter to operate. Use only UL Danger of explosion if Lithium (clock) bat- Listed Class 2 Adapters with an output rating of 16 tery is incorrectly replaced.
-
Page 3: Table Of Contents
About This Guide ......3 Fujitsu Contact Information ....3 LifeBook Application Panel Warranty . - Page 4 Care and Maintenance Memory Upgrade Module LifeBook P Series notebook ....65 Installing Memory Upgrade Modules ..39 Keyboard .
- Page 5 T a b l e o f C o n t e n t s APPENDIX A: INTEGRATED WIRELESS LAN USER’S GUIDE Before Using the Wireless LAN Wireless LAN Modes Using this Device..86 Wireless Network Considerations .
- Page 6 L i f e B o o k P S e r i e s...
- Page 7 Preface...
- Page 8 L i f e B o o k P S e r i e s N o t e b o o k...
-
Page 9: Preface
Product serial number ■ operating system pre-installed. Purchase date ■ Your LifeBook P Series notebook is a completely self- Conditions under which the problem occurred ■ contained unit with an active-matrix (TFT) color LCD Any error messages that have occurred ■... - Page 10 L i f e B o o k P S e r i e s N o t e b o o k...
-
Page 11: Getting To Know Your Lifebook
Getting to Know Your LifeBook... - Page 12 L i f e B o o k P S e r i e s N o t e b o o k - S e c t i o n T w o...
-
Page 13: Overview
■ A variety of optional accessories is available for use with your LifeBook P Series notebook. For the latest list of You may also have one or more of the following devices accessories available, be sure to frequently check the in the box, depending upon the configuration of your Fujitsu Web site at: www.shopfujitsu.com. -
Page 14: Locating The Controls And Connectors
L i f e B o o k P S e r i e s N o t e b o o k - S e c t i o n T w o Locating the Controls and Connectors Connectors and peripheral interfaces on the LifeBook P provides a short description of each icon on the Life- Series notebook and the optional port replicator allow Book P Series notebook. -
Page 15: Front And Display Components
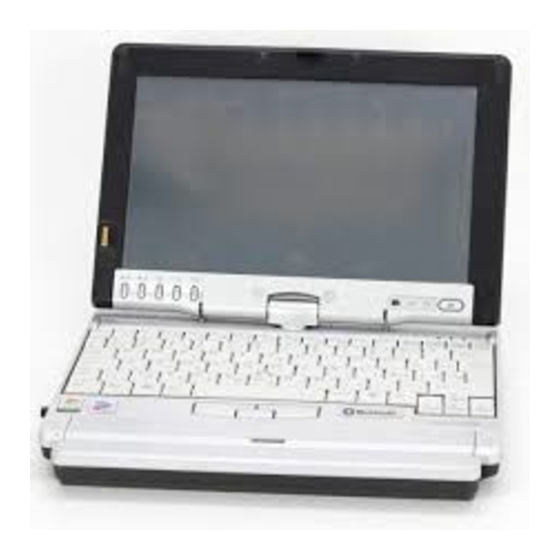
Touchpad Pointing Rotation Hinge Built-in Microphone Device (in front of keyboard) Figure 2-4. LifeBook P Series notebook with display open FRONT AND DISPLAY COMPONENTS Keyboard A full-function keyboard with dedicated Windows keys. The following is a brief description of the front and See “Keyboard”... -
Page 16: Left-Side Panel Components
Compact Flash Card Slot Compact Flash Card Headphone Jack USB 2.0 Port Eject Button Figure 2-5. LifeBook P Series notebook left-side panel LEFT-SIDE PANEL COMPONENTS Following is a brief description of your notebook’s left- side components. (Figure 2-5) USB 2.0 Port The USB 2.0 port allow you to connect Universal Serial... -
Page 17: Right-Side Panel Components
Secure Digital (SD) Card Slot Pen/Pen Holder USB 2.0 Port DC Power Jack WLAN On/Off Switch Figure 2-6. LifeBook P Series notebook right-side panel RIGHT-SIDE PANEL COMPONENTS Following is a brief description of your notebook’s right- side components. Pen/Pen Holder The pen is used as the interface with the digitizer display. -
Page 18: Rear Panel Components
Video Port (behind cover) LAN (RJ-45) Port Anti-theft Lock Slot Air Vents Figure 2-7. LifeBook P Series notebook rear panel REAR PANEL COMPONENTS Air Vents The air vents allow proper air circulation to ensure that Modem (RJ-11) Telephone Port the notebook does not overheat... -
Page 19: Bottom Components
Pack Latch Latch Lithium ion Battery Figure 2-8. LifeBook P Series notebook bottom panel BOTTOM COMPONENTS compartment allows you to expand the system memory capacity of your notebook, hence improving overall Following is a brief description of your notebook’s performance. See “Memory Upgrade Module” on bottom panel components. -
Page 20: Status Indicators
L i f e B o o k P S e r i e s N o t e b o o k - S e c t i o n T w o AC Adapter/ Hard Drive Access Charging Battery Level Power Button/ Indicator... -
Page 21: Numlk Indicator
G e t t i n g t o K n o w Y o u r T a b l e t P C NUMLK INDICATOR The NumLk indicator shows that the integral keyboard is set in ten-key numeric keypad mode. CAPSLOCK INDICATOR The CapsLock indicator shows that your keyboard is set to type in all capital letters. -
Page 22: Display Panel
4. Push the latch towards the display (See “A” in Figure 2-11). The latch will click twice and the top The convertible design of your LifeBook P Series note- latch disappears, and the bottom latch appears (See book allows you to open the display fully, rotate it 180 “B”... -
Page 23: Adjusting Display Panel Brightness
Using the Fujitsu Menu to Adjust Brightness To adjust brightness using the Fujitsu menu, click on the Fujitsu Menu icon in the system tray in the lower right corner of the screen. From the menu that appears, select Brightness Control. The Brightness Control window will open. -
Page 24: Keyboard
NumLk can be activated by pressing the [NumLk] key. Turning off the NumLk feature is done the same way. Your LifeBook P Series notebook has an integral 82-key Once this feature is activated you can enter numerals 0 keyboard. The keys perform all the standard functions of... -
Page 25: Function Keys
G e t t i n g t o K n o w Y o u r T a b l e t P C FUNCTION KEYS Your notebook has 12 function keys, F1 through F12. The functions assigned to these keys differ for each application. -
Page 26: Lifebook Application Panel
All five of the buttons have primary functions. Four of the buttons have secondary functions when used as A unique feature of your LifeBook P Series notebook is application buttons. The secondary functions are acti- the application panel buttons. These buttons allow you... -
Page 27: Changing Button Functions
Refer to specific details above. Pressing the Fn button twice in succession causes the Fujitsu Menu Utility to appear on your screen, allowing you to modify certain system settings. Ctl+Alt+Del Button... -
Page 28: Clicking
L i f e B o o k P S e r i e s N o t e b o o k - S e c t i o n T w o Left Button Scroll Button Right Button Cursor Control Figure 2-18. -
Page 29: Quick Point Control Adjustment
QUICK POINT CONTROL ADJUSTMENT To purchase additional or replacement The Windows Control Panel allows you to customize styluses, visit Fujitsu’s accessories web site your Quick Point with selections made from within the at: www.shopfujitsu.com. Mouse Properties dialog box. There are three aspects of... - Page 30 L i f e B o o k P S e r i e s N o t e b o o k - S e c t i o n T w o Dragging Dragging means moving an item with the stylus by touching the screen, moving and then lifting the stylus.
-
Page 31: Volume Control
G e t t i n g t o K n o w Y o u r T a b l e t P C Volume Control Your Fujitsu LifeBook notebook has multiple volume controls which interact with each other. - Page 32 L i f e B o o k P S e r i e s N o t e b o o k - S e c t i o n T w o...
-
Page 33: Using Your Lifebook
Using Your LifeBook... - Page 34 L i f e B o o k P S e r i e s N o t e b o o k - S e c t i o n T h r e e...
-
Page 35: Power Sources
Power Sources Connecting the Optional Auto/Airline Adapter 1. Plug the DC output cable into the DC power jack Your LifeBook P Series notebook has three possible on your notebook. power sources: a primary Lithium ion battery, an AC 2. Plug the Auto/Airline adapter into the cigarette adapter or an optional Auto/Airline adapter. -
Page 36: Starting Your Lifebook
BIOS Setup The Suspend/Resume button is used to turn on your Utility, the system displays the operating system’s LifeBook P Series notebook from its off state. Once you opening screen. have connected your AC adapter or charged the internal Lithium ion battery, you can power on your notebook. -
Page 37: Booting The System
When you turn on your LifeBook notebook for the first time, it will display a Fujitsu logo on the screen. If you You will need to be set up with an Internet Service do nothing the system will load the operating system, Provider (ISP) to register online. -
Page 38: Power Management
L i f e B o o k P S e r i e s N o t e b o o k - S e c t i o n T h r e e Power Management Your LifeBook P Series notebook has many options and Besides the options available for conserving battery features for conserving battery power. -
Page 39: Hibernate Mode
G e t t i n g S t a r t e d from Standby mode, your notebook will return to the Using Hibernate Mode point where it left off. To resume operation, you must Hibernate default setting is enabled for Windows XP. use the Suspend/Resume button to resume operation, To enable or disable the Hibernation feature follow these and there must be an adequate power source available,... -
Page 40: Power Off
L i f e B o o k P S e r i e s N o t e b o o k - S e c t i o n T h r e e Turning off your notebook without exiting Windows or turning on your notebook within 10 seconds of the notebook being shut off may cause an error when you start... -
Page 41: User-Installable Features
User-Installable Features... - Page 42 L i f e B o o k P S e r i e s N o t e b o o k - S e c t i o n F o u r...
-
Page 43: Lithium Ion Battery
The Lithium ion battery is recharged internally using the AC adapter or Auto/Airline adapter. To recharge the Your LifeBook P Series notebook has a Lithium ion battery make sure the battery that needs to be charged is battery that provides power for operating your note- installed in your notebook and connect the AC or Auto/ book when no external power source is available. -
Page 44: Replacing The Battery
REPLACING THE BATTERY Your LifeBook P Series notebook comes with one battery pack; you might want to consider purchasing a spare. By keeping a spare battery fully charged, you can immedi- Figure 4-1. -
Page 45: Memory Upgrade Module
You will hear a click when it is prop- Your Fujitsu LifeBook P Series notebook comes with a erly in place. minimum of 256 MB of high speed Double Data Rate Synchronous Dynamic RAM 2 (DDR2 SDRAM), 400 MHz factory installed. -
Page 46: Checking The Memory Capacity
L i f e B o o k P S e r i e s N o t e b o o k - S e c t i o n F o u r CHECKING THE MEMORY CAPACITY Once you have changed the system memory capacity by either adding or removing a memory upgrade module, be sure to check that your notebook has recognized the change. -
Page 47: Secure Digital Media
U s e r - I n s t a l l a b l e F e a t u r e s SD Card Slot SD Card Figure 4-5. Inserting an SD Card Secure Digital Media REMOVING AN SD CARD To remove an SD Card, first see your SD Card manual Your LifeBook notebook supports Secure Digital (SD) for instructions. -
Page 48: Compact Flash Cards
Flash Card Compact Flash Card Eject Button Figure 4-6. Compact Flash Card Slot Compact Flash Cards Your Fujitsu LifeBook notebook supports Compact Flash (CF) cards, which can perform a variety of func- tions. Some available Compact Flash Cards: Memory cards ■... -
Page 49: Removing Compact Flash Cards
U s e r I n s t a l l a b l e F e a t u r e s REMOVING COMPACT FLASH CARDS To remove a Compact Flash Card, follow these easy steps: Windows has a shutdown procedure for Compact Flash Cards that must be fol- lowed before removing a card. -
Page 50: Port Replicator
Port Replicator Release Latch Figure 4-8. Port Replicator rear panel Port Replicator An optional Port Replicator is available from Fujitsu to Docking Port support your LifeBook P Series notebook. The Port The docking port connects the Port Replicator to your LifeBook notebook. - Page 51 U s e r - I n s t a l l a b l e F e a t u r e s Figure 4-10. Unlatching the Port Replicator 2. Pull the notebook away from the Port Replicator to detach (Figure 4-14) it from your notebook.
-
Page 52: Device Ports
Device Ports Note that the optional Port Replicator is designed to cover the LAN jack located on Your LifeBook P Series notebook and the optional Port the system. This design ensures that the Replicator come equipped with multiple Device Ports to... -
Page 53: External Video Port
U s e r - I n s t a l l a b l e F e a t u r e s If you plug headphones into the headphone jack, the built-in stereo speakers will be disabled. EXTERNAL VIDEO PORT The external video port allows you to connect an external monitor or LCD projector. - Page 54 L i f e B o o k P S e r i e s N o t e b o o k - S e c t i o n F o u r...
-
Page 55: Troubleshooting
Troubleshooting... - Page 56 L i f e B o o k P S e r i e s N o t e b o o k - S e c t i o n F i v e...
-
Page 57: Troubleshooting
Before you place the call, you should have the following information ready so that the customer support repre- Your LifeBook P Series notebook is sturdy and subject to sentative can provide you with the fastest possible solu- few problems in the field. However, you may encounter... -
Page 58: Troubleshooting Table
L i f e B o o k P S e r i e s N o t e b o o k - S e c t i o n F i v e TROUBLESHOOTING TABLE Problem Page Problem Page Audio Problems . -
Page 59: Pen Input Problems
T r o u b l e s h o o t i n g Problem Possible Cause Possible Solutions You have installed an Your external device is not Re-install your device. See “Device Ports” on page 46. external keyboard or properly installed. -
Page 60: Power Failures
L i f e B o o k P S e r i e s N o t e b o o k - S e c t i o n F i v e Problem Possible Cause Possible Solutions Power Failures You turn on your notebook The installed battery is... -
Page 61: Shutdown And Startup Problems
Set the operating source by pressing the [F2] key and displays power-on the setup utility are not while the Fujitsu logo is on screen, entering the information, but fails to compatible with your setup utility and adjusting the source settings from load the operating system. -
Page 62: Video Problems
L i f e B o o k P S e r i e s N o t e b o o k - S e c t i o n F i v e Problem Possible Cause Possible Solutions An error message is Power On Self Test (POST) has See the Power On Self Test (POST) messages to... -
Page 63: Miscellaneous Problems
T r o u b l e s h o o t i n g Problem Possible Cause Possible Solutions The display goes blank by The power management time- Press any button on the keyboard, or move the mouse itself after you have been outs may be set for very short to restore operation. -
Page 64: Power On Self Test Messages
L i f e B o o k P S e r i e s N o t e b o o k - S e c t i o n F i v e POWER ON SELF TEST MESSAGES *Keyboard controller error The keyboard controller test failed. -
Page 65: Modem Result Codes
T r o u b l e s h o o t i n g MODEM RESULT CODES *Real time clock error Real-time clock fails BIOS test. May require board The operating system and application software that is repair. Contact your support representative. factory installed detects the modem characteristics and provides the necessary command strings to operate the *Shadow RAM Failed at offset: nnnn... -
Page 66: Restoring Your Pre-Installed Software
6. After the components are installed, click [OK], then The Drivers and Applications Restore (DAR) CD click [Yes] when asked if you want to reboot the contains sets of device drivers and Fujitsu utilities (in system. specific directories) that are unique to your notebook... -
Page 67: Automatically Downloading Driver Updates
Driver Update (FDU) utility. With FDU, you can choose • If Legacy USB Support is disabled, press the space to automatically or manually go to the Fujitsu site to bar to enable it. check for new updates for your system. - Page 68 L i f e B o o k P S e r i e s N o t e b o o k - S e c t i o n F i v e...
-
Page 69: Care And Maintenance
Care and Maintenance... - Page 70 L i f e B o o k P S e r i e s N o t e b o o k - S e c t i o n S i x...
-
Page 71: Lifebook P Series Notebook
Do not expose your notebook to direct sunlight for ■ long periods of time as temperatures above 140° F If you use your LifeBook P Series notebook carefully, (60° C) may damage your notebook. you will increase its life and reliability. This section Keep the covers closed on the connectors and slots ■... -
Page 72: Keyboard
L i f e B o o k P S e r i e s N o t e b o o k - S e c t i o n S i x may mix with coins, keys, or other metal objects. Outlet Type Location Doing so may cause an explosion or fire. -
Page 73: Optional Optical Drive And Discs
C a r e a n d M a i n t e n a n c e OPTIONAL OPTICAL DRIVE AND DISCS Caring for your Optional Optical Drive Your optical drive is durable but you must treat it with Caring for your discs care. - Page 74 L i f e B o o k P S e r i e s N o t e b o o k - S e c t i o n S i x...
-
Page 75: Specifications
Specifications... - Page 76 L i f e B o o k P S e r i e s N o t e b o o k - S e c t i o n S e v e n...
-
Page 77: Configuration Label
• 30 GB or 60 GB IDE (4200 rpm) CONFIGURATION LABEL ATA 100 Your LifeBook P Series notebook has a configuration • Shock-mounted label located on the bottom. (See figure 2-8 on page 13 • SMART Support for location). This label contains specific information regarding the options you’ve chosen for your notebook. -
Page 78: Power Specifications
L i f e B o o k P S e r i e s N o t e b o o k - S e c t i o n S e v e n LifeBook P Series notebook Specifications (Continued) -
Page 79: Regulatory Information
RENs should not exceed five (5.0). To be certain of the Changes or modifications not expressly number of devices that may be connected to a line, as approved by Fujitsu could void this user’s determined by the total RENs, contact the local tele- authority to operate the equipment phone company. - Page 80 Any repairs or alterations not expressly approved by présent matériel est de 0.1B. L’IES assigné à chaque Fujitsu or any equipment failures may give the telecom- dispositif terminal indique le nombre maximal de munication company cause to request the user to terminaux qui peuvent être raccordés à...
- Page 81 Glossary...
- Page 82 L i f e B o o k P S e r i e s N o t e b o o k - S e c t i o n E i g h t...
-
Page 83: Glossary
G l o s s a r y Glossary AC Adapter Cache Memory A device which converts the AC voltage from a wall A block of memory built into the micro-processor outlet to the DC voltage needed to power your note- which is much faster to access than your system RAM book. - Page 84 L i f e B o o k P S e r i e s N o t e b o o k - S e c t i o n E i g h t DHCP Extended Capability Port. A set of standards for high Dynamic Host Configuration Protocol speed data communication and interconnection A protocol used for automatically fetching communica-...
- Page 85 G l o s s a r y IEEE802.11a One of the wireless LAN standards prescribed by the 802 Interrupt Request committee in charge of establishing standards of LAN An acronym for the hardware signal to the CPU that an technology in IEEE (Institute of Electrical and Elec- external event has occurred which needs to be tronic Engineers).
- Page 86 L i f e B o o k P S e r i e s N o t e b o o k - S e c t i o n E i g h t MIDI actual communications, the same network key must be Musical Instrument Digital Interface.
- Page 87 G l o s s a r y Protocol is enabled the hard drive monitors pre-determined drive attributes that are susceptible to degradation over time. Procedures and rules use to send and receive data If a failure is likely to occur, SMART makes a status between computers.
- Page 88 L i f e B o o k P S e r i e s N o t e b o o k - S e c t i o n E i g h t Thin Film Transistor – A technology for flat display panels which uses a thin film matrix of transistors to control each pixel of the display screen individually.
-
Page 89: Appendix A: Integrated
Appendix A Integrated Wireless LAN* User’s Guide *Optional Device... - Page 90 L i f e B o o k P S e r i e s N o t e b o o k - A p p e n d i x A...
-
Page 91: Wireless Lan User's Guide
This device must not be co-located or operating in conjunc- undesirable operation. Modifications not expressly autho- tion with any other antenna or transmitter. rized by Fujitsu Computer Systems Corporation may invali- date the user's right to operate this equipment. For operation within 5.15~5.25 GHz frequency range, it is... -
Page 92: Before Using The Wireless Lan
L i f e B o o k P S e r i e s N o t e b o o k - A p p e n d i x A Before Using the Wireless LAN This manual describes the procedures required to prop- The maximum communication range indoors is ■... -
Page 93: Wireless Network Considerations
The Oper- certain environments require it (i.e. hospitals, clinics, ating System that your mobile computer comes with has airplanes, etc.). Fujitsu mobile computers employ two been pre-configured to support the WLAN device. methods with which to deactivate the WLAN device: Using the Wireless On/Off Switch, or, ■... -
Page 94: Activating The Wlan Device
L i f e B o o k P S e r i e s N o t e b o o k - A p p e n d i x A Deactivation using Atheros Client Utility software Click [Start] -> [Program Files] -> [Atheros] -> Atheros Client Utility. -
Page 95: Configuration Of The Wlan Device
W i r e l e s s L A N U s e r ’ s G u i d e Configuration of the WLAN Device The optional WLAN device can be configured to estab- otherwise Click the [New] button. The Profile lish wireless network connectivity using the Atheros Management dialog displays. -
Page 96: Connection To The Network
L i f e B o o k P S e r i e s N o t e b o o k - A p p e n d i x A Double-click [Network Connections]. A list of cur- rently installed networks will be displayed. - Page 97 W i r e l e s s L A N U s e r ’ s G u i d e If [File and Printer Sharing for Microsoft Net- To change the name, click [Change] and works] is displayed, proceed to step 6. If [File and then proceed in accordance with the Printer Sharing for Microsoft Networks] is not dis- instruction messages displayed on the...
- Page 98 L i f e B o o k P S e r i e s N o t e b o o k - A p p e n d i x A Click [My Network Places] in the “Other Places” To specify the corresponding folder as a list.
-
Page 99: Troubleshooting The Wlan
W i r e l e s s L A N U s e r ’ s G u i d e Troubleshooting the WLAN TROUBLESHOOTING TABLE Causes and countermeasures for troubles you may encounter while using your wireless LAN are described in the following table. -
Page 100: Glossary
L i f e B o o k P S e r i e s N o t e b o o k - A p p e n d i x A Wireless LAN Glossary GLOSSARY MAC address (Media Access Control Address) A MAC address (also called an Ethernet address or IEEE MAC address) is the 48-bit address (typically written as Ad Hoc Mode... - Page 101 W i r e l e s s L A N U s e r ’ s G u i d e Shared key authentication 802.11 network authentication method in which the AP sends the client device a challenge text packet that the client must then encrypt with the correct WEP key and return to the AP.
-
Page 102: Ip Address Information
L i f e B o o k P S e r i e s N o t e b o o k - A p p e n d i x A IP address information ABOUT IP ADDRESSES IP addressing is much more complicated than can be briefly explained in this document. -
Page 103: Specifications
W i r e l e s s L A N U s e r ’ s G u i d e Specifications Item Specification Type of network Atheros Super AG (802.11a+b/g) WLAN device conforms to IEEE 802.11a and 802.11b/g (Wi-Fi based)* Transfer rate (Automatic switching) IEEE 802.11a/g: 54 Mbps maximum data rate (108 Mbps... - Page 104 L i f e B o o k P S e r i e s N o t e b o o k - A p p e n d i x A...
-
Page 105: Appendix B: Using The Fingerprint Swipe Sensor
Appendix B Using the Fingerprint Swipe Sensor... - Page 106 L i f e B o o k T S e r i e s T a b l e t P C - A p p e n d i x B...
-
Page 107: Fingerprint Sensor Device
F I n g e r p r i n t S e n s o r U s e r ’ s G u i d e Fingerprint Sensor Device INSTALLING OMNIPASS If OmniPass has already been installed on your system, skip this section and go directly to “User Enrollment”... -
Page 108: User Enrollment
L i f e B o o k T S e r i e s T a b l e t P C - A p p e n d i x B Verifying Information about OmniPass to gain access. This can result in dozens of sets of creden- After you have completed installing OmniPass and tials that you have to remember. -
Page 109: Using Omnipass
F I n g e r p r i n t S e n s o r U s e r ’ s G u i d e will be your Windows computer name. In a corpo- 3. Once OmniPass has successfully acquired the finger- rate environment, or when accessing corporate print, the Verify Fingerprint screen will automati- resources, the Domain: may not be your Windows... - Page 110 L i f e B o o k T S e r i e s T a b l e t P C - A p p e n d i x B Go to a site that requires a login (username and pass- Click Finish to complete the remember password proce- word), but do not log in yet.
-
Page 111: Configuring Omnipass
F I n g e r p r i n t S e n s o r U s e r ’ s G u i d e You can view the credentials stored for any remembered Choosing User Identity during Login website by highlighting the desired resource under Pass- To choose your identity during login, type your user- word Protected Dialog and clicking Unmask Values. -
Page 112: Omnipass Control Center
L i f e B o o k T S e r i e s T a b l e t P C - A p p e n d i x B Exporting an OmniPass User Profile If you export an OmniPass-only user, you can import ■... -
Page 113: Troubleshooting
F I n g e r p r i n t S e n s o r U s e r ’ s G u i d e you can set how OmniPass notifies the user of OmniPass correct setting should be Classic - Local Users Authen- events (e.g., successful login, access denied, etc.). - Page 114 L i f e B o o k T S e r i e s T a b l e t P C - A p p e n d i x B...
-
Page 115: Floppy Disk
........38 Fujitsu Driver Update utility ....61 shorted . -
Page 116: Memory Stick
........14 LifeBook P Series notebook specifications management . - Page 117 I n d e x Security lock slot ....... 8 Shut Down .
- Page 118 L i f e B o o k P S e r i e s N o t e b o o k - I n d e x...