Brother ADS-2000 User Manual
Advanced document scanner
Hide thumbs
Also See for ADS-2000:
- Service manual (124 pages) ,
- Product safety manual (20 pages) ,
- Manual (16 pages)

Related Manuals for Brother ADS-2000


Summary of Contents for Brother ADS-2000
- Page 1 HTML Version 0 ©2012 Brother Industries, Ltd. All rights reserved. file:///C|/Documents%20and%20Settings/mcampbell.AM/My%20Documents/ADS2000solutions/index.html[3/11/2013 10:23:20 AM]...
- Page 2 Scan From Your Computer Scan Using the Scan Key on the Control Panel of the Machine Managing the Machine ADS-2000 from Your Computer Routine Maintenance Troubleshooting Specifications Appendix Index Version 0 ©2012 Brother Industries, Ltd. All rights reserved. file:///C|/Documents%20and%20Settings/mcampbell.AM/My%20Documents/ADS2000solutions/index-1.html[3/11/2013 10:23:24 AM]...
- Page 3 USER’S GUIDE ADS-2000 Version 0 file:///C|/Documents%20and%20Settings/mcampbell.AM/My%20Documents/ADS2000solutions/cover1d.html[3/11/2013 10:23:24 AM]...
-
Page 4: General Information
General Information General Information User's Guides and where to find them? Which manual? What's in it? Where is it? Product Safety Guide Read this Guide first. Please read the Safety Printed / In the box Instructions before you set up your machine. See this Guide for trademarks and legal limitations. -
Page 5: Using The Documentation
1 General Information Using the Documentation Thank you for buying a Brother machine! Reading the documentation will help you make the most of your machine. Symbols and Conventions Used in the Documentation The following symbols and conventions are used throughout the documentation. -
Page 6: Before Scanning
Before using the Scan to PC key, the Scan to USB key or attempting any other scanning operation, confirm the following: • Make sure you have installed the Brother software (MFL-Pro Suite) by following the steps in the Quick Setup Guide. - Page 7 Scan From Your Computer 3 Scan From Your Computer ® Change the User Interface of ControlCenter4 (Windows ControlCenter4 has two operation modes: Home Mode and Advanced Mode. You can change the mode at any time. • Home Mode Lets you access your machine's main functions easily. You can intuitively use the functions without any settings. 1.
- Page 8 Scan From Your Computer Gives you more control over the details of your machine's functions. You can also customize one-button scan actions as you like. 1. Image button Lets you scan a document directly into any graphic viewer/editor application. 2. OCR button Lets you scan a document and convert it to text.
- Page 9 Scan From Your Computer • Click ControlCenter4 located in Start/All Programs/Brother/ADS-XXXX (where XXXX is your model name). Click Configuration and then select Mode Select. Select Home Mode or Advanced Mode in the mode dialog box. Page Top file:///C|/Documents%20and%20Settings/mcampbell.AM/My%20Documents/ADS2000solutions/chapter3.html[3/11/2013 10:23:27 AM]...
- Page 10 ® ® XP, Windows Vista Double-click the (ControlCenter4) icon in the task tray. • Click ControlCenter4 located in Start/All Programs/Brother/ADS-XXXX (where XXXX is your model name). Click the Device Settings tab (the example below uses Home Mode). file:///C|/Documents%20and%20Settings/mcampbell.AM/My%20Documents/ADS2000solutions/chapter4.html[3/11/2013 10:23:28 AM]...
- Page 11 Scan Using the Scan Key on the Control Panel of the Machine Click the Scan to PC Settings button. The Remote Setup window will appear. Select Image from the drop-down list. Click the OK button to close the Remote Setup window. Click the Device Scan Settings button on the Device Settings tab.
- Page 12 Scan Using the Scan Key on the Control Panel of the Machine Select PDF from the File Type drop-down list. Note • To save the document as a password-protected PDF, select Secure PDF (*.pdf) from the File Type drop- down list, click the (Set PDF Password) button, and enter the password.
- Page 13 Scan Using the Scan Key on the Control Panel of the Machine file:///C|/Documents%20and%20Settings/mcampbell.AM/My%20Documents/ADS2000solutions/chapter4.html[3/11/2013 10:23:28 AM]...
- Page 14 Lets you access the troubleshooting web site by clicking the Troubleshooting button. • Visit the Genuine Supplies website Lets you access the Brother genuine supplies web site by clicking the Visit the Genuine Supplies website button. • Pick-up Roller Count Displays the Pick-up Roller replacement cycle.
- Page 15 Managing the Machine from Your Computer select Help. Page Top file:///C|/Documents%20and%20Settings/mcampbell.AM/My%20Documents/ADS2000solutions/chapter5.html[3/11/2013 10:23:28 AM]...
-
Page 16: Routine Maintenance
Routine Maintenance 6 Routine Maintenance Clean the Outside of the Machine Wipe the outside of the machine with a dry, soft, and lint-free cloth to remove dust. Open the Top Cover. Wipe the Control Panel with a dry, soft, and lint-free cloth to remove dust. Close the Top Cover. - Page 17 Routine Maintenance Fold the Document Stopper and firmly insert the Output Tray into the machine. Page Top file:///C|/Documents%20and%20Settings/mcampbell.AM/My%20Documents/ADS2000solutions/chapter6.html[3/11/2013 10:23:29 AM]...
-
Page 18: Troubleshooting
Troubleshooting 7 Troubleshooting Identifying Your Problem First, check the following: • The AC power cord is connected properly and the machine is turned on. • All of the protective parts have been removed. • The Front Cover, Separation Pad Cover and Pick-up Roller Cover are completely closed. •... -
Page 19: Specifications
Specifications A Specifications General Note This chapter provides a summary of the machine’s specifications. For additional specifications, visit http://www.brother.com/ for details. Memory Capacity Standard 256 MB Power Source 100 - 120 V AC 50/60 Hz Latin American 220 - 240 V AC 50/60 Hz... - Page 20 Specifications Weights Approx. 7.3 lb (3.3 kg) Temperature Operating 41 to 95 °F (5 to 35 °C) Humidity Operating 20 to 80 % ADF (automatic document feeder) Up to 50 pages (Paper: 20 lb (80 g/m ) Letter or A4 size, or less than 0.2 in.
- Page 21 Specifications Page Top file:///C|/Documents%20and%20Settings/mcampbell.AM/My%20Documents/ADS2000solutions/appendix11.html[3/11/2013 10:23:30 AM]...
-
Page 22: Brother Numbers
For Customer Service Register Your Product By registering your product with Brother International Corporation, you will be recorded as the original owner of the product. Your registration with Brother: • may serve as confirmation of the purchase date of your product should you lose your receipt;... - Page 23 Index Brother Brother numbers Brother Numbers Customer Service For Customer Service FAQs (frequently asked questions) FAQs (frequently asked questions) product support For Customer Service Solutions Center FAQs (frequently asked questions) ControlCenter2 Macintosh Scan Using ControlCenter2 (Macintosh) Scan Using the Scan Key on the Control...
- Page 24 Scan Using Presto! PageManager or TWAIN Applications (Macintosh) Remote Setup Change Scan to USB Key Settings ® (Windows and Macintosh) Set Up the Brother Machine from Your Computer Replace the Separation Pad Replace the Pick-up Roller Scan Macintosh ICA compliant Scan Using Apple Image Capture (ICA Driver - Mac OS X 10.6.x, 10.7.x)
- Page 25 index Panel of the Machine (Macintosh) Change Scan to PC Key Settings (Macintosh) Save Scanned Documents to a USB Flash Memory Drive Save Scanned Documents on Mobile Devices Save Scanned Documents to a USB Flash Memory Drive Save Scanned Documents on Mobile Devices Change Scan to USB Key Settings ®...
-
Page 26: About This Machine
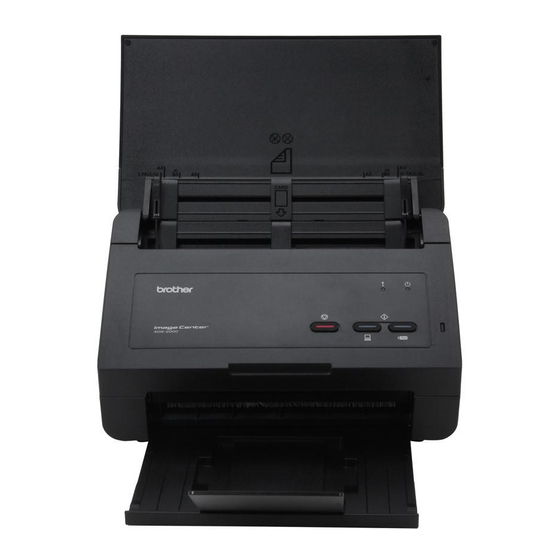
About This Machine About This Machine 1. Top Cover The machine is turned on by opening the Top Cover. 2. Document Guides 3. Front Cover 4. Output Tray 5. Document Stopper 6. USB Direct Interface 7. Cover Release Lever 8. AC Power Connector 9. - Page 27 Loading Receipts and Other Thin Documents Loading Receipts and Other Thin Documents Make sure documents with ink or correction fluid are completely dry. Open the Top Cover (1). Insert the document into the Carrier Sheet. Note Set the document in the center of the Carrier Sheet and align the top of the document with the top of the Carrier Sheet.
- Page 28 Loading Receipts and Other Thin Documents machine. Pull the Output Tray out of the machine and then unfold the Document Stopper. Page Top file:///C|/Documents%20and%20Settings/mcampbell.AM/My%20Documents/ADS2000solutions/chapter1_5_7.html[3/11/2013 10:23:33 AM]...
-
Page 29: Scanning Methods
Scanning Methods Scanning Methods There are two ways to scan using your Brother machine. • Scan to PC • Scan to USB Scan to PC The Scan to PC feature lets you scan your document and save the scanned image into your computer. Before using the Scan to PC feature, you must install MFL-Pro Suite from the supplied DVD-ROM and the machine must be connected to the computer. -
Page 30: Scan To Usb
Scan to USB Scan to USB The Scan to USB feature lets you scan your document and save the scanned image into a USB device. You can start scanning using the Scan to USB feature by pressing the Scan to USB key. Before scanning, you can configure the settings from your computer. -
Page 31: Scan Photos And Graphics
Scan Using ControlCenter4 Home Mode (Windows Brother provides a software interface for your machine called ControlCenter. You can use this software to quickly scan photos and save them as JPEGs or PDFs, as well as other file formats. You can also scan single-sided and two-sided documents and save them as PDFs or use OCR (Optical Character Recognition) to convert them to editable text. - Page 32 ® XP, Windows Vista Double-click the (ControlCenter4) icon in the task tray. • Click ControlCenter4 located in Start/All Programs/Brother/ADS-XXXX (where XXXX is your model name). Select the Scan tab. Do one of the following: • Select Photo, Text and Graph, or Monochrome Text in the Document Type option for the type of original you want to scan.
- Page 33 Scan Using ControlCenter4 Home Mode (Windows®) Crop the scanned image if needed (see Crop Scanned Image). Do one of the following: • Click the (Save) button to save the scanned data. See Save Scanned Documents. • Click the (Open with an Application) button to open the scanned data in another application. See Scan to an Application.
- Page 34 Scan Using ControlCenter4 Home Mode (Windows®) Auto Automatically selects suitable colors for your document. Brightness Adjust the setting (-50 to 50) to get the best image. The default value of 0 represents an average and is usually suitable for most images. You can set the Brightness level by dragging the slider to the right or left to lighten or darken the image.
- Page 35 Scan Using ControlCenter4 Home Mode (Windows®) • Set the document in the center of the Carrier Sheet and align the top of the document with the top of the Carrier Sheet. Plastic Card Mode Lets you scan non-embossed cards, such as driver's licenses or insurance cards, using these automatic settings: •...
- Page 36 Scan Using ControlCenter4 Home Mode (Windows®) this function detects a multifeed, confirm that the data scanned before the multifeed has been saved, and then start scanning again at the next page or the beginning of the document. Display Scanning Results Shows the numbers of total pages saved and blank pages skipped on your computer screen.
- Page 37 Scan Using ControlCenter4 Home Mode (Windows®) Image Editing Toolbar 1. Restart Cancels all the edits applied to the selected image. The edited image returns to its original state. 2. Fit to Window Displays the scanned image so that the entire image fits in the window. 3.
- Page 38 Scan Using ControlCenter4 Home Mode (Windows®) 2. Zooms in on the image. 3. Zooms out of the image. 4. Rotates the image counter-clockwise by 90 degrees. 5. Rotates the image clockwise by 90 degrees. 6. Drag the frame to adjust the area to be cropped. Click the OK button.
- Page 39 Scan Using ControlCenter4 Home Mode (Windows®) scanned document to. Click the OK button. The scanned document is saved in the destination folder. Page Top Open with an Application (Open with an Application) button lets you scan an image directly into your graphics application for image editing.
- Page 40 Scan Using Captiva QuickScan Pro™ or ISIS™ Applications (Windows®) ® Scan Using Captiva QuickScan Pro™ or ISIS™ Applications (Windows You can use the free trial version of Captiva QuickScan Pro™ or other applications, which support ISIS™ specifications, for scanning. Before scanning using the ISIS™ applications, you must install the ISIS™ scanner driver. Note To install the ISIS™...
- Page 41 XP, Windows Vista Double-click the (ControlCenter4) icon in the task tray. • Click ControlCenter4 located in Start/All Programs/Brother/ADS-XXXX (where XXXX is your model name). Click the Device Settings tab (the example below uses Home Mode). Click the Scan to PC Settings button. The Remote Setup window will appear.
- Page 42 Scan Photos and Graphics Click the OK button to close the Remote Setup window. Click the Device Scan Settings button on the Device Settings tab. The Device Scan Settings dialog box will appear. Click the Image tab. Change other settings if needed (see Change Scan to PC Settings).
- Page 43 Scan Photos and Graphics Load your document. Press Scan to PC. The machine starts scanning. Page Top file:///C|/Documents%20and%20Settings/mcampbell.AM/My%20Documents/ADS2000solutions/chapter4_1_2.html[3/11/2013 10:23:37 AM]...
- Page 44 XP, Windows Vista Double-click the (ControlCenter4) icon in the task tray. • Click ControlCenter4 located in Start/All Programs/Brother/ADS-XXXX (where XXXX is your model name). Click the Device Settings tab (the example below uses Home Mode). Click the Scan to PC Settings button. The Remote Setup window will appear.
- Page 45 Scan to E-mail attachment Click the OK button to close the Remote Setup window. Click the Device Scan Settings button on the Device Settings tab. The Device Scan Settings dialog box will appear. Click the E-mail tab. Change other settings if needed (see Change Scan to PC Settings).
- Page 46 Scan to E-mail attachment Load your document. Press Scan to PC. The machine starts scanning the document, creates a file attachment, and launches your E- mail application displaying the new message waiting to be addressed. Page Top file:///C|/Documents%20and%20Settings/mcampbell.AM/My%20Documents/ADS2000solutions/chapter4_1_3.html[3/11/2013 10:23:38 AM]...
- Page 47 XP, Windows Vista Double-click the (ControlCenter4) icon in the task tray. • Click ControlCenter4 located in Start/All Programs/Brother/ADS-XXXX (where XXXX is your model name). Click the Device Settings tab (the example below uses Home Mode). Click the Scan to PC Settings button. The Remote Setup window will appear.
- Page 48 Scan to an Editable Text File (OCR) Click the OK button to close the Remote Setup window. Click the Device Scan Settings button on the Device Settings tab. The Device Scan Settings dialog box will appear. Click the OCR tab. Change other settings if needed (see Change Scan to PC Settings).
- Page 49 Scan to an Editable Text File (OCR) Load your document. Press Scan to PC. The machine scans the document, converts it into editable text, then sends it to your default word processing application. Page Top file:///C|/Documents%20and%20Settings/mcampbell.AM/My%20Documents/ADS2000solutions/chapter4_1_4.html[3/11/2013 10:23:39 AM]...
- Page 50 XP, Windows Vista Double-click the (ControlCenter4) icon in the task tray. • Click ControlCenter4 located in Start/All Programs/Brother/ADS-XXXX (where XXXX is your model name). Click the Device Settings tab (the example below uses Home Mode). Click the Scan to PC Settings button. The Remote Setup window will appear.
- Page 51 Change the Feature Assigned to the Scan to PC Key to set the Default Scan-to Action Click the OK button. Page Top file:///C|/Documents%20and%20Settings/mcampbell.AM/My%20Documents/ADS2000solutions/chapter4_1_5.html[3/11/2013 10:23:40 AM]...
- Page 52 XP, Windows Vista Double-click the (ControlCenter4) icon in the task tray. • Click ControlCenter4 located in Start/All Programs/Brother/ADS-XXXX (where XXXX is your model name). Click the Device Settings tab (the example below uses Home Mode). Click the Remote Setup button. The Remote Setup window will appear.
- Page 53 Save Scanned Documents to a USB Flash Memory Drive Change other settings if needed (see Change Scan Settings). Insert a USB flash memory drive into your machine. Load your document. Press Scan to USB on the control panel. The machine starts scanning. Important DO NOT remove the USB flash memory drive while the Scan to USB key is blinking to avoid damaging the drive or the data stored on it.
- Page 54 • The machine does not support charging any USB devices. • Brother Image Viewer for Android™, which is available for download from the Android™ Market, enables users to view or edit the scanned data. For details, download the Brother Image Viewer for Android™.
- Page 55 XP, Windows Vista Double-click the (ControlCenter4) icon in the task tray. • Click ControlCenter4 located in Start/All Programs/Brother/ADS-XXXX (where XXXX is your model name). Click the Device Settings tab (the example below uses Home Mode). Click the Device Scan Settings button. The Device Scan Settings dialog box will appear.
- Page 56 Change Scan to PC Settings Select the tab for the Scan-to action you want to change (Image, OCR, E-mail, or File). Change the settings. The following settings can be changed. Setting Description Applicable Feature Image E-mail File File Type Select the file type you want to use for the scanned data.
- Page 57 Change Scan to PC Settings Nuance™ PaperPort™12SE must be installed on your computer. • Several file types such as TIFF, TIFF Multi-Page, PDF, Secure PDF and JPEG support file size compression. Select Uncompressed or Compressed to adjust the file size for TIFF or TIFF Multi-Page.
- Page 58 Change Scan to PC Settings 24bit Color Uses up to 16.8 million colors to scan the image. Although using 24bit Color creates an image with the most accurate color reproduction, it requires the most memory and has the longest transfer time. Auto Uses suitable colors for your document automatically.
- Page 59 Change Scan to PC Settings setting Scan Type to Auto, Gray (Error Diffusion), True Gray or 24bit Color. Duplex(two- If you check this box, the machine scans both sides of sided) Scanning the document. When using the automatic 2-sided (duplex) scan feature, you must select Long-edge binding or Short-edge binding depending on the layout of your original to make sure that the data file created appears correctly in the scanned document.
- Page 60 Change Scan to PC Settings Note • If you want to scan a plastic card with different settings, set Plastic Card Mode off, Resolution to 600 dpi, and Multifeed Detection to Off. • Load only one plastic card at a time. Click the Advanced Settings button.
- Page 61 Change Scan to PC Settings Click the OK button to close the Device Scan Settings dialog box. Page Top file:///C|/Documents%20and%20Settings/mcampbell.AM/My%20Documents/ADS2000solutions/chapter4_2_19.html[3/11/2013 10:23:42 AM]...
-
Page 62: Change Scan Settings
The ControlCenter2 window will appear. Note (ControlCenter2) icon is not displayed in the menu bar, double-click the ControlCenter icon. The ControlCenter icon is in Macintosh HD/Applications/Brother. (ControlCenter2) icon will appear in the menu bar. Click the DEVICE SETTINGS tab. file:///C|/Documents%20and%20Settings/mcampbell.AM/My%20Documents/ADS2000solutions/chapter4_5_8.html[3/11/2013 10:23:43 AM]... - Page 63 You can also start Remote Setup by following the instructions below: ® • Windows Click Start, All Programs, Brother, ADS-XXXX, and Remote Setup. • Macintosh Double-click the RemoteSetup icon located in Macintosh HD/Applications/Brother. Select Scan to USB in the folder tree.
- Page 64 Change Scan Settings Change the settings. The following settings can be changed. Setting Description Scan Type Lets you select from a range of scan color depth. • B&W Use for text or line art images. • Gray Use for photographic images or graphics. •...
- Page 65 Change Scan Settings To save the document as a password-protected PDF, select Secure PDF from the File Type(Gray) drop-down list, and then enter the password (the default value is “0000”) in the Password for Secure PDF field. File Type(Color) Lets you select a file type for scanning in color. Select a file type you want to use for the scanned data.
- Page 66 Change Scan Settings entered, the file name will be the date and a sequential number. File Size(Gray) Lets you select a file size for scanning in gray. Select a file size you want to use for the scanned data. File Size(Color) Lets you select a file size for scanning in color.
- Page 67 Turn Off the Status Monitor Turn Off the Status Monitor Right-click the Brother Status Monitor icon and then click Load Status Monitor on Startup to clear the check mark. Right-click again then click Exit. Page Top file:///C|/Documents%20and%20Settings/mcampbell.AM/My%20Documents/ADS2000solutions/chapter5_1_2.html[3/11/2013 10:23:44 AM]...
- Page 68 What are the Status Monitor Indicators? What are the Status Monitor Indicators? Once you start up your computer, the Brother Status Monitor icon appears on the tasktray. A green icon indicates the normal stand-by condition. A yellow icon indicates a warning.
- Page 69 The ControlCenter2 window will appear. Note (ControlCenter2) icon is not displayed in the menu bar, double-click the ControlCenter icon. The ControlCenter icon is in Macintosh HD/Applications/Brother. (ControlCenter2) icon will appear in the menu bar. Click the DEVICE SETTINGS tab. file:///C|/Documents%20and%20Settings/mcampbell.AM/My%20Documents/ADS2000solutions/chapter5_3_3.html[3/11/2013 10:23:45 AM]...
- Page 70 Note You can also start Remote Setup by following the instructions below: ® • Windows Click Start, All Programs, Brother, ADS-XXXX, and Remote Setup. • Macintosh Double-click the RemoteSetup icon located in Macintosh HD/Applications/Brother. Select Language in the folder tree.
- Page 71 Change the Language on Remote Setup Select a language from the Language on Remote Setup drop-down list. Click the OK button. Note After you change the language in the Remote Setup window, restart Remote Setup to see the change. Page Top file:///C|/Documents%20and%20Settings/mcampbell.AM/My%20Documents/ADS2000solutions/chapter5_3_3.html[3/11/2013 10:23:45 AM]...
-
Page 72: Clean The Scanner
Clean the Scanner Clean the Scanner A spot of dirt or correction fluid on the glass strip may cause poor-quality scans. Clean the inside of the scanner if a vertical line appears in the scanned data or if areas are missing in the scanned data. Unplug the machine from the AC power outlet. - Page 73 Clean the Scanner Press and hold the green buttons (1) of the Separation Pad and then pull the Separation Pad (2) upward. CAUTION DO NOT touch the metal part of the Separation Pad Cover. Doing this may cause injury to you and serious damage to the machine.
- Page 74 Clean the Scanner Hold both sides of the Pick-up Roller Cover (1) and then pull the cover down. Slide the Pick-up Roller (1) to the right edge. The holder of the Pick-up Roller has a narrow opening that is designed to avoid dropping the roller, and the shape of the shaft of the Pick-up Roller matches the opening.
- Page 75 Clean the Scanner Slide the Pick-up Roller (1) to the left edge while turning the Pick-up Roller. Close the Pick-up Roller Cover. Close the Front Cover and the Top Cover. CAUTION DO NOT touch the metal part of the Separation Pad Cover. Doing this may cause injury to you and serious damage to the machine.
- Page 76 Clean the Scanner Note In addition to cleaning the glass strips with a non-flammable glass cleaner, run your fingertip over the glass to see if you can feel anything on it. If you feel dirt or debris, clean the glass again concentrating on that area. You may need to repeat the cleaning process three or four times.
-
Page 77: Packing And Shipping The Machine
Packing and Shipping the Machine Packing and Shipping the Machine When you transport the machine, use the packing materials that came with your machine. If you do not pack the machine properly, any damage that may occur in transit may not be covered by your warranty. The machine should be adequately insured with the carrier. - Page 78 Packing and Shipping the Machine Note If you are returning your machine to Brother as part of the Exchange Service, pack only the machine. Keep all separate parts (power cord, carrier sheet and USB cable) and printed materials to use with your “Exchange”...
-
Page 79: Error Messages In The Status Monitor
Error Messages in the Status Monitor Error Messages in the Status Monitor The Status Monitor will report problems with the machine. Take the proper action by referring to the following table. ® If you want to turn the status monitor on, see Monitor the Status of the Machine from Your Computer (Windows Monitor the Status of the Machine from Your Computer (Macintosh). - Page 80 Error Messages in the Status Monitor again. Document Jam Clear the document jam (see Document Jam) and • The Document Guides are not set to then do the following: the correct document size. • Adjust the Document Guides to fit the width of •...
-
Page 81: Control Panel Overview
Control Panel Overview Control Panel Overview 1. Error Indicator (with LED) The Error Indicator indicates that the machine is in one of the following states: Document Jam / Front Cover is Open / Unusable Device / Unsupported Device / Multifeed Detection etc. 2. - Page 82 Control Panel Overview The machine is ready to scan. Ready (PC connected) The machine is connected to your computer and ready to scan. Ready (USB connected) The USB device is connected to the machine and ready to scan. Ready (PC and USB connected) The machine is connected to your computer and a USB device and is ready to scan.
- Page 83 Control Panel Overview Scanning to PC Scan to your computer is in process. Note The Scan to USB key lights up when the USB flash memory drive is connected to the machine. Scanning to USB Scan to your USB device is in process. Note The Scan to PC key lights up when your computer is connected to the machine.
- Page 84 Control Panel Overview Replace Separation Pad Replace the Separation Pad with a new one. See Replace the Separation Pad. Replace Pick-up Roller Replace the Pick-up Roller with a new one. See Replace the Pick-up Roller. Replace Separation Pad and Pick-up Roller Replace the Separation Pad and the Pick-up Roller with new ones.
- Page 85 Control Panel Overview • See ® Custom Scan Settings to scan using ControlCenter4 Home Mode (Windows and follow the steps. • See Change Scan Settings to scan using ControlCenter4 Advanced Mode ® (Windows ) and follow the steps. • See Change Scan Settings to scan using ControlCenter2 (Macintosh) and follow the steps.
- Page 86 Control Panel Overview steps. ® • See Change Scan to PC Settings to scan using the Scan to PC key (Windows and follow the steps. • See Change Scan Settings to scan using the Scan to PC key (Macintosh) and follow the steps.
- Page 87 Control Panel Overview USB flash memory drive, press any key and then do one of the following: • Turn off the USB flash memory drive's write-protection and then try again. • Use a USB flash memory drive that has write-protection turned off. Too Many Files Your machine cannot save to a USB flash memory drive if it contains too many files.
- Page 88 Change Scan Settings to scan using the Scan to PC key (Macintosh) and follow the steps. Machine Error Make a note of the LED indication and report the indication to your dealer or to Brother Customer Service. Page Top file:///C|/Documents%20and%20Settings/mcampbell.AM/My%20Documents/ADS2000solutions/chapter1_3.html[3/11/2013 10:23:49 AM]...
-
Page 89: Scanning Difficulties
Cause Suggestions TWAIN or WIA errors TWAIN or WIA driver has not been Make sure the Brother TWAIN or WIA driver is appear when starting chosen as the primary source in your chosen as the primary source in your scanning ®... - Page 90 Scanning Difficulties document. and you are scanning a document that contains multiple page sizes, insert narrow pages straight • The Auto Deskew feature was set to and as close to the center of the machine as On when the document was possible.
- Page 91 Scanning Difficulties • See Change Scan to PC Settings to scan ® using the Scan to PC key (Windows ) and follow the steps. • See Change Scan Settings to scan using the Scan to PC key (Macintosh) and follow the steps.
- Page 92 Scanning Difficulties • Use the Carrier Sheet to scan the overlapped • The document is sticky or has a document. sticky note on it, which caused an overlap. The document is • Paper dust has accumulated on the • Clean the Separation Pad and Pick-up Roller. jammed.
- Page 93 Scanning Difficulties Bleed through is seen The settings are not appropriate for the Check the Bleed Through Prevention/Base Color in the scan data. type of document being scanned. Removal check box. Colors in the scanned The settings are not appropriate for the Do one of the following: data are dark.
-
Page 94: Software Difficulties
Software Difficulties Software Difficulties Difficulty Suggestions ® Cannot install software. (Windows users only) Run the Repair MFL-Pro Suite program on the DVD-ROM. This program will repair and reinstall the software. Page Top file:///C|/Documents%20and%20Settings/mcampbell.AM/My%20Documents/ADS2000solutions/chapter7_6.html[3/11/2013 10:23:52 AM]... - Page 95 Other Difficulties Other Difficulties Difficulty Cause Suggestions The machine is not The machine was plugged in within 60 Turn off the machine, wait 60 seconds, and then turned on. seconds after pulling out the plug. turn on the scanner. Cannot start Remote •...
- Page 96 The ControlCenter2 window will appear. Note (ControlCenter2) icon is not displayed in the menu bar, double-click the ControlCenter icon. The ControlCenter icon is in Macintosh HD/Applications/Brother. (ControlCenter2) icon will appear in the menu bar. Click the DEVICE SETTINGS tab. file:///C|/Documents%20and%20Settings/mcampbell.AM/My%20Documents/ADS2000solutions/chapter7_8_2.html[3/11/2013 10:23:53 AM]...
- Page 97 You can also start Remote Setup by following the instructions below: ® • Windows Click Start, All Programs, Brother, ADS-XXXX, and Remote Setup. • Macintosh Double-click the RemoteSetup icon located in Macintosh HD/Applications/Brother. Select Machine Info. in the folder tree. The window will display the Main Controller Main ROM Version.
- Page 98 Check the ROM Version Page Top file:///C|/Documents%20and%20Settings/mcampbell.AM/My%20Documents/ADS2000solutions/chapter7_8_2.html[3/11/2013 10:23:53 AM]...
- Page 99 ® ® ® Windows XP in this User’s Guide includes Windows XP Home Edition and Windows XP Professional. For the latest driver updates for the Mac OS X you are using, visit us at http://solutions.brother.com/. Page Top file:///C|/Documents%20and%20Settings/mcampbell.AM/My%20Documents/ADS2000solutions/appendix11_2.html[3/11/2013 10:23:54 AM]...
-
Page 100: Computer Requirements
2 GB 10.7.x Conditions: Third party USB ports are not supported. For the latest driver updates, visit us at Nuance™ PaperPort™12SE supports (in USA) www.brother.com/ ® Windows XP Home (SP3 or greater), XP (in Canada) www.brother.ca/ Professional (SP3 or greater), Windows ®... - Page 101 FAQs (frequently asked questions) The Brother Solutions Center is our one-stop resource for all your Brother machine needs. You can download the latest software documents and utilities, read FAQs and troubleshooting tips, and learn how to get the most from your Brother product.
-
Page 102: For Customer Service
- Marketing Dept. 1, rue Hotel de Ville Dollard-des-Ormeaux, PQ, Canada H9B 3H6 Service center locator (USA only) For the location of a Brother authorized service center, call 1-877-BROTHER (1-877-276-8437) or visit us on-line at http://www.brother-usa.com/service/. Service center locations (Canada only) For the location of a Brother authorized service center, call 1-877-BROTHER. - Page 103 Scan Using ControlCenter2 (Macintosh) Scan Using ControlCenter2 (Macintosh) • Scan Documents and Photos • Scan to PDF • Scan to an Application • Scan to E-mail Attachment • Scan to an Editable Text File (OCR) • Save Scanned Documents to a Folder •...
- Page 104 Note (ControlCenter2) icon is not displayed in the menu bar, double-click the ControlCenter icon. The ControlCenter icon is in Macintosh HD/Applications/Brother. (ControlCenter2) icon will appear in the menu bar. While holding down the Control key click the Image button in the SCAN tab to change scan settings, such as...
- Page 105 The ControlCenter2 window will appear. Note (ControlCenter2) icon is not displayed in the menu bar, double-click the ControlCenter icon. The ControlCenter icon is in Macintosh HD/Applications/Brother. (ControlCenter2) icon will appear in the menu bar. Click the DEVICE SETTINGS tab. Click the Scan to PC Settings button. The Remote Setup window will appear.
- Page 106 Scan Using the Scan Key on the Control Panel of the Machine (Macintosh) Select Image from the drop-down list. Click the OK button to close the Remote Setup window. Click the SCAN tab on the ControlCenter2 window. While holding down the Control key click the Image button. The Scan To Image dialog box will appear. Click the Device Button tab.
- Page 107 Scan Using the Scan Key on the Control Panel of the Machine (Macintosh) Select PDF from the File Type drop-down list. Note • To save the document as a password-protected PDF, select Secure PDF (*.pdf) from the File Type drop- down list and then enter the password in the Set PDF Password dialog box.
- Page 108 Scan Using the Scan Key on the Control Panel of the Machine (Macintosh) • Several file types such as TIFF, TIFF Multi-Page, PDF, Secure PDF and JPEG support file size compression. Select Uncompressed or Compressed to adjust the file size for TIFF or TIFF Multi-Page. For PDF, Secure PDF and JPEG, use the slider to adjust the file size.
- Page 109 Change Scan to PC Key Settings (Macintosh) Change Scan to PC Key Settings (Macintosh) • Scan Color and Black-and-White Pages at the Same Time • Scan Pages of Different Sizes at the Same Time • Scan Business Cards • Scan Two Pages and Combine Them on One Page (2 in 1) •...
- Page 110 Change Scan to PC Key Settings (Macintosh) The ControlCenter icon is in Macintosh HD/Applications/Brother. (ControlCenter2) icon will appear in the menu bar. While holding down the Control key click a button for the Scan-to action you want to change (Image, OCR, E- mail, or File).
-
Page 111: And Macintosh
Change Scan to USB Key Settings (Windows®and Macintosh) ® Change Scan to USB Key Settings (Windows and Macintosh) • Scan Color and Black-and-White Pages at the Same Time • Scan Pages of Different Sizes at the Same Time • Scan Business Cards •... - Page 112 You can also start Remote Setup by following the instructions below: ® • Windows Click Start, All Programs, Brother, ADS-XXXX, and Remote Setup. • Macintosh Double-click the RemoteSetup icon located in Macintosh HD/Applications/Brother. Select Scan to USB in the folder tree.
- Page 113 Change Scan to USB Key Settings (Windows®and Macintosh) • Macintosh Select Auto from the Scan Type drop-down list. Change other settings if needed (see Change Scan Settings). Load your document. Press Scan to USB on the control panel. The machine starts scanning. Page Top file:///C|/Documents%20and%20Settings/mcampbell.AM/My%20Documents/ADS2000solutions/chapter4_5.html[3/11/2013 10:23:59 AM]...
- Page 114 Change Scan to USB Key Settings (Windows®and Macintosh) file:///C|/Documents%20and%20Settings/mcampbell.AM/My%20Documents/ADS2000solutions/chapter4_5.html[3/11/2013 10:23:59 AM]...
- Page 115 The ControlCenter2 window will appear. Note (ControlCenter2) icon is not displayed in the menu bar, double-click the ControlCenter icon. The ControlCenter icon is in Macintosh HD/Applications/Brother. (ControlCenter2) icon will appear in the menu bar. Select the DEVICE SETTINGS tab. Click the Status Monitor button.
- Page 116 Lets you access the troubleshooting web site by clicking the Troubleshooting button. • Visit the Genuine Supplies website Lets you access the Brother genuine supplies web site by clicking the Visit the Genuine Supplies website button. • Pick-up Roller Count Displays the Pick-up Roller replacement cycle.
- Page 117 Scan Using ControlCenter4 Advanced Mode (Windows Brother provides a software interface for your machine called ControlCenter. You can use this software to quickly scan photos and save them as JPEGs or PDFs, as well as other file formats. You can also scan single sided and two-sided documents and save them as PDFs or use OCR (Optical Character Recognition) to convert them to editable text.
- Page 118 ® XP, Windows Vista Double-click the (ControlCenter4) icon in the task tray. • Click ControlCenter4 located in Start/All Programs/Brother/ADS-XXXX (where XXXX is your model name). Select the Scan tab. Right-click the (Image) button and select Button settings to change scan settings, such as file format,...
- Page 119 ® ® XP, Windows Vista Double-click the (ControlCenter4) icon in the task tray. • Click ControlCenter4 located in Start/All Programs/Brother/ADS-XXXX (where XXXX is your model name). Click the Device Settings tab (the example below uses Home Mode). file:///C|/Documents%20and%20Settings/mcampbell.AM/My%20Documents/ADS2000solutions/chapter4_2.html[3/11/2013 10:24:01 AM]...
- Page 120 Change Scan to PC Key Settings (Windows®) Click the Device Scan Settings button. The Device Scan Settings dialog box will appear. Select the tab for the Scan-to action you want to change (Image, OCR, E-mail, or File). Select Auto from the Scan Type drop-down list. Change other settings if needed (see Change Scan to PC Settings).
- Page 121 Change Scan to PC Key Settings (Windows®) file:///C|/Documents%20and%20Settings/mcampbell.AM/My%20Documents/ADS2000solutions/chapter4_2.html[3/11/2013 10:24:01 AM]...
- Page 122 Scan Using Apple Image Capture(ICA Driver - Mac OS X 10.6.x, 10.7.x) Scan Using Apple Image Capture (ICA Driver - Mac OS X 10.6.x, 10.7.x) You can scan a document using the ICA driver. If you installed MFL-Pro Suite from the installer DVD-ROM, the ICA driver has been already installed on your computer.
- Page 123 Scan Using Apple Image Capture(ICA Driver - Mac OS X 10.6.x, 10.7.x) Load your document. Select a size of your document for Scan Size. Select the destination folder or destination application for Scan To. Click the Scan button. The machine starts scanning. Page Top file:///C|/Documents%20and%20Settings/mcampbell.AM/My%20Documents/ADS2000solutions/chapter3_11.html[3/11/2013 10:24:02 AM]...
- Page 124 Presto! PageManager. For other applications which support TWAIN specifications, these steps will be similar. • Installing Presto! PageManager • Scan Using Presto! PageManager Installing Presto! PageManager Insert the supplied DVD-ROM into your DVD-ROM drive. Double-click the BROTHER icon on your desktop. Double-click Utilities. Double-click the PageManager Installer icon. Follow the on-screen instructions. Note •...
- Page 125 Fax and Scan Scan Using Nuance™ PaperPort™12SE You can use the Nuance™ PaperPort™12SE application, which is included in the Brother MFL-Pro software suite, for ® scanning. The instructions for scanning in these steps are for Nuance™ PaperPort™12SE. For other Windows applications these steps will be similar.
- Page 126 From the Available Scanners list, select TWAIN: TW-Brother ADS-XXXX (where ADS-XXXX is the model name of your machine). If you want to use the WIA driver, select the Brother driver that has “WIA” as the prefix. Click the OK button.
- Page 127 Scan Using Nuance™ PaperPort™12SE or Other Windows®Applications From the Document Size drop-down list, select your document size. Note After you select a document size, you can adjust the scanning area further by clicking the left mouse button and dragging it. This is required when cropping an image for scanning. Click the Start button.
- Page 128 Scan Using Nuance™ PaperPort™12SE or Other Windows®Applications 300 x 300 dpi 400 x 400 dpi 600 x 600 dpi 1200 x 1200 dpi 3. Scan Type Select one of the following type: • Black & White Use for text or line art images. •...
- Page 129 Scan Using Nuance™ PaperPort™12SE or Other Windows®Applications from the Document Size drop down list. If you select Custom, the Custom Document Size dialog box appears in which you can specify the document size. 8. Duplex(two-sided) Scanning Select Long-edge binding or Short-edge binding depending on the layout of your original to make sure that the data file created appears correctly in the scanned document.
- Page 130 Scan Using Nuance™ PaperPort™12SE or Other Windows®Applications If you want to change some advanced settings, click Adjust the quality of the scanned picture. • Resolution You can select a scanning resolution from the Resolution text box. Higher resolutions take more memory and transfer time, but produce a finer scanned image.
- Page 131 The Remote Setup application lets you configure many machine settings from your computer. When you start the Remote Setup application, the settings on your Brother machine will be downloaded automatically to your computer and displayed on the screen. If you change the settings, you can upload them directly to the machine.
- Page 132 Click the Remote Setup button. The Remote Setup window will appear. Note You can also start Remote Setup by following the instructions below: ® • Windows Click Start, All Programs, Brother, ADS-XXXX, and Remote Setup. • Macintosh Double-click the RemoteSetup icon located in Macintosh HD/Applications/Brother. file:///C|/Documents%20and%20Settings/mcampbell.AM/My%20Documents/ADS2000solutions/chapter5_3.html[3/11/2013 10:24:05 AM]...
- Page 133 Set Up the Brother Machine from Your Computer Select a menu in the folder tree and then configure the settings as needed (the example below uses General Setup). ® • Windows • Macintosh • OK Lets you start uploading data to the machine and exit the Remote Setup application. If an error message is displayed, enter the correct data again and then click OK.
- Page 134 Set Up the Brother Machine from Your Computer • Apply Lets you upload data to the machine without exiting the Remote Setup application. The Remote Setup synchronizes the date and time of the machine with the connected computer during startup.
-
Page 135: Replace The Separation Pad
Replace the Separation Pad Replace the Separation Pad Your machine is equipped with a scan counter. The counter automatically counts how many times the machine has scanned. When the machine scans 50,000 times, the machine will display a message on the Status Monitor to remind you to replace the Separation Pad. - Page 136 Replace the Separation Pad Press and hold the green buttons (1) of the Separation Pad and then pull the Separation Pad (2) upward. Attach a new Separation Pad into the Separation Pad Cover. Close the Separation Pad Cover until it clicks. Close the Front Cover and the Top Cover.
- Page 137 Replace the Separation Pad Page Top file:///C|/Documents%20and%20Settings/mcampbell.AM/My%20Documents/ADS2000solutions/chapter6_3_4.html[3/11/2013 10:24:06 AM]...
- Page 138 Replace the Pick-up Roller Replace the Pick-up Roller Your machine is equipped with a scan counter. The counter automatically counts how many times the machine has scanned. When the machine scans 50,000 times, the machine will display a message on the Status Monitor to remind you to replace the Pick-up Roller.
- Page 139 Replace the Pick-up Roller Pinch and pull the Pick-up Roller out of the machine. Place a new Pick-up Roller into the machine. Note Identify the left and right sides of the Pick-up Roller before attaching it. Slide the Pick-up Roller (1) to the left edge while turning the Pick-up Roller. file:///C|/Documents%20and%20Settings/mcampbell.AM/My%20Documents/ADS2000solutions/chapter6_3_5.html[3/11/2013 10:24:06 AM]...
- Page 140 Replace the Pick-up Roller Close the Pick-up Roller Cover. Close the Front Cover and the Top Cover. Reset the counter (see Reset the Usage Counters). Note Confirm the following items: • The value of Pick-up Roller Count is 0 (see ®...
- Page 141 The ControlCenter2 window will appear. Note (ControlCenter2) icon is not displayed in the menu bar, double-click the ControlCenter icon. The ControlCenter icon is in Macintosh HD/Applications/Brother. (ControlCenter2) icon will appear in the menu bar. Click the DEVICE SETTINGS tab. Click the Remote Setup button. The Remote Setup window will appear.
- Page 142 Save Scanned Documents to a USB Flash Memory Drive Insert a USB flash memory drive into your machine. Load your document. Press Scan to USB on the control panel. The machine starts scanning. Important DO NOT remove the USB flash memory drive while the Scan to USB key is blinking to avoid damaging the drive or the data stored on it.
- Page 143 • The machine does not support charging any USB devices. • Brother Image Viewer for Android™, which is available for download from the Android™ Market, enables users to view or edit the scanned data. For details, download the Brother Image Viewer for Android™.
- Page 144 Loading Clippings, Photos, and Other Important Documents Loading Clippings, Photos, and Other Important Documents Make sure documents with ink or correction fluid are completely dry. Open the Top Cover (1). Insert the document into the Carrier Sheet. Note Set the document in the center of the Carrier Sheet and align the top of the document with the top of the Carrier Sheet.
- Page 145 Loading Clippings, Photos, and Other Important Documents machine. Pull the Output Tray out of the machine and then unfold the Document Stopper. Page Top file:///C|/Documents%20and%20Settings/mcampbell.AM/My%20Documents/ADS2000solutions/chapter1_5_6.html[3/11/2013 10:24:08 AM]...
- Page 146 • (Windows XP, Windows Vista Double-click the (ControlCenter4) icon in the task tray. • Click ControlCenter4 located in Start/All Programs/Brother/ADS-XXXX (where XXXX is your model name). Select the Scan tab. Do one of the following: • Select Photo, Text and Graph, or Monochrome Text in the Document Type option for the type of original you want to scan.
- Page 147 Scan Documents (Scan to PDF) The machine starts scanning, and then the Scanning Completed dialog box will appear and display the number of scanned pages. The scanned image appears in the image viewer. Note If the Scanning Completed dialog box does not appear and you want to display the number of scanned pages, check the Display Scanning Results check box.
- Page 148 Scan Documents (Scan to PDF) file:///C|/Documents%20and%20Settings/mcampbell.AM/My%20Documents/ADS2000solutions/chapter3_2_2.html[3/11/2013 10:24:09 AM]...
- Page 149 • (Windows XP, Windows Vista Double-click the (ControlCenter4) icon in the task tray. • Click ControlCenter4 located in Start/All Programs/Brother/ADS-XXXX (where XXXX is your model name). Select the Scan tab. Do one of the following: • Select Photo, Text and Graph, or Monochrome Text in the Document Type option for the type of original you want to scan.
- Page 150 Scan Documents (Other File Types) The machine starts scanning, and then the Scanning Completed dialog box will appear and display the number of scanned pages. The scanned image appears in the image viewer. Note If the Scanning Completed dialog box does not appear and you want to display the number of scanned pages, check the Display Scanning Results check box.
- Page 151 XP, Windows Vista Double-click the (ControlCenter4) icon in the task tray. • Click ControlCenter4 located in Start/All Programs/Brother/ADS-XXXX (where XXXX is your model name). Select the Scan tab. Select Custom in the Document Type option and then click the Custom Settings button.
- Page 152 Scan Color and Black-and-White Pages at the Same Time Select Auto from the Scan Type drop-down list. Click the OK button. Change the scan size if needed (see Change the Scan Size). Click the (Scan) button. The machine starts scanning, and then the Scanning Completed dialog box will appear and display the number of scanned pages.
- Page 153 ® XP, Windows Vista Double-click the (ControlCenter4) icon in the task tray. • Click ControlCenter4 located in Start/All Programs/Brother/ADS-XXXX (where XXXX is your model name). Select the Scan tab. Do one of the following: • Select Photo, Text and Graph, or Monochrome Text in the Document Type option for the type of original you want to scan.
- Page 154 Scan Pages of Different Sizes at the Same Time Select Auto from the Scan Size drop-down list. Click the (Scan) button. The machine starts scanning, and then the Scanning Completed dialog box will appear and display the number of scanned pages. The scanned image appears in the image viewer. Note If the Scanning Completed dialog box does not appear and you want to display the number of scanned pages, check the Display Scanning Results check box.
- Page 155 • (Windows XP, Windows Vista Double-click the (ControlCenter4) icon in the task tray. • Click ControlCenter4 located in Start/All Programs/Brother/ADS-XXXX (where XXXX is your model name). Select the Scan tab. Do one of the following: • Select Photo, Text and Graph, or Monochrome Text in the Document Type option for the type of original you want to scan.
- Page 156 Scan Business Cards appear and display the number of scanned pages. The scanned image appears in the image viewer. Note If the Scanning Completed dialog box does not appear and you want to display the number of scanned pages, check the Display Scanning Results check box. Click the left or right arrow buttons to preview each scanned document.
- Page 157 • (Windows XP, Windows Vista Double-click the (ControlCenter4) icon in the task tray. • Click ControlCenter4 located in Start/All Programs/Brother/ADS-XXXX (where XXXX is your model name). Select the Scan tab. Do one of the following: • Select Photo, Text and Graph, or Monochrome Text in the Document Type option for the type of original you want to scan.
- Page 158 Scan Two Pages and Combine Them on One Page (2 in 1) Select 2 in 1 from the Scan Size drop-down list. Click the (Scan) button. The machine starts scanning, and then the Scanning Completed dialog box will appear and display the number of scanned pages. The scanned image appears in the image viewer. Note If the Scanning Completed dialog box does not appear and you want to display the number of scanned pages, check the Display Scanning Results check box.
- Page 159 XP, Windows Vista Double-click the (ControlCenter4) icon in the task tray. • Click ControlCenter4 located in Start/All Programs/Brother/ADS-XXXX (where XXXX is your model name). Select the Scan tab. Select Custom in the Document Type option and then click the Custom Settings button.
- Page 160 Scan Documents Wider than Letter Size Check the Carrier Sheet Mode check box. Check the Duplex(two-sided) Scanning check box and then select the Long-edge binding option. Note If you cannot check the Duplex(two-sided) Scanning check box, select a document size other than Long Paper from the Scan Size drop-down list.
- Page 161 ® XP, Windows Vista Double-click the (ControlCenter4) icon in the task tray. • Click ControlCenter4 located in Start/All Programs/Brother/ADS-XXXX (where XXXX is your model name). Select the Scan tab. Do one of the following: • Select Photo, Text and Graph, or Monochrome Text in the Document Type option for the type of original you want to scan.
- Page 162 Scan Documents Longer than Letter Size Select Long Paper (Normal Width) or Long Paper (Narrow Width) from the Scan Size drop-down list. Note • Each Long Paper option can scan a large document up to the following size: Long Paper (Normal Width): 8 1/2 × 34.0 in. (215.9 × 863.0 mm) Long Paper (Narrow Width): 4 1/4 ×...
- Page 163 XP, Windows Vista Double-click the (ControlCenter4) icon in the task tray. • Click ControlCenter4 located in Start/All Programs/Brother/ADS-XXXX (where XXXX is your model name). Select the Scan tab. Select Custom in the Document Type option and then click the Custom Settings button.
- Page 164 Scan Documents with More than 50 Pages Check the Continuous Scanning check box. Configure other settings if needed (see Custom Scan Settings). Change the scan size if needed (see Change the Scan Size). Click the (Scan) button. The machine starts scanning. When the machine has finished scanning, a dialog asks you if you want to continue scanning.
- Page 165 XP, Windows Vista Double-click the (ControlCenter4) icon in the task tray. • Click ControlCenter4 located in Start/All Programs/Brother/ADS-XXXX (where XXXX is your model name). Select the Scan tab. Select Custom in the Document Type option and then click the Custom Settings button.
- Page 166 Scan Both Sides of a Page Automatically Check the Duplex(two-sided) Scanning check box. Note If you cannot check the Duplex(two-sided) Scanning check box, select a document size other than Long Paper from the Scan Size drop-down list. Select Long-edge binding or Short-edge binding depending for the document layout as shown in the following table.
- Page 167 Scan Both Sides of a Page Automatically of scanned pages. The scanned image appears in the image viewer. Note If the Scanning Completed dialog box does not appear and you want to display the number of scanned pages, check the Display Scanning Results check box. Click the left or right arrow buttons to preview each scanned document.
- Page 168 XP, Windows Vista Double-click the (ControlCenter4) icon in the task tray. • Click ControlCenter4 located in Start/All Programs/Brother/ADS-XXXX (where XXXX is your model name). Select the Scan tab. Select Custom in the Document Type option and then click the Custom Settings button.
- Page 169 Scan Specific/irregular-sized Documents Using the Carrier Sheet Check the Carrier Sheet Mode check box. Configure other settings if needed (see Custom Scan Settings). Select a scan size other than Auto from the Scan Size drop-down list. Click the (Scan) button. The machine starts scanning, and then the Scanning Completed dialog box will appear and display the number of scanned pages.
- Page 170 XP, Windows Vista Double-click the (ControlCenter4) icon in the task tray. • Click ControlCenter4 located in Start/All Programs/Brother/ADS-XXXX (where XXXX is your model name). Select the Scan tab. Select Custom in the Document Type option and then click the Custom Settings button.
- Page 171 Scan Plastic Cards Check the Plastic Card Mode check box. Configure other settings if needed (see Custom Scan Settings). Click the (Scan) button. The machine starts scanning, and then the Scanning Completed dialog box will appear and display the number of scanned pages. The scanned image appears in the image viewer. Note If the Scanning Completed dialog box does not appear and you want to display the number of scanned pages, check the Display Scanning Results check box.
- Page 172 Scan Plastic Cards Automatic Image Rotation: Off Original Layout Scan Result Page Top file:///C|/Documents%20and%20Settings/mcampbell.AM/My%20Documents/ADS2000solutions/chapter3_2_13.html[3/11/2013 10:24:18 AM]...
- Page 173 XP, Windows Vista Double-click the (ControlCenter4) icon in the task tray. • Click ControlCenter4 located in Start/All Programs/Brother/ADS-XXXX (where XXXX is your model name). Select the Scan tab. Select Custom in the Document Type option and then click the Custom Settings button.
- Page 174 Correct Page Skew Click the Advanced Settings button. The Advanced Settings dialog box will appear. Check the Auto Deskew check box and then click the OK button. Click the OK button. Page Top file:///C|/Documents%20and%20Settings/mcampbell.AM/My%20Documents/ADS2000solutions/chapter3_2_14.html[3/11/2013 10:24:19 AM]...
- Page 175 XP, Windows Vista Double-click the (ControlCenter4) icon in the task tray. • Click ControlCenter4 located in Start/All Programs/Brother/ADS-XXXX (where XXXX is your model name). Select the Scan tab. Select Custom in the Document Type option and then click the Custom Settings button.
- Page 176 Delete Blank Pages Click the Advanced Settings button. The Advanced Settings dialog box will appear. Check the Blank Page Skip check box and then click the OK button. Click the OK button. Note The Blank Page Skip feature may not remove blank pages depending on the document. Page Top file:///C|/Documents%20and%20Settings/mcampbell.AM/My%20Documents/ADS2000solutions/chapter3_2_15.html[3/11/2013 10:24:20 AM]...
- Page 177 XP, Windows Vista Double-click the (ControlCenter4) icon in the task tray. • Click ControlCenter4 located in Start/All Programs/Brother/ADS-XXXX (where XXXX is your model name). Select the Scan tab. Select Custom in the Document Type option and then click the Custom Settings button.
- Page 178 Change Document Orientation to Match the Text Click the Advanced Settings button. The Advanced Settings dialog box will appear. Check the Automatic Image Rotation check box and then click the OK button. Click the OK button. Page Top file:///C|/Documents%20and%20Settings/mcampbell.AM/My%20Documents/ADS2000solutions/chapter3_2_16.html[3/11/2013 10:24:21 AM]...
- Page 179 XP, Windows Vista Double-click the (ControlCenter4) icon in the task tray. • Click ControlCenter4 located in Start/All Programs/Brother/ADS-XXXX (where XXXX is your model name). Select the Scan tab. Select Custom in the Document Type option and then click the Custom Settings button.
- Page 180 Detect Overlapping (Multifeed) Pages Click the Advanced Settings button. The Advanced Settings dialog box will appear. Check the Multifeed Detection check box and then click the OK button. Click the OK button. Note The Multifeed Detection feature does not support documents narrower than 2 3/4 in. (70 mm) wide. Page Top file:///C|/Documents%20and%20Settings/mcampbell.AM/My%20Documents/ADS2000solutions/chapter3_2_17.html[3/11/2013 10:24:21 AM]...
- Page 181 XP, Windows Vista Double-click the (ControlCenter4) icon in the task tray. • Click ControlCenter4 located in Start/All Programs/Brother/ADS-XXXX (where XXXX is your model name). Select the Scan tab. Select Custom in the Document Type option and then click the Custom Settings button.
- Page 182 Scan Pages Laid on Top of Each Other Check the Carrier Sheet Mode check box. Configure other settings if needed (see Custom Scan Settings). Select a scan size other than Auto from the Scan Size drop-down list. Click the (Scan) button. The machine starts scanning, and then the Scanning Completed dialog box will appear and display the number of scanned pages.
- Page 183 XP, Windows Vista Double-click the (ControlCenter4) icon in the task tray. • Click ControlCenter4 located in Start/All Programs/Brother/ADS-XXXX (where XXXX is your model name). Select the Scan tab. Select Custom in the Document Type option and then click the Custom Settings button.
- Page 184 Scan Envelopes Check the Carrier Sheet Mode check box. Configure other settings if needed (see Custom Scan Settings). Select a scan size other than Auto from the Scan Size drop-down list. Click the (Scan) button. The machine starts scanning, and then the Scanning Completed dialog box will appear and display the number of scanned pages.
- Page 185 XP, Windows Vista Double-click the (ControlCenter4) icon in the task tray. • Click ControlCenter4 located in Start/All Programs/Brother/ADS-XXXX (where XXXX is your model name). Select the Scan tab. Select Custom in the Document Type option and then click the Custom Settings button.
- Page 186 Prevent Bleed Through Click the Advanced Settings button. The Advanced Settings dialog box will appear. Check the Bleed Through Prevention/Base Color Removal check box and then click the OK button. Click the OK button. Note When you scan newspapers or magazines with the Bleed Through Prevention/Base Color Removal feature, the scanned data can be faded.
- Page 187 XP, Windows Vista Double-click the (ControlCenter4) icon in the task tray. • Click ControlCenter4 located in Start/All Programs/Brother/ADS-XXXX (where XXXX is your model name). Select the Scan tab. Select Custom in the Document Type option and then click the Custom Settings button.
- Page 188 Remove the Background Color (Base Color Removal) and Make Documents Easier to Read Click the Advanced Settings button. The Advanced Settings dialog box will appear. Check the Bleed Through Prevention/Base Color Removal check box and then click the OK button. Click the OK button.
- Page 189 XP, Windows Vista Double-click the (ControlCenter4) icon in the task tray. • Click ControlCenter4 located in Start/All Programs/Brother/ADS-XXXX (where XXXX is your model name). Select the Scan tab. Select Custom in the Document Type option and then click the Custom Settings button.
- Page 190 View the Number of Scanned Pages Click the Advanced Settings button. The Advanced Settings dialog box will appear. Check the Display Scanning Results check box and then click the OK button. Click the OK button. Page Top file:///C|/Documents%20and%20Settings/mcampbell.AM/My%20Documents/ADS2000solutions/chapter3_2_22.html[3/11/2013 10:24:25 AM]...
-
Page 191: Scan To An Application
• (Windows XP, Windows Vista Double-click the (ControlCenter4) icon in the task tray. • Click ControlCenter4 located in Start/All Programs/Brother/ADS-XXXX (where XXXX is your model name). Select the Scan tab. Do one of the following: • Select Photo, Text and Graph, or Monochrome Text in the Document Type option for the type of original you want to scan. - Page 192 Scan to an Application Click the (Scan) button. The machine starts scanning, and then the Scanning Completed dialog box will appear and display the number of scanned pages. The scanned image appears in the image viewer. Note If the Scanning Completed dialog box does not appear and you want to display the number of scanned pages, check the Display Scanning Results check box.
- Page 193 ® XP, Windows Vista Double-click the (ControlCenter4) icon in the task tray. • Click ControlCenter4 located in Start/All Programs/Brother/ADS-XXXX (where XXXX is your model name). Select the Scan tab. Do one of the following: • Select Photo, Text and Graph, or Monochrome Text in the Document Type option for the type of original you want to scan.
- Page 194 Scan to E-mail Attachment Click the (Scan) button. The machine starts scanning, and then the Scanning Completed dialog box will appear and display the number of scanned pages. The scanned image appears in the image viewer. Note If the Scanning Completed dialog box does not appear and you want to display the number of scanned pages, check the Display Scanning Results check box.
- Page 195 • (Windows XP, Windows Vista Double-click the (ControlCenter4) icon in the task tray. • Click ControlCenter4 located in Start/All Programs/Brother/ADS-XXXX (where XXXX is your model name). Select the Scan tab. Select Monochrome Text in the Document Type option. Change the scan size if needed (see Change the Scan Size).
- Page 196 Scan to Editable Text File (OCR) Note If the Scanning Completed dialog box does not appear and you want to display the number of scanned pages, check the Display Scanning Results check box. Click the left or right arrow buttons to preview each scanned document. Click the (OCR) button.
- Page 197 Presto! BizCard automatically saves the data and image for each card. Different viewing modes are available for easy searching, editing, creating, and sorting. Installing NewSoft Presto! BizCard 5 Insert the supplied DVD-ROM into your DVD-ROM drive. Double-click the BROTHER icon on your desktop. Double-click Utilities. Double-click the BizCard Installer icon. Follow the on-screen instructions.
- Page 198 XP, Windows Vista Double-click the (ControlCenter4) icon in the task tray. • Click ControlCenter4 located in Start/All Programs/Brother/ADS-XXXX (where XXXX is your model name). Click the Device Settings tab (the example below uses Home Mode). Click the Device Scan Settings button. The Device Scan Settings dialog box will appear.
- Page 199 View Scanned Documents on Your Computer Screen Select the tab for the Scan-to action you want to change (Image, OCR, E-mail, or File). Click the Advanced Settings button. The Advanced Settings dialog box will appear. Check the Display Scanning Results check box and then click the OK button. Change other settings if needed (see Change Scan to PC Settings).
- Page 200 The ControlCenter2 window will appear. Note (ControlCenter2) icon is not displayed in the menu bar, double-click the ControlCenter icon. The ControlCenter icon is in Macintosh HD/Applications/Brother. (ControlCenter2) icon will appear in the menu bar. Click the DEVICE SETTINGS tab. file:///C|/Documents%20and%20Settings/mcampbell.AM/My%20Documents/ADS2000solutions/chapter4_5_7.html[3/11/2013 10:24:30 AM]...
- Page 201 You can also start Remote Setup by following the instructions below: ® • Windows Click Start, All Programs, Brother, ADS-XXXX, and Remote Setup. • Macintosh Double-click the RemoteSetup icon located in Macintosh HD/Applications/Brother. Select Scan to USB in the folder tree.
- Page 202 Detect Overlapping (Multifeed) Pages Select On from the Multifeed Detection drop-down list. Change other settings if needed (see Change Scan Settings). Note The Multifeed Detection feature does not support documents narrower than 2 3/4 in. (70 mm) wide. Page Top file:///C|/Documents%20and%20Settings/mcampbell.AM/My%20Documents/ADS2000solutions/chapter4_5_7.html[3/11/2013 10:24:30 AM]...
-
Page 203: Set Sleep Mode
The ControlCenter2 window will appear. Note (ControlCenter2) icon is not displayed in the menu bar, double-click the ControlCenter icon. The ControlCenter icon is in Macintosh HD/Applications/Brother. (ControlCenter2) icon will appear in the menu bar. Click the DEVICE SETTINGS tab. file:///C|/Documents%20and%20Settings/mcampbell.AM/My%20Documents/ADS2000solutions/chapter5_3_2.html[3/11/2013 10:24:30 AM]... - Page 204 You can also start Remote Setup by following the instructions below: ® • Windows Click Start, All Programs, Brother, ADS-XXXX, and Remote Setup. • Macintosh Double-click the RemoteSetup icon located in Macintosh HD/Applications/Brother. Select General Setup in the folder tree.
- Page 205 Set Sleep Mode and Auto Powerdown Configure the settings as needed. • Sleep Time You can select how long the machine must be idle before it goes into Sleep mode. To enter Ready mode, do one of the following: • Press any key. •...
-
Page 206: Replace Consumables
Replace Consumables Replace Consumables The Status Monitor will tell you when the machine detects that consumables are near the end of their life. • Order Consumables • ® Check Consumable Replacement Cycle (Windows • Check Consumable Replacement Cycle (Macintosh) • Replace the Separation Pad •... - Page 207 These parts are available at most Brother retailers. If you cannot find the part you need and you have a Visa, MasterCard, Discover, or American Express credit card, you can order parts directly from Brother. (You can visit us online for a complete selection of the Brother parts and supplies that are available for purchase.)
- Page 208 The ControlCenter2 window will appear. Note (ControlCenter2) icon is not displayed in the menu bar, double-click the ControlCenter icon. The ControlCenter icon is in Macintosh HD/Applications/Brother. (ControlCenter2) icon will appear in the menu bar. Click the DEVICE SETTINGS tab. file:///C|/Documents%20and%20Settings/mcampbell.AM/My%20Documents/ADS2000solutions/chapter6_3_6.html[3/11/2013 10:24:32 AM]...
- Page 209 Reset the Usage Counters Click the Remote Setup button. The Remote Setup window will appear. Select Machine Info. in the folder tree. ® • Windows • Macintosh file:///C|/Documents%20and%20Settings/mcampbell.AM/My%20Documents/ADS2000solutions/chapter6_3_6.html[3/11/2013 10:24:32 AM]...
- Page 210 Reset the Usage Counters Do one of the following: • To reset the counter for the Separation Pad, check the Separation Pad check box for Reset Counter for Consumables. • To reset the counter for the Pick-up Roller, check the Pick-up Roller check box for Reset Counter for Consumables.
-
Page 211: Document Jam
Document Jam Document Jam Documents can jam in the document feeder unit if they are not inserted or fed properly, or if they are too long. Follow the steps below to clear a document jam. Take out any paper from the ADF that is not jammed. Open the Front Cover by pinching the Cover Release Lever (1). - Page 212 Document Jam Important • To avoid damage to the jammed document, DO NOT pull the document out before opening the Front Cover. • Take out any paper from the ADF before closing the Front Cover. • To avoid future document jams, do the following: •...
-
Page 213: Service Call Indications
When pressing the Scan to PC key When pressing the Scan to USB key Make a note of the error code, referring to the table above, and report the code to your dealer or to Brother Customer file:///C|/Documents%20and%20Settings/mcampbell.AM/My%20Documents/ADS2000solutions/chapter1_3_2.html[3/11/2013 10:24:34 AM]... - Page 214 Service Call Indications Service. Page Top file:///C|/Documents%20and%20Settings/mcampbell.AM/My%20Documents/ADS2000solutions/chapter1_3_2.html[3/11/2013 10:24:34 AM]...
- Page 215 Multifeed Multifeed Multiple pages were fed at the same time. Follow the steps below to clear the multifeed. Remove any paper from the document feeder. Open the Front Cover by pinching the Cover Release Lever (1). Pull the document out of the machine. Close the Front Cover.
- Page 216 Multifeed damage to the machine. Important Remove any paper from the document feeder before closing the Front Cover. Page Top file:///C|/Documents%20and%20Settings/mcampbell.AM/My%20Documents/ADS2000solutions/chapter7_4.html[3/11/2013 10:24:34 AM]...
- Page 217 ® • (Windows XP, Windows Vista Double-click the (ControlCenter4) icon in the task tray. • Click ControlCenter4 located in Start/All Programs/Brother/ADS-XXXX (where XXXX is your model name). Select the Scan tab. RIght-click the button you want to change ( (Image),...
- Page 218 Change Scan Settings Change the settings. The following settings can be changed. Setting Description Applicable Feature Image E-mail File File Type Select the file type you want to use for the scanned data. Note • To save the document as a password-protected PDF, select Secure PDF (*.pdf) from the File Type drop-down list, click the (Set PDF...
- Page 219 Change Scan Settings Target Select the destination application from the drop-down Application list. OCR Language Set to match the language of the scanned document’s text. File Name Click the Change button for Image, OCR or E-mail. Enter a prefix for the file name if needed. Show Save As If you want to specify the destination of the scanned Window...
- Page 220 Change Scan Settings Auto Automatically selects suitable colors for your document. Document Size Document size is set to Auto by default. You can scan documents of any size without making any adjustments to Document Size. For faster scan speeds you can select the exact size of your document from the Document Size drop down list.
- Page 221 Change Scan Settings setting Scan Type to Auto, Gray (Error Diffusion), True Gray or 24bit Color. Continuous Lets you scan multiple pages. After the page is Scanning scanned, you can select to continue scanning or finish. Using this method, you can scan more pages than the maximum capacity of the document feeder.
- Page 222 Change Scan Settings • Multifeed Detection: Off • Automatic Image Rotation: Off Note • If you want to scan a plastic card with different settings, set Plastic Card Mode off, Resolution to 600 dpi, and Multifeed Detection to Off. • Load only one plastic card at a time. Default Restore all settings to their factory default values.
- Page 223 Change Scan Settings Scanning pages skipped on your computer screen. Results Click the OK button to close the Advanced Settings dialog box. Click the OK button to close the settings dialog box. Page Top file:///C|/Documents%20and%20Settings/mcampbell.AM/My%20Documents/ADS2000solutions/chapter3_3_27.html[3/11/2013 10:24:35 AM]...
- Page 224 Note (ControlCenter2) icon is not displayed in the menu bar, double-click the ControlCenter icon. The ControlCenter icon is in Macintosh HD/Applications/Brother. (ControlCenter2) icon will appear in the menu bar. While holding down the Control key click the button in the SCAN tab for the Scan-to action you want to change (Image, OCR, E-mail, or File).
- Page 225 Change Scan Settings Change the settings in the Software Button tab. The following settings can be changed. Setting Description Applicable Feature Image E-mail File Target You can select which application is used to open Application scanned data. Only applications installed on your computer can be selected.
- Page 226 Change Scan Settings Select the Application Name and click the Delete button. File Type Select the file type you want to use for the scanned data. Note • To save the document as a password-protected PDF, select Secure PDF (*.pdf) for File Type and then enter the password in the Set PDF Password dialog box.
- Page 227 Change Scan Settings Destination File Click the Change button and then the Browse button Path to change the folder you would like to save your scanned document to. Destination Click Browse and browse to the folder you would like Folder to save your scanned document to.
- Page 228 Change Scan Settings images will be combined into one document. Brightness Adjust the setting (0 to 100) to get the best image. The default value of 50 represents an average and is usually suitable for most images. You can set the Brightness level by dragging the slider to the right or left to lighten or darken the image.
- Page 229 Change Scan Settings Fold the document in half and insert it in the Carrier Sheet for 2-sided (duplex) scanning, then both front and back pages will be combined into a single page. • Important documents (photos, contracts) • Thin paper (receipts) •...
- Page 230 Change Scan Settings Change the settings. The following settings can be changed. Setting Description Applicable Feature Image E-mail File Auto Deskew Corrects the skew (within 5 degrees) of the scanned data. Automatic Image Changes the direction of the document based on the Rotation text orientation.
- Page 231 Note (ControlCenter2) icon is not displayed in the menu bar, double-click the ControlCenter icon. The ControlCenter icon is in Macintosh HD/Applications/Brother. (ControlCenter2) icon will appear in the menu bar. While holding down the Control key click a button for the Scan-to action you want to change (Image, OCR, E- mail, or File).
- Page 232 Change Scan Settings Change the settings. The following settings can be changed. Setting Description Applicable Feature Image E-mail File Target You can select which application is used to open Application scanned data. Only applications installed on your computer can be selected. •...
- Page 233 Change Scan Settings button. File Type Select the file type you want to use for the scanned data. Note • To save the document as a password-protected PDF, select Secure PDF (*.pdf) for File Type and then enter the password in the Set PDF Password dialog box.
- Page 234 Change Scan Settings Destination Click Browse and browse to the folder you would like Folder to save your scanned document to. Check Show Folder to automatically display the destination folder after scanning. Resolution You can select a scanning resolution from the Resolution drop-down list.
- Page 235 Change Scan Settings Brightness Adjust the setting (0 to 100) to get the best image. The default value of 50 represents an average and is usually suitable for most images. You can set the Brightness level by dragging the slider to the right or left to lighten or darken the image.
- Page 236 Change Scan Settings • Load only one Carrier Sheet at a time. • Set the document in the center of the Carrier Sheet and align the top of the document with the top of the Carrier Sheet. Plastic Card Lets you scan non-embossed cards, such as driver's Mode licenses or insurance cards, using these automatic settings:...
- Page 237 Change Scan Settings Bleed Through Prevents the Bleed Through phenomenon on a two- Prevention/Base sided document, and also allows you to remove the Color Removal base color of documents such as newspapers to make the scanned data more recognizable. Blank Page Skip Removes blank pages of the document from the scanning results.
- Page 238 Acceptable Document Acceptable Document • Acceptable Document • Document Suitable for Carrier Sheet • Carrier Sheet Attentions • Unsupported Documents Note Do not load documents that contain multiple page thicknesses, paper qualities, etc. Acceptable Document Standard Paper Length 2.76 in. to 11.7 in. (70 mm to 297 mm) Width 2.0 in.
- Page 239 Acceptable Document Maximum Number of Total thickness of no more than 0.2 in. (5 mm), no more than Documents 25 sheets Long Paper Length 11.7 in. to 34.0 in. (297 mm to 863 mm) Width 2.0 in. to 8.5 in. (51 mm to 215.9 mm) Weight 14 lb to 29 lb (52 g/m to 110 g/m...
- Page 240 Acceptable Document Carrier Sheet Thickness Total thickness of no more than 24 mil (0.6 mm) (one 12 mil (0.3 mm) document plus the carrier sheet) Maximum Number of 1 page Documents Note A Carrier Sheet can be used when saving the scanned image to your computer. Check the Carrier Sheet Mode check box in the setting dialog box.
- Page 241 The ControlCenter2 window will appear. Note (ControlCenter2) icon is not displayed in the menu bar, double-click the ControlCenter icon. The ControlCenter icon is in Macintosh HD/Applications/Brother. (ControlCenter2) icon will appear in the menu bar. Click the DEVICE SETTINGS tab. file:///C|/Documents%20and%20Settings/mcampbell.AM/My%20Documents/ADS2000solutions/chapter7_8.html[3/11/2013 10:24:40 AM]...
- Page 242 You can also start Remote Setup by following the instructions below: ® • Windows Click Start, All Programs, Brother, ADS-XXXX, and Remote Setup. • Macintosh Double-click the RemoteSetup icon located in Macintosh HD/Applications/Brother. Select Machine Info. in the folder tree. The window will display the Serial Number.
- Page 243 Check the Serial Number and ROM Version Page Top file:///C|/Documents%20and%20Settings/mcampbell.AM/My%20Documents/ADS2000solutions/chapter7_8.html[3/11/2013 10:24:40 AM]...
- Page 244 Interfaces Interfaces Hi-Speed USB 2.0 Use a USB 2.0 cable (Type A/B) that is no more than 6 feet (2.0 meters) long. Your machine has a Hi-Speed USB 2.0 interface. The machine can also be connected to a computer that has a USB 1.1 interface.
- Page 245 Create a Custom Button in Custom Tab Create a Custom Button in Custom Tab Create a Custom tab. Right-click the area inside the tab and select Create custom button. Select a button you want to create from the menu. The settings dialog box will appear. Note You can also copy a custom button by selecting Copy custom button from the right-click context menu.
- Page 246 Create a Custom Button in Custom Tab Note You can change or remove the tab, button or settings you created. Click Configuration and continue as prompted. Page Top file:///C|/Documents%20and%20Settings/mcampbell.AM/My%20Documents/ADS2000solutions/chapter3_4_2.html[3/11/2013 10:24:41 AM]...
- Page 247 Note (ControlCenter2) icon is not displayed in the menu bar, double-click the ControlCenter icon. The ControlCenter icon is in Macintosh HD/Applications/Brother. (ControlCenter2) icon will appear in the menu bar. While holding down the Control key click the Image button in the SCAN tab.
- Page 248 Scan to PDF Select PDF (*.pdf) from the File Type drop-down list. Note • To save the document as a password-protected PDF, select Secure PDF (*.pdf) for File Type and then enter the password in the Set PDF Password dialog box. •...
- Page 249 Scan to PDF the Scan to OCR action. • Several file types such as TIFF, TIFF Multi-Page, PDF, Secure PDF and JPEG support file size compression. Select Uncompressed or Compressed to adjust the file size for TIFF or TIFF Multi-Page. For PDF, Secure PDF and JPEG, use the slider to adjust the file size.
- Page 250 Note (ControlCenter2) icon is not displayed in the menu bar, double-click the ControlCenter icon. The ControlCenter icon is in Macintosh HD/Applications/Brother. (ControlCenter2) icon will appear in the menu bar. While holding down the Control key click the Image button in the SCAN tab to change scan settings, such as...
- Page 251 Note (ControlCenter2) icon is not displayed in the menu bar, double-click the ControlCenter icon. The ControlCenter icon is in Macintosh HD/Applications/Brother. (ControlCenter2) icon will appear in the menu bar. While holding down the Control key click the E-mail button in the SCAN tab to change scan settings, such as...
- Page 252 Note (ControlCenter2) icon is not displayed in the menu bar, double-click the ControlCenter icon. The ControlCenter icon is in Macintosh HD/Applications/Brother. (ControlCenter2) icon will appear in the menu bar. While holding down the Control key click the OCR button in the SCAN tab to change scan settings, such as file...
- Page 253 Scan to an Editable Text File (OCR) file:///C|/Documents%20and%20Settings/mcampbell.AM/My%20Documents/ADS2000solutions/chapter3_5_5.html[3/11/2013 10:24:44 AM]...
- Page 254 Note (ControlCenter2) icon is not displayed in the menu bar, double-click the ControlCenter icon. The ControlCenter icon is in Macintosh HD/Applications/Brother. (ControlCenter2) icon will appear in the menu bar. While holding down the Control key click the File button in the SCAN tab to change scan settings, such as file...
- Page 255 Note (ControlCenter2) icon is not displayed in the menu bar, double-click the ControlCenter icon. The ControlCenter icon is in Macintosh HD/Applications/Brother. (ControlCenter2) icon will appear in the menu bar. While holding down the Control key click the button in the SCAN tab for the Scan-to action you want to change (Image, OCR, E-mail, or File).
- Page 256 Scan Color and Black-and-White Pages at the Same Time Select Auto from the Scan Type drop-down list. Change other settings if needed (see Change Scan Settings). Click the button you selected in step 3. The message dialog appears. Click the Start Scanning button. The machine starts scanning.
- Page 257 Note (ControlCenter2) icon is not displayed in the menu bar, double-click the ControlCenter icon. The ControlCenter icon is in Macintosh HD/Applications/Brother. (ControlCenter2) icon will appear in the menu bar. While holding down the Control key click the button in the SCAN tab for the Scan-to action you want to change (Image, OCR, E-mail, or File).
- Page 258 Scan Pages of Different Sizes at the Same Time Select Auto from the Document Size drop-down list. Change other settings if needed (see Change Scan Settings). Click the button you selected in step 3. The message dialog appears. Click the Start Scanning button. The machine starts scanning.
- Page 259 Note (ControlCenter2) icon is not displayed in the menu bar, double-click the ControlCenter icon. The ControlCenter icon is in Macintosh HD/Applications/Brother. (ControlCenter2) icon will appear in the menu bar. While holding down the Control key click the button in the SCAN tab for the Scan-to action you want to change (Image, OCR, E-mail, or File).
- Page 260 Scan Business Cards Select Business Card from the Document Size drop-down list. Change other settings if needed (see Change Scan Settings). Click the button you selected in step 3. The message dialog appears. Click the Start Scanning button. The machine starts scanning. Note Check the Don’t show me again.
- Page 261 Scan Business Cards file:///C|/Documents%20and%20Settings/mcampbell.AM/My%20Documents/ADS2000solutions/chapter3_5_9.html[3/11/2013 10:24:47 AM]...
- Page 262 Note (ControlCenter2) icon is not displayed in the menu bar, double-click the ControlCenter icon. The ControlCenter icon is in Macintosh HD/Applications/Brother. (ControlCenter2) icon will appear in the menu bar. While holding down the Control key click the button in the SCAN tab for the Scan-to action you want to change (Image, OCR, E-mail, or File).
- Page 263 Scan Two Pages and Combine Them on One Page (2 in 1) Select 2 in 1 from the Document Size drop-down list. Note To do 2 in 1 scanning, uncheck the Automatic Image Rotation check box in the Advanced Settings dialog box.
- Page 264 Scan Two Pages and Combine Them on One Page (2 in 1) file:///C|/Documents%20and%20Settings/mcampbell.AM/My%20Documents/ADS2000solutions/chapter3_5_10.html[3/11/2013 10:24:48 AM]...
- Page 265 Note (ControlCenter2) icon is not displayed in the menu bar, double-click the ControlCenter icon. The ControlCenter icon is in Macintosh HD/Applications/Brother. (ControlCenter2) icon will appear in the menu bar. While holding down the Control key click the button in the SCAN tab for the Scan-to action you want to change (Image, OCR, E-mail, or File).
- Page 266 Scan Documents Wider than Letter Check the Carrier Sheet Mode check box. Check the Duplex(two-sided) Scanning check box and then select the Long-edge binding option. Note If you cannot check the Duplex(two-sided) Scanning check box, select a document size other than Long Paper from the Document Size drop-down list.
- Page 267 Scan Documents Wider than Letter Check the Don’t show me again. check box not to show the message dialog again. Page Top file:///C|/Documents%20and%20Settings/mcampbell.AM/My%20Documents/ADS2000solutions/chapter3_5_11.html[3/11/2013 10:24:49 AM]...
- Page 268 Note (ControlCenter2) icon is not displayed in the menu bar, double-click the ControlCenter icon. The ControlCenter icon is in Macintosh HD/Applications/Brother. (ControlCenter2) icon will appear in the menu bar. While holding down the Control key click the button in the SCAN tab for the Scan-to action you want to change (Image, OCR, E-mail, or File).
- Page 269 Scan Documents Longer than Letter Select Long Paper (Normal Width) or Long Paper (Narrow Width) from the Document Size drop-down list. Note • Each Long Paper option can scan a large document up to the following size: Long Paper (Normal Width): 8 1/2 × 34.0 in. (215.9 × 863.0 mm) Long Paper (Narrow Width): 4 1/4 ×...
- Page 270 Scan Documents Longer than Letter Note Support the document with your hand if the document is longer than the Top Cover. Page Top file:///C|/Documents%20and%20Settings/mcampbell.AM/My%20Documents/ADS2000solutions/chapter3_5_12.html[3/11/2013 10:24:49 AM]...
- Page 271 Note (ControlCenter2) icon is not displayed in the menu bar, double-click the ControlCenter icon. The ControlCenter icon is in Macintosh HD/Applications/Brother. (ControlCenter2) icon will appear in the menu bar. While holding down the Control key click the button in the SCAN tab for the Scan-to action you want to change (Image, OCR, E-mail, or File).
- Page 272 Scan Documents with More than 50 Pages Check the Continuous Scanning check box. Change other settings if needed (see Change Scan Settings). Click the button you selected in step 3. The message dialog appears. Click the Start Scanning button. The machine starts scanning. When the machine has finished scanning, a dialog asks you if you want to continue scanning.
- Page 273 Scan Documents with More than 50 Pages file:///C|/Documents%20and%20Settings/mcampbell.AM/My%20Documents/ADS2000solutions/chapter3_5_13.html[3/11/2013 10:24:50 AM]...
- Page 274 Note (ControlCenter2) icon is not displayed in the menu bar, double-click the ControlCenter icon. The ControlCenter icon is in Macintosh HD/Applications/Brother. (ControlCenter2) icon will appear in the menu bar. While holding down the Control key click the button in the SCAN tab for the Scan-to action you want to change (Image, OCR, E-mail, or File).
- Page 275 Scan Both Sides of a Page Automatically Check the Duplex(two-sided) Scanning check box. Note If you cannot check the Duplex(two-sided) Scanning check box, select a document size other than Long Paper from the Document Size drop-down list. Select Long-edge binding or Short-edge binding depending for the document layout as shown in the following table.
- Page 276 Scan Both Sides of a Page Automatically Short-edge binding Change other settings if needed (see Change Scan Settings). You have now changed the default settings for your chosen Scan-to action. These settings will be used the next time you click (Image, OCR, E-mail, or File). Page Top file:///C|/Documents%20and%20Settings/mcampbell.AM/My%20Documents/ADS2000solutions/chapter3_5_14.html[3/11/2013 10:24:51 AM]...
- Page 277 Note (ControlCenter2) icon is not displayed in the menu bar, double-click the ControlCenter icon. The ControlCenter icon is in Macintosh HD/Applications/Brother. (ControlCenter2) icon will appear in the menu bar. While holding down the Control key click the button in the SCAN tab for the Scan-to action you want to change (Image, OCR, E-mail, or File).
- Page 278 Scan Specific/irregular-sized Documents Using the Carrier Sheet Check the Carrier Sheet Mode check box. Select a document size other than Auto from the Document Size drop-down list. Change other settings if needed (see Change Scan Settings). Click the button you selected in step 3. The message dialog appears.
- Page 279 Note (ControlCenter2) icon is not displayed in the menu bar, double-click the ControlCenter icon. The ControlCenter icon is in Macintosh HD/Applications/Brother. (ControlCenter2) icon will appear in the menu bar. While holding down the Control key click the button in the SCAN tab for the Scan-to action you want to change (Image, OCR, E-mail, or File).
- Page 280 Scan Plastic Cards Check the Plastic Card Mode check box. Change other settings if needed (see Change Scan Settings). Click the button you selected in step 3. The message dialog appears. Click the Start Scanning button. The machine starts scanning. Important If a feed error should occur while scanning, open the front cover and carefully remove the plastic card in order to prevent damage to the card.
- Page 281 Scan Plastic Cards Duplex(two-sided) Scanning: On (Short-edge binding) Auto Deskew: Off Multifeed Detection: Off Automatic Image Rotation: Off Original Layout Scan Result Page Top file:///C|/Documents%20and%20Settings/mcampbell.AM/My%20Documents/ADS2000solutions/chapter3_5_16.html[3/11/2013 10:24:53 AM]...
- Page 282 Note (ControlCenter2) icon is not displayed in the menu bar, double-click the ControlCenter icon. The ControlCenter icon is in Macintosh HD/Applications/Brother. (ControlCenter2) icon will appear in the menu bar. While holding down the Control key click the button in the SCAN tab for the Scan-to action you want to change (Image, OCR, E-mail, or File).
- Page 283 Correct Page Skew Click the Advanced Settings button. The Advanced Settings dialog box will appear. Check the Auto Deskew check box and then click the OK button. Click the OK button. Page Top file:///C|/Documents%20and%20Settings/mcampbell.AM/My%20Documents/ADS2000solutions/chapter3_5_17.html[3/11/2013 10:24:53 AM]...
- Page 284 Correct Page Skew file:///C|/Documents%20and%20Settings/mcampbell.AM/My%20Documents/ADS2000solutions/chapter3_5_17.html[3/11/2013 10:24:53 AM]...
- Page 285 Note (ControlCenter2) icon is not displayed in the menu bar, double-click the ControlCenter icon. The ControlCenter icon is in Macintosh HD/Applications/Brother. (ControlCenter2) icon will appear in the menu bar. While holding down the Control key click the button in the SCAN tab for the Scan-to action you want to change (Image, OCR, E-mail, or File).
- Page 286 Delete Blank Pages Click the Advanced Settings button. The Advanced Settings dialog box will appear. Check the Blank Page Skip check box and then click the OK button. Click the OK button. file:///C|/Documents%20and%20Settings/mcampbell.AM/My%20Documents/ADS2000solutions/chapter3_5_18.html[3/11/2013 10:24:54 AM]...
- Page 287 Delete Blank Pages Note The Blank Page Skip feature may not remove blank pages depending on the document. Page Top file:///C|/Documents%20and%20Settings/mcampbell.AM/My%20Documents/ADS2000solutions/chapter3_5_18.html[3/11/2013 10:24:54 AM]...
- Page 288 Note (ControlCenter2) icon is not displayed in the menu bar, double-click the ControlCenter icon. The ControlCenter icon is in Macintosh HD/Applications/Brother. (ControlCenter2) icon will appear in the menu bar. While holding down the Control key click the button in the SCAN tab for the Scan-to action you want to change (Image, OCR, E-mail, or File).
- Page 289 Change Document Orientation to Match the Text Click the Advanced Settings button. The Advanced Settings dialog box will appear. Check the Automatic Image Rotation check box and then click the OK button. Click the OK button. Page Top file:///C|/Documents%20and%20Settings/mcampbell.AM/My%20Documents/ADS2000solutions/chapter3_5_19.html[3/11/2013 10:24:55 AM]...
- Page 290 Change Document Orientation to Match the Text file:///C|/Documents%20and%20Settings/mcampbell.AM/My%20Documents/ADS2000solutions/chapter3_5_19.html[3/11/2013 10:24:55 AM]...
- Page 291 Note (ControlCenter2) icon is not displayed in the menu bar, double-click the ControlCenter icon. The ControlCenter icon is in Macintosh HD/Applications/Brother. (ControlCenter2) icon will appear in the menu bar. While holding down the Control key click the button in the SCAN tab for the Scan-to action you want to change (Image, OCR, E-mail, or File).
- Page 292 Detect Overlapping (Multifeed) Pages Click the Advanced Settings button. The Advanced Settings dialog box will appear. Check the Multifeed Detection check box and then click the OK button. Click the OK button. file:///C|/Documents%20and%20Settings/mcampbell.AM/My%20Documents/ADS2000solutions/chapter3_5_20.html[3/11/2013 10:24:56 AM]...
- Page 293 Detect Overlapping (Multifeed) Pages Note The Multifeed Detection feature does not support documents narrower than 2 3/4 in. (70 mm) wide. Page Top file:///C|/Documents%20and%20Settings/mcampbell.AM/My%20Documents/ADS2000solutions/chapter3_5_20.html[3/11/2013 10:24:56 AM]...
- Page 294 Note (ControlCenter2) icon is not displayed in the menu bar, double-click the ControlCenter icon. The ControlCenter icon is in Macintosh HD/Applications/Brother. (ControlCenter2) icon will appear in the menu bar. While holding down the Control key click the button in the SCAN tab for the Scan-to action you want to change (Image, OCR, E-mail, or File).
- Page 295 Scan Pages Laid on Top of Each Other Check the Carrier Sheet Mode check box. Select a document size other than Auto from the Document Size drop-down list. Change other settings if needed (see Change Scan Settings). Click the button you selected in step 3. The message dialog appears.
- Page 296 Note (ControlCenter2) icon is not displayed in the menu bar, double-click the ControlCenter icon. The ControlCenter icon is in Macintosh HD/Applications/Brother. (ControlCenter2) icon will appear in the menu bar. While holding down the Control key click the button in the SCAN tab for the Scan-to action you want to change (Image, OCR, E-mail, or File).
- Page 297 Scan Envelopes Check the Carrier Sheet Mode check box. Select a document size other than Auto from the Document Size drop-down list. Change other settings if needed (see Change Scan Settings). Click the button you selected in step 3. The message dialog appears. Click the Start Scanning button. The machine starts scanning.
- Page 298 Note (ControlCenter2) icon is not displayed in the menu bar, double-click the ControlCenter icon. The ControlCenter icon is in Macintosh HD/Applications/Brother. (ControlCenter2) icon will appear in the menu bar. While holding down the Control key click the button in the SCAN tab for the Scan-to action you want to change (Image, OCR, E-mail, or File).
- Page 299 Prevent Bleed Through Click the Advanced Settings button. The Advanced Settings dialog box will appear. Check the Bleed Through Prevention/Base Color Removal check box and then click the OK button. Click the OK button. file:///C|/Documents%20and%20Settings/mcampbell.AM/My%20Documents/ADS2000solutions/chapter3_5_23.html[3/11/2013 10:24:58 AM]...
- Page 300 Prevent Bleed Through Note When you scan newspapers or magazines with the Bleed Through Prevention/Base Color Removal feature, the scanned data can be faded. To avoid faded scanned data, select a higher resolution. Page Top file:///C|/Documents%20and%20Settings/mcampbell.AM/My%20Documents/ADS2000solutions/chapter3_5_23.html[3/11/2013 10:24:58 AM]...
- Page 301 Note (ControlCenter2) icon is not displayed in the menu bar, double-click the ControlCenter icon. The ControlCenter icon is in Macintosh HD/Applications/Brother. (ControlCenter2) icon will appear in the menu bar. While holding down the Control key click the button in the SCAN tab for the Scan-to action you want to change (Image, OCR, E-mail, or File).
- Page 302 Remove the Background Color (Base Color Removal) and Make Documents Easier to Read Click the Advanced Settings button. The Advanced Settings dialog box will appear. Check the Bleed Through Prevention/Base Color Removal check box and then click the OK button. Click the OK button.
- Page 303 Remove the Background Color (Base Color Removal) and Make Documents Easier to Read Note When you scan newspapers or magazines with the Bleed Through Prevention/Base Color Removal feature, the scanned data can be faded. To avoid faded scanned data, select a higher resolution. Page Top file:///C|/Documents%20and%20Settings/mcampbell.AM/My%20Documents/ADS2000solutions/chapter3_5_24.html[3/11/2013 10:24:59 AM]...
- Page 304 Note (ControlCenter2) icon is not displayed in the menu bar, double-click the ControlCenter icon. The ControlCenter icon is in Macintosh HD/Applications/Brother. (ControlCenter2) icon will appear in the menu bar. While holding down the Control key click the button in the SCAN tab for the Scan-to action you want to change (Image, OCR, E-mail, or File).
- Page 305 View the Number of Scanned Pages Click the Advanced Settings button. The Advanced Settings dialog box will appear. Check the Display Scanning Results check box and then click the OK button. Click the OK button. Page Top file:///C|/Documents%20and%20Settings/mcampbell.AM/My%20Documents/ADS2000solutions/chapter3_5_25.html[3/11/2013 10:24:59 AM]...
- Page 306 View the Number of Scanned Pages file:///C|/Documents%20and%20Settings/mcampbell.AM/My%20Documents/ADS2000solutions/chapter3_5_25.html[3/11/2013 10:24:59 AM]...
- Page 307 The ControlCenter2 window will appear. Note (ControlCenter2) icon is not displayed in the menu bar, double-click the ControlCenter icon. The ControlCenter icon is in Macintosh HD/Applications/Brother. (ControlCenter2) icon will appear in the menu bar. Click the DEVICE SETTINGS tab. Click the Scan to PC Settings button. The Remote Setup window will appear.
- Page 308 Scan Photos and Graphics Click the OK button to close the Remote Setup window. Click the SCAN tab on the ControlCenter2 window. While holding down the Control key click the Image button. The Scan To Image dialog box will appear. Click the Device Button tab.
- Page 309 Scan Photos and Graphics Change other settings if needed (see Change Scan Settings). Load your document. Press Scan to PC. The machine starts scanning. Page Top file:///C|/Documents%20and%20Settings/mcampbell.AM/My%20Documents/ADS2000solutions/chapter4_3_2.html[3/11/2013 10:25:00 AM]...
- Page 310 The ControlCenter2 window will appear. Note (ControlCenter2) icon is not displayed in the menu bar, double-click the ControlCenter icon. The ControlCenter icon is in Macintosh HD/Applications/Brother. (ControlCenter2) icon will appear in the menu bar. Click the DEVICE SETTINGS tab. Click the Scan to PC Settings button. The Remote Setup window will appear.
- Page 311 Scan to E-mail attachment Click the OK button to close the Remote Setup window. Click the SCAN tab on the ControlCenter2 window. While holding down the Control key click the E-mail button. The Scan To E-mail dialog box will appear. Click the Device Button tab.
- Page 312 Scan to E-mail attachment Change other settings if needed (see Change Scan Settings). Load your document. Press Scan to PC. The machine starts scanning the document, creates a file attachment, and launches your E- mail application displaying the new message waiting to be addressed. Page Top file:///C|/Documents%20and%20Settings/mcampbell.AM/My%20Documents/ADS2000solutions/chapter4_3_3.html[3/11/2013 10:25:01 AM]...
- Page 313 The ControlCenter2 window will appear. Note (ControlCenter2) icon is not displayed in the menu bar, double-click the ControlCenter icon. The ControlCenter icon is in Macintosh HD/Applications/Brother. (ControlCenter2) icon will appear in the menu bar. Click the DEVICE SETTINGS tab. Click the Scan to PC Settings button. The Remote Setup window will appear.
- Page 314 Scan to an Editable Text File (OCR) Select OCR from the drop-down list. Click the OK button to close the Remote Setup window. Click the SCAN tab on the ControlCenter2 window. While holding down the Control key click the OCR button. The Scan To OCR dialog box will appear. Click the Device Button tab.
- Page 315 Scan to an Editable Text File (OCR) Change other settings if needed (see Change Scan Settings). Load your document. Press Scan to PC. The machine scans the document, converts it into editable text, then sends it to your default word processing application. Page Top file:///C|/Documents%20and%20Settings/mcampbell.AM/My%20Documents/ADS2000solutions/chapter4_3_4.html[3/11/2013 10:25:02 AM]...
- Page 316 The ControlCenter2 window will appear. Note (ControlCenter2) icon is not displayed in the menu bar, double-click the ControlCenter icon. The ControlCenter icon is in Macintosh HD/Applications/Brother. (ControlCenter2) icon will appear in the menu bar. Click the DEVICE SETTINGS tab. Click the Scan to PC Settings button. The Remote Setup window will appear.
- Page 317 Change the Feature Assigned to the Scan to PC Key to set the Default Scan-to Action Page Top file:///C|/Documents%20and%20Settings/mcampbell.AM/My%20Documents/ADS2000solutions/chapter4_3_5.html[3/11/2013 10:25:03 AM]...
- Page 318 Note (ControlCenter2) icon is not displayed in the menu bar, double-click the ControlCenter icon. The ControlCenter icon is in Macintosh HD/Applications/Brother. (ControlCenter2) icon will appear in the menu bar. While holding down the Control key click a button for the Scan-to action you want to change (Image, OCR, E- mail, or File).
- Page 319 Scan Pages of Different Sizes at the Same Time Select Auto from the Document Size drop-down list. Change other settings if needed (see Change Scan Settings). Load your document. Note Narrow documents should be inserted straight and as close to the center of the machine as possible. Press Scan to PC.
- Page 320 Note (ControlCenter2) icon is not displayed in the menu bar, double-click the ControlCenter icon. The ControlCenter icon is in Macintosh HD/Applications/Brother. (ControlCenter2) icon will appear in the menu bar. While holding down the Control key click a button for the Scan-to action you want to change (Image, OCR, E- mail, or File).
- Page 321 Scan Business Cards Select Business Card from the Document Size drop-down list. Change other settings if needed (see Change Scan Settings). Load your document (see Loading Business Cards and Plastic Cards). Press Scan to PC. The machine starts scanning. Note Certain kinds of business cards and thick paper might be detected as being multi-fed by the Multifeed detector, even though they were fed properly.
- Page 322 Note (ControlCenter2) icon is not displayed in the menu bar, double-click the ControlCenter icon. The ControlCenter icon is in Macintosh HD/Applications/Brother. (ControlCenter2) icon will appear in the menu bar. While holding down the Control key click a button for the Scan-to action you want to change (Image, OCR, E- mail, or File).
- Page 323 Scan Two Pages and Combine Them on One Page (2 in 1) Select 2 in 1 from the Document Size drop-down list. Note To do 2 in 1 scanning, uncheck the Automatic Image Rotation check box in the Advanced Settings dialog box.
- Page 324 Note (ControlCenter2) icon is not displayed in the menu bar, double-click the ControlCenter icon. The ControlCenter icon is in Macintosh HD/Applications/Brother. (ControlCenter2) icon will appear in the menu bar. While holding down the Control key click a button for the Scan-to action you want to change (Image, OCR, E- mail, or File).
- Page 325 Scan Documents Wider than Letter Check the Carrier Sheet Mode check box. Check the Duplex(two-sided) Scanning check box and then select the Long-edge binding option. Note If you cannot check the Duplex(two-sided) Scanning check box, select a document size other than Long Paper from the Document Size drop-down list.
- Page 326 Scan Documents Wider than Letter Press Scan to PC. The machine starts scanning. Page Top file:///C|/Documents%20and%20Settings/mcampbell.AM/My%20Documents/ADS2000solutions/chapter4_4_5.html[3/11/2013 10:25:06 AM]...
- Page 327 Note (ControlCenter2) icon is not displayed in the menu bar, double-click the ControlCenter icon. The ControlCenter icon is in Macintosh HD/Applications/Brother. (ControlCenter2) icon will appear in the menu bar. While holding down the Control key click a button for the Scan-to action you want to change (Image, OCR, E- mail, or File).
- Page 328 Scan Documents Longer than Letter Select Long Paper (Normal Width) or Long Paper (Narrow Width) from the Document Size drop-down list. Note • Each Long Paper option can scan a large document up to the following size: Long Paper (Normal Width): 8 1/2 × 34.0 in. (215.9 × 863.0 mm) Long Paper (Narrow Width): 4 1/4 ×...
- Page 329 Note (ControlCenter2) icon is not displayed in the menu bar, double-click the ControlCenter icon. The ControlCenter icon is in Macintosh HD/Applications/Brother. (ControlCenter2) icon will appear in the menu bar. While holding down the Control key click a button for the Scan-to action you want to change (Image, OCR, E- mail, or File).
- Page 330 Scan Both Sides of a Page Automatically Check the Duplex(two-sided) Scanning check box. Note If you cannot check the Duplex(two-sided) Scanning check box, select a document size other than Long Paper from the Document Size drop-down list. Select Long-edge binding or Short-edge binding depending for the document layout as shown in the following table.
- Page 331 Scan Both Sides of a Page Automatically Short-edge binding Change other settings if needed (see Change Scan Settings). Load your document. Press Scan to PC. The machine starts scanning. Page Top file:///C|/Documents%20and%20Settings/mcampbell.AM/My%20Documents/ADS2000solutions/chapter4_4_7.html[3/11/2013 10:25:07 AM]...
- Page 332 Note (ControlCenter2) icon is not displayed in the menu bar, double-click the ControlCenter icon. The ControlCenter icon is in Macintosh HD/Applications/Brother. (ControlCenter2) icon will appear in the menu bar. While holding down the Control key click a button for the Scan-to action you want to change (Image, OCR, E- mail, or File).
- Page 333 Scan Specific/irregular-sized Documents Using the Carrier Sheet Check the Carrier Sheet Mode check box. Change other settings if needed (see Change Scan Settings). Load the Carrier Sheet (see Loading Clippings, Photos, and Other Important Documents). Note Load only one Carrier Sheet at a time. Press Scan to PC.
- Page 334 Note (ControlCenter2) icon is not displayed in the menu bar, double-click the ControlCenter icon. The ControlCenter icon is in Macintosh HD/Applications/Brother. (ControlCenter2) icon will appear in the menu bar. While holding down the Control key click a button for the Scan-to action you want to change (Image, OCR, E- mail, or File).
- Page 335 Scan Plastic Cards Check the Plastic Card Mode check box. Change other settings if needed (see Change Scan Settings). Load a plastic card (see Loading Business Cards and Plastic Cards). Note Load only one plastic card at a time. Press Scan to PC. The machine starts scanning. Important If a feed error should occur while scanning, open the front cover and carefully remove the plastic card in order to prevent damage to the card.
- Page 336 Scan Plastic Cards Plastic Card Mode automatically uses these settings: Resolution: 600 x 600 dpi Document Size: 2 in 1 (Business Card) Duplex(two-sided) Scanning: On (Short-edge binding) Auto Deskew: Off Multifeed Detection: Off Automatic Image Rotation: Off Original Layout Scan Result Page Top file:///C|/Documents%20and%20Settings/mcampbell.AM/My%20Documents/ADS2000solutions/chapter4_4_9.html[3/11/2013 10:25:09 AM]...
- Page 337 Note (ControlCenter2) icon is not displayed in the menu bar, double-click the ControlCenter icon. The ControlCenter icon is in Macintosh HD/Applications/Brother. (ControlCenter2) icon will appear in the menu bar. While holding down the Control key click a button for the Scan-to action you want to change (Image, OCR, E- mail, or File).
- Page 338 Correct Page Skew Click the Advanced Settings button. The Advanced Settings dialog box will appear. Check the Auto Deskew check box and then click the OK button. Change other settings if needed (see Change Scan Settings). Page Top file:///C|/Documents%20and%20Settings/mcampbell.AM/My%20Documents/ADS2000solutions/chapter4_4_10.html[3/11/2013 10:25:09 AM]...
- Page 339 Correct Page Skew file:///C|/Documents%20and%20Settings/mcampbell.AM/My%20Documents/ADS2000solutions/chapter4_4_10.html[3/11/2013 10:25:09 AM]...
- Page 340 Note (ControlCenter2) icon is not displayed in the menu bar, double-click the ControlCenter icon. The ControlCenter icon is in Macintosh HD/Applications/Brother. (ControlCenter2) icon will appear in the menu bar. While holding down the Control key click a button for the Scan-to action you want to change (Image, OCR, E- mail, or File).
- Page 341 Delete Blank Pages Click the Advanced Settings button. The Advanced Settings dialog box will appear. Check the Blank Page Skip check box and then click the OK button. Change other settings if needed (see Change Scan Settings). file:///C|/Documents%20and%20Settings/mcampbell.AM/My%20Documents/ADS2000solutions/chapter4_4_11.html[3/11/2013 10:25:10 AM]...
- Page 342 Delete Blank Pages Note The Blank Page Skip feature may not remove blank pages depending on the document. Page Top file:///C|/Documents%20and%20Settings/mcampbell.AM/My%20Documents/ADS2000solutions/chapter4_4_11.html[3/11/2013 10:25:10 AM]...
- Page 343 Note (ControlCenter2) icon is not displayed in the menu bar, double-click the ControlCenter icon. The ControlCenter icon is in Macintosh HD/Applications/Brother. (ControlCenter2) icon will appear in the menu bar. While holding down the Control key click a button for the Scan-to action you want to change (Image, OCR, E- mail, or File).
- Page 344 Change Document Orientation to Match the Text Click the Advanced Settings button. The Advanced Settings dialog box will appear. Check the Automatic Image Rotation check box and then click the OK button. Change other settings if needed (see Change Scan Settings).
- Page 345 Change Document Orientation to Match the Text file:///C|/Documents%20and%20Settings/mcampbell.AM/My%20Documents/ADS2000solutions/chapter4_4_12.html[3/11/2013 10:25:11 AM]...
- Page 346 Note (ControlCenter2) icon is not displayed in the menu bar, double-click the ControlCenter icon. The ControlCenter icon is in Macintosh HD/Applications/Brother. (ControlCenter2) icon will appear in the menu bar. While holding down the Control key click a button for the Scan-to action you want to change (Image, OCR, E- mail, or File).
- Page 347 Detect Overlapping (Multifeed) Pages Click the Advanced Settings button. The Advanced Settings dialog box will appear. Check the Multifeed Detection check box and then click the OK button. Change other settings if needed (see Change Scan Settings). file:///C|/Documents%20and%20Settings/mcampbell.AM/My%20Documents/ADS2000solutions/chapter4_4_13.html[3/11/2013 10:25:12 AM]...
- Page 348 Detect Overlapping (Multifeed) Pages Note The Multifeed Detection feature does not support documents narrower than 2 3/4 in. (70 mm) wide. Page Top file:///C|/Documents%20and%20Settings/mcampbell.AM/My%20Documents/ADS2000solutions/chapter4_4_13.html[3/11/2013 10:25:12 AM]...
- Page 349 Note (ControlCenter2) icon is not displayed in the menu bar, double-click the ControlCenter icon. The ControlCenter icon is in Macintosh HD/Applications/Brother. (ControlCenter2) icon will appear in the menu bar. While holding down the Control key click a button for the Scan-to action you want to change (Image, OCR, E- mail, or File).
- Page 350 Scan Pages Laid on Top of Each Other Check the Carrier Sheet Mode check box. Change other settings if needed (see Change Scan Settings). Load the Carrier Sheet (see Loading Clippings, Photos, and Other Important Documents). Note Load only one Carrier Sheet at a time. Press Scan to PC.
- Page 351 Note (ControlCenter2) icon is not displayed in the menu bar, double-click the ControlCenter icon. The ControlCenter icon is in Macintosh HD/Applications/Brother. (ControlCenter2) icon will appear in the menu bar. While holding down the Control key click a button for the Scan-to action you want to change (Image, OCR, E- mail, or File).
- Page 352 Scan Envelopes Check the Carrier Sheet Mode check box. Change other settings if needed (see Change Scan Settings). Load the Carrier Sheet (see Loading Clippings, Photos, and Other Important Documents). Note Load only one Carrier Sheet at a time. Press Scan to PC. The machine starts scanning. Page Top file:///C|/Documents%20and%20Settings/mcampbell.AM/My%20Documents/ADS2000solutions/chapter4_4_15.html[3/11/2013 10:25:13 AM]...
- Page 353 Note (ControlCenter2) icon is not displayed in the menu bar, double-click the ControlCenter icon. The ControlCenter icon is in Macintosh HD/Applications/Brother. (ControlCenter2) icon will appear in the menu bar. While holding down the Control key click a button for the Scan-to action you want to change (Image, OCR, E- mail, or File).
- Page 354 Prevent Bleed Through Click the Advanced Settings button. The Advanced Settings dialog box will appear. Check the Bleed Through Prevention/Base Color Removal check box and then click the OK button. Change other settings if needed (see Change Scan Settings). file:///C|/Documents%20and%20Settings/mcampbell.AM/My%20Documents/ADS2000solutions/chapter4_4_16.html[3/11/2013 10:25:14 AM]...
- Page 355 Prevent Bleed Through Note When you scan newspapers or magazines with the Bleed Through Prevention/Base Color Removal feature, the scanned data can be faded. To avoid faded scanned data, select a higher resolution. Page Top file:///C|/Documents%20and%20Settings/mcampbell.AM/My%20Documents/ADS2000solutions/chapter4_4_16.html[3/11/2013 10:25:14 AM]...
- Page 356 Note (ControlCenter2) icon is not displayed in the menu bar, double-click the ControlCenter icon. The ControlCenter icon is in Macintosh HD/Applications/Brother. (ControlCenter2) icon will appear in the menu bar. While holding down the Control key click a button for the Scan-to action you want to change (Image, OCR, E- mail, or File).
- Page 357 Remove the Background Color (Base Color Removal) and Make Documents Easier to Read Click the Advanced Settings button. The Advanced Settings dialog box will appear. Check the Bleed Through Prevention/Base Color Removal check box and then click the OK button. Change other settings if needed (see Change Scan Settings).
- Page 358 Remove the Background Color (Base Color Removal) and Make Documents Easier to Read Note When you scan newspapers or magazines with the Bleed Through Prevention/Base Color Removal feature, the scanned data can be faded. To avoid faded scanned data, select a higher resolution. Page Top file:///C|/Documents%20and%20Settings/mcampbell.AM/My%20Documents/ADS2000solutions/chapter4_4_17.html[3/11/2013 10:25:15 AM]...
- Page 359 Note (ControlCenter2) icon is not displayed in the menu bar, double-click the ControlCenter icon. The ControlCenter icon is in Macintosh HD/Applications/Brother. (ControlCenter2) icon will appear in the menu bar. While holding down the Control key click a button for the Scan-to action you want to change (Image, OCR, E- mail, or File).
- Page 360 View Scanned Documents on Your Computer Screen Click the Advanced Settings button. The Advanced Settings dialog box will appear. Check the Display Scanning Results check box and then click the OK button. Change other settings if needed (see Change Scan Settings).
- Page 361 View Scanned Documents on Your Computer Screen file:///C|/Documents%20and%20Settings/mcampbell.AM/My%20Documents/ADS2000solutions/chapter4_4_18.html[3/11/2013 10:25:15 AM]...
- Page 362 The ControlCenter2 window will appear. Note (ControlCenter2) icon is not displayed in the menu bar, double-click the ControlCenter icon. The ControlCenter icon is in Macintosh HD/Applications/Brother. (ControlCenter2) icon will appear in the menu bar. Click the DEVICE SETTINGS tab. file:///C|/Documents%20and%20Settings/mcampbell.AM/My%20Documents/ADS2000solutions/chapter4_5_2.html[3/11/2013 10:25:16 AM]...
- Page 363 You can also start Remote Setup by following the instructions below: ® • Windows Click Start, All Programs, Brother, ADS-XXXX, and Remote Setup. • Macintosh Double-click the RemoteSetup icon located in Macintosh HD/Applications/Brother. Select Scan to USB in the folder tree.
- Page 364 Scan Pages of Different Sizes at the Same Time Select Auto from the Document Size drop-down list. Note Select Off from the Auto Deskew drop-down list if the Document Size drop-down list is grayed out. Change other settings if needed (see Change Scan Settings).
- Page 365 The ControlCenter2 window will appear. Note (ControlCenter2) icon is not displayed in the menu bar, double-click the ControlCenter icon. The ControlCenter icon is in Macintosh HD/Applications/Brother. (ControlCenter2) icon will appear in the menu bar. Click the DEVICE SETTINGS tab. file:///C|/Documents%20and%20Settings/mcampbell.AM/My%20Documents/ADS2000solutions/chapter4_5_3.html[3/11/2013 10:25:17 AM]...
- Page 366 You can also start Remote Setup by following the instructions below: ® • Windows Click Start, All Programs, Brother, ADS-XXXX, and Remote Setup. • Macintosh Double-click the RemoteSetup icon located in Macintosh HD/Applications/Brother. Select Scan to USB in the folder tree.
- Page 367 Scan Business Cards Select Business Card from the Document Size drop-down list. Note Select Off from the Auto Deskew drop-down list if the Document Size drop-down list is grayed out. Change other settings if needed (see Change Scan Settings). Load your document (see Loading Business Cards and Plastic Cards).
- Page 368 The ControlCenter2 window will appear. Note (ControlCenter2) icon is not displayed in the menu bar, double-click the ControlCenter icon. The ControlCenter icon is in Macintosh HD/Applications/Brother. (ControlCenter2) icon will appear in the menu bar. Click the DEVICE SETTINGS tab. file:///C|/Documents%20and%20Settings/mcampbell.AM/My%20Documents/ADS2000solutions/chapter4_5_4.html[3/11/2013 10:25:18 AM]...
- Page 369 You can also start Remote Setup by following the instructions below: ® • Windows Click Start, All Programs, Brother, ADS-XXXX, and Remote Setup. • Macintosh Double-click the RemoteSetup icon located in Macintosh HD/Applications/Brother. Select Scan to USB in the folder tree.
- Page 370 Scan Both Sides of a Page Automatically Select On : Long-edge binding or On : Short-edge binding from the Duplex Scanning drop-down list depending for the document layout as shown in the following table. 2-sided (Duplex) Scan Original Layout Scan Result Setting Long-edge binding Short-edge binding...
- Page 371 Scan Both Sides of a Page Automatically file:///C|/Documents%20and%20Settings/mcampbell.AM/My%20Documents/ADS2000solutions/chapter4_5_4.html[3/11/2013 10:25:18 AM]...
- Page 372 The ControlCenter2 window will appear. Note (ControlCenter2) icon is not displayed in the menu bar, double-click the ControlCenter icon. The ControlCenter icon is in Macintosh HD/Applications/Brother. (ControlCenter2) icon will appear in the menu bar. Click the DEVICE SETTINGS tab. file:///C|/Documents%20and%20Settings/mcampbell.AM/My%20Documents/ADS2000solutions/chapter4_5_5.html[3/11/2013 10:25:19 AM]...
- Page 373 You can also start Remote Setup by following the instructions below: ® • Windows Click Start, All Programs, Brother, ADS-XXXX, and Remote Setup. • Macintosh Double-click the RemoteSetup icon located in Macintosh HD/Applications/Brother. Select Scan to USB in the folder tree.
- Page 374 Correct Skewed Documents Select On from the Auto Deskew drop-down list. Change other settings if needed (see Change Scan Settings). Page Top file:///C|/Documents%20and%20Settings/mcampbell.AM/My%20Documents/ADS2000solutions/chapter4_5_5.html[3/11/2013 10:25:19 AM]...
- Page 375 The ControlCenter2 window will appear. Note (ControlCenter2) icon is not displayed in the menu bar, double-click the ControlCenter icon. The ControlCenter icon is in Macintosh HD/Applications/Brother. (ControlCenter2) icon will appear in the menu bar. Click the DEVICE SETTINGS tab. file:///C|/Documents%20and%20Settings/mcampbell.AM/My%20Documents/ADS2000solutions/chapter4_5_6.html[3/11/2013 10:25:20 AM]...
- Page 376 You can also start Remote Setup by following the instructions below: ® • Windows Click Start, All Programs, Brother, ADS-XXXX, and Remote Setup. • Macintosh Double-click the RemoteSetup icon located in Macintosh HD/Applications/Brother. Select Scan to USB in the folder tree.
- Page 377 Delete Blank Pages Select On from the Blank Page Skip drop-down list. Change other settings if needed (see Change Scan Settings). Note The Blank Page Skip feature may not remove blank pages depending on the document. Page Top file:///C|/Documents%20and%20Settings/mcampbell.AM/My%20Documents/ADS2000solutions/chapter4_5_6.html[3/11/2013 10:25:20 AM]...
- Page 378 The ControlCenter2 Preferences window will appear. Note (ControlCenter2) icon is not displayed in the menu bar, double-click the ControlCenter icon. The ControlCenter icon is in Macintosh HD/Applications/Brother. (ControlCenter2) icon will appear in the menu bar. Uncheck Start ControlCenter on computer startup.
- Page 379 ® • (Windows XP, Windows Vista Double-click the (ControlCenter4) icon in the task tray. • Click ControlCenter4 located in Start/All Programs/Brother/ADS-XXXX (where XXXX is your model name). Select the Scan tab. Right-click the (Image) button and select Button settings. Select PDF (*.pdf) from the File Type drop-down list.
- Page 380 Scan Documents (Scan to PDF) compression. Select Uncompressed or Compressed to adjust the file size for TIFF or TIFF Multi-Page. For PDF, Secure PDF and JPEG, use the slider to adjust the file size. Change other settings if needed (see Change Scan Settings).
- Page 381 ® • (Windows XP, Windows Vista Double-click the (ControlCenter4) icon in the task tray. • Click ControlCenter4 located in Start/All Programs/Brother/ADS-XXXX (where XXXX is your model name). Select the Scan tab. Right-click the (Image) button and select Button settings. Select a file type from the File Type drop-down list.
- Page 382 Scan Documents (Other File Types) file:///C|/Documents%20and%20Settings/mcampbell.AM/My%20Documents/ADS2000solutions/chapter3_3_3.html[3/11/2013 10:25:22 AM]...
- Page 383 ® • (Windows XP, Windows Vista Double-click the (ControlCenter4) icon in the task tray. • Click ControlCenter4 located in Start/All Programs/Brother/ADS-XXXX (where XXXX is your model name). Select the Scan tab. Right-click the button you want to use ( (Image),...
- Page 384 Scan Color and Black-and-White Pages at the Same Time Select Auto from the Scan Type drop-down list. Change other settings if needed (see Change Scan Settings). Click the button you selected in step 4. The message dialog appears. Click the Start Scanning button. The machine starts scanning.
- Page 385 ® ® XP, Windows Vista Double-click the (ControlCenter4) icon in the task tray. • Click ControlCenter4 located in Start/All Programs/Brother/ADS-XXXX (where XXXX is your model name). Select the Scan tab. Right-click the button you want to use ( (Image), (OCR),...
- Page 386 Scan Pages of Different Sizes at the Same Time Select Auto from the Document Size drop-down list. Change other settings if needed (see Change Scan Settings). Click the button you selected in step 4. The message dialog appears. Click the Start Scanning button. The machine starts scanning.
- Page 387 ® • (Windows XP, Windows Vista Double-click the (ControlCenter4) icon in the task tray. • Click ControlCenter4 located in Start/All Programs/Brother/ADS-XXXX (where XXXX is your model name). Select the Scan tab. Right-click the button you want to use ( (Image),...
- Page 388 Scan Business Cards Select Business Card from the Document Size drop-down list. Change other settings if needed (see Change Scan Settings). Click the button you selected in step 4. The message dialog appears. Click the Start Scanning button. The machine starts scanning. Note Check the Don’t show me again.
- Page 389 ® • (Windows XP, Windows Vista Double-click the (ControlCenter4) icon in the task tray. • Click ControlCenter4 located in Start/All Programs/Brother/ADS-XXXX (where XXXX is your model name). Select the Scan tab. Right-click the button you want to use ( (Image),...
- Page 390 Scan Two Pages and Combine Them on One Page (2 in 1) Select 2 in 1 from the Document Size drop-down list. Note To do 2 in 1 scanning, uncheck the Automatic Image Rotation check box in the Advanced Settings dialog box.
- Page 391 ® ® XP, Windows Vista Double-click the (ControlCenter4) icon in the task tray. • Click ControlCenter4 located in Start/All Programs/Brother/ADS-XXXX (where XXXX is your model name). Select the Scan tab. Right-click the button you want to use ( (Image), (OCR),...
- Page 392 Scan Documents Wider than Letter Check the Carrier Sheet Mode check box. Check the Duplex(two-sided) Scanning check box and then select the Long-edge binding option. Note If you cannot check the Duplex(two-sided) Scanning check box, select a document size other than Long Paper from the Document Size drop-down list.
- Page 393 ® ® XP, Windows Vista Double-click the (ControlCenter4) icon in the task tray. • Click ControlCenter4 located in Start/All Programs/Brother/ADS-XXXX (where XXXX is your model name). Select the Scan tab. Right-click the button you want to use ( (Image), (OCR),...
- Page 394 Scan Documents Longer than Letter Select Long Paper (Normal Width) or Long Paper (Narrow Width) from the Document Size drop-down list. Note • Each Long Paper option can scan a large document up to the following size: Long Paper (Normal Width): 8 1/2 × 34.0 in. (215.9 × 863.0 mm) Long Paper (Narrow Width): 4 1/4 ×...
- Page 395 ® ® XP, Windows Vista Double-click the (ControlCenter4) icon in the task tray. • Click ControlCenter4 located in Start/All Programs/Brother/ADS-XXXX (where XXXX is your model name). Select the Scan tab. Right-click the button you want to use ( (Image), (OCR),...
- Page 396 Scan Documents with More than 50 Pages Check the Continuous Scanning check box. Change other settings if needed (see Change Scan Settings). Click the button you selected in step 4. The message dialog appears. Click the Start Scanning button. The machine starts scanning. Note Check the Don’t show me again.
- Page 397 ® • (Windows XP, Windows Vista Double-click the (ControlCenter4) icon in the task tray. • Click ControlCenter4 located in Start/All Programs/Brother/ADS-XXXX (where XXXX is your model name). Select the Scan tab. Right-click the button you want to change ( (Image),...
- Page 398 Scan Both Sides of a Page Automatically Check the Duplex(two-sided) Scanning check box. Note If you cannot check the Duplex(two-sided) Scanning check box, select a document size other than Long Paper from the Document Size drop-down list. Select Long-edge binding or Short-edge binding depending for the document layout as shown in the following table.
- Page 399 Scan Both Sides of a Page Automatically Change other settings if needed (see Change Scan Settings). Click the OK button. You have now changed the default settings for your chosen Scan-to action. These settings will be used the next time you click the scan option ( (Image), (OCR),...
- Page 400 ® ® XP, Windows Vista Double-click the (ControlCenter4) icon in the task tray. • Click ControlCenter4 located in Start/All Programs/Brother/ADS-XXXX (where XXXX is your model name). Select the Scan tab. Right-click the button you want to use ( (Image), (OCR),...
- Page 401 Scan Specific/irregular-sized Documents Using the Carrier Sheet Check the Carrier Sheet Mode check box. Select a document size other than Auto from the Document Size drop-down list. Change other settings if needed (see Change Scan Settings). Click the button you selected in step 4. The message dialog appears.
- Page 402 ® ® XP, Windows Vista Double-click the (ControlCenter4) icon in the task tray. • Click ControlCenter4 located in Start/All Programs/Brother/ADS-XXXX (where XXXX is your model name). Select the Scan tab. Right-click the button you want to use ( (Image), (OCR),...
- Page 403 Scan Plastic Cards Check the Plastic Card Mode check box. Change other settings if needed (see Change Scan Settings). Click the button you selected in step 4. The message dialog appears. Click the Start Scanning button. The machine starts scanning. Important If a feed error should occur while scanning, open the front cover and carefully remove the plastic card in order to prevent damage to the card.
- Page 404 Scan Plastic Cards Page Top file:///C|/Documents%20and%20Settings/mcampbell.AM/My%20Documents/ADS2000solutions/chapter3_3_13.html[3/11/2013 10:25:30 AM]...
- Page 405 ® • (Windows XP, Windows Vista Double-click the (ControlCenter4) icon in the task tray. • Click ControlCenter4 located in Start/All Programs/Brother/ADS-XXXX (where XXXX is your model name). Select the Scan tab. Right-click the button you want to use ( (Image),...
- Page 406 Correct Page Skew Click the Advanced Settings button. The Advanced Settings dialog box will appear. Check the Auto Deskew check box and then click the OK button. Click the OK button. Page Top file:///C|/Documents%20and%20Settings/mcampbell.AM/My%20Documents/ADS2000solutions/chapter3_3_14.html[3/11/2013 10:25:31 AM]...
- Page 407 ® • (Windows XP, Windows Vista Double-click the (ControlCenter4) icon in the task tray. • Click ControlCenter4 located in Start/All Programs/Brother/ADS-XXXX (where XXXX is your model name). Select the Scan tab. Right-click the button you want to use ( (Image),...
- Page 408 Delete Blank Pages Click the Advanced Settings button. The Advanced Settings dialog box will appear. Check the Blank Page Skip check box and then click the OK button. Click the OK button. Note The Blank Page Skip feature may not remove blank pages depending on the document. Page Top file:///C|/Documents%20and%20Settings/mcampbell.AM/My%20Documents/ADS2000solutions/chapter3_3_15.html[3/11/2013 10:25:32 AM]...
- Page 409 ® • (Windows XP, Windows Vista Double-click the (ControlCenter4) icon in the task tray. • Click ControlCenter4 located in Start/All Programs/Brother/ADS-XXXX (where XXXX is your model name). Select the Scan tab. Right-click the button you want to use ( (Image),...
- Page 410 Change Document Orientation to Match the Text Click the Advanced Settings button. The Advanced Settings dialog box will appear. Check the Automatic Image Rotation check box and then click the OK button. Click the OK button. Page Top file:///C|/Documents%20and%20Settings/mcampbell.AM/My%20Documents/ADS2000solutions/chapter3_3_16.html[3/11/2013 10:25:33 AM]...
- Page 411 ® • (Windows XP, Windows Vista Double-click the (ControlCenter4) icon in the task tray. • Click ControlCenter4 located in Start/All Programs/Brother/ADS-XXXX (where XXXX is your model name). Select the Scan tab. Right-click the button you want to use ( (Image),...
- Page 412 Detect Overlapping (Multifeed) Pages Click the Advanced Settings button. The Advanced Settings dialog box will appear. Check the Multifeed Detection check box and then click the OK button. Click the OK button. Note The Multifeed Detection feature does not support documents narrower than 2 3/4 in. (70 mm) wide. Page Top file:///C|/Documents%20and%20Settings/mcampbell.AM/My%20Documents/ADS2000solutions/chapter3_3_17.html[3/11/2013 10:25:34 AM]...
- Page 413 ® ® XP, Windows Vista Double-click the (ControlCenter4) icon in the task tray. • Click ControlCenter4 located in Start/All Programs/Brother/ADS-XXXX (where XXXX is your model name). Select the Scan tab. Right-click the button you want to use ( (Image), (OCR),...
- Page 414 Scan Pages Laid on Top of Each Other Check the Carrier Sheet Mode check box. Select a document size other than Auto from the Document Size drop-down list. Change other settings if needed (see Change Scan Settings). Click the button you selected in step 4. The message dialog appears.
- Page 415 ® ® XP, Windows Vista Double-click the (ControlCenter4) icon in the task tray. • Click ControlCenter4 located in Start/All Programs/Brother/ADS-XXXX (where XXXX is your model name). Select the Scan tab. Right-click the button you want to use ( (Image), (OCR),...
- Page 416 Scan Envelopes Check the Carrier Sheet Mode check box. Select a document size other than Auto from the Document Size drop-down list. Change other settings if needed (see Change Scan Settings). Click the button you selected in step 4. The message dialog appears. Click the Start Scanning button. The machine starts scanning.
- Page 417 ® • (Windows XP, Windows Vista Double-click the (ControlCenter4) icon in the task tray. • Click ControlCenter4 located in Start/All Programs/Brother/ADS-XXXX (where XXXX is your model name). Select the Scan tab. Right-click the button you want to use ( (Image),...
- Page 418 Prevent Bleed Through Click the Advanced Settings button. The Advanced Settings dialog box will appear. Check the Bleed Through Prevention/Base Color Removal check box and then click the OK button. Click the OK button. Note When you scan newspapers or magazines with the Bleed Through Prevention/Base Color Removal feature, the scanned data can be faded.
- Page 419 ® • (Windows XP, Windows Vista Double-click the (ControlCenter4) icon in the task tray. • Click ControlCenter4 located in Start/All Programs/Brother/ADS-XXXX (where XXXX is your model name). Select the Scan tab. Right-click the button you want to use ( (Image),...
- Page 420 Remove the Background Color (Base Color Removal) and Make Documents Easier to Read Click the Advanced Settings button. The Advanced Settings dialog box will appear. Check the Bleed Through Prevention/Base Color Removal check box and then click the OK button. Click the OK button.
- Page 421 ® • (Windows XP, Windows Vista Double-click the (ControlCenter4) icon in the task tray. • Click ControlCenter4 located in Start/All Programs/Brother/ADS-XXXX (where XXXX is your model name). Select the Scan tab. Right-click the button you want to use ( (Image),...
- Page 422 View the Number of Scanned Pages Click the Advanced Settings button. The Advanced Settings dialog box will appear. Check the Display Scanning Results check box and then click the OK button. Click the OK button. Page Top file:///C|/Documents%20and%20Settings/mcampbell.AM/My%20Documents/ADS2000solutions/chapter3_3_22.html[3/11/2013 10:25:38 AM]...
- Page 423 • (Windows XP, Windows Vista Double-click the (ControlCenter4) icon in the task tray. • Click ControlCenter4 located in Start/All Programs/Brother/ADS-XXXX (where XXXX is your model name). Select the Scan tab. Right-click the (Image) button and select Button settings to change scan settings, such as file format,...
- Page 424 • (Windows XP, Windows Vista Double-click the (ControlCenter4) icon in the task tray. • Click ControlCenter4 located in Start/All Programs/Brother/ADS-XXXX (where XXXX is your model name). Select the Scan tab. Right-click the (E-mail) button and select Button settings to change scan settings, such as file format,...
- Page 425 Scan to E-mail Attachment file:///C|/Documents%20and%20Settings/mcampbell.AM/My%20Documents/ADS2000solutions/chapter3_3_24.html[3/11/2013 10:25:39 AM]...
- Page 426 • (Windows XP, Windows Vista Double-click the (ControlCenter4) icon in the task tray. • Click ControlCenter4 located in Start/All Programs/Brother/ADS-XXXX (where XXXX is your model name). Select the Scan tab. Right-click the (OCR) button and select Button settings to change scan settings, such as file format,...
- Page 427 Scan to an Editable Text File (OCR) Check the Don’t show me again. check box not to show the message dialog again. Page Top file:///C|/Documents%20and%20Settings/mcampbell.AM/My%20Documents/ADS2000solutions/chapter3_3_25.html[3/11/2013 10:25:40 AM]...
- Page 428 • (Windows XP, Windows Vista Double-click the (ControlCenter4) icon in the task tray. • Click ControlCenter4 located in Start/All Programs/Brother/ADS-XXXX (where XXXX is your model name). Select the Scan tab. Right-click the (File) button and select Button settings to change scan settings, such as file format, file...
- Page 429 Save Scanned Documents to a Folder file:///C|/Documents%20and%20Settings/mcampbell.AM/My%20Documents/ADS2000solutions/chapter3_3_26.html[3/11/2013 10:25:41 AM]...
- Page 430 XP, Windows Vista Double-click the (ControlCenter4) icon in the task tray. • Click ControlCenter4 located in Start/All Programs/Brother/ADS-XXXX (where XXXX is your model name). Click the Device Settings tab (the example below uses Home Mode). Click the Device Scan Settings button. The Device Scan Settings dialog box will appear.
- Page 431 Scan Pages of Different Sizes at the Same Time Select the tab for the Scan-to action you want to change (Image, OCR, E-mail, or File). Select Auto from the Document Size drop-down list. Change other settings if needed (see Change Scan to PC Settings).
- Page 432 XP, Windows Vista Double-click the (ControlCenter4) icon in the task tray. • Click ControlCenter4 located in Start/All Programs/Brother/ADS-XXXX (where XXXX is your model name). Click the Device Settings tab (the example below uses Home Mode). Click the Device Scan Settings button. The Device Scan Settings dialog box will appear.
- Page 433 Scan Business Cards Select the tab for the Scan-to action you want to change (Image, OCR, E-mail, or File). Select Business Card from the Document Size drop-down list. Change other settings if needed (see Change Scan to PC Settings). Load your document (see Loading Business Cards and Plastic Cards).
- Page 434 XP, Windows Vista Double-click the (ControlCenter4) icon in the task tray. • Click ControlCenter4 located in Start/All Programs/Brother/ADS-XXXX (where XXXX is your model name). Click the Device Settings tab (the example below uses Home Mode). Click the Device Scan Settings button. The Device Scan Settings dialog box will appear.
- Page 435 Scan Two Pages and Combine Them on One Page (2 in 1) Select the tab for the Scan-to action you want to change (Image, OCR, E-mail, or File). Select 2 in 1 from the Document Size drop-down list. Note To do 2 in 1 scanning, uncheck the Automatic Image Rotation check box in the Advanced Settings dialog box.
- Page 436 XP, Windows Vista Double-click the (ControlCenter4) icon in the task tray. • Click ControlCenter4 located in Start/All Programs/Brother/ADS-XXXX (where XXXX is your model name). Click the Device Settings tab (the example below uses Home Mode). Click the Device Scan Settings button. The Device Scan Settings dialog box will appear.
- Page 437 Scan Documents Wider than Letter Select the tab for the Scan-to action you want to change (Image, OCR, E-mail, or File). Check the Carrier Sheet Mode check box. Check the Duplex(two-sided) Scanning check box and then select the Long-edge binding option. Note If you cannot check the Duplex(two-sided) Scanning check box, select a document size other than Long Paper from the Document Size drop-down list.
- Page 438 XP, Windows Vista Double-click the (ControlCenter4) icon in the task tray. • Click ControlCenter4 located in Start/All Programs/Brother/ADS-XXXX (where XXXX is your model name). Click the Device Settings tab (the example below uses Home Mode). Click the Device Scan Settings button. The Device Scan Settings dialog box will appear.
- Page 439 Scan Documents Longer than Letter Select the tab for the Scan-to action you want to change (Image, OCR, E-mail, or File). Select Long Paper (Normal Width) or Long Paper (Narrow Width) from the Document Size drop-down list. Note • Each Long Paper option can scan a large document up to the following size: Long Paper (Normal Width): 8 1/2 ×...
- Page 440 XP, Windows Vista Double-click the (ControlCenter4) icon in the task tray. • Click ControlCenter4 located in Start/All Programs/Brother/ADS-XXXX (where XXXX is your model name). Click the Device Settings tab (the example below uses Home Mode). Click the Device Scan Settings button. The Device Scan Settings dialog box will appear.
- Page 441 Scan Both Sides of a Page Automatically Select the tab for the Scan-to action you want to change (Image, OCR, E-mail, or File). Check the Duplex(two-sided) Scanning check box. Note If you cannot check the Duplex(two-sided) Scanning check box, select a document size other than Long Paper from the Document Size drop-down list.
- Page 442 Scan Both Sides of a Page Automatically Change other settings if needed (see Change Scan to PC Settings). Load your document. Press Scan to PC. The machine starts scanning. Page Top file:///C|/Documents%20and%20Settings/mcampbell.AM/My%20Documents/ADS2000solutions/chapter4_2_7.html[3/11/2013 10:25:45 AM]...
- Page 443 XP, Windows Vista Double-click the (ControlCenter4) icon in the task tray. • Click ControlCenter4 located in Start/All Programs/Brother/ADS-XXXX (where XXXX is your model name). Click the Device Settings tab (the example below uses Home Mode). Click the Device Scan Settings button. The Device Scan Settings dialog box will appear.
- Page 444 Scan Specific/irregular-sized Documents Using the Carrier Sheet Select the tab for the Scan-to action you want to change (Image, OCR, E-mail, or File). Check the Carrier Sheet Mode check box. Change other settings if needed (see Change Scan to PC Settings).
- Page 445 XP, Windows Vista Double-click the (ControlCenter4) icon in the task tray. • Click ControlCenter4 located in Start/All Programs/Brother/ADS-XXXX (where XXXX is your model name). Click the Device Settings tab (the example below uses Home Mode). Click the Device Scan Settings button. The Device Scan Settings dialog box will appear.
- Page 446 Scan Plastic Cards Select the tab for the Scan-to action you want to change (Image, OCR, E-mail, or File). Check the Plastic Card Mode check box. Change other settings if needed (see Change Scan to PC Settings). Load a plastic card (see Loading Business Cards and Plastic Cards).
- Page 447 Scan Plastic Cards Original Layout Scan Result Page Top file:///C|/Documents%20and%20Settings/mcampbell.AM/My%20Documents/ADS2000solutions/chapter4_2_9.html[3/11/2013 10:25:47 AM]...
- Page 448 XP, Windows Vista Double-click the (ControlCenter4) icon in the task tray. • Click ControlCenter4 located in Start/All Programs/Brother/ADS-XXXX (where XXXX is your model name). Click the Device Settings tab (the example below uses Home Mode). Click the Device Scan Settings button. The Device Scan Settings dialog box will appear.
- Page 449 Correct Page Skew Select the tab for the Scan-to action you want to change (Image, OCR, E-mail, or File). Click the Advanced Settings button. The Advanced Settings dialog box will appear. Check the Auto Deskew check box and then click the OK button. Change other settings if needed (see Change Scan to PC Settings).
- Page 450 XP, Windows Vista Double-click the (ControlCenter4) icon in the task tray. • Click ControlCenter4 located in Start/All Programs/Brother/ADS-XXXX (where XXXX is your model name). Click the Device Settings tab (the example below uses Home Mode). Click the Device Scan Settings button. The Device Scan Settings dialog box will appear.
- Page 451 Delete Blank Pages Select the tab for the Scan-to action you want to change (Image, OCR, E-mail, or File). Click the Advanced Settings button. The Advanced Settings dialog box will appear. Check the Blank Page Skip check box and then click the OK button. Change other settings if needed (see Change Scan to PC Settings).
- Page 452 XP, Windows Vista Double-click the (ControlCenter4) icon in the task tray. • Click ControlCenter4 located in Start/All Programs/Brother/ADS-XXXX (where XXXX is your model name). Click the Device Settings tab (the example below uses Home Mode). Click the Device Scan Settings button. The Device Scan Settings dialog box will appear.
- Page 453 Change Document Orientation to Match the Text Select the tab for the Scan-to action you want to change (Image, OCR, E-mail, or File). Click the Advanced Settings button. The Advanced Settings dialog box will appear. Check the Automatic Image Rotation check box and then click the OK button. Change other settings if needed (see Change Scan to PC Settings).
- Page 454 XP, Windows Vista Double-click the (ControlCenter4) icon in the task tray. • Click ControlCenter4 located in Start/All Programs/Brother/ADS-XXXX (where XXXX is your model name). Click the Device Settings tab (the example below uses Home Mode). Click the Device Scan Settings button. The Device Scan Settings dialog box will appear.
- Page 455 Detect Overlapping (Multifeed) Pages Select the tab for the Scan-to action you want to change (Image, OCR, E-mail, or File). Click the Advanced Settings button. The Advanced Settings dialog box will appear. Check the Multifeed Detection check box and then click the OK button. Change other settings if needed (see Change Scan to PC Settings).
- Page 456 XP, Windows Vista Double-click the (ControlCenter4) icon in the task tray. • Click ControlCenter4 located in Start/All Programs/Brother/ADS-XXXX (where XXXX is your model name). Click the Device Settings tab (the example below uses Home Mode). Click the Device Scan Settings button. The Device Scan Settings dialog box will appear.
- Page 457 Scan Pages Laid on Top of Each Other Select the tab for the Scan-to action you want to change (Image, OCR, E-mail, or File). Check the Carrier Sheet Mode check box. Change other settings if needed (see Change Scan to PC Settings).
- Page 458 XP, Windows Vista Double-click the (ControlCenter4) icon in the task tray. • Click ControlCenter4 located in Start/All Programs/Brother/ADS-XXXX (where XXXX is your model name). Click the Device Settings tab (the example below uses Home Mode). Click the Device Scan Settings button. The Device Scan Settings dialog box will appear.
- Page 459 Scan Envelopes Select the tab for the Scan-to action you want to change (Image, OCR, E-mail, or File). Check the Carrier Sheet Mode check box. Change other settings if needed (see Change Scan to PC Settings). Load the Carrier Sheet (see Loading Clippings, Photos, and Other Important Documents).
- Page 460 XP, Windows Vista Double-click the (ControlCenter4) icon in the task tray. • Click ControlCenter4 located in Start/All Programs/Brother/ADS-XXXX (where XXXX is your model name). Click the Device Settings tab (the example below uses Home Mode). Click the Device Scan Settings button. The Device Scan Settings dialog box will appear.
- Page 461 Prevent Bleed Through Select the tab for the Scan-to action you want to change (Image, OCR, E-mail, or File). Click the Advanced Settings button. The Advanced Settings dialog box will appear. Check the Bleed Through Prevention/Base Color Removal check box and then click the OK button. Change other settings if needed (see Change Scan to PC Settings).
- Page 462 Prevent Bleed Through file:///C|/Documents%20and%20Settings/mcampbell.AM/My%20Documents/ADS2000solutions/chapter4_2_16.html[3/11/2013 10:25:52 AM]...
- Page 463 XP, Windows Vista Double-click the (ControlCenter4) icon in the task tray. • Click ControlCenter4 located in Start/All Programs/Brother/ADS-XXXX (where XXXX is your model name). Click the Device Settings tab (the example below uses Home Mode). Click the Device Scan Settings button. The Device Scan Settings dialog box will appear.
- Page 464 Remove the Background Color (Base Color Removal) and Make Documents Easier to Read Select the tab for the Scan-to action you want to change (Image, OCR, E-mail, or File). Click the Advanced Settings button. The Advanced Settings dialog box will appear. Check the Bleed Through Prevention/Base Color Removal check box and then click the OK button.
- Page 465 Remove the Background Color (Base Color Removal) and Make Documents Easier to Read file:///C|/Documents%20and%20Settings/mcampbell.AM/My%20Documents/ADS2000solutions/chapter4_2_17.html[3/11/2013 10:25:53 AM]...
-
Page 466: Twain Driver Settings
TWAIN Driver Settings TWAIN Driver Settings 1. Resolution You can select a scanning resolution from the Resolution drop-down list. Higher resolutions take more memory and transfer time, but produce a finer scanned image. Resolution Black & White/Gray 256 Color True Gray/24bit Color (Error Diffusion) 100 x 100 dpi 150 x 150 dpi... - Page 467 TWAIN Driver Settings • 24bit Color Uses up to 16.8 million colors to scan the image. Although using 24bit Color creates an image with the most accurate color reproduction, it requires the most memory and has the longest transfer time. Note 256 Color is only available when your scanning application supports this setting.
- Page 468 TWAIN Driver Settings Short-edge binding Page Top file:///C|/Documents%20and%20Settings/mcampbell.AM/My%20Documents/ADS2000solutions/chapter3_10_3.html[3/11/2013 10:25:54 AM]...
- Page 469 ICA Driver Settings ICA Driver Settings Note that the item name and assignable value will vary depending on the machine. 1. Kind Select from Color, Black & White or Text. 2. Resolution Select the resolution you want to scan your document at. 3.
- Page 470 ICA Driver Settings You can configure settings depending on Kind that you have chosen. Kind Configurable Settings Color Brightness, Tint, Temperature, Saturation Black & White Brightness, Contrast (Mac OS X 10.7.x only) Text Threshold Page Top file:///C|/Documents%20and%20Settings/mcampbell.AM/My%20Documents/ADS2000solutions/chapter3_11_2.html[3/11/2013 10:25:54 AM]...
- Page 471 Select your machine from Print & Fax or Print & Scan Select your machine from Print & Fax or Print & Scan Select System Preferences in the menu bar. Click the Print & Fax icon or the Print & Scan icon. Select the machine from the list on the left side of the screen.
- Page 472 Use NewSoft Presto! BizCard 6 (Windows®) ® Use NewSoft Presto! BizCard 6 (Windows Presto! BizCard lets you manage the information from scanned business cards, such as names, companies, mailing addresses, phone/fax numbers and e-mail addresses, on your computer. Simply scan, or import your business cards and Presto! BizCard automatically saves the data and image for each card.
- Page 473 Start Presto! PageManager by double-clicking the Presto! PageManager icon on your computer screen. Note The first time you use the Brother TWAIN driver, you need to set it as the default driver. To set the Brother TWAIN driver as the default driver, do the following.
- Page 474 The ControlCenter2 window will appear. Note (ControlCenter2) icon is not displayed in the menu bar, double-click the ControlCenter icon. The ControlCenter icon is in Macintosh HD/Applications/Brother. (ControlCenter2) icon will appear in the menu bar. Select the CUSTOM SCAN tab. While holding down the Control key click the button. The setting dialog box will appear.
- Page 475 Register the Favorite Scan Settings Using ControlCenter2 (CUSTOM SCAN) (Macintosh) Select the type of scan from the Scan Action field. In the Settings tab, change the scan settings. file:///C|/Documents%20and%20Settings/mcampbell.AM/My%20Documents/ADS2000solutions/chapter3_6.html[3/11/2013 10:25:57 AM]...
- Page 476 Register the Favorite Scan Settings Using ControlCenter2 (CUSTOM SCAN) (Macintosh) The following settings can be changed. Setting Description Applicable Feature Image E-mail File Target You can select which application is used to open Application scanned data. Only applications installed on your computer can be selected.
- Page 477 Register the Favorite Scan Settings Using ControlCenter2 (CUSTOM SCAN) (Macintosh) File Type Select the file type you want to use for the scanned data. Note • To save the document as a password-protected PDF, select Secure PDF (*.pdf) for File Type and then enter the password in the Set PDF Password dialog box.
- Page 478 Register the Favorite Scan Settings Using ControlCenter2 (CUSTOM SCAN) (Macintosh) Destination Click Browse and browse to the folder you would like Folder to save your scanned document to. Check Show Folder to automatically display the destination folder after scanning. Resolution You can select a scanning resolution from the Resolution drop-down list.
- Page 479 Register the Favorite Scan Settings Using ControlCenter2 (CUSTOM SCAN) (Macintosh) Brightness Adjust the setting (0 to 100) to get the best image. The default value of 50 represents an average and is usually suitable for most images. You can set the Brightness level by dragging the slider to the right or left to lighten or darken the image.
- Page 480 Register the Favorite Scan Settings Using ControlCenter2 (CUSTOM SCAN) (Macintosh) • Important documents (photos, contracts) • Thin paper (receipts) • Irregular-shaped paper (clippings) Note • Load only one Carrier Sheet at a time. • Set the document in the center of the Carrier Sheet and align the top of the document with the top of the Carrier Sheet.
- Page 481 Register the Favorite Scan Settings Using ControlCenter2 (CUSTOM SCAN) (Macintosh) Image E-mail File Auto Deskew Corrects the skew (within 5 degrees) of the scanned data. Automatic Image Changes the direction of the document based on the Rotation text orientation. Bleed Through Prevents the Bleed Through phenomenon on a two- Prevention/Base sided document, and also allows you to remove the...
- Page 482 Scan Using Windows®Photo Gallery or Windows®Fax and Scan ® ® Scan Using Windows Photo Gallery or Windows Fax and Scan ® ® You can use the Windows Photo Gallery or Windows Fax and Scan applications for scanning. These applications use the WIA scanner driver. The steps below will guide you through the scanning operations. ®...
- Page 483 The ControlCenter2 window will appear. Note (ControlCenter2) icon is not displayed in the menu bar, double-click the ControlCenter icon. The ControlCenter icon is in Macintosh HD/Applications/Brother. (ControlCenter2) icon will appear in the menu bar. Select the DEVICE SETTINGS tab. Click the Status Monitor button. The Status Monitor window will appear.
- Page 484 Check Consumable Replacement Cycle (Macintosh) Page Top file:///C|/Documents%20and%20Settings/mcampbell.AM/My%20Documents/ADS2000solutions/chapter6_3_3.html[3/11/2013 10:25:59 AM]...
- Page 485 (Status Monitor) icon in the task tray. The Brother Status Monitor window will appear. If the Brother Status Monitor window warns you to replace the Separation Pad and/or the Pick-up Roller, order the necessary parts and then replace the used parts with new ones.
- Page 486 Loading Documents with Facing Pages Loading Documents with Facing Pages Make sure documents with ink or correction fluid are completely dry. Open the Top Cover (1). Fold your document in half and then insert the document into the Carrier Sheet. Note Set the document in the center of the Carrier Sheet and align the top of the document with the top of the Carrier Sheet.
- Page 487 Loading Documents with Facing Pages Place the Carrier Sheet in the document feeder between the Guides until you feel it touch the inside of the machine. Pull the Output Tray out of the machine and then unfold the Document Stopper. Page Top file:///C|/Documents%20and%20Settings/mcampbell.AM/My%20Documents/ADS2000solutions/chapter1_5_5.html[3/11/2013 10:26:00 AM]...
- Page 488 Loading Business Cards and Plastic Cards Loading Business Cards and Plastic Cards Make sure documents with ink or correction fluid are completely dry. Open the Top Cover (1). Adjust the Document Guides (1) to fit the width of your document. Place your document, face down and short side first in the document feeder between the Guides until you feel it touch the inside of the machine.
- Page 489 Loading Business Cards and Plastic Cards Load only one plastic card at a time. Pull the Output Tray out of the machine until the triangular marks match the edge of the machine. Note Certain types of plastic cards may be scratched when scanned. To prevent damage to the card, it is recommended to use the Plastic Card Carrier sheet.
- Page 490 Loading Documents Wider than Letter Size Loading Documents Wider than Letter Size Make sure documents with ink or correction fluid are completely dry. Open the Top Cover (1). Fold your document in half and then insert the document into the Carrier Sheet. Note Set the document in the center of the Carrier Sheet and align the top of the document with the top of the Carrier Sheet.
- Page 491 Loading Documents Wider than Letter Size Place the Carrier Sheet in the document feeder between the Guides until you feel it touch the inside of the machine. Pull the Output Tray out of the machine and then unfold the Document Stopper. Page Top file:///C|/Documents%20and%20Settings/mcampbell.AM/My%20Documents/ADS2000solutions/chapter1_5_4.html[3/11/2013 10:26:02 AM]...
- Page 492 XP, Windows Vista Double-click the (ControlCenter4) icon in the task tray. • Click ControlCenter4 located in Start/All Programs/Brother/ADS-XXXX (where XXXX is your model name). Click Configuration and then select Create custom tab. You can also create a custom tab by right-clicking the tab area and selecting Create custom tab.
- Page 493 Create a Custom Tab (ControlCenter4 Advanced Mode) (Windows®) If you want to change the name of custom tab, right-click the custom tab and select Rename custom tab. Note You can also change the name of the custom tab by clicking Configuration and then Rename custom tab. Page Top file:///C|/Documents%20and%20Settings/mcampbell.AM/My%20Documents/ADS2000solutions/chapter3_4.html[3/11/2013 10:26:03 AM]...
- Page 494 Document Suitable for Carrier Sheet Document Suitable for Carrier Sheet • Documents with a carbon sheet attached on the back • Documents written in pencil • Documents narrower than 2.0 in. (51 mm) wide • Documents shorter than 2.76 in. (70 mm) long •...
- Page 495 Carrier Sheet Attentions Carrier Sheet Attentions • To avoid document jams, do not load the carrier sheet upside down. Refer to the instructions printed on the carrier sheet itself for more information or see Loading Documents. • To avoid document jams, do not put several small documents into the carrier sheet at the same time. Insert only one document into the carrier sheet at a time.
- Page 496 Unsupported Documents Unsupported Documents • Documents with paper clips or staples • Documents with wet ink • Fabrics, metallic sheets, Over Head Projector sheets • Glossy or mirrored media • Embossed plastic cards Page Top file:///C|/Documents%20and%20Settings/mcampbell.AM/My%20Documents/ADS2000solutions/chapter1_4_4.html[3/11/2013 10:26:04 AM]...
- Page 497 Use Nuance PDF Converter Professional 7 (Windows®) ® Use Nuance PDF Converter Professional 7 (Windows Nuance PDF Converter Professional 7 offers a variety of features for handling PDF files. It can unlock and open PDF files for viewing, editing, annotation and re-assembly. Installing Nuance PDF Converter Professional 7 Insert the supplied DVD-ROM into your DVD-ROM drive.
-
Page 498: Loading Documents
Loading Documents Loading Documents The document feeder can hold up to 50 pages and feeds each sheet individually. Use 20 lb (80 g/m ) paper and always fan the pages before placing them in the document feeder. Important • DO NOT pull on the document while it is feeding. •... - Page 499 Loading Documents Place your document, face down, top edge first in the document feeder between the Guides until you feel it touch the inside of the machine. Pull the Output Tray out of the machine and then unfold the Document Stopper. Page Top file:///C|/Documents%20and%20Settings/mcampbell.AM/My%20Documents/ADS2000solutions/chapter1_5.html[3/11/2013 10:26:06 AM]...
- Page 500 Loading Documents Longer than Letter Size Loading Documents Longer than Letter Size Make sure documents with ink or correction fluid are completely dry. Open the Top Cover (1). Adjust the Document Guides (1) to fit the width of your document. Place your document, face down, top edge first in the document feeder between the Guides until you feel it touch the inside of the machine.
- Page 501 Loading Documents Longer than Letter Size Note • Load only one document at a time. • Support the document with your hand if the document is longer than the Top Cover. Pull the Output Tray out of the machine and then unfold the Document Stopper. Page Top file:///C|/Documents%20and%20Settings/mcampbell.AM/My%20Documents/ADS2000solutions/chapter1_5_3.html[3/11/2013 10:26:06 AM]...