
Related Manuals for Samsung DMS300TR


Summary of Contents for Samsung DMS300TR
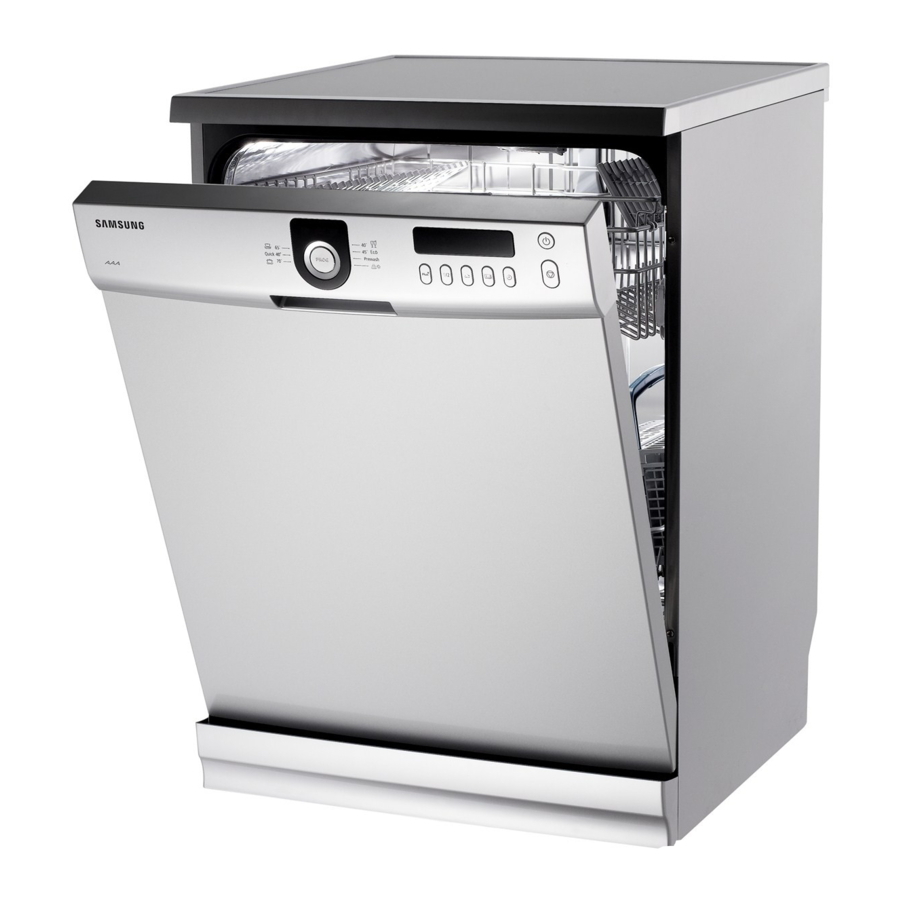
- Page 1 DMS300TR DMS301TR DMS400TR DMS500TR D146 Dishwasher user manual imagine the possibilities Thank you for purchasing this Samsung product. To receive more complete service, please register your product at www.samsung.com/global/register AAA Class...
- Page 2 Your Samsung dishwasher has the best filtration performance of dishwashers in its class. This manual contains important information regarding the use and care of your new Samsung dishwasher. Refer to it for descriptions of the control panel, instructions on how to use the dishwasher, and tips for making the most of its state-of-the-art features and technologies.
-
Page 3: Safety Information
It is your responsibility to use and caution when installing, maintaining, and operating your dishwasher. Samsung will not be liable for damages resulting from improper use. ImPorTAnT sAfeTy InsTruCTIons... - Page 4 safety information Use only detergents or rinse agents recommended for use in a dishwasher, and keep them out of the reach of children. After unpacking the dishwasher, keep the packaging out of the reach of children. Locate sharp items so that they do not damage the door seal. Knives and other utensils with sharp points must be loaded in the basket with their points facing downwards or placed in a horizontal position.
- Page 5 In particular, keep the detergent dispenser dry when using the delay start function as it may become clogged up. The dishwasher is extremely heavy. Do not attempt to move or carry the dishwasher by yourself. Two or more people are needed to move a dishwasher and avoid potential injuries. If the power cord or plug is damaged, do not repair it yourself.
-
Page 6: Meeting Installation Requirements
safety information Child care To ensure your children’s safety, use the Child Lock function while using this appliance. For detailed information about the Child Lock function, refer to the description about the Child Lock button in the “Control panel” section. Do not allow children to play with or operate the appliance. -
Page 7: Before Using Your Dishwasher
Electrically ground the dishwasher Do not use an extension cord. Do not install the dishwasher in front of the power outlet. When the power cord needs to be replaced, please call a Samsung Service technician. ConneCTInG The AQuA sToP (MODELS: DMS400TR/DMS500TR/D146) -
Page 8: Table Of Contents
contents SeTTING Up yOUR dIShWASheR Unpacking your dishwasher Checking parts Adjusting the level Freestanding type installation Freestanding built-in type installation Power source Connecting the hose Control panel Program selector Display USING yOUR dIShWASheR Salt container setting Adjusting the angle of the plate supports Adjusting the height of the top basket Handling the top and bottom basket Loading the top and bottom baskets... -
Page 9: Setting Up Your Dishwasher
When your dishwasher has been unpacked, make sure you’ve received all the parts shown below. If your dishwasher was damaged during shipping, or if you do not have all the parts, contact samsung service Centre referring to the back of the cover. -
Page 10: Adjusting The Level
setting up your dishwasher ADjusTInG The LeveL Unfasten the adjusting nuts of the legs. Rotate the legs to adjust the height. If the ground surface is too uneven, please contact a qualified service technician. leveler higher lower freesTAnDInG TyPe InsTALLATIon 1. - Page 11 Make sure that the dishwasher is level using a leveling tool. CAUTION Level 0~35mm Remove the four protective pieces of rubber. Make sure that the hoses are not bent when you insert the dishwasher into its location in CAUTION your kitchen unit. A: MAXIMUM DRAIN CONNECTION LENGTH 2.9 M Aqua stop B: MAXIMUM SUPPLY CONNECTION LENGTH 1.5 M...
-
Page 12: Freestanding Built-In Type Installation
setting up your dishwasher freesTAnDInG BuILT-In TyPe InsTALLATIon Cut the plinthfacia lower rubber (protective panel) to a width of 589 mm. 589 mm Remove the four protective pieces of rubber. Insert part “a”. Cut the rubber (part “a”) to the same height of as the level of your dishwasher. - Page 13 Remove the two screws at the top left and right at the back of the dishwasher and separate the Top Table. Remove the two screws at the top left and right at the front of the dishwasher and separate the Top Bracket.
-
Page 14: Power Source
setting up your dishwasher Level Gap:5mm 0~35mm • Make sure that the dishwasher is level using a leveling tool. • Please make sure to follow the recommended measurements for the CAUTION installation. using the cable clamp Hoses can be fixed using the Cable Clamp. using the cable tie The power cord can be tied using the Cable Ties. -
Page 15: Connecting The Hose
ConneCTInG The hose • Connect the appliance to the water mains using a new set of hoses. Do not reuse the old hoses. Water supply hose 1. Turn off the water supply. 2. Fasten the water supply hose (or aqua stop) to the inlet connector tightly. -
Page 16: Control Panel
setting up your dishwasher ConTroL PAneL pROGRAm You can select the appropriate wash program depending on the soil level of SeleCTOR your dishes. When a program is selected, the indicator for that program is lit. Displays the remaining wash time, the wash information (Delay start, Salt refill, Rinse refill, Child lock), and error messages. - Page 17 Press this button to start the selected program. When the door is opened while the dishwasher is operating, the Pause function is activated. START/ReSeT When the Pause function is activated, only the power button works. To deactivate the Pause function, close the door. If you want to reset the selected program, press the Start/Reset button for 3 seconds.
-
Page 18: Program Selector
setting up your dishwasher ProGrAm seLeCTor Washing Rinsing drying Crystal Normal eco. Quick prewash Rinse dry pots & pans program selection button • The indicator changes each time the button is pressed. • Press the select button to select one of the seven available wash programs. • By pressing the select button, the program is selected in the order of “Normal →... -
Page 19: Using Your Dishwasher
using your dishwasher sALT ConTAIner seTTInG Filling the salt container with special salt 1. Turn the cap anti-clockwise to remove it. 2. Fill the salt container with salt. Use a funnel or similar mechanism to easily and cleanly fill the container. - Page 20 using your dishwasher using the salt container • Your dishwasher is equipped with an adjustable water softening system. To avoid scale deposits on the dishes and in the dishwasher, the dishes should be washed with soft water, i.e. water with a low lime content. The salt container should be adjusted according to the hardness of the water in your area. Your local Water Authority can advise you on the hardness of the water in your area.
-
Page 21: Adjusting The Angle Of The Plate Supports
ADjusTInG The AnGLe of The PLATe suPPorTs The foldable plate spikes in the top and bottom baskets allow you to adjust the angle of the tines up to five different levels according to the size and shape of the dishes. To adjust the angles, see the illustrations below. -
Page 22: Adjusting The Height Of The Top Basket
ADjusTInG The heIGhT of The ToP BAskeT This Samsung dishwasher uses a basket able to accommodate large-sized plates. By adjusting the height of the top basket, you can make room for different sized dishes. You can place dinner plates with a diameter of 36 cm in the bottom basket and plates up to 30 cm. -
Page 23: Handling The Top And Bottom Basket
hAnDLInG The ToP AnD BoTTom BAskeT See the illustrations below for handling the top and bottom basket. Please do not pull out the top and bottom baskets at the same time when both baskets are filled with dishes. Gently lift up the bottom basket and pull it out of the door. Then, draw out the top basket to the end of the guide rail. -
Page 24: Using The Cutlery Basket
using your dishwasher using the glass support You can load cups or glasses into the glass support. This is also very convenient for washing wine glasses. You can place wine glasses onto the pegs of the glass support. You can fold the glass support back when it is not being used. -
Page 25: Using The Detergent & Rinse Aid Dispenser
usInG The DeTerGenT & rInse AID DIsPenser filling the detergent dispenser 1. Pull the latch to open the dispenser. (The cover is always opened at the end of a washing program.) 2. Add 25 g detergent to the Main wash compartment and add 5 g to the Pre-wash compartment, and close the main pre-wash... -
Page 26: Filling The Rinse Aid Dispenser
using your dishwasher filling the rinse aid dispenser Your dishwasher has been designed to use liquid rinse aid. The use of a rinse aid greatly improves the drying performance during the drying cycle. 1. Push and turn the dispenser knob counterclockwise to open the cover. -
Page 27: Program Overview
programs ProGrAm overvIeW For heavily soiled For lightly For lightly For rinsing Normal wash crockery For washing Keep dishes Soil level soiled soiled and to remove program with glassware soaked crockery crockery odors stubborn leftovers Amount of A lot A little A lot A little very little... -
Page 28: Cleaning And Maintaining Your Dishwasher
cleaning and maintaining your dishwasher Keeping your dishwasher clean improves its performance, reduces unnecessary repairs, and lengthens its life. CLeAnInG The exTerIor It’s best to clean spills on the outside of your dishwasher as they occur. Use a soft damp cloth on the control panel to gently wipe away spills and dust. -
Page 29: Cleaning The Filter
CLeAnInG The fILTer 1. Rotate the filter cap in an anti-clockwise direction to release the coarse filter. 2. Remove the fine filter (rectangular). 3. Remove the outer filter (circle). 4. Rinse the coarse, fine and outer filters under running water. 5. -
Page 30: Troubleshooting
troubleshooting CheCk These PoInTs If your DIshWAsher… pROblem pOSSIble CAUSe SOlUTION Will not start. The door is not closed completely. Check that the door is latched and closed completely. The start/reset button is not selected. Press the start/reset button after closing the door. - Page 31 pROblem pOSSIble CAUSe SOlUTION Leaves an oily film on the The amount of detergent is incorrect. Supply the appropriate amount of dishes. The dishes are automatic dishwasher detergent. not clean enough. Too many dishes have been loaded. Load only an appropriate number of dishes.
-
Page 32: Information Codes
Before requesting service, unplug the power supply and turn the water valve off. For the more detailed information about the error codes, or if the suggested solution doesn’t fix the problem, call your Samsung Service Centre referring to the back of the cover. 32_ troubleshooting... -
Page 33: Appendix
appendix DeTAILeD PArT nAmes AnD ImAGes Top spray arm (Invisible) Top Shelf (models: dmS301TR/ dmS400TR/dmS500TR/ d146) Top basket Upper spray arm lower spray arm Salt container Filter Cutlery basket bottom basket detergent & rinse aid dispensers vapor vent cover latch appendix _33... -
Page 34: Helping The Environment
• Remove the door so that animals and small children cannot get trapped inside the appliance. • Do not exceed the detergent quantities recommended in the detergent manufacturers’ instructions. sPeCIfICATIons model dmS300TR/dmS301TR/dmS400TR/dmS500TR/d146 Type Dishwasher Wash capacity 12 place setting... -
Page 35: Notice About Recycling
noTICe ABouT reCyCLInG WARNING WARNING Your product is designed and manufactured with high quality materials and components which can be recycled and reused. This symbol means that electrical and electronic equipment, at their end-of-life, should be disposed of separately from your household waste. Please dispose of this equipment at your local community waste collection/recycling centre. - Page 36 POLAND 0 801 1SAMSUNG(172678) www.samsung.com 022-607-93-33 PORTUGAL 80820-SAMSUNG(726-7864) www.samsung.com SLOVAKIA 0800-SAMSUNG(726-7864) www.samsung.com SPAIN 902 - 1 - SAMSUNG (902 172 678) www.samsung.com SWEDEN 0771 726 7864 (SAMSUNG) www.samsung.com 0845 SAMSUNG (7267864) www.samsung.com SWITZERLAND 0848 - SAMSUNG www.samsung.com/ch (7267864, CHF 0.08/min) www.samsung.com/ch_fr (French)