
Related Manuals for Sanyo DMP-P7


Summary of Contents for Sanyo DMP-P7
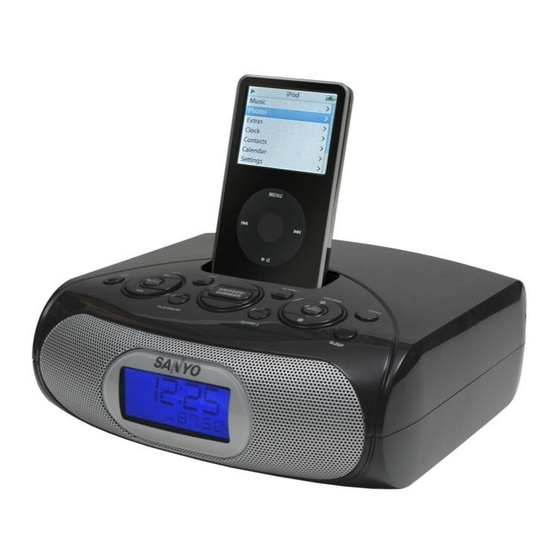
- Page 1 INSTRUCTION MANUAL DMP-P7 Clock Radio with dock for iPod iPod is a trademark of Apple Inc., registered in the US and other countries.
- Page 2 PRECAUTIONS Please take good note of the following instructions: The unit must be connected to the power voltage which is Avoid strong magnetic fields, e.g. near TVs or the same as the local area. If not, there is a danger of Speakers for other units.
-
Page 3: Some Do's And Don'ts On The Safe Use Of Equipment
SOME DO'S AND DON'TS ON THE SAFE USE OF EQUIPMENT This equipment has been designed and manufactured to meet European safety standards but like any electrical equipment, care must be taken if you are to obtain the best results and safety is to be assured. DO read the operating instructions before you attempt to use the equipment. -
Page 4: Controls And Indicators
Controls and Indicators Speaker LCD Display SKIP FORWARD/BACKWARD Buttons AUX Button Dock ALARM 1 Button WAKE Button Buttons VOLUME UP/DOWN SLEEP Button ST/MONO Button ALARM 2 Button SNOOZE/DIMMER Button iPod PLAY/PAUSE Button BAND/RADIO Button POWER Button Battery compartment AC Cord AUX OUT Jack CLOCK Button AM Loop Antenna Socket... -
Page 5: Getting Started
Designed specifically to work with your docking iPod, this system provides high quality audio and radio performance that brings out the best in your music. An auxiliary input enables connection of a non-iPod. Please read this instruction book carefully before operating the DMP-P7, and keep it for future reference. iPod Inserts Your clock radio comes with removable inserts to ensure your iPod fits properly in the dock on the top of the system. - Page 6 Getting Started Install/Replace Backup Battery The clock radio uses a backup battery system to provide continuous alarm operation and clock settings in the event of a power failure. If the Backup Battery has been installed and a power failure occurs or the AC cord is accidentally disconnected, the display will not remain lit, but the current time and alarm time settings will be temporarily maintained.
-
Page 7: Using The Remote Control Unit
Using The Remote Control Unit Install/Replace the Remote Control Battery The remote control battery is already installed at the factory. When the remote control stops operating, replace the battery with a new one. The battery door is located on the back end of the unit. Squeeze notched tab A while pulling battery door latch B to release the battery door latch and take out the battery holder. -
Page 8: Clock Display
Clock Display Alarm 2 Armed TIME/ALARM Display AM Indicator Alarm 1 Armed iPod Indicator Wake To Indicator: iPod, Radio, Buzzer, SHUFFLE Indicator PRESET Indicator FM Indicator ST/KHz/MHz SLEEP Indicator Indicator PM Indicator Radio Frequency/Date/ Volume Level/AUX Display... - Page 9 Setting Up the Clock Radio Setting Clock Time and Calendar Press and hold the CLOCK Button located on the back of the unit until 12H or 24H appeared. Select your desired clock display either 12 hour or 24 hour by pressing SKIP FORWARD or BACKWARD Button repeatedly.
-
Page 10: Charging Your Ipod
Charging your iPod Note: Please make sure you are using the correct insert for your iPod and that it is properly docked into the clock radio. Failure to do so may damage your iPod. While your iPod is docked in the system, it recharges (until fully charged). Note that other non-docking iPods will NOT charge. -
Page 11: Listening To Radio
Listening to a non-docking iPod or other portable audio devices If you are using an iPod without a docking port or other MP3 player or other portable audio device, you can still play it through the clock radio via the AUX IN Jack. NOTE: To use the AUX IN Jack, make sure no iPod is docked in the clock radio. -
Page 12: Storing Preset Stations
Storing preset stations The unit enables you to program 10 stations of FM and 10 stations of AM band. Press the SKIP FORWARD or BACKWARD Button on the clock radio (or Button on the remote control) to tune to the station you wish to store. Press the PROG Button once on the remote. -
Page 13: Sleep Operation
Sleep Operation When the clock radio is off or while listening to your iPod or the radio, press the SLEEP Button to enter sleep mode. The unit will automatically turn off after the selected time. Sleep mode has a Gentle Sleep feature which gradually lowers the volume. -
Page 14: Troubleshooting
Troubleshooting Symptom Possible Problem Solution Unit doesn’t respond AC cord isn’t plugged into a wall Plug the AC cord into a wall outlet. (no power) outlet. Plug another device into the same outlet to confirm the Wall outlet is not functioning outlet is working iPod does not dock Make sure the dock insert is the proper fit for your... -
Page 15: Receiver Section
Troubleshooting Symptom Possible Problem Solution Remove your iPod from the dock and check for iPod didn’t charge up obstruction on the connectors in the dock and iPod is not installed properly on your iPod. Then reseat it in the dock. Please make sure your iPod is working iPod is locked up/frozen properly before docking into the unit. - Page 16 SANYO Electric Co., Ltd. 77-20AR60100520 (English) Made in China...