
Related Manuals for Asus 3DP-V264GT


Summary of Contents for Asus 3DP-V264GT
- Page 1 3DP-V264GT/PRO 3DP-V264GT2/TV 3D Graphic Cards USER'S MANUAL Hardware & Video Drivers...
- Page 2 In no event shall ASUS be liable for any loss or profits, loss of business, loss of use or data, interruption of business, or for indirect, special, inci-...
-
Page 3: Asus Contact Information
1-408-474-0568 Email: [email protected] Technical Support: BBS: 1-408-474-0555 Email: [email protected] ASUS COMPUTER GmbH Marketing Info: Address: Harkort Str. 25, 40880 Ratingen, BRD, Germany Telephone: 49-2102-445011 Fax: 49-2102-442066 Email: [email protected] Technical Support: BBS: 49-2102-448690 Email: [email protected] ASUS 3DP-V264GT/PRO & 3DP-V264GT2/TV User’s Manual... -
Page 4: Table Of Contents
FlexDesk+ Advanced Settings ..........28 DPMS (for Windows) ..............29 Timer Settings ................29 Buttons ..................29 DeskScape ..................30 DeskScape Functions ............... 30 Buttons ..................31 WinSwitch ..................31 Screen Adjustment ..............32 DPMS Parameters ..............34 ASUS 3DP-V264GT/PRO & 3DP-V264GT2/TV User’s Manual... - Page 5 Capturing Audio/Video (only on 3DP-V264GT/PRO) ..38 Capturing Still Frames ............39 Capturing Video ..............39 Playing Captured Video and Audio ........40 Intelligent Video In (only on 3DP-V264GT/PRO) ... 40 Features ................40 Using the VIDEO IN ............40 Using ImpacTV ................42 If there is no display, you may ..........
- Page 6 Canadian Department of Communications Statement This digital apparatus does not exceed the Class B limits for radio noise emissions from digital apparatus set out in the Radio Interference Regulations of the Cana- dian Department of Communications. ASUS 3DP-V264GT/PRO & 3DP-V264GT2/TV User’s Manual...
-
Page 7: Introduction
PCI bus to provide high performance graphics. The 3DP-V264GT/PRO & 3DP- V264GT2/TV are graphics controllers that integrate 3D, 2D, video accelerators, palette DAC, and dual clock synthesizer into a single chip. The 3DP-V264GT/PRO & 3DP-V264GT2/TV deliver superior texture mapping performance for 3D games,... - Page 8 • Display images on both the TV and PC montior simultaneously. • Provide a big-screen experience for entertainment PCs which is ideal for play- ing games, giving presentations, watching movies, and browsing the Internet. ASUS 3DP-V264GT/PRO & 3DP-V264GT2/TV User’s Manual...
-
Page 9: Resolution Table
Please note that the 3DP-V264GT2/TV has 2MB or 4MB configurations and the 3DP-V264GT/PRO has 4MB or 8MB configurations. 3DP-V264GT2/TV Max Referesh Rates... -
Page 10: Features
ATI MPEG video player application with VCR-like controls • Extensive software driver support for major applications and operating systems as follows: • Windows 3.1, Windows 95, Windows NT, AutoCAD, Microstation, OS/2, VESA BIOS Extension support. ASUS 3DP-V264GT/PRO & 3DP-V264GT2/TV User’s Manual... - Page 11 (15-Pin VGA) 4MB Memory (four 128K x 32 x 2 SGRAM) Adding Additional Memory The ASUS 3DP-V264GT/PRO graphics card comes with 4MB video memory configuration. Special conntectors are available to upgrade the video memory to 8MB by adding a daughter card.
- Page 12 You must use the same standard for all devices. IMPORTANT: External devices and ASUS Video cards both have NTSC and PAL versions. You must make sure that all your devices and the ASUS Video card are of the same type or else you will not have video capabilities.
-
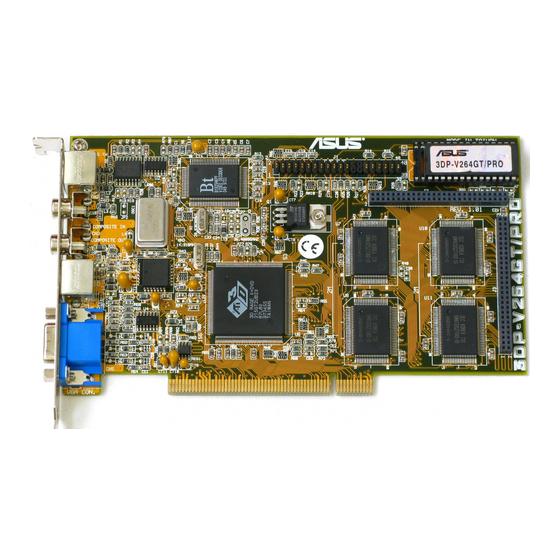
Page 13: Asus V264Gt/Pro Layout
(four 256K x 16 EDO DRAM) Adding Additional Memory The ASUS 3DP-V264GT2/TV graphics card comes with 2MB video memory con- figuration. Memory sockets are available to upgrade the video memory to 4MB by adding 4 memory chips. Memory size 3MB is not supported on this product. Speci- fications may change without notice. - Page 14 You must use the same standard for all devices. IMPORTANT: External devices and ASUS Video cards both have NTSC and PAL versions. You must make sure that all your devices and the ASUS Video card are of the same type or else you will not have video capabilities.
-
Page 15: Hardware Installation
III. Hardware Installation This section tells you how to install the ASUS graphics card in your PC computer. The steps provided below demonstrate how to install the cards in a typical system. Your system may be slightly different. WARNING: Computer boards and components contain very delicate Integrated Circuit (IC) chips. - Page 16 12. Replace the cover on the system unit. 13. Connect your analog monitor's 15-pin VGA connector to the card and fasten the retaining screws (if any). 14. Connect other cables and devices if available. (see software section for details) ASUS 3DP-V264GT/PRO & 3DP-V264GT2/TV User’s Manual...
-
Page 17: Driver Installation
IV. Driver Installation Video Driver Installation for Windows 95 Introduction After installing the ASUS graphics card, software drivers and utilities must be in- stalled. The following are various driver installation procedures for Windows 95 under specific situations. Windows Plug and Play in Windows 95: (Auto installing drivers) IMPORTANT: If an ASUS graphics card (or ATI compatible) was installed at one time, Windows 95 Plug and Play may install ATI’s original driver upon entering... - Page 18 Video Driver Installation for Windows 95 Installing ATI Video drivers in Windows 95: (New Hardware Found) If installing an ASUS graphics card for the first time, a “New Hardware Found” window will appear upon entering Windows 95: Select which driver you want to install for your new hardware:...
- Page 19 Video Driver Installation for Windows 95 Installing ATI Video drivers in Windows 95 (Prompted by Windows 95) If an ASUS graphics card (or ATI compatible) was installed unsuccessfully or modi- fied at one time a “Display” message will appear upon entering Windows 95: There is a problem with your display settings.
- Page 20 If for some reason you need to reinstall the ATI video drivers or if you skipped the previous procedures, you may use the following steps: 1. Insert the ASUS installation CD (or double click on the CD drive in “My Com- puter” if CD already inserted)- ASUS Windows 95 Install Shell appears.
-
Page 21: Software Mpeg & Video Player For Windows 95
For Software MPEG support in Windows 95, you must first install DirectVideo Upgrade For Microsoft Windows, then install ATI Video Player. Installing Microsoft DirectVideo in Windows 95: 1. Reinsert the ASUS installation CD or select the CD from My Computer. 2. Click Install DirectX - Click 3. Restart Windows when finished. -
Page 22: Display Settings For Windows 95
You can save your settings by clicking "Save As" button and typing in a file name. This allows you to recall pre- viously saved settings. Click on "Defaults" button to re- store all settings to the default. ASUS 3DP-V264GT/PRO & 3DP-V264GT2/TV User’s Manual... -
Page 23: Video Driver Installation For Windows 3.X
Video Driver Installation for Windows 3.x For your convenience, the ATI video drivers for Windows 3.x can be installed in Windows 3.x or in DOS. The autorun ASUS Windows 3.1 Install Shell cannot be automatically run by Window 3.x, so manual execution is necessary. - Page 24 6. “ASUS driver is successfully installed !!” - press any key. 7. “Do you want to launch Windows 3.1 to continue installation now? (Y/N) Note: You must make sure that ASUS ATI VGA card has been plugged in your machine.” - Press Y.
-
Page 25: Software Mpeg & Video Player For Windows 3.X
2. Insert the ASUS installation CD. 3. Change to your CD drive. 4. Double click setup.exe - ASUS Windows 3.1 Install Shell appears 5. Click on Install Video Player - Memory Requirement appears: The ATI Video Player needs at least 600K conventional memory to execute. - Page 26 (This page was intentionally left blank) ASUS 3DP-V264GT/PRO & 3DP-V264GT2/TV User’s Manual...
-
Page 27: Video Software
Have the report ready before contacting your vendor. Feature Icons: Double click a Feature icon to launch the associated control panel. ASUS 3DP-V264GT/PRO & 3DP-V264GT2/TV User’s Manual... -
Page 28: Flexdesk
FlexDesk+ FlexDesk+ Basic Settings FlexDesk+ is for configuring the operating modes and parameters of the ASUS 264 Series Card. The availability of options in FlexDesk+ is dependent on the card and its hardware configuration. This control panel allows you to configure Colors (color depth), Screen Size (resolution), Desktop Size (virtual desktop size), Advanced set- tings and Default parameters (factory settings). - Page 29 Defaults: Provides same functionality as the push button. Advanced...: Provides same functionality as the push button. HELP Menu Help: Provides same functionality as the push button. Contents: Displays the Help index. About...: Displays the product version number and information. ASUS 3DP-V264GT/PRO & 3DP-V264GT2/TV User’s Manual...
-
Page 30: Flexdesk+ Advanced Settings
Off: Provides smooth dithering which results in faster performance than VGA dith- ering. Buttons OK: Accepts the advanced settings as shown and returns to the FlexDesk+ main panel. Cancel: Discards all changes and returns to the FlexDesk+ main panel. Help: Displays Help information on FlexDesk+. ASUS 3DP-V264GT/PRO & 3DP-V264GT2/TV User’s Manual... -
Page 31: Dpms (For Windows)
DPMS Enable: DPMS feature is enabled if box is checked. Defaults: Sets DPMS timers to default values. Help: Displays Help information on DPMS. OK: Accepts settings as shown and exits. Cancel: Discards all changes and exits. ASUS 3DP-V264GT/PRO & 3DP-V264GT2/TV User’s Manual... -
Page 32: Deskscape
Zoom In: Makes the screen image larger, with user defined keys, e.g.,+ . NOTE: The entire desktop can be panned. Zoom Out: Displays more of the virtual desktop, with user defined keys, e.g., + ASUS 3DP-V264GT/PRO & 3DP-V264GT2/TV User’s Manual... -
Page 33: Buttons
2. Adjust any or all of the sliders. Slider functions are identical to those in FlexDesk+. 3. Either enable WinSwitch by checking the WinSwitch Enabled box, or disable WinSwitch by removing the check mark. 4. Click Ok. ASUS 3DP-V264GT/PRO & 3DP-V264GT2/TV User’s Manual... -
Page 34: Screen Adjustment
Desktop Size: Sets the virtual desktop to one of the supported sizes. Screen Adjustment This allows the selection of different resolutions supported by your monitor. Select the proper monitor by pressing the "Select Monitor" button and then choosing from the list of monitors. ASUS 3DP-V264GT/PRO & 3DP-V264GT2/TV User’s Manual... -
Page 35
Use the Preview/Adjust to see the results and allow digital adjust- ments to the screen. If the image is distorted you may press
or wait a few seconds to return to the original menu without the change. ASUS 3DP-V264GT/PRO & 3DP-V264GT2/TV User’s Manual... -
Page 36: Dpms Parameters
V. Video Software The ASUS 264 Series Card supports a VESA power management control specifica- tion called DPMS-Display Power Management Signaling. Monitors that comply with DPMS can provide energy savings up to 80% compared to non DPMS compli- ant monitors. This also translates into extended monitor life. -
Page 37: Video Player
The question mark on top right of the Video Screen allows inspection into each button on the control panel. Click on the “?” then on a button that you would like to know about. ASUS 3DP-V264GT/PRO & 3DP-V264GT2/TV User’s Manual... -
Page 38: Playing Audio Cds (Only In Window 95)
The Audio CD player uses Windows 95 standard INI file to store disc names, track names, and the play list. You can use the Setup dialog to enter the name of the artist and the disc. ASUS 3DP-V264GT/PRO & 3DP-V264GT2/TV User’s Manual... -
Page 39: Playing Media Files
Playing Interactive Discs (Video CD 2.0) Capture File Dialog Play Menu Selection Audio Track Play Return Play Select Selection Default When playing Video CD 2.0 discs, the Control panel changes to this interactive panel. ASUS 3DP-V264GT/PRO & 3DP-V264GT2/TV User’s Manual... -
Page 40: Capturing Audio/Video (Only On 3Dp-V264Gt/Pro)
Capture Stream Sequence Capture Still File Name Save File Play Capture File You can use the Setup button to specify capture options, file names, display options, and file handling for captured video Captured File. ASUS 3DP-V264GT/PRO & 3DP-V264GT2/TV User’s Manual... -
Page 41: Capturing Still Frames
You can use the buttons at the top of the still capture window to save the captured image, delete it, print it, or make it into a desktop pattern. If you try to delete an unsaved still frame, 3DP-V264GT/PRO prompts you to save it before deleting. -
Page 42: Playing Captured Video And Audio
Capture, save, and print video images. • Replace your desktop with live VIDEO display. The 3DP-V264GT/PRO accepts a wide range of video inputs — from just about any device that has a VIDEO OUT connector: VCR, Video camera, laser disk, and video games. - Page 43 2. Hold down the mouse button and draw a rectangle around the area you want to zoom. To return your display to normal, click the Unzoom button in the Control panel.Select and enlarge a portion of the display by dragging the mouse across the Display Panel ASUS 3DP-V264GT/PRO & 3DP-V264GT2/TV User’s Manual...
-
Page 44: Using Impactv
VI. Video Player Using ImpacTV If you have a 3DP-V264GT/PRO or 3DP-V264GT2/TV card, you can use ATI’s ImpacTV to connect a television for your computer’s display. You can use ImpacTV to do the following: • View computer output directly on your television in either NTSC or PAL formats •... -
Page 45: Other Driver Installation
Video Driver Installation for Windows NT 4.0 Windows Plug and Play in Windows NT 4.0: (Auto installing drivers) IMPORTANT: If an ASUS Graphics device (or ATI compatible) was installed at one time, Windows NT 4.0 Plug and Play may install ATI’s original driver upon entering Windows NT 4.0 . - Page 46 Video Driver Installation for Windows NT 4.0 Installing ATI Video drivers in Windows NT 4.0: (New Hardware Found) If installing an ASUS Graphics device for the first time, a “New Hardware Found” window will appear upon entering Windows NT 4.0:...
-
Page 47: Video Driver Installation For Windows Nt 4.0
If for some reason you need to reinstall the ATI video drivers or if you skipped the previous procedures, you may use the following steps: 1. Insert the ASUS installation CD (or double click on the CD drive in “My Com- puter” if CD already inserted)- ASUS Windows NT Install Shell appears. -
Page 48: Video Driver Installation For Windows Nt 3.5X
9. Supply the Setup program with the location of the NT files of your revision, for example, type: D:\NT351 (or D:\NT35) 10. Click OK button. 11. Select the appropriate driver for your ASUS 264 series card 12. Click Install button. 13. Click Yes to change to your system configuration. -
Page 49: Video Driver Installation For Ibm Os/2
19. Type EXIT to close the OS/2 full screen command prompt. 20. Shut down OS/2 21. Restart OS/2. It will default to 640x480 in 256 colors. To change screen reso- lution and/or color depth, see your OS/2 User’s Guide. ASUS 3DP-V264GT/PRO & 3DP-V264GT2/TV User’s Manual... -
Page 50: Autocad Video Driver Installation
7. Press Enter when completed and press ESC twice and Y to exit the installation program. 8. Reboot the computer from DOS - Your Windows 3.x & DOS system ATI drivers should be installed and ready to use. ASUS 3DP-V264GT/PRO & 3DP-V264GT2/TV User’s Manual... -
Page 51: Microstation Video Driver Installation
7. Press Enter when completed and press ESC twice and Y to exit the installation program. 8. Reboot the computer from DOS - Your Windows 3.x & DOS system ATI drivers should be installed and ready to use. ASUS 3DP-V264GT/PRO & 3DP-V264GT2/TV User’s Manual... -
Page 52: Select System Information (Optional)
INFO BOX. In case of a conflict, it will issue a warning and suggest possible corrective actions. Your ASUS V264GT/PRO Card is a PCI Plug-and-Play compatible: your system will automatically allocate system resources and resolve possible conflicts between your Plug-and-Play compatible mach64 accelerator card and other expansion cards. -
Page 53: Vdif Files (Optional)
5. Adjust the size and position of the box outline. Pressto accept. 6. Repeat steps 2 and 3 until you are satisfied with the box outline for all the resolutions. When finished, remember to exit and save the settings. ASUS 3DP-V264GT/PRO & 3DP-V264GT2/TV User’s Manual... -
Page 54: Advanced Setup (Optional)
Factory Defaults The card can be reset to factory defaults by pressing+ . Saving Your Configuration Once you have finished configuring the necessary parameters described above, save them by pressing . ASUS 3DP-V264GT/PRO & 3DP-V264GT2/TV User’s Manual... -
Page 55: Troubleshooting
• Try the card in a different system and reset to factory defaults using the IN- STALL program. If the card works in another system, the problem is likely due to incorrect configuration. ASUS 3DP-V264GT/PRO & 3DP-V264GT2/TV User’s Manual... - Page 56 DOS disk. Try exclud- ing the video BIOS address (C0000-C7FFF) from the memory manager. Refer to the documentation furnished with the memory manager software for information. ASUS 3DP-V264GT/PRO & 3DP-V264GT2/TV User’s Manual...
- Page 57 Draw sequence failure. An error has occurred in the draw engine. If the error is intermittent, it might indi- cate a marginal RAM failure. The effects of this failure may not be immediately apparent. ASUS 3DP-V264GT/PRO & 3DP-V264GT2/TV User’s Manual...
- Page 58 A: Xing MPEG Player and ATI Video Player can not be installed together. They confilct with each other. The previously installed player will work abnormally. You can re-install ATI Video Player to recover it. ASUS 3DP-V264GT/PRO & 3DP-V264GT2/TV User’s Manual...