KitchenAid 5KFPM770 Instructions And Recipes Manual
Kitchenaid food processor instructions and recipes
Hide thumbs
Also See for 5KFPM770:
- Manual d'instructions (6 pages) ,
- Operating instructions and recipes (368 pages)
Table of Contents
FOOD PROCESSOR
INSTRUCTIONS AND RECIPES
FOOD PROCESSOR
INSTRUCTIONS AND RECIPES
FOOD PROCESSOR
INSTRUCTIONS AND RECIPES
FOOD PROCESSOR
INSTRUCTIONS AND RECIPES
FOOD PROCESSOR
INSTRUCTIONS AND RECIPES
FOOD PROCESSOR
INSTRUCTIONS AND RECIPES
FOOD PROCESSOR
INSTRUCTIONS AND RECIPES
FOOD PROCESSOR
INSTRUCTIONS AND RECIPES
FOOD PROCESSOR
INSTRUCTIONS AND RECIPES
FOOD PROCESSOR
INSTRUKTIONER OG OPSKRIFTER
FOOD PROCESSOR
INSTRUCTIONS AND RECIPES
FOOD PROCESSOR
INSTRUCTIONS AND RECIPES
FOOD PROCESSOR
INSTRUCTIONS AND RECIPES
Model 5KFPM770
Food Processor
1
Table of Contents

Related Manuals for KitchenAid 5KFPM770


Summary of Contents for KitchenAid 5KFPM770
-
Page 1: Food Processor
INSTRUCTIONS AND RECIPES FOOD PROCESSOR INSTRUCTIONS AND RECIPES FOOD PROCESSOR INSTRUCTIONS AND RECIPES FOOD PROCESSOR INSTRUCTIONS AND RECIPES FOOD PROCESSOR INSTRUKTIONER OG OPSKRIFTER FOOD PROCESSOR INSTRUCTIONS AND RECIPES FOOD PROCESSOR INSTRUCTIONS AND RECIPES FOOD PROCESSOR INSTRUCTIONS AND RECIPES Model 5KFPM770 Food Processor... -
Page 2: Table Of Contents
Food Processing Tips ...................17 Using the Multipurpose Blade...............17 Using a Slicing or Shredding Disc............18 Using the Dough Blade.................19 Using the Egg Whip................19 Helpful Hints..................20 Recipes......................22 Warranty and Service Information Household KitchenAid ® Food Processor Warranty for Europe ....27 Service Centers..................27 Customer Service ..................28... -
Page 3: Food Processor Safety
Electrical Requirements Model 5KFPM770: 220-240 Volts A.C. Hertz: 50/60 Hz NOTE: Model 5KFPM770 has a grounded plug. To reduce the risk of electrical shock, this plug will fit in an outlet only one way. If the plug does not fit in the outlet, contact a qualified electrician. -
Page 4: Important Safeguards
IMPORTANT SAFEGUARDS When using electrical appliances, basic safety precautions should always be followed, including the following: 1. Read all instructions. 2. To protect against risk of electrical shock do not put Food Processor in water or other liquid. 3. Close supervision is necessary when any appliance is used by or near children. -
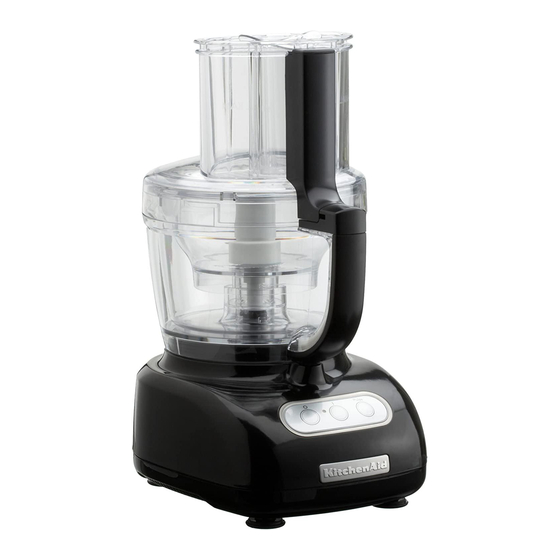
Page 5: Food Processor Features
Food Processor Features Work Bowl Medium (4 mm) Die-Cast Metal Base Shredding Disc Medium (4 mm) Slicing Disc 2.4 liters (10 cup) Chef's Bowl Disc Stem Fine (2 mm) Slicing Disc Citrus Press 2-Piece Cone Egg Whip 950 ml (4 cup) Mini Bowl and Mini Blade Work Bowl Cover... - Page 6 Food Processor Features Work Bowl Cover with Disc Stem Ultra Wide Mouth Feed Tube Stem fits over the power shaft on One of the industry’s largest, the the base and into the bottom of a Ultra Wide Mouth feed tube slicing or shredding disc.
-
Page 7: Preparing The Food Processor For Use
Preparing the Food Processor for Use 4. Insert the desired accessory into the work bowl. See pages 7–11 for accessory instructions. 5. Place the work bowl cover on the work bowl with the feed tube just to the left of the work bowl handle. -
Page 8: Multipurpose Blade & Dough Blade Assembly
Preparing the Food Processor for Use Multipurpose Blade and Dough Blade Assembly Place the blade on the power shaft. Rotate the blade so it falls into place on the shaft. 7. Plug into a proper electrical outlet (see “Electrical Requirements” on page 3). -
Page 9: Mini Bowl Assembly
Preparing the Food Processor for Use 2. Fit the disc over the metal pin on the disc stem, then rotate The mini bowl can also be placed the disc until it falls fully onto in the chef’s bowl in a similar the stem. -
Page 10: Egg Whip Assembly & Use
Preparing the Food Processor for Use Egg Whip Assembly and Use 5. Place the work bowl cover on the work bowl with the feed tube The egg whip is designed to whip just to the left of the handle. egg whites or heavy cream to create Make sure the center pin of the toppings or soft meringues. - Page 11 Preparing the Food Processor for Use 4. The 2-piece cone offers two sizes; 9. Operate the citrus press by choose the right size for the fruit pressing the “I” Button or the you are juicing. Use the outer “Pulse” Button. cone for grapefruit, oranges and 10.
-
Page 12: Using The Food Processor
Using the Food Processor Maximum Liquid Level This line on the work bowl indicates the maximum level of liquid that can be processed by the Food Processor. Turning the Food Processor “I” and “O” 1. To turn on the Food Processor, press the “I”... -
Page 13: Using The Pulse Control
Using the Food Processor The 2-Piece Food Pusher To slice or shred small items, insert the 2-piece food pusher into the feed tube, then turn the small center pusher clockwise to unlock and remove. Use the center feed tube and pusher to process small or slender items, or to add liquid while the Food Processor is running. - Page 14 Disassembling the Food Processor 2. If using a disc, remove it before 4. Turn the work bowl to the left to removing the bowl. Place two unlock it from the base. Lift to fingers under each side of the remove. disc and lift it straight up.
-
Page 15: Care And Cleaning
Care and Cleaning 4. To prevent damage to the interlock system, always store the work bowl and work bowl cover in the unlocked position when not in use. 1. Press the “O” Button and unplug the Food Processor before cleaning. 2. -
Page 16: Troubleshooting
(see “Electrical Requirements” on with the steps in this section, see the page 3). If it is, unplug the Food KitchenAid warranty and after sales Processor, then plug it into the service section on pages 27-28. Do same outlet again. If the Food... -
Page 17: Food Processing Tips
Food Processing Tips USING THE To mince garlic or to chop MULTIPURPOSE BLADE fresh herbs or small quantities of vegetables: With processor running, add food To chop fresh fruits or through the small feed tube. Process vegetables: until chopped. For best results, make Peel, core, and/or remove seeds. -
Page 18: Using A Slicing Or Shredding Disc
Food Processing Tips To grate hard cheeses, such as To slice or shred fruits or Parmesan and Pecorino: vegetables that are long and relatively small in diameter, such Never attempt to process cheese as celery, carrots, and bananas: that cannot be pierced with the tip of a sharp knife. -
Page 19: Using The Dough Blade
Food Processing Tips To slice uncooked meat or USING THE EGG WHIP poultry, such as stir-fry meats: To make soft egg Cut or roll food to fit feed tube. white meringue: Wrap and freeze food until hard to Place 3 egg whites and ⁄... -
Page 20: Helpful Hints
Helpful Hints 1. When cutting and packing food 7. Soft and medium-hard cheese items in the Ultra Wide Mouth may spread out or roll up on the feed tube, do not exceed the shredding disc. To avoid this, maximum fill line. This will permit shred only well-chilled cheese. - Page 21 Helpful Hints 15. After removing the work bowl 17. Your Food Processor is not cover, place it upside down on designed to perform the the counter. This will help keep following functions: the counter clean. • grind coffee beans, grains, or 16.
-
Page 22: Recipes
White Balsamic Vinaigrette 1 tablespoon fresh Position mini bowl and mini blade in work bowl. basil leaves With processor running, add basil, oregano, and 1 tablespoon fresh garlic through the small feed tube. Process until oregano leaves chopped, 5 to 8 seconds. Scrape sides of bowl. 1 clove garlic With processor running, add balsamic vinegar, 3 tablespoons white... -
Page 23: Cheddar Broccoli Soup
Cheddar Broccoli Soup 230 g sharp Cheddar Position 4 mm shredding disc in work bowl. Add cheese, chilled cheese. Process to shred. Remove and set aside. 1 small onion, cut into Exchange shredding disc for 2 mm slicing disc in halves lengthwise work bowl. -
Page 24: Spring Mix Basmati Rice
Spring Mix Basmati Rice 1 clove garlic Position multipurpose blade in work bowl. With processor running, add garlic through the small 1 medium shallot, cut into quarters feed tube. Process 5 seconds. Add shallot. Pulse 1 tablespoon olive oil 2 to 3 times, about 2 seconds each time, or until ⁄... - Page 25 Chicken Satay with Peanut Sauce Chicken Position multipurpose blade in work bowl. With 2 cloves garlic processor running, add garlic and gingerroot 1 teaspoon coarsely through the small feed tube. Process until chopped gingerroot chopped, 5 to 10 seconds. Add soy sauce, oil, 60 ml ( ⁄...
-
Page 26: Fresh Fruit Tart
Fresh Fruit Tart Crust Position multipurpose blade in work bowl. Add 125 g (1 cup) all-purpose flour, sugar, and salt. Process until mixed, about flour 2 seconds. Add butter and shortening. Pulse 3 to 2 teaspoons sugar 4 times, 2 to 3 seconds each time, or until ⁄... -
Page 27: Household Kitchenaid ® Food Processor Warranty For Europe
KITCHENAID DOES NOT ASSUME ANY RESPONSIBILITY FOR INDIRECT DAMAGES. Service Centers All service should be handled locally In the U.K.: by an Authorized KitchenAid Service Call: 0845 6011 287 Center. -
Page 28: Customer Service
In U.K. & Ireland: Tollfree number 00800 38104026 Address: KitchenAid Europa, Inc. PO BOX 19 B-2018 ANTWERP 11 BELGIUM www.KitchenAid.com ™ FOR THE WAY IT’S MADE. ™ ® Registered Trademark/™ Trademark of KitchenAid, U.S.A. © 2005. All rights reserved. Specifications subject to change without notice. (4511dZw105)