Table of Contents
Table of Contents

Related Manuals for AEG 24" BS7304001M


Summary of Contents for AEG 24" BS7304001M
- Page 1 User’s Manual BS7304001M 24” Built-in Oven - User’s Manual...
- Page 2 Please spend a few minutes reading to get the very best from it. ACCESSORIES AND CONSUMABLES In the AEG webshop, you’ll find everything you need to keep all your AEG appliances looking spotless and working perfectly. Along with a wide range of...
-
Page 3: Table Of Contents
Contents CONTENTS 4 Safety information 7 Product description 9 Before first use 10 Control panel 12 Daily use 15 Clock functions 17 Automatic programmes 19 Using the accessories 21 Additional functions 23 Care and cleaning 27 What to do if… 28 Environment concerns The following symbols are used in this user manual:... -
Page 4: Safety Information
Safety information SAFETY INFORMATION Before the installation and use, read this manual carefully: • For your personal safety and the safety of your property • For the respect of the environment • For the correct operation of the appliance. Always keep these instructions with the appliance also if you move or sell it. The manufacturer is not responsible if incorrect installation or use results in damage. -
Page 5: Electrical Connection
Safety information • Make sure that the appliance is installed below and adjacent safe structures. • Keep the minimum distances to the other appliances and units. • The appliance cannot be positioned on a base. • Built in ovens and built in cooking surfaces are attached with special connection sys- tem. -
Page 6: Risk Of Fire
Safety information Care and cleaning • Before maintenance, switch off the appliance and disconnect the appliance from the power supply. • Before maintenance, make sure that the appliance is cold. There is the risk of burns. There is the risk that the glass panels can break. •... -
Page 7: Product Description
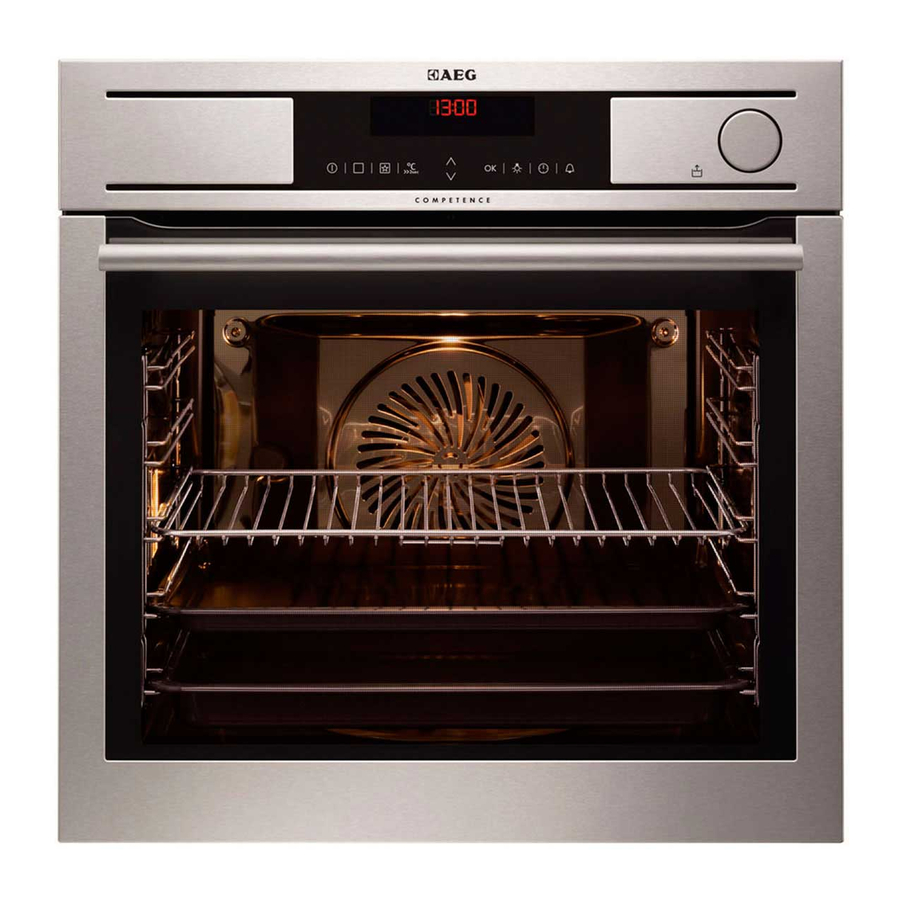
Product description – Disconnect the appliance from the power supply. – Cut off the mains cable and discard it. – Discard the door catch. This prevents children or small animals from being closed inside of the appliance. There is the risk of suffocation. PRODUCT DESCRIPTION General overview Control panel... - Page 8 Product description Oven accessories • Wire shelf For cookware, cake tins, roasts. • Baking tray For cakes and biscuits. • Grill / roasting pan To bake and roast or as pan to collect fat. • Steam set Unperforated and perforated food contain-...
-
Page 9: Before First Use
Before first use • Sponge 150 For absorbing residual water from the steam generator. • Core Temperature Sensor To measure how far the food is cooked. BEFORE FIRST USE WARNING! Refer to "Safety information" chapter. Initial Cleaning • Remove all parts from the appliance. •... -
Page 10: Control Panel
Control panel If you do not touch at the end, the settings save automatically after five seconds. CONTROL PANEL Electronic programmer Use the sensor fields to operate the appliance. Sensor Field Function Description DISPLAY Shows the current settings of the appliance. ON/OFF To activate and deactivate the appliance. -
Page 11: Heat Up Indicator
Control panel Sensor Field Function Description MINUTE MINDER To set the minute minder. Display Oven function symbol Temperature/Time display Clock/Residual heat display (also Minute minder and Time of day) Residual heat indicator Indicators for the clock functions (refer to the table "Clock functions") Heat up indicator Number of oven function/programme Other indicators of display... -
Page 12: Daily Use
Daily use When the appliance is at the set temperature Heat up indicator goes off the display. DAILY USE WARNING! Refer to "Safety information" chapter. To operate the appliance you can use: • manual mode -to set an oven function, the temperature and the cooking time manually. •... -
Page 13: Changing The Oven Temperature
Daily use Oven function Application Slow Cook To prepare very lean, tender roasted food. Conventional To bake and roast food on one shelf position. Cooking Frozen Foods To make your convenience food like e.g. French Fries, Wedg- es, spring rolls crispy. Turbo Grilling To roast larger meat joints or poultry with bones on one shelf position. -
Page 14: Fast Heat Up Function
Daily use Fast heat up function The fast heat up function decreases the heat up time. Do not put food in the oven when the fast heat up function operates. Activating the fast heat up function : Touch and hold for more then three seconds. -
Page 15: Clock Functions
Clock functions Energy saving The appliance has same features that help you save energy during everyday cooking: • Residual heat: – the oven function or programme operates: the heating elements are deactivated 10% time earlier (the lamp and fan continue to operate). The condition: the cook- ing time is longer then 30 minutes or you use the clock functions (Duration, End, Time delay). -
Page 16: Setting The End
Clock functions 2. Touch again and again until the dis- play shows flashes in the display. 3. Use to set minutes for DURA- TION. 4. Touch to confirm 5. Use to set hours for DURATION. If you touch during setting hours for DURATION, the appliance goes to setting of the END function. -
Page 17: Automatic Programmes
Automatic programmes TION function. During these two minutes you can examine the cooking results and, if necessary, add END or DURATION time. Setting the Time delay function DURATION and END can be used at the same time, if the oven is to be switched on and off automatically later. -
Page 18: Automatic Programmes With Weight Input
Automatic programmes 2. Touch to choose the automatic recipes. 3. Touch or the automatic recipe activates automatically after five seconds. 4. When set time ends, an acoustic signal operates for two minutes. Symbol flashes. The appliance deactivates. 5. Touch any sensor field or open the oven door to stop an acoustic signal. Automatic programmes with weight input If you set the weight of the meat, the appliance calculates the roasting time. -
Page 19: Using The Accessories
Using the accessories • Deactivating the my favourite programme function: Touch When the my favourite programme function operates, you can change the time and tem- perature. USING THE ACCESSORIES WARNING! Refer to "Safety information" chapter. Core Temperature Sensor The core temperature sensor measures the core temperature of the meat. When the meat is at the set temperature, the appliance deactivates. -
Page 20: Inserting The Oven Accessories
Using the accessories While the appliance calculates the approximate duration time, the value of the Count Up Timer function shows in the Timer/Residual heat display. When the first calculation ends, the Timer/Residual heat display shows - , and then the approximate duration of the cooking. The appliance continues to calculate the duration during the cooking. -
Page 21: Additional Functions
Additional functions Inserting the wire shelf and pan together Put the wire shelf on the pan. Push the pan be- tween the guide-bars of one of the shelf positions. ADDITIONAL FUNCTIONS Child safety You cannot activate the appliance on if the child safety device operates. Activating/Deactivating the child safety device: 1. - Page 22 Additional functions eight settings (from SET1 to SET7). The number of the settings is different for different models. Look into the table below to see the possible value of each setting. Settings menu Indicator of the setting menu Description Value to set SET1 SET+GO ON/OFF...
-
Page 23: Care And Cleaning
Care and cleaning Brightness of the display There are two modes of display's brightness: • Night brightness - when the appliance is off, the brightness of the display is lower between 22:00 and 06:00; • Day brightness: – when the appliance is on; –... -
Page 24: Steam Generation System
Care and cleaning Remove water from the steam generator with the Sponge 150 and rub dry. Keep the door open for approximately 1 hour to let the appliance dry fully. You can use the End function to delay start of cleaning process (refer to "Setting the END"). Shelf support You can remove the shelf support to clean the side walls. - Page 25 Care and cleaning Remove a lime residue with water and vinegar. CAUTION! Chemical de-scaling agents can damage oven enamel. Obey instructions of the manufac- turer! Cleaning the Water Tank and the Steam Generator: 1. Fill the water and vinegar mixture (approximately 250 ml) through the water tank in the steam generator.
-
Page 26: Oven Door And Glass Panels
Care and cleaning Use the same oven lamp type. 5. Install metal frame and seal and tighten screws. 6. Install the left shelf rail. Oven door and glass panels To clean the oven door, remove it. CAUTION! Be careful when you remove the door from the appliance. The door is heavy! Removing the oven door 1. -
Page 27: What To Do If
What to do if… 4. Hold the door glass panels on their top edge one by one and pull them up out of the guide 5. Clean the door glass panels. To install panels follow the procedure in re- verse. Install the smaller panel first, then the larger. -
Page 28: Environment Concerns
Environment concerns The necessary data for the service centre is on the rating plate. The rating plate is on the front frame of the oven cavity. We recommend that you write the data here: Model (MOD.) ......... Product number (PNC) ......... - Page 29 Canada Tel 905-829.3980 Fax 905-829.3985 email [email protected] For Service & Spares: EURO-PARTS 1.800.678.8352 Important: Please record details of your purchase below and mail or fax to AEG -----------------------------------------------------------------------------------------cut along line ------------------------------------------------------------------------------------ Name: TEL No Address: City : State: Zip Code:...
- Page 30 AEG appliances are imported and distributed in North America by Euro-Line Appliances Inc. For more information visit www.euro-line-appliances.com / www.elawest.com 871 Cranberry Court 2912 West 4th Ave Oakville, ON L6L 6J7 Vancouver, BC V6K 1R2 Canada Canada Toll Free: 1.800.421.6332 Toll Free: 1.855.352-9378...