Electrolux Service 7000 User Manual
Cooking stove
Hide thumbs
Also See for Service 7000:
- Manual (197 pages) ,
- Instruction book (76 pages) ,
- Service manual (100 pages)
Table of Contents
Quick Links
See also:
Service Manual
Table of Contents

Related Manuals for Electrolux Service 7000


Summary of Contents for Electrolux Service 7000
- Page 1 Servicenummer 0848 88 7000 EHL2S7000W Bedienungsanleitung für den Kochherd Mode d’emploi pour votre cuisinière Istruzioni d'uso per il vostro fornello...
-
Page 2: Table Of Contents
Please read these instructions carefully to enable you to use all the possibilities and advan- tages of your new cooking stove. Please also note the safety notice and the enclosed guarantee and customer services book- let. We hope you will be very happy with your new Service 7000 machine. Yours, Service 7000 AG Contents Safety instructions........ -
Page 3: Safety Instructions
Safety instructions Electrical safety How to avoid damage to the appliance • This appliance must be only connected • Do not line the oven with aluminium foil by a registered electrician. and do not place baking trays, pots, etc. on the oven floor, as the heat that builds •... -
Page 4: Description Of The Appliance
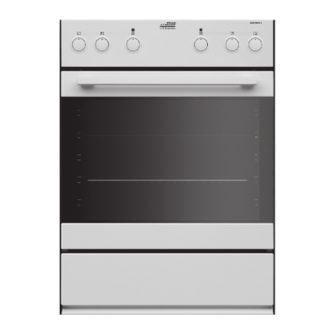
Description of the Appliance General Overview Control panel Door handle Oven door Appliance drawer Control Panel EH L2-4 Oven Power Indicator Oven Functions Temperature selector Temperature Pilot Light Hob Cooking Zone Control Knobs Hob Cooking Zone Control Knobs... -
Page 5: Before Using For The First Time
Oven Features Top heat and heating elements Fat trap Oven lighting Shelf positions Oven lighting Fan heating element Aluminium base plate Bottom heating element, removable Oven shelf runners, removable Oven accessories Oven shelf Baking tray For cakes and biscuits. For cookware, cake tins, roasts and grilled foods. -
Page 6: Using The Rings
Using the Rings Also refer to the operating instructions for your built-in hob. It contains impor- tant information on ovenware, opera- tion, cleaning and care. Heat settings • Heat settings can be set in the range 1 - 9. • Half-way settings are available between 1 and 9. -
Page 7: Using The Oven
Switching on the dual fry/cook area Finally, turn back to the desired setting. After cooking, turn back to the OFF po- The control for the dual fry/cook area is sition. switched on by turning to the right, and cannot be turned past the stop! To use the dual fry/cook area again af- 1. -
Page 8: Oven Functions
Oven Functions The oven has the following functions: Oven function Application Light Using this function you can light up the oven interior, e.g. for cleaning. Convection with ring To bake on three oven levels maximum at the same time. heating element Decrease the oven temperatures (20-40 °C) compared with Conven- tional. -
Page 9: Uses, Tables And Tips
Inserting the oven shelf: Inserting the oven shelf and the baking tray together: Insert the oven shelf so that the feet point downwards. Lay the oven shelf on the baking tray. Push the oven shelf between the guide bars Push the baking tray between the guide of the selected oven level. - Page 10 Heat Cooking- Cooking set- suitable for Hints process time ting Use only some liquid, e.g.: ¼ To steam potatoes 20-60 mins. max. l water for 750 g potatoes Boiling To cook larger quantities of food, 3 l liquid maximum plus 60-150 mins.
- Page 11 3 baking trays: • We recommend using the lower temper- ature the first time and then if necessary, for example, if a deeper browning is re- quired, or baking time is too long, se- lecting a higher temperature. • If you cannot find the settings for a par- ticular recipe, look for the one that is most similar.
- Page 12 Type of Oven Temperature Time Oven function baking level °C Mins. Flan base - short pastry Convection with ring 170-180 20-25 heating element Flan base - sponge mixture Convection with ring 150-170 25-30 heating element Apple pie Conventional 170-190 50-60 Apple pie (2tins Ø20cm, Convection with ring 60-80...
- Page 13 Type of Oven Temperature Time Oven function baking level °C Mins. Tarts (CH) Convection with ring 180-200 40-55 heating element Biscuits Short pastry biscuits Convection with ring 150-160 15-25 heating element Viennese whirls Convection with ring 25-35 heating element Viennese whirls Conventional 20-30 Biscuits made with sponge mix-...
-
Page 14: Tips On Baking
Convection Convection with ring with ring heating heating Temperature Time element element Type of baking in °C Mins. Shelf positions from bottom 2 levels 3 levels Biscuits made with sponge 1 / 3 160-170 20-30 mixture Biscuits made with egg white, 1 / 3 80-100 90-150... - Page 15 Pizza setting table Temperature Time Type of baking Shelf position °C Mins. Pizza (thin crust) 200 - 250 10 - 15 Pizza (with a lot of topping) 180 - 200 20 - 30 Tarts 180 - 200 45 - 60 Spinach flan 160 -180 45 - 60...
- Page 16 Frozen Ready Meals Table Food to be Shelf Temperature Oven function Time cooked position °C as per manufactur- as per manufactur- Frozen pizza Conventional er’s instructions er’s instructions Chips Convection with ring as per manufactur- 200-220 (500 g) heating element er’s instructions as per manufactur- as per manufactur-...
- Page 17 Temper- Shelf Time Type of meat Quantity Ovenfunction ature position Mins. °C Pork Convection Shoulder, neck, ham joint 1-1.5 kg 160-180 90-120 grilling Convection Chop, spare rib 1-1.5 kg 170-180 60-90 grilling Convection Meat loaf 750 g-1 kg 160-170 50-60 grilling Porkknuckle Convection...
-
Page 18: Grill Sizes
Grill sizes Oven function: Grill or Dual grill with maximum temperature setting Important: Always grill with the oven door closed. The empty oven should always be pre- heated with the grill functions for 5 minutes. • For grilling, place the shelf in the recommended shelf position. - Page 19 Defrosting table Defrosting Further Dish time defrosting Comments mins. time (mins.) Place the chicken on an upturned saucer Chicken, 1000 g 100-140 20-30 placed on a large plate Turn halfway through Meat, 1000 g 100-140 20-30 Turn halfway through Meat, 500 g 90-120 20-30 Turn halfway through...
-
Page 20: Making Preserves
Making preserves Oven function: Bottom heat • For preserving, use only commercially available preserve jars of the same size. • Jars with twist-off or bayonet type lids and metal tins are not suitable. • When making preserves, the first shelf position from the bottom is the one most used. -
Page 21: Cleaning And Care
Cleaning and Care Aluminium base plate Warning: First switch off the appliance and let it cool down before carrying out Never use cleaning materials, cleaning any cleaning. agents or steel wool that scratch or scour. Warning: For safety reasons, do not clean the appliance with steam blasters or high- Do not clean in the dishwasher. - Page 22 Fitting the shelf support rails Pull the top heating elements out of the plug connection to the front (see illustra- tion). Important! The rounded ends of the guide rails must be pointing forwards! To re-insert, first hook the rail into place at the back (1) and then insert the front and press into place (2).
-
Page 23: Oven Lighting
Oven Lighting Refit the glass cover. Warning: Risk of electric shock! Prior to changing the oven light bulb: – Switch off the oven! – Disconnect from the electricity supply. Place a cloth on the oven floor to protect the oven light and glass cover. Changing the oven light bulb/cleaning the glass cover Insert the shelf support rail. -
Page 24: Oven Door
1. Remove the side shelf support rails. Oven door 2. Grip the heating element at the front and For easier cleaning of the oven interior the pull it forwards and out over the support oven door of your appliance can be taken off lug on the inner wall of the oven. - Page 25 4. Take hold of the oven door with a hand Open the oven door as far as it will go. on each side and pull it away from the oven at an upwards angle (Take care: It is heavy). Fold up the clamping levers (A) on both door hinges back into their original positions.
-
Page 26: What To Do If
Replace the bulb. If you were not able to remedy the prob- lem by yourself, please contact the Cus- tomer Care Service 7000. Warning! Repairs to the appliance are only to be carried out by qualified serv- ice engineers. Considerable danger to the user may result from improper re- pairs. -
Page 27: Installation Instructions
Installation Instructions Built-in cooker SMS width 55 cm Installation into flammable material must comply with NIN 2005, Chapter 4.2.2 of the VKF (Association of Cantonal Fire In- surers) fire protection guidelines and regulations. 1. a) Install the hotplates according to the installation instruction no.374307900/ 374307901 so that the hotplate socket connections can be carried out before... - Page 28 Electrical connection/power supply Installation diagram 400V The oven must be connected to the electric- ity supply by a designated electrician. Use a H05VV-F type power cable or higher. Phase definitions: The appliance must be installed with a sock- L1, L2, L3 (or R, S,T) et supply line, otherwise the fixed home elec- trical system must include an isolating device with at least a 3mm-contact separation to...
-
Page 29: Disposal
Disposal Packaging material The packaging materials are environ- mentally friendly and can be recycled. The plastic components are identified by markings, e.g. >PE<, >PS<, etc. Please dispose of the packaging materials in the appropriate container at the com- munity waste disposal facilities. Old appliance The symbol on the product or on its... - Page 32 (fa stato la data della datum an den Endverbrau- partir de la date de livraison a partire dalla data di conseg- Service 7000 AG 7000 AG, Garantieschein, Fak- au moyen d’une facture, d’un fattura, del certificato di CH-8754 Netstal GL...