Table of Contents
Available languages
Available languages
Quick Links
Chapters
Table of Contents

Related Manuals for GE 16017970


Summary of Contents for GE 16017970
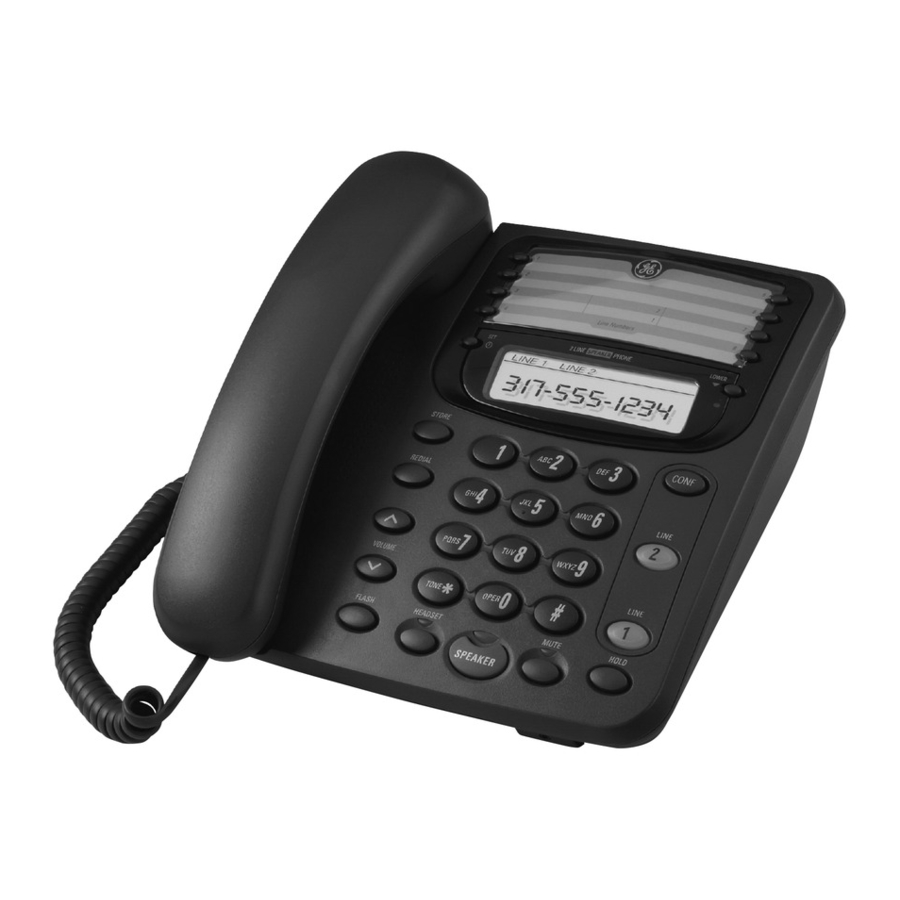
- Page 1 Model 29484 Two Line Home/Office Speakerphone User’s Guide...
-
Page 2: Equipment Approval Information
The REN is useful in determining the number of devices you may connect to your telephone line and still have all of these devices ring when your telephone number is called. In most (but not all) areas, the sum of the RENs of all devices connected to one line should not exceed 5. To be certain of the number of devices you may connect to your line as determined by the REN, you should contact your local telephone company. -
Page 3: Interference Information
FCC Rules and Regulations. If these changes are expected to affect the use or performance of your telephone equipment, the telephone company must give you adequate notice, in writing, to allow you to maintain uninterrupted service. -
Page 4: Table Of Contents
Table of Contents quipmEnt pprovAl nformAtion ...3 ntErfErEncE nformAtion (HAc) ...3 EAring ompAtibility ...4 AblE of ontEnts ...6 ntroduction ...6 EforE Egin ...6 arts heCklist elePhone equirements mportAnt nstAllAtion nformAtion ...7 nstAlling tHE HonE aC (e onneCting the leCtriCal onneCting ines ...7 hone... - Page 5 Table of Contents onnEcting An ptionAl EAdsEt ...24 roublEsHooting uidE ...25 EnErAl roduct ...26 ErvicE ...26 ccEssory nformAtion ...27 ndEx ...29 imitEd ArrAnty WARNING: TO PREVENT FIRE OR ELECTRICAL SHOCK HAZARD, DO NOT EXPOSE THIS PRODUCT TO RAIN OR MOISTURE..23 RISK OF ELECTRIC SHOCK CAUTION: TO REDUCE THE...
-
Page 6: Before You Begin
Important Installation Information • Never install telephone wiring during a lightning storm. • Never install telephone jacks in wet locations unless the jack is specifically designed for wet locations. • Never touch non-insulated telephone wires or terminals, unless the telephone line has been disconnected at the network interface. -
Page 7: Installing The Phone
1. Connect one end of the straight telephone line cord (that came packaged with your unit) to the jack on the back of the phone labeled LINE 1+2. 2. Connect the other end of the straight telephone line cord to a dual line wall phone jack. -
Page 8: Attaching The Desktop Pedestal
2. Turn the mounting pedestal so that the flat side is facing upwards. 3. Thread the telephone line cord through the groove on the thin end of the pedestal. 4. With the thin end of the pedestal pointing upward, insert the tabs on the rounded edge of the pedestal into the two lower slots on the bottom of the base, then push the pedestal down until all of the tabs snap into place. -
Page 9: Connecting The Handset
3. Press the # key to select AM or PM. 4. Press SET to confirm. Your phone provides the convenience of accessing 2 separate telephone lines, each obtained from the telephone company and each having its own phone number. This is generally applicable to small offices. MEMORY buttons... -
Page 10: Isplay
Display This phone features a Liquid Crystal Display that shows the following information: • Clock • Phone numbers dialed and memory contents • AM PM Icons • CONF (Conference) Icon Adjusting the Display Contrast 1. Press the STORE button to enter the store mode. 2. -
Page 11: Receiving Incoming Calls
NOTE: Only one-way conversation is possible in speakerphone mode. When you are speaking, you are transmitting. When you are listening, you are receiving. You can’t do both at the same time. The phone will automatically switch between transmitting and receiving depending on the level of the voice or the room noise picked up by the speakerphone mic. -
Page 12: Sing The Ptional Eadset
Using the Optional Headset CAUTION: Use only the 5-2425 headset with this unit. Using other headsets may damage the unit. For information on ordering the headset, refer to the Connecting an Optional Headset section of this user’s guide. When the phone rings, the corresponding line’s indicator flashes rapidly. 1. -
Page 13: Placing A Call On Hold
NOTE: The call on hold can be picked up at any station using this procedure. Flash Press FLASH to activate special features of your telephone network, such as Call Transfer, or special services from your local telephone company, such as Call Waiting. Pause... -
Page 14: Redial
Volume You may adjust the ringer, speaker, handset and headset volumes independently with the VOLUME ^ and VOLUME v buttons. Your telephone comes with predetermined settings which can be adjusted to individual taste. You will hear an error tone when the maximum or minimum volume level is reached. -
Page 15: Adjusting The Headset Volume
Adjusting the Headset Volume Press the VOLUME ^ or v button while in headset mode (HEADSET indicator is on). You may choose from four volume settings: LOW, MID1, MID2, and HIGH. NOTE: To return to the preset settings, see “Reset to Default Settings.” Conference Calls This feature allows you to have a 3-way conversation using 2 lines. -
Page 16: Line Status Indicators
Line Status Indicators Your two-line phone is designed for use at multiple stations. The indicator light tells you the status of each line. When the indicator light is Blinking Green Flashing Red Solid Green Solid Red Speakerphone Operation Using the Base Speakerphone Your phone features a speakerphone for ease of use and convenience during a phone conversation. -
Page 17: Aking A All
Note the following guidelines when you use the speakerphone: • The speakerphone works similar to a two-way radio in that you can only listen or talk at one time. • Stay reasonably close to the phone so that you can be clearly heard by the person to whom you are speaking. -
Page 18: Storing A Number
Memory Each of the 8 memory buttons has the capability of storing 2 separate telephone numbers (up to 32 digits each). Each memory button accesses an upper and a lower memory location. The LOWER button accesses those numbers stored in the lower memory locations. -
Page 19: Memory Location
Storing a Chain of Numbers You can link together a dialing sequence of phone numbers in separate memory locations by combining them in a single memory location or have another memory location stored in one of the locations to be linked. For example Local access number of long distance company. -
Page 20: Storing A Flash
This process allows you to dial a succession of stored numbers from separate memory locations. This is useful when you must dial several sequences of numbers, such as with frequent calls via a telephone company long distance provider. Digits used... -
Page 21: Special Features
For example Local access number of long distance company Authorization code (ID) Long distance phone number Using: 1. Press the line you want. 2. Press memory location 6. 3. Press memory location 7. 4. Press memory location 8. Deleting Numbers Stored in Memory 1. -
Page 22: Setting The Dialing Mode
Checking the Ringer Settings Check the setting or each ringer (on, off) by pressing STORE, followed by LINE 1 or LINE 2 button when the phone is on the hook. The ringer setting of the selected line will be shown in the display. Setting the Dialing Mode 1. -
Page 23: Ettings
Speaker volume: MID 2 Handset volume: LOW Headset volume: LOW Ringer tone: Line 1 = 1, Line 2 = 2 Incoming call tone: ON To reset to the default settings: 1. Press the LOWER button. 2. Simultaneously press and hold * and #. After about 2 seconds you will hear a beep for two seconds. -
Page 24: Troubleshooting Guide
No dial tone • Check installation: Are the telephone line cords connected to the phone and the wall jack? Are they damaged? • Does the hook switch pop up when the handset is lifted? • Check the SPEAKER button. Is the indicator off? •... -
Page 25: General Product Care
• Make sure the pulse/tone mode is programmed correctly. General Product Care To keep your telephone working and looking good, follow these guidelines: • Avoid putting the phone near heating appliances and devices that generate electrical noise (for example, motors or fluorescent lamps). -
Page 26: Accessory Information
If trouble is experienced with this equipment, for repair or warranty information, please contact customer service at 1-800-448-0329. If the equipment is causing harm to the telephone network, the telephone company may request that you disconnect the equipment until the problem is resolved. - Page 27 Index Accessory Information 26 Adjusting the Display Contrast 10 Adjusting the Handset Volume 14 Adjusting the Headset Volume 15 Adjusting the Ringer Volume 14 Adjusting the Speakerphone Volume 14 and Headset 12 Attaching the Desktop Pedestal 8 Attaching the Wall Mount Pedestal 8 Basic Operation 9 Before You Begin 6 Chain Dialing 20...
- Page 28 Storing a Chain of Numbers 19 Storing a Flash 20 Storing a Number 18 Storing a Pause 19 Switching Between Using the Speakerphone Telephone Jack Requirements 6 Temporary Tone 13 Troubleshooting Guide 24 Using One Touch Redial 14 Volume 14...
-
Page 29: Limited Warranty
Limited Warranty What your warranty covers: • Defects in materials or workmanship. For how long after your purchase: • One year, from date of purchase. (The warranty period for rental units begins with the first rental or 45 days from date of shipment to the rental firm, whichever comes first.) What we will do: •... - Page 30 If you purchased your product outside the USA: • This warranty does not apply. Contact your dealer for warranty information. Model 29484 16017970 (Rev. 1 Dom E/S) 06-23 Printed in China Thomson Inc. 10330 North Meridian St.
- Page 31 Modelo 29484 Teléfono con Altavoz de Dos Líneas para Hogar/Oficina Guía del Usuario...
-
Page 32: Información Sobre La Aprobación De Equipo
El equipo de su teléfono esta aprobado para la conexión con la red Telefónica Pública (Public Switched Telephone Network) y cumple con los requisitos establecidos en las secciones 15 y 68 de las Reglas y Regulaciones de la FCC y con los Requerimientos Técnicos para Equipos de Terminales Telefónicas (Technical Requirements for Telephone Terminal Equipment), publicado por ACTA. -
Page 33: Información De Interferencias
La compañía telefónica puede hacer los cambios en sus instalaciones de comunicación, en equipos, en sus funcionamientos o procedimientos que digne necesarios para el manejo de sus negocios y que no sean incompatibles con las Reglas y Regulaciones de l a FCC. Si estos cambios pudieran alterar el uso o el funcionamiento de su equipo telefónico, la compañía telefónica deberá... -
Page 34: Tabla De Contenido
TABLA DE CONTENIDO nformacIón sobre la probacIón de nformacIón de nterferencIas ompatIbIlIdad con udífonos tabla de contenIdo ...4 ...6 ntroduccIón ...6 ntes de omenzar ...6 ista de artes equerimientos nchufe nformacIón mportante para la ...7 nstalar el eléfono onectar La orriente onectar Las íneas... - Page 35 ...17 acer una Lamada ... 17 ecibir una Lamada ntercambiar entre Ltavoz ... 17 uricuLar y udífonos ...18 emorIa Lmacenar un úmero ambiar un ombre o ... 18 Lmacenado Lmacenar una adena de Lmacenar una ausa Lmacenar unciones (“f ”) ... 20 Lash nformación Para Lmacenaje de...
-
Page 36: Antes De Comenzar
Introducción CUIDADO: Cuando utilice equipo telefónico, hay instrucciones básicas de seguridad que siempre deben seguirse. Refiérase a la guía de INSTRUCCIONES DE SEGURIDAD IMPORTANTES provista con este producto y guárdela para referencia futura. Antes de Comenzar Lista de Partes Asegúrese de que su paquete incluye los artículos mostrados aquí: Pedestal para Instalar Un cable de sobre Superficie Plana/... -
Page 37: Para Instalar El Teléfono
Para Instalar el Teléfono Su Teléfono con Altavoz de Dos Líneas para Hogar/Oficina debe ser colocado sobre una superficie nivelada como una mesa o escritorio, o puede ser montado sobre pared. Para Conectar la Corriente AC (Eléctrica) Conecte el cable de corriente en el enchufe marcado “9VAC” en la parte posterior de la base. Después conecte el otro extremo del cable en un enchufe eléctrico. -
Page 38: Lana
Adaptador/ separador de Líneas 1+2 Para Instalar el Pedestal sobre la Superficie Plana 1. Voltée el teléfono de cabeza de manera que la parte de debajo de la base quede mirando hacia arriba y el extremo más ancho esté del lado contrario a usted. 2. -
Page 39: Para Conectar El Auricular
Para Conectar el Auricular 1. Conecte un extremo del cable espiral del auricular al enchufe en el costado de la base del aparato. 2. Conecte el otro extremo del cable en el enchufe en la parte de abajo del auricular, y después coloque el auricular sobre la base. -
Page 40: Antalla
Pantalla El teléfono tiene una pantalla de cristal líquido (LCD) que muestra la siguiente información: • Reloj • Números telefónicos marcados y contenido de la memoria • Símbolos de AM y PM • Símbolo de CONF (Conferencia) Para Ajustar el Contraste de la Pantalla 1. -
Page 41: Ltavoz
NOTA: Únicamente una conversación unidireccional es posible en la modalidad de altavoz. Cuando usted está hablando, usted está transmitiendo. Cuando usted está escuchando, usted está recibiendo. Usted no puede hacer ambas cosas al mismo tiempo. El teléfono automáticamente cambiará entre modalidad de transmisión y recepción, depende del nivel de la voz o del ruido de fondo que el micrófono del altavoz pueda captar. -
Page 42: ("Mute")
Para Utilizar los Audífonos Opcionales CUIDADO: Utilice únicamente los audífonos 5-2425 que vienen incluidos con este aparato. El uso de otros audífonos puede resultar en daño al aparato. Para información acerca de cómo ordenar audífonos, refiérase a la sección Para Conectar Audífonos Opcionales en esta guía del usuario. -
Page 43: Para Poner Una Llamada En Espera
Para Poner una Llamada en Espera 1. Oprima el botón HOLD y el teléfono emite un tono cada 30 segundos como recordatorio. 2. Coloque el auricular en su sitio sobre la base, u oprima otro botón de línea. Cómo Liberar una Llamada en Espera 1. -
Page 44: Para Volver A Marcar (Redial)
Para Volver a Marcar (Redial) 1. Levante el auricular, u oprima el botón SPEAKER. La línea es seleccionada automáticamente. ‑O‑ 2. Oprima el botón HEADSET, y después oprima el botón de la línea deseada. 3. Espere al tono de marcar. Oprima le botón REDIAL/pause. NOTA: La función para volver a marcar no operará... -
Page 45: Onferencia
Para Ajustar el Volumen de los Audífonos Oprima el botón VOLUME ^ o v mientras el auricular está en modalidad de audífonos (el indicador HEADSET está iluminado). Usted puede seleccionar entre cuatro niveles de volumen: LOW, MID1, MID2 y HIGH. NOTA: Para regresar a las programaciones originales, vea la sección “Para Volver a las Programaciones Originales.”... -
Page 46: Stado De Las L Íneas
Indicadores del Estado de las Líneas Su teléfono de dos líneas está diseñado para ser usado en múltiples estaciones. La luz del indicador le avisa el estado de cada línea. Cuando la luz del indicador está Apagada Parpadeando en verde Centellando en rojo Verde Roja... -
Page 47: Para Hacer Una Llamada
Siga las siguientes pautas cuando utilice el altavoz: • El altavoz funciona en una forma similar a un radio bidireccional, en que usted puede únicamente escuchar o hablar al mismo tiempo. • Quédese razonablemente cerca del teléfono para que pueda ser escuchado claramente por la persona con la que está... -
Page 48: Para Almacenar Un Número
Memoria Cada uno de los 8 botones de memoria tiene la capacidad de almacenar 2 números telefónicos separados (de hasta 32 dígitos cada uno). Cada botón de memoria tiene acceso a una localización de memoria alta y baja. El botón LOWER da el acceso a los números almacenados en las localizaciones de memoria baja. -
Page 49: Para Almacenar Una Cadena De Números
Para Almacenar una Cadena de Números Usted puede enlazar una secuencia de números telefónicos para ser marcados en localizaciones de memoria separadas, combinándolos en una misma localización de memoria o tener otra localización de memoria almacenada en una de las localizaciones que será... -
Page 50: Para Marcar Un Número Almacenado
Para Almacenar Funciones Especiales (“Flash”) Utilice el botón FLASH para generar una pausa en la secuencia de marcado para hacer la señal en la red de que se requiere un servicio especial, como Llamada en Espera. Cuando un “Flash” almacenado se encuentra durante la secuencia de Marcado por Memoria, el teléfono genera un servicio especial de pausa, o “Flash”... -
Page 51: Funciones Especiales
Por ejemplo Número local de acceso a la compañía de larga distancia Clave de autorización (ID) En donde se almacenará toda la secuencia, incluyendo el número telefónico de larga distancia. Para utilizarla 1. Oprima el botón de la línea que usted quiera usar. 2. -
Page 52: Para Verificar Las Programaciones Del Timbre
Para Verificar las Programaciones del Timbre Verifique la programación para cada timbre (activado, desactivado) oprimiendo el botón STORE, seguido por el botón de línea 1 (“LINE 1”) o línea 2 (“LINE 2”) cuando el teléfono está colgado. La programación del timbre de la línea seleccionada se muestra en la pantalla. Para Programar la Modalidad para Marcar 1. -
Page 53: Terminal De Datos ("Data Port)
Volumen de altavoz: medio (“MID 2”) Volumen del auricular: bajo (“LOW”) Volumen de los audífonos: bajo (“LOW”) Tono del timbre: Línea 1 = 1, Línea 2 = 2 Tono de llamada entrante: activo (ON) Para volver a las programaciones de fábrica: 1. -
Page 54: Guía Para Solución De Problemas
Guía para Solución de Problemas En caso de dificultad, por favor verifique la siguiente sección de Guía para Solución de Problemas antes de solicitar servicio de reparación. No hay tono de marcar • Verifique la instalación: ¿Están todos los cables de línea conectados al teléfono y al enchufe de pared? ¿Están dañados? •... -
Page 55: Cuidado General Del Producto
Volumen de la voz entrante muy bajo o no se oye. • Verifique el nivel de volumen. La función de marcar por memoria no sirve • ¿Usted programó las teclas de la localización de memoria correctamente? • ¿Siguió usted la secuencia adecuada para marcar? •... -
Page 56: Cómo Obtener Servicios De Mantenimiento
Cómo Obtener Servicios de Mantenimiento Si usted experimenta problemas con este equipo, para reparaciones o para información de garantía, comuníquese con el departamento de servicio al cliente al 1‑800‑448‑0329. Si el equipo está causando daños a la red telefónica, la compañía telefónica puede pedirle que desconecte su equipo hasta que el problema haya sido resuelto. - Page 57 Índice Antes de Comenzar 6 Auricular y Audífonos 12 Cómo Liberar una Llamada en Espera 13 Cómo Obtener Servicios de Mantenimiento Compatibilidad con Audífonos (CCA) 3 Cuidado General del Producto 25 de Pared 7 En Espera (“HOLD”) 12 Enmudecedor (“MUTE”) 12 Flash 13 Funciones Especiales 21 Guía para Solución de Problemas 24...
- Page 58 Para Almacenar una Pausa 19 Para Almacenar un Número 18 Para Alternar Entre el Uso del Altavoz 12 Para Borrar Números Almacenados en la Memoria 21 Para Cambiar un Nombre o Número Almacenado 18 Para Conectar Audífonos Opcionales 23 Para Conectar el Auricular 9 Para Conectar la Corriente AC (Eléctrica) 7 Para Conectar las Líneas 1 + 2 en Dos Enchufes Sencillos 7...
- Page 59 Garantía Limitada Lo que cubre su garantía: • Defectos de materiales o de trabajo. Por cuánto tiempo después de la compra: • Un año, a partir de la fecha de compra. (El periodo de garantía para unidades arrendadas se inicia con la primera renta o 45 días de la fecha del embarque a la firma de arrendamiento, lo que ocurra primero).
- Page 60 Si compró su producto fuera de los Estados Unidos: • Esta garantía no se aplica. Vea a su distribuidor para información sobre la garantía. Modelo 29484 16017970 (Rev. 1 DOM E/S) 06‑23 Impreso en China Thomson Inc.