
Related Manuals for NEC ITL-8LD-1 - DT730 - 8 Button DESI Less Display IP Phone


Summary of Contents for NEC ITL-8LD-1 - DT730 - 8 Button DESI Less Display IP Phone
- Page 1 NWA-039300-001 ISSUE 5.0 DT730/DT710/DT330/DT310 USER’S GUIDE NEC Corporation 2011 August...
- Page 2 NEC Corporation reserves the right to change the specifications, functions, or features, at any time, without notice. NEC Corporation has prepared this document for use by its employees and customers. The information contained herein is the property of NEC Cor- poration and shall not be reproduced without prior written approval from NEC Corporation.
-
Page 3: Table Of Contents
TABLE OF CONTENTS 1. INTRODUCTION FACE LAYOUT ................... KEYS AND PARTS ................MENU KEY ..................SIMPLE OPERATION BY MENU KEY AND CURSOR KEY....ICON DISPLAY................... SHORTCUT MENU ................PROGRAMMABLE FEATURE KEYS ..........SOFT KEYS..................8LD Display..................CONDITIONS FOR DT700 SERIES ........... 2.INSTALLATION PROCEDURE ADJUSTING ANGLE OF TILT LEG ............ - Page 4 TABLE OF CONTENTS 4.BASIC OPERATION TO LOGIN ..................100 TO LOGOUT ..................100 TO MAKE AN EXTERNAL CALL ............101 TO MAKE AN INTERNAL CALL ............103 TO ANSWER AN EXTERNAL CALL ..........105 TO ANSWER AN INTERNAL CALL ........... 107 MULTILINE APPEARANCE..............
- Page 5 TABLE OF CONTENTS AUTHORIZATION CODE ..............139 VOICE CALL ..................140 TO ANSWER A VOICE CALL HANDS FREE ........141 AUTOMATIC INTERCOM..............141 MANUAL INTERCOM ................. 142 DIAL INTERCOM ................143 CONFERENCE ................. 144 TO ESTABLISH A BROKER CALL............. 144 TO ANSWER A CAMPED-ON CALL ..........
- Page 6 TABLE OF CONTENTS BOSS/SECRETARY - MW LAMP CONTROL ........162 BOSS SECRETARY OVERRIDE ............163 DO NOT DISTURB ................164 CALL REDIRECT ................165 PRIVACY ..................166 PRIVACY RELEASE................167 PHONEBOOK ................... 168 CALL HISTORY ................178 6.DIRECTORY OPERATION TO ADD NEW DATA ................. 183 TO CHANGE GROUP NAME ............
- Page 7 TABLE OF CONTENTS TO VIEW CALL HISTORY ..............228 TO MAKE A CALL FROM CALL HISTORY ........231 TO DELETE ALL DATA ..............232 TO DELETE A SPECIFIC DATA ............233 8.SPECIFICATIONS TECHNICAL SPECIFICATIONS............235 9.MENU LIST MENU LIST FOR DT730 SERIES ............237 MENU LIST FOR ITL-8LDE-1.............
- Page 8 This page is for your notes.
-
Page 9: Introduction
NTRODUCTION FACE LAYOUT ITL-8LD-1 (DT730 Series) DTL-8LD-1 (DT330 Series) 179 [mm] 179 [mm] Exit Help Exit Help Scroll Scroll Feautre Feature Recall Feature Recall Answer Answer Menu PQRS WXYZ Menu PQRS WXYZ Redial Redial Speaker Transfer Speaker HOLD HOLD Transfer... - Page 10 ITL-32D-1 (DT730 Series) DTL-32D-1 (DT330 Series) 205.8 [mm] 205.8 [mm] Exit Help Exit Help Feature Recall Feature Recall Answer Answer Menu PQRS WXYZ Menu PQRS WXYZ Redial Redial Speaker HOLD Transfer Speaker HOLD Transfer...
- Page 11 ITL-24D-1 (DT730 Series) DTL-24D-1 (DT330 Series) 179 [mm] 179 [mm] Exit Help Exit Help Feature Feature Recall Recall Answer Answer PQRS WXYZ Menu Menu PQRS WXYZ Redial Redial Speaker Transfer Speaker HOLD HOLD Transfer...
- Page 12 ITL-12D-1 (DT730 Series) DTL-12D-1 (DT330 Series) 179 [mm] 179 [mm] Exit Help Exit Help Feature Recall Feature Recall Answer Answer Menu PQRS WXYZ PQRS WXYZ Menu Redial Redial Transfer Speaker HOLD Transfer Speaker HOLD...
- Page 13 ITL-12PA-1 (DT730 Series) DTL-12PA-1 (DT330 Series) 193 [mm] 193 [mm] Exit Help Exit Help Line Line Feature Recall Feature Recall Answer Answer PQRS WXYZ Menu PQRS WXYZ Menu Redial Redial Transfer Speaker HOLD Speaker Transfer HOLD...
- Page 14 ITL-8LDE-1 (DT710 Series) ITL-6DE-1 (DT710 Series) 179 [mm] 179 [mm] Exit Help Exit Help Feature Recall Recall Feature Answer Answer Menu PQRS WXYZ Menu PQRS WXYZ Redial Redial Speaker HOLD Transfer Hold Transfer Speaker Note: ITL-8LDE-1 supports functions equivalent to ITL- 8LD-1 (DT730 Series).
- Page 15 DTL-6DE-1 (DT310 Series) ITL-2E-1 (DT710 Series) 179 [mm] 179 [mm] Exit Help Feature Recall Feature Recall Redial Conf Redial Conf Answer Answer PQRS WXYZ Directory Message PQRS WXYZ Directory Message Transfer Speaker HOLD Transfer Speaker HOLD...
- Page 16 DTL-2E-1 (DT310 Series) 179 [mm] Feature Recall Redial Conf Answer PQRS WXYZ Directory Message Speaker HOLD Transfer...
-
Page 17: Keys And Parts
KEYS AND PARTS (1) Security Button (DT730 only) You can prevent unauthorized access and infor- mation leakage from terminal by simple operation. • KEYS AND PARTS ON ITL-24D-1 (2) Call Indicator Lamp This subsection explains keys and parts of DT Series Lamp at the top corner of DT Series Display taking ITL-24D-1 as an example. - Page 18 ber, etc.) to the key (up to 32 digits). Details on Cursor key * For the assignment of the keys, contact your Volume (UP) key Enter Key (4-way Scroll UP key) Telephony Server Administrator. Redial key Directory key ** When two telephone numbers are assigned on (4-way Scroll RIGHT key) (4-way Scroll LEFT key) A side and B side of “One-Touch Speed Dial key”,...
- Page 19 (16)Hold (d) Enter Press this key to place an internal or external call DT730/DT330 Series has shortcut menu for fre- on hold. quently-used features. Use this key to display the shortcut menu (see SHORTCUT MENU) and determine the selected item in the menu. •...
-
Page 20: Menu Key
MENU KEY Up/Down (only for DTL-2E-1, ITL-2E-1 and DTL-6DE-1) From the Menu key, you can use various application DOWN features such as Directory and Call History. Used to adjust LCD contrast, speaker/receiver vol- To Display Menu List ume, and ringer volume. •... - Page 21 Main Menu for DT730 Series Digit key Menu Item Description (Firmware version 5.0.0.0 or later with XML to select application) To use Directory features.There are the following three types of History Portal directory features. Directory • Personal Directory: Con- trolled by telephone set. For Service details, see 6.DIRECTORY...
- Page 22 Digit key Menu Item Description Note: A Portal screen is the home (entrance) screen of to select the phone. When you use multiple XML Phone To switch from Main Menu to applications, the URL that is registered as the the Portal screen or Phone home URL is the Portal screen: this is where other screen (time indication XML applications can be accessed.
- Page 23 Menu Item Description Menu Item Description To use Directory features.There are the following three types of directory features. - Uses when accessing external XML server. • Personal Directory: Controlled by tele- For details, please contact the system Tool administrator. phone set. For details, see 6.DIRECTO- - Uses when sending/receiving Instant OPERATION.
-
Page 24: Simple Operation By Menu Key And Cursor Key
SIMPLE OPERATION BY MENU KEY ICON DISPLAY AND CURSOR KEY The LCD of DT730 Series/DT330 Series displays Desktop Icons which provide notification when events By using Menu key and key, DT Series user can (such as missed call and voice mail) occur. access Call History, Directory and terminal settings with simple operation. -
Page 25: Shortcut Menu
SHORTCUT MENU Shortcut Menu for DT330 Series As shown in the figure below, DT730 Series/DT330 Series has Shortcut Menu for frequently-used features. Feature Description You can access to Shortcut Menu by pressing key. (Enter) Missed Calls Access to history of Missed Call. Voice Mail Access to history of incoming Voice Mail. - Page 26 [Missed] 12/JUL/2010 (MON) 10:00 Ken Kobus 7205 Option ↓ Back Note: or ↑/↓ soft If two or more records exist, use key to display the next/former records. Note: For unanswered incoming calls, will be dis- played on the left of the name. Note: If you make/answer a call to/from the telephone number which is registered to Personal Directory,...
-
Page 27: Programmable Feature Keys
PROGRAMMABLE FEATURE KEYS MW-SET: Press key to leave message waiting indication on These are examples of DT Series features available by boss’ station from secretary’s station. pressing the programmable keys. Some features using feature access code may be programmed by the user. MW-OFF: Others must be programmed by the telephone system Press key to cancel message waiting indication on... - Page 28 Programmable Feature keys have a built-in Light Emitting Diode (LED) that lights or flashes according to the activity of that Feature key. Function Key Activities Feature + 0 = Side Tone On/Off. (for handset) Feature + 1 = Turns microphone on or off. Feature + 2 = Adjusts handset receiver volume.* Feature + 3 = Selects ringer tone.* Feature + 4 = Adjusts transmission/receiving volume.*...
-
Page 29: Soft Keys
SOFT KEYS preassigned station. The Soft Keys on the DT Series provide a set of functions on the LCD that adapt to the changing state Default Displays for Each Status of the telephone. While default Soft Key settings are Default Soft Key settings are provided corresponding to provided, desired functions can be assigned to particular functions. - Page 30 The following shows the default display patterns of main features. BUSY FDB (Call Forwarding - Busy Line) BUSY 2000 Permits a call to a busy station to be immediately 4:26 PM MON 12 JUL 2010 forwarded to a predesignated station. >>>...
- Page 31 MWSET (Message Waiting - Set) Busy Out. Allows a station to set a Message Waiting indication or FLASH (Flash) lamp. Provides the station with a switchhook flash. HOLD (Call Hold) FDN (Call Forward - No Answer) Permits a station user to hold a call in progress and to Permits a call to an unanswered station to be forwarded return to the previously held call.
- Page 32 RLS (Release Key) VISIT (Survivable Remote MGC) Allows you to release the current call when using the Allows a station to indicate a status: when a user is in headset, without waiting for the party to hang up. remote office, VISIT will be blinking. After recovering the main office, VISIT will return to light.
-
Page 33: 8Ld Display
8LD Display DTL-8LD-1/ITL-8LD-1 8LD Display is available for DTL-8LD-1, ITL- Time Indication Screen 8LD-1, and ITL-8LDE-1. (Indicates current time information, call information, and Soft Keys, etc.) DTL-8LD-1/ITL-8LD-1/ITL-8LDE-1 DTL-8LD-1/ITL-8LD-1 provides 32 (8 keys x 4 7:25 AM WED 29 JUN 2011 pages additional programmable keys) keys, ITL- >>>... - Page 34 Flashing ITL-8LDE-1 User Status Icon Pattern • Idle No Icon Time Indication Screen • Call Hold (Indicates current time information, call information, and Soft Keys, etc.) (Individual Hold/Individual Hold on Call Park Group) • Call Hold (Other Party Hold/Other Party Hold on 7:25 AM WED 29 JUN 2011 Call Park Group) >>>...
- Page 35 (b) Programmable Key Information Example: Page Turning by Scroll Key Programmable Key Information displays the fol- Flashing lowings. Page 1 Maximum Key No. 1 Key No. 5 RACHEL LINDA Description digits to be Key No. 2 Key No. 6 displayed Key No.
- Page 36 (d) Programmable Key Indication When any features using feature access code The following shows LCD indication of Program- are assigned. mable keys. Black square icons are displayed. * You can register name on each One-Touch Speed Dial key. For the procedures, see TO REG- ISTER NAME ON ONE-TOUCH SPEED CALLING KEY.
- Page 37 Note: The following key operations are not available while DESI-less screen is displayed. - Soft Key - Help Key - Exit Key Right-cursor key and Left-cursor key...
-
Page 38: Conditions For Dt700 Series
CONDITIONS FOR DT700 SERIES Note: When pressing and holding Help key, the menu Please note that following terminal settings (by Feature of "Online Monitoring" will be displayed. For Key + Digit Key) cannot be used for DT700 Series. details on Online Monitoring, see ONLINE MONI- TORING in Chapter 10. -
Page 39: Adjusting Angle Of Tilt Leg
NSTALLATION ROCEDURE ADJUSTING ANGLE OF TILT LEG • TO LOWER TILT LEG DT730/710 DT330/310 STEP 1: Turn the telephone set upside down. The angle of the tilt leg can be adjusted in four levels. STEP 2: While lifting the center of the stopper, adjust the tilt leg in the direction of the arrow until you hear it click. -
Page 40: To Remove Tilt Leg
TO REMOVE TILT LEG TO ATTACH TILT LEG DT730/710 DT330/310 DT730/710 DT330/310 STEP 1: Turn the telephone set upside down. STEP 1: Turn the telephone set upside down. STEP 2: Lower the tilt leg to first level. STEP 2: Align the hooks (c-h) of the tilt leg over the ap- propriate slots (C-H) of the telephone set. -
Page 41: Connecting Lan Cable
CONNECTING LAN CABLE Connector for AC Adapter DT730/710 Telephone STEP 1: Prepare 10 BASE-T/100 BASE-T/TX cables (Straight) for connecting the telephone to net- work device such as HUB, PoE Switch. STEP 2: Connect the telephone to the network device using the LAN cable. Groove AC Adapter Plug STEP 3: Thread the LAN cable through the groove on... -
Page 42: Connecting Line Cord
CONNECTING LINE CORD DT330/DT310 Line Cord STEP 1: Insert Line cord plug into Line connector on the back of the telephone set until you hear it click. Line Connector Tilt Leg Telephone Groove Line Cord Line Cord Plug STEP 2: Thread the line cord through the groove on the back of the telephone. -
Page 43: Installing Directory Card
INSTALLING DIRECTORY CARD ATTACHING HANDSET DT730/710 DT330/310 DT730/710 DT330/310 A directory card (also known as an abbreviated dialing STEP 1: Insert the coiled cord plug into HANDSET table) can be attached to the telephone sets. The connector on the back of the telephone until directory card can be used to record often dialed you hear it click. -
Page 44: Installing/Removing Key Set Unit
INSTALLING/REMOVING KEY SET then push the four corners of the panel until the panel clicks into place. UNIT DT730/710 DT330/310 • TO REMOVE KEY SET UNIT Line Key Panel STEP 1: Insert a tapered rod lightly into the right side of the line key panel/button panel. -
Page 45: Wall Mounting
WALL MOUNTING To mount the telephone set on the wall, use the DT730/710 DT330/310 following procedure. A wall mount unit (WM-L UNIT) is used to mount all telephones to the wall. This unit connects to the back STEP 1: Mount the hanger of the handset upside side of the telephone. - Page 46 Wall Wall Wall WM-L WM-L UNIT WM-L UNIT Modular Terminal Screws Screws (suppulied) - When attaching WM-L UNIT to the wall plate: STEP 5: Insert the line cord plug (included with the Attach WM-L UNIT to the posts on the wall telephone set) into the modular connector.
- Page 47 Line Cord Telephone Wall Line Connector Groove WM-L Modular Plug STEP 8: Insert the four tabs on WM-L UNIT in the tab slots on the back of the telephone. Tuck the excess cord into WM-L UNIT. Wall Tab Slots Tabs...
- Page 48 This page is for your notes.
-
Page 49: Terminal Setup
ERMINAL ETUP LCD indication for Australia This chapter describes operating procedures for terminal settings by the Up/Down ( HANDSET key, key and key. Menu Feature Various terminal settings such as display, sounds, • TO ADJUST SPEAKER VOLUME password, and language are also available from Menu DT730/710 DT330/310 key. -
Page 50: Setup With Feature Key
SETUP WITH FEATURE KEY • TO ADJUST LCD CONTRAST DT730/710 DT330/310 • MICROPHONE ON/OFF Press Up/Down ( ) key in the on-hook status. DT730/710 DT330/310 LED on key shows the status of the built-in microphone. STEP 1: Press soft key associated with the MIC Dis- play or press key. - Page 51 • TO SELECT RINGER TONE DT330/310 DT Series has 10 kinds of ringer tones that you can select. STEP 1: Press key. The LCD displays Feature the selected tone number (n=1 ~ 10). RINGER TONE 4:26 PM MON 12 JUL 2010 Frequency (Hz) Modulation (Hz) 520/660...
- Page 52 • TO ADJUST TRANSMISSION/RECEIV- ING VOLUME HANDS FREE DT330/310 4:26 PM MON 12 JUL 2010 Handset volume can be changed. STEP 1: Press key. The LCD displays Feature • CALL INDICATOR LAMP ON/OFF the current volume. DT730/710 DT330/310 You can choose to turn the call indicator lamp either on T/R VOL.
- Page 53 To Set/Reset Dynamic Dial Pad When both Dynamic Dial Pad and Preset Dial are activated: STEP 1: Press key. The LCD displays: Feature To Set Dial Mode Direct Dial Pad STEP 1: Every time key are pressed, Feature 4:26 PM MON 12 JUL 2010 Dial Mode switches.
-
Page 54: Setup With Menu Key For Dt700 Series
SETUP WITH MENU KEY FOR DT700 SERIES [User Setting] Incoming Call • TO ENABLE/DISABLE OFF-HOOK Talk RINGING DT730/DT710 Display The procedure below shows how to enable/disable Off- Change Password hook ringing. Security Peripherals Usability STEP 1: Display the Menu screen, and select Setting. ↓... - Page 55 • TO SET RINGING OF HEADSET STEP 5: To disable/enable the off-hook ringing, select DT730 Disable or Enable. The procedure below shows how to enable/disable the Select an item by one of the following operations. ringing of headset. • Highlight an item by using , and then press or OK soft key.
- Page 56 STEP 3: Select Incoming Call. STEP 5: To disable/enable the ringing of headset, se- Select an item by either of the following operations. • Highlight an item by using , and then press lect Disable or Enable. or OK soft key. Select an item by one of the following operations.
- Page 57 • TO SET RINGER TONE DT730/DT710 [User Setting] The procedure below shows how to change the ringer Incoming Call tone for internal call and external call. Talk STEP 1: Display the Menu screen, and select Setting. Display Change Password Security STEP 2: Select User Setting.
- Page 58 nal calls. Select an item by either of the following operations. [External Call] • Highlight an item by using , and then press Automatic or OK soft key. • Press key. Tone Type 1 Tone Type 2 [Ring Tone] Tone Type 3 Tone Type 4 External Call Tone Type 5...
- Page 59 Frequency (Hz) Note: You can set ringer tone for the telephone set Menu Item Remarks here. Ringer Tone type can be set for "Name", "Group" and "Telephone set". The ringer Tone Tone Type 6 1100 1400 16Hz modulation type set for "Name" has higher priority than the Tone Type 7 16Hz modulation types set for "Group"...
- Page 60 • TO SET ILLUMINATION PATTERN FOR CALL INDICATION LAMP DT730 [User Setting] Incoming Call The procedure below shows how to set the illumination Talk pattern (color of Call Indicator Lamp). Display STEP 1: Display the Menu screen, and select Setting. Change Password Security STEP 2: Select...
- Page 61 pattern for internal call. • For DT730 Series Select an item by one of the following operations. [External Call] • Highlight an item by using , and then press or OK soft key. Automatic • Press key. Disable [Illumination] Green External Call Blue Yellow...
- Page 62 • TO ENABLE/DISABLE RTP ALARM Note: You can set illumination pattern for the telephone set here. Illumination pattern can be set for DT730/DT710 "Name", "Group" and "Telephone set". The illumi- nation pattern set for "Name" has higher priority The procedure below shows how to enable/disable than the patterns set for "Group"...
- Page 63 STEP 3: Select Talk. able (see the following table). Select an item by either of the following operations. Select an item by either of the following operations. • Highlight an item by using , and then press • Highlight an item by using , and then press or OK soft key.
- Page 64 • TO ENABLE/DISABLE DTMF TONE DT730/DT710 [User Setting] Incoming Call The procedure below shows how to enable/disable Talk DTMF Tone. Display STEP 1: Display the Menu screen, and select Setting. Change Password Security STEP 2: Select User Setting. Peripherals Select an item by either of the following operations. Usability •...
- Page 65 • TO SET KEY TOUCH TONE STEP 5: Select Automatic, Disable or able (see the following table). DT730/DT710 Select an item by either of the following operations. The procedure below shows how to set Key Touch • Highlight an item by using , and then press Tone.
- Page 66 • Press key, and then press or OK soft key. [User Setting] Incoming Call [Key Touch Tone] Talk Automatic Display No Tone Change Password Tone Security Voice Peripherals ↓ Back Usability ↓ ↓ Back Note: When 0 Automatic is set, the default setting (Tone) is applied.
- Page 67 • TO SET MUSIC ON HOLD DT730/DT710 [User Setting] The procedure below shows how to set Music on Hold Incoming Call to be heard by DT Series user. Talk STEP 1: Display the Menu screen, and select Setting. Display Change Password STEP 2: Select User Setting.
- Page 68 • TO SET CLOCK FORMAT when a downloaded data is used as Music on DT730/DT710 Hold. Determines whether time is displayed with a 12-hour or Select an item by either of the following operations. 24-hour clock format. • Highlight an item by using , and then press or OK soft key.
- Page 69 Menu Item Meaning [User Setting] Follow the setting on the system. 0 Automatic Incoming Call (default) Talk 1 12 hour Indication 12-hour clock Display 2 24 hour Indication 24-hour clock Change Password Note: For the setting on the System, contact the Sys- Security tem Administrator.
- Page 70 • TO ENABLE/DISABLE VOLUME LEVEL DISPLAY DT730/DT710 [User Setting] Incoming Call Determines whether or not to display the following Talk volume levels: handset receiver volume, speaker volume, ringer tone volume and LCD contrast. Display Change Password STEP 1: Display the Menu screen, and select Setting. Security Peripherals STEP 2: Select...
- Page 71 • Press key, and then press or OK soft key. Menu Item Meaning Each volume level is displayed on 0 Automatic LCD (default). Each volume level is not displayed 1 Disable on LCD. Each volume level is displayed on 2 Enable LCD.
- Page 72 • TO SET SCREEN SAVER STEP 3: Select Display. DT730/DT710 Select an item by either of the following operations. Screen Saver works after the telephone is idle for a • Highlight an item by using , and then press or OK soft key. certain period of time.
- Page 73 STEP 4: Select Screen Saver. key. Select an item by either of the following operations. [Screen Saver] • Highlight an item by using , and then press or OK soft key. Disable • Press key. Enable [Display] ↓ Back Time Format Local Volume Note: Default setting is 1 Disable.
- Page 74 • TO ENABLE/DISABLE BACKLIGHT DT730 [User Setting] Incoming Call The following explains how to enable/disable the Talk backlights of LCD and digit keys. Display The backlights illuminate (for approximately 10 Change Password seconds) when you press any key or lifts the handset. Security Peripherals STEP 1: Display the Menu screen, and select Setting.
- Page 75 STEP 5: Make a selection from the following list. Select an item by either of the following operations. • Highlight an item by using , and then press or OK soft key. • Press key, and then press or OK soft key.
- Page 76 • TO CHANGE CHARACTER SIZE DT730 [User Setting] The following explains how to change the displayed Incoming Call character size on the LCD. Talk Display STEP 1: Display the Menu screen, and select Setting. Change Password STEP 2: Select User Setting. Security Select an item by either of the following operations.
- Page 77 • TO SET A LANGUAGE STEP 5: Select either “Standard(16dot)“ or DT730/DT710 “Small(12dot)“. The following explains how to set a language to be Select an item by either of the following operations. displayed on LCD. • Highlight an item by using , and then press or OK soft key.
- Page 78 Change Password Security [Language] Peripherals Automatic Usability Japanese ↓ ↓ Back NEC English NEC Portuguese STEP 4: Select Language (DT730) / Lan- NEC Spanish guage (DT710) NEC French Select an item by either of the following operations. German • Highlight an item by using...
- Page 79 Danish Swedish Greek English Portuguese Spanish French Russian Turkish Romania Polish Catalan Catalan ↓ Back Note: The enabled item is highlighted. STEP 6: After Making a selection, press or OK soft key.
- Page 80 • TO CHANGE PASSWORD DT730/DT710 [User Setting] To change an existing password, follow the procedure Incoming Call below. This password is used for the following Talk occasions. Display • To lock/unlock the telephone. Change Password • To delete the directory data. Security •...
- Page 81 [Change Password] [Password] Old Pass **** Complete New Pass Retry Pass Cancel Note: When the password entry ends in failure, the fol- STEP 6: Enter the new password again and then lowing error message is issued. In that case, press OK soft key and try again. press or OK soft key.
- Page 82 • TO SET USABILITY The procedure below shows how to set the operation of [User Setting] Help key while pop-up window is displayed. Incoming Call Talk Note: This feature is supported from Terminal Firmware Version 5.0.0.0. Display Change Password STEP 1: Display the Menu screen, and select Setting. Security STEP 2: Select User Setting.
-
Page 83: Popup Window
STEP 4: Select Help Key Mode. STEP 5: Select a desired mode of Help key. Select an item by one of the following operations. Select an item by one of the following operations. • Touch panel operation. • Touch panel operation, and press or OK. - Page 84 • TO RESET TELEPHONE SETTINGS STEP 3: Select Setting Reset. DT730/DT710 Select an item by either of the following operations. • Highlight an item by using , and then press or OK soft key. The following explains how to clear the personal data •...
- Page 85 • TO DOWNLOAD A FILE STEP 5: Press or OK soft key to clear the person- DT730/DT710 al data of the telephone. DT730 Series user can download files for Music on Hold, Ringer Tone and Directory. When downloading [Setting Reset] these files, the DT Series needs to be connected to the Are you sure? network that has FTP (TFTP server).
- Page 86 [Protocol] [Setting] User Setting TFTP Download Data Backup/Restore ↓ ↓ Menu ↓ Back Note: For the firmware version earlier than 5.0.0.0, STEP 6: The display goes back to the Download Back is displayed instead of Menu. Menu screen. STEP 4: Select Protocol.
- Page 87 • Highlight an item by using , and then press or OK soft key. [FTP Settings] • Press key. User ID [FTP Settings] Password Folder User ID ↓ ↓ Back Password Folder STEP 11:Enter a password by using digit keys, then ↓...
- Page 88 STEP 13:Enter the directory where the download file is [Download Menu] stored and then press or OK soft key. Download Files Download Address [Folder] Protocol Input a folder name. FTP Settings ↓ ↓ Back Back STEP 16:Enter an IP address of the FTP/TFTP server Note: For details on character entry method, see which stores the download file.
- Page 89 • Highlight an item by using , and then press or OK soft key. [Download Menu] • Press key. Download Files [Ring Tone] Download Address Protocol Download1 FTP Settings Download2 ↓ Back Download3 ↓ Back STEP 18:Select a file to be downloaded. STEP 20:The default file name will be displayed.
- Page 90 [Download1/2/3] Note: For details on character entry method, see TO INPUT CHARACTERS in chapter 4 Basic Input a file name. Operation. Note: A maximum of 20 characters ("0-9", "A-Z", "a-z", Melody 1/2/3.wav "*", "#", ".", "-" or "_") can be entered as a file Cancel Exec name.
- Page 91 Actions Check Points Download file is not Place the download file in the placed in the specified specified directory. directory. A different file name is Set the same file name from specified between both DT700 Series and FTP/ DT700 Series and FTP/ TFTP server.
- Page 92 • TO BACKUP PERSONAL SETTINGS DT730/DT710 [Setting] User Setting DT730\DT710 Series user can backup personal Download settings of DT Series to FTP/TFTP server. To back up the setting data, the DT Series needs to be connected Data Backup/Restore to the network that has FTP (TFTP server). ↓...
- Page 93 Select an item by either of the following operations. • Highlight an item by using , and then press [Protocol] or OK soft key. • Press key. TFTP [FTP Settings] User ID ↓ Back Password Folder STEP 6: The display goes back to the Backup/Re- ↓...
- Page 94 [FTP Settings] [FTP Settings] User ID User ID Password Password Folder Folder ↓ ↓ Back ↓ Back STEP 11:Enter a password by using digit keys, then STEP 13:Enter the destination directory of the FTP/ press or OK soft key. TFTP server and then press or OK soft key.
- Page 95 [FTP Settings] [Server Address] ‘*‘For‘.‘ User ID Password Folder Back ↓ Back After entering an IP address, press OK soft key. STEP 15:Select Server Address. Select an item by either of the following operations. STEP 17:The display goes back to the Backup/Re- •...
- Page 96 [Data Backup] Upload Complete! Input a folder name. PersonalData.tgz Exit Cancel Exec The display goes back to the Backup/ Note: Do not change the extension of the backup file. Restore screen by Exit soft key. The setting data of the telephone can only be backed up as a.tgz file.
- Page 97 • TO RESTORE PERSONAL SETTINGS • Press key. DT730/DT710 [Setting] DT730/DT710 Series user can restore the personal User Setting settings of DT Series. To download the backup file to Download the telephone, the DT Series needs to be connected to Data Backup/Restore the network that has FTP (TFTP server).
- Page 98 Select an item by either of the following operations. • Highlight an item by using , and then press [Protocol] or OK soft key. • Press key. TFTP [FTP Settings] User ID ↓ Back Password Folder STEP 6: The display goes back to the Backup/Re- ↓...
- Page 99 [FTP Settings] [FTP Settings] User ID User ID Password Password Folder Folder ↓ ↓ ↓ Back Back STEP 11:Enter a password by using digit keys, then STEP 13:Enter the directory where the backup file is press or OK soft key. stored and then press or OK soft key.
- Page 100 STEP 15:Select Server Address. Select an item by either of the following operations. • Highlight an item by using , and then press Select an item by either of the following operations. or OK soft key. • Highlight an item by using , and then press •...
- Page 101 Note: A maximum of 20 characters ("0-9", "A-Z", "a-z", "*", "#", ".", "-" or "_") can be entered as a file Check Points Actions name. Download file is not Place the download file in Note: To delete an entered character, press BK soft placed in the specified key.
-
Page 102: Setup With Menu Key For Dt300 Series
SETUP WITH MENU KEY FOR [Settings] DT300 SERIES Ring Volume • TO CHANGE RINGER TONE VOLUME Off Hook Ring DT330 Back Light Headset The procedure below shows how to change the volume Peripherals of ringer tone. Back STEP 3: Ring Volume can be set in 13 levels (0 - 12). STEP 1: While indicating the current time on LCD, Adjust the ringer tone volume by using press... - Page 103 • TO ENABLE/DISABLE OFF-HOOK RINGING DT330 STEP 3: To disable/enable the off-hook ringing, select Disable or Enable. The procedure below shows how to Select an item by either of the following operations. • Highlight an item by using , and then press STEP 1: While indicating the current time on LCD, or OK soft key.
- Page 104 • TO ENABLE/DISABLE BACKLIGHT [Settings] DT330 Ring Volume The following explains how to enable/disable the Off Hook Ring backlights of LCD and digit keys. Back Light The backlights illuminate (for approximately 10 Headset seconds) when you press any key or lift the handset. Peripherals Back STEP 1: While indicating the current time on LCD,...
- Page 105 • TO SET RINGING OF HEADSET STEP 3: To disable/enable the ringing of headset, se- DT330 lect Disable or Enable. The procedure below shows how to enable/disable the Select an item by either of the following operations. ringing of headset. •...
- Page 106 This page is for your notes.
-
Page 107: Basic Operation
ASIC PERATION This chapter describes the following basic operation of DT Series. • TO LOGIN • TO LOGOUT • TO MAKE AN EXTERNAL CALL • TO MAKE AN INTERNAL CALL • TO ANSWER AN EXTERNAL CALL • TO ANSWER AN INTERNAL CALL •... -
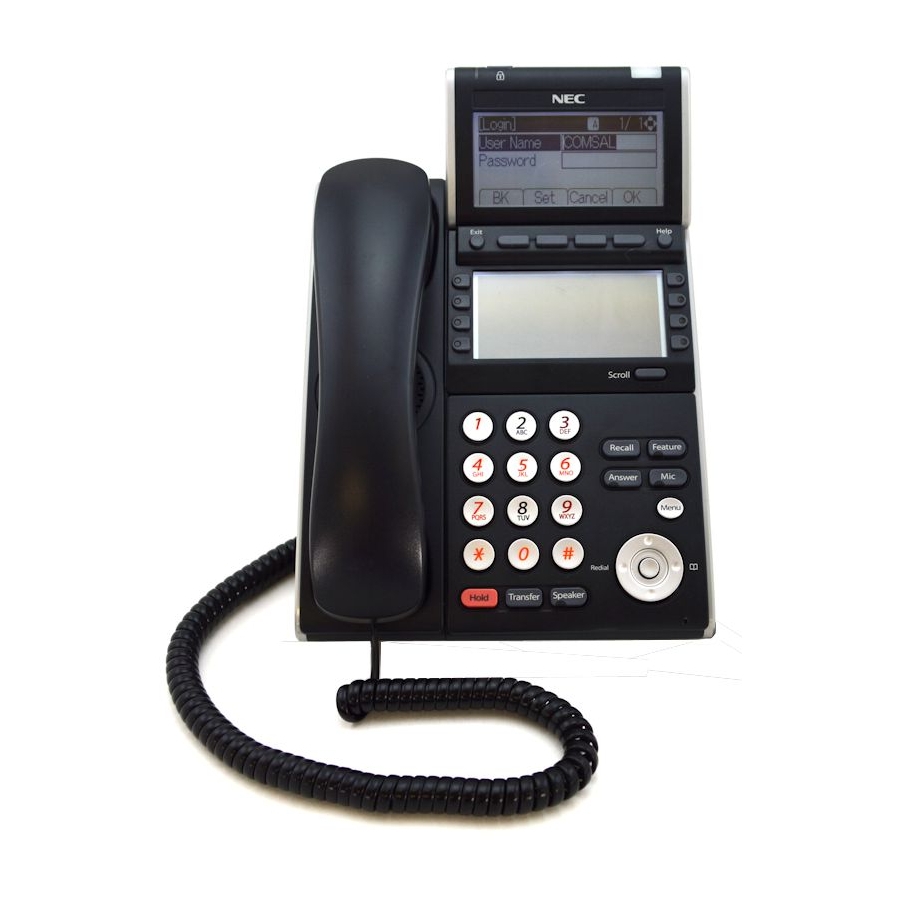
Page 108: To Login
TO LOGIN TO LOGOUT DT730/710 DT730/710 Note: This feature is only available for DT700 Series. STEP 1: Press the preassigned Logout Feature Key on the terminal. STEP 1: When login mode is activated, the telephone prompts for Login ID and Password. Note: This feature is only available for DT700 Series. -
Page 109: To Make An External Call
TO MAKE AN EXTERNAL CALL STEP 3: Dial desired telephone number. DT730/710 DT330/310 (while hearing a ringback tone) When dialed telephone number is registered in Per- Dialed Code + Number sonal Directory, the corresponding name information will be displayed on LCD of DT730 Series while you 9XXXXXXXXX are hearing a ringback tone or are engaged in a con- 1:25 PM... - Page 110 • When dialed number is not registered in Personal Direc- tory Dialed Code Elapsed Time + Number 00:05 9XXXXXXXXX >>> Note: My Line is an actual line that is directly associ- ated with station number of the telephone. You can make/answer a call via this line. Usually, My line is seized automatically only by lifting the handset or pressing the Speaker key.
-
Page 111: To Make An Internal Call
TO MAKE AN INTERNAL CALL Name Information registered Dialed Station Number DT730/710 DT330/310 in Personal Directory When dialed station number is registered in Personal 31314 Directory, the corresponding name information will be MARY HARRIS displayed on LCD of DT730 Series while you are hear- >>>... - Page 112 • When dialed station number is not registered in Personal Directory Dialed Station Number 31314 1:25 PM MON 12 JUL 2010 >>> Note: My Line is an actual line that is directly associ- ated with station number of the telephone. You can make/answer a call via this line.
-
Page 113: To Answer An External Call
TO ANSWER AN EXTERNAL CALL Trunk Trunk DT730/710 DT330/310 Number Type When calling party telephone number is registered in Personal Directory, the corresponding name informa- 1:25 PM MON 12 JUL 2010 tion will be displayed on LCD of DT730 Series while >>>... - Page 114 • When caller ID is not received Elapsed Trunk Trunk Time Type Number 00:05 1:25 PM MON 12 JUL 2010 >>> Note: When an incoming call is terminated to My Line of the telephone, you can usually answer the call only by lifting the handset or pressing the Speaker Key.
-
Page 115: To Answer An Internal Call
TO ANSWER AN INTERNAL CALL STEP 2: Press key or touch the appropriate Answer Line Key. The following procedure explains how to answer an internal call routed to My Line of the telephone. STEP 3: Lift the handset to answer the call. When calling station number is registered in Personal Directory, the corresponding name information will be (while in a conversation) -
Page 116: Multiline Appearance
MULTILINE APPEARANCE TO HOLD A CALL DT730/710 DT330/310 DT730/710 DT330/310 STEP 1: Press key. Held line wink flashes. HOLD To Originate a Call Held Station Number STEP 1: Press the MULTILINE APPEARANCE fea- ture key. 2001 HOLD Speaker STEP 2: Lift handset or press key. -
Page 117: To Place A Call On Exclusive Hold
TO PLACE A CALL ON EXCLUSIVE Note: Exclusive Hold excludes any other phone from HOLD DT730/710 DT330/310 picking up your held call. Exclusive Hold shows as a flashing green LED on your phone. The same line on other phones appears as a solid red STEP 1: Press key twice. - Page 118 STEP 4: If transferring party hangs up, that station’s number appears in the center of recipient’s display. Transferring station TRANSFER 2000 DDD 3 1:25 PM MON 12 JUL 2010 >>>...
-
Page 119: How To Input Characters
HOW TO INPUT CHARACTERS DT730 This section explains how to enter characters on the text input screen such as Name or User ID, etc. • Character Entry Mode When entering characters from the telephone set, the following three modes are available: uppercase alphabetic character, lowercase alphabetic character and numeric character. - Page 120 To display the Sub Menu screen, press HELP key or Option Soft Key while the text input screen is displayed. Also, the following operations are available from the Sub Menu screen. Note: Use Menu key instead of HELP key for the firm- ware version before 5.0.0.0.
-
Page 121
• Character Code List
DIGIT CASE 10th 11th 12th 13th SHIFT “ Note [SP] Note: Not available from Firmware version 3.0.0.0 and later... -
Page 122
10th 11th 12th 13th 14th 15th 16th 17th 18th 19th 20th & “ Note2 Note1 21th 22th 23th 24th 25th 26th 27th 28th 29th 30th < > Used as a case shift key. Shifts the characters between alphabetic and numeric. Note1 Note1: key is the same for Russian, Turkish and other Languages. -
Page 123
DIGIT CASE 10th 11th 12th 13th 14th 15th SHIFT ¿ ¡ & Б В Г а б в г Д Е Ё Ж З д е ё ж з И Й К Л и й к л... -
Page 124
DIGIT CASE 10th 11th 12th 13th 14th 15th SHIFT ¿ ¡ & Ç ç Ğ İ ğ Ö ö Ş Ş Ü ü [SP] Note: key is the same for English. Refer to the . -
Page 125
DIGIT CASE 10th 11th 12th 13th 14th 15th SHIFT ¿ ¡ & À Á Â Ã Ä Å Æ Ç à á â ã ä å æ ç È É Ê Ë è é ê ë... -
Page 126
DIGIT CASE 10th 11th 12th 13th 14th 15th SHIFT & ‘ Used as a case shift key. Shifts the characters between alphabetic and numeric. Note: When entering password, “0-9”, “*” and “#” are available. “#” is entered by pressing key. - Page 127 • Character Entry Method Note: Use Menu key instead of HELP key for the firm- As an example of character entry method, the fol- ware version before 5.0.0.0. lowing shows how to enter “Ken Kobus”. STEP 3: Press or OK soft key on the Sub Menu to STEP 1: Press key twice to enter “K”.
- Page 128 STEP 6: Press HELP key or Option soft key to display SubMenu screen, and then select Word- [Name] case to switch the text input mode from low- Input a name. ercase to uppercase. Option Back SubMenu Change-word STEP 8: Press key twice to enter “K”.
- Page 129 STEP 9: Press HELP key or Option soft key to display STEP 11:Enter “obus” by using digit keys. SubMenu screen, and then select Word- Press key three times to enter “o”. Press key twice to enter “b“. case to switch the text input mode from low- Press key twice to enter “u”.
- Page 130 • To Overwrite Characters SubMenu STEP 1: Place the cursor at the left of the characters Change-word to be overwritten. Word-case Word-width [Name] Delete Input a name. Copy ABCDE Paste Option Back Space Return STEP 2: Press HELP key or Option soft key. Overwrite/Insert ↓...
- Page 131 • To Copy and Paste Characters STEP 4: Enter new words over existing characters. In this example, “F” is entered. STEP 1: While characters which you want to copy are [Name] displayed, HELP key or Option soft key. Input a name. [Name] Input a name.
- Page 132 Note: Use Menu key instead of HELP key for the firm- STEP 3: Place the cursor at the starting point of the ware version before 5.0.0.0. target characters by using and then press Start soft key. STEP 6: On the Sub Menu screen, select Paste and then press or OK soft key.
-
Page 133: Security Mode
SECURITY MODE DT730 Note: To make a call of VOICE CALL is available DT730 Series has the Security key which prevents toward a called party in the Security mode. information leakage from terminal. While the terminal is When a called party activates the Security mode with leaving its MIC to ON, the called locked, Security Lamp lights up. - Page 134 STEP 3: When DT730 Series is placed in Security Note: When the password entry ends in failure, the fol- mode, Security Lamp lights red and the lowing error message is issued. In that case, screen saver will be activated. press or OK soft key and then retry.
-
Page 135: Emergency Call
EMERGENCY CALL DT730 Note: You can make a call to only the predetermined number. When telephone numbers other than the You can make a call to a predetermined emergency predetermined emergency number are dialed, telephone number while the telephone is locked (in the following message appears (after a few sec- onds, the display goes back to "Dial Emergency Security mode). -
Page 136: Xml Application
XML APPLICATION DT730 DT730 has an XML browser function. You can display History Portal the information of XML application installed in an Directory XML-1 external server onto the LCD of DT730 and use various Service XML-2 services in collaboration with the XML application. Setting XML-3 Also, It is possible to launch multiple applications (up to... - Page 137 • When a fifth application is launched You can launch up to four XML applications including Portal at a time. If you try to launch a fifth application, a notification message to ask you to exit one of the currently running applications is displayed. The selected application exits.
-
Page 138: Screen Pop-Up
SCREEN POP-UP DT730 When you receive an incoming call while an application [User Setting] screen (History, Directory, or XML application) is Incoming Call displayed, you can suspend the application and answer Talk the incoming call. Display Note: This function is available since firmware version Change Password 5.0.0.0. - Page 139 STEP 5: Select a desired mode of Help key. Select an item by one of the following operations. • Highlight an item by using , and press Answer Line Key Answer Key Call Indicator Key • Press , and press or OK.
- Page 140 • To answer the incoming call, lift the hand- set. If you do not answer the call and con- tinue to edit the name list of Directory, press key to display the menu Menu screen. And highlight Directory icon us- , and then press key.
-
Page 141: To Originate A Call Using Selective Dialing
EATURE PERATION TO ORIGINATE A CALL USING STEP 2: The dialed number appears on the top of SELECTIVE DIALING LCD. (DYNAMIC DIAL PAD, PRESET Input Dial Number DIAL) 2000 Dynamic Dial Pad DT730/710 DT330/310 STEP 3: Lift handset or press Speaker key. -
Page 142: To Originate A Call Using Speed Calling (One-Touch Speed Calling Keys)
TO ORIGINATE A CALL USING SPEED STEP 3: Display indicates digits programmed. CALLING Note: To program a hook switch for transfer or feature (ONE-TOUCH SPEED CALLING KEYS) activation, press key as first digit. (! dis- Recall DT730/710 DT330/310 plays on LCD.) Note: To program a pause, press the key as... - Page 143 LCD Indication of DESI-less screen EUROPEAN CHARACTER (UPPERCASE) DIGIT STEP 1: Press the desired One-Touch Speed Call- ∗ ing key and originate a call. ∗ Registered name will be displayed as follows. H K N Q U For the key to which no name information is registered, the character “SPD”...
- Page 144 EUROPEAN CHARACTER (LOWERCASE) DIGIT ∗ ∗ à è ì ñ ù β á é í ò ú â ê î ó û ã ë ï ô ü ä õ å ö & æ œ ç ø ¿ ¡ Note: The shaded area indicates the characters which cannot be entered.
-
Page 145: To Register Name On One-Touch Speed Calling Key
(Redial) STEP 3: Enter desired name on the keypad. STEP 2: Press the desired speed calling number. Display indicates the name entered. LNR[ ]/SPD[_ _] –X NEC BNET XXXXXX PICK >>> SET CANCEL CLEAR >>> STEP 4: Press SET to save the name. - Page 146 STEP 3: Dial the “Speed Calling – System” access XXXX code and the abbreviated call code. 1:25 PM MON 12 JUL 2010 STEP 4: Press key again. Feature SPEED SET 1:25 PM MON 12 JUL 2010 To Operate From Speed Calling – System STEP 1: Press the “Speed Calling –...
-
Page 147: Account Code
ACCOUNT CODE FORCED ACCOUNT CODE DT730/710 DT330/310 DT730/710 DT330/310 To Enter Speaker STEP 1: Lift handset or press key, receive dial Speaker STEP 1: Lift handset or press key, receive dial tone. tone. STEP 2: Enter feature access code, receive service STEP 2: Enter feature access code, receive service set tone. -
Page 148: Voice Call
Using Soft Key STEP 5: Dial desired number. STEP 1: Lift handset. STEP 6: If an “Authorization Code” is required, caller hears special dial tone. STEP 2: Dial desired station number; VOICE Soft Key appears while station is ringing. STEP 7: Enter “Authorization Code”, or call will be de- nied. -
Page 149: To Answer A Voice Call Hands Free
TO ANSWER A VOICE CALL HANDS To Answer FREE STEP 1: AICM key flashes red indicating an incoming DT730/710 DT330/310 intercom call. STEP 1: Receive incoming Voice Call. STEP 2: Press the MIC Soft Key or key. LED Overriding party lights. -
Page 150: Manual Intercom
STEP 2: A three-party conference is established. solid green. STEP 4: If called station is engaged in a non-intercom CONF call, the station may press MICM after placing 1:25 PM MON 12 JUL 2010 original caller on hold (with key). HOLD To Bridge Into A Manual Intercom Call MANUAL INTERCOM... -
Page 151: Dial Intercom
DIAL INTERCOM To Bridge Into A Dial Intercom Call DT730/710 DT330/310 To Initiate Note: Bridging is an optional feature. Speaker STEP 1: Lift handset or press the key. STEP 1: Press the DICM key, lift handset or press STEP 2: Press DICM key. Speaker key. -
Page 152: Conference
CONFERENCE nected. Conf LED goes out. DT730/710 DT330/310 STEP 1: With call in progress, ask party to hold. TO ESTABLISH A BROKER CALL STEP 2: Press key, receive interrupted dial Transfer DT730/710 DT330/310 tone. STEP 1: While engaged in a call and wishing to con- STEP 3: Dial desired number. -
Page 153: Call Waiting - Originating
STEP 5: By repeating these steps, it is possible to al- STEP 2: Press CALL WAITING. ternate between calls. Display indicates con- STEP 3: Receive special ringback tone. nected station or trunk at any given time. STEP 4: Call waiting tone is sent to busy station. Trunk Trunk Called station... - Page 154 STEP 2: Press CW Soft Key receive call waiting ring- Calling station back tone. number Called station number C WAIT 2001 1:25 PM MON 12 JUL 2010 C WAIT SET 2000 >>> 1:25 PM MON 12 JUL 2010 >>> To Disconnect To Answer A Waiting Call STEP 1: Press key.
-
Page 155: Call Park
CALL PARK DT730/710 DT330/310 To Retrieve A Parked Call From A Remote Station To Program Call Park Key (On One-Touch Speed Calling Key) STEP 1: Dial “Call Park” local retrieval code. STEP 1: Press key. Feature STEP 2: Station user is connected to parked call. STEP 2: Press One-Touch Speed Calling key. -
Page 156: Call Pick-Up (Group)
CALL PICK-UP (GROUP) CALL PICK-UP (DIRECT) DT730/710 DT330/310 DT730/710 DT330/310 To Program Pick-up Direct Key (One- When Station Within Pick-up Group Rings Touch Speed Calling Key) STEP 1: Lift handset. STEP 1: Press key. Feature STEP 2: Press CALL PICK-UP or dial “Call Pick-up” STEP 2: Press One-Touch Speed Calling key. -
Page 157: Outgoing Trunk Queuing
OUTGOING TRUNK QUEUING EXECUTIVE OVERRIDE DT730/710 DT330/310 DT730/710 DT330/310 If Trunk Is Busy If Called Station Is Busy STEP 1: Receive Trunk Busy indication. Press CALL STEP 1: Press OVERRIDE. BACK. Call is placed in queue for next avail- STEP 2: Interrupted parties receive warning tone. able trunk. -
Page 158: Last Number Redial
CALL FORWARDING - ALL CALLS Note: Override may be programmed by the Telephony Server Admin. for one of the Programmable fea- DT730/710 DT330/310 ture keys, or may be programmed on a One- Touch Speed Calling key by storing the Recall To Set and Override access code. - Page 159 STEP 3: “FORWARD SET” is displayed, call forward- ing for all calls is set. FORWARD CANCEL 1:25 PM MON 12 JUL 2010 FORWARD SET 1:25 PM MON 12 JUL 2010 Using Soft Key >>> STEP 1: Press FDA Soft Key. To Verify (Only For Terminal With LCD) STEP 2: Receive service set tone and “FORWARD STEP 1: Press FWD.
-
Page 160: Call Forwarding - Busy Line
CALL FORWARDING - BUSY LINE ing – Busy Line is set. DT730/710 DT330/310 FORWARD SET To Set 1:25 PM MON 12 JUL 2010 >>> Speaker STEP 1: Press key. Receive dial tone. STEP 2: If setting for another station, press MULTI- To Verify (Only For Terminal With LCD) LINE APPEARANCE. -
Page 161: Call Forwarding - Don't Answer
Speaker STEP 3: Press key. Call Forwarding – Busy STEP 5: FWD-NA LED lights (at your station or at the Line is cancelled. DT Series of the multiline station you are set- ting). FORWARD CANCEL Speaker STEP 6: Press key. Call Forwarding – Don’t 1:25 PM MON 12 JUL 2010 Answer is set. -
Page 162: Logged Out Ip Station - Call Destination
LOGGED OUT IP STATION - CALL STEP 3: Display indicates the station number calls are forwarded to. DESTINATION DT730 To Set Forwarding station Speaker STEP 1: Lift handset or press key. FORWARD 2000 STEP 2: Press the FDL Key or dial “Logged Out IP 1:25 PM MON 12 JUL 2010 Station –... - Page 163 To Verify (Only For Terminal with LCD) STEP 2: Press FDL Soft Key; receive service set tone. STEP 1: Press “Logged Out IP Station – Call Destina- STEP 3: Dial destination station number; receive ser- tion” feature key lit red or press FDL. vice set tone.
-
Page 164: Call Back
CALL BACK DT730/710 DT330/310 Note: Call Back may be programmed by the Telephony Server Admin. on a Programmable feature key or If Called Station is Busy by the user on a One-Touch Speed Calling key. STEP 1: Press CALL BACK. Receive service set tone. Using Soft Key Called party STEP 1: Press CB Soft Key and receive service set... - Page 165 STEP 5: S&R LED lights. Using Soft Key STEP 1: Press S&R. Number is stored in memory. STEP 2: S&R LED lights. To Verify (Only For Terminal With LCD) STEP 1: While idle, press S&R. STEP 2: Display indicates digits sorted. To Repeat STEP 1: Press Speaker...
-
Page 166: To Leave A Message
TO LEAVE A MESSAGE TO ANSWER A MESSAGE DT730/710 DT330/310 DT730/710 DT330/310 To Display Speaker STEP 1: Press key. Receive dial tone. STEP 1: MSG LED is lit. Station is idle. STEP 2: Dial desired station number. Encounter no STEP 2: Press MSG. answer or busy condition. -
Page 167: Voice Mail System
STEP 2: Dial # or while message displays. Mes- – Or – sage is erased. STEP 2: Press key. The Shortcut menu (Enter) screen is displayed on LCD. MESSAGE CANCEL 1:25 PM MON 12 JUL 2010 STEP 3: Select Voice Mail and then press (En- or OK soft key to access ter) -
Page 168: Paging Transfer
To Answer (Station B) Calling trunk If Station A remains off hook number STEP 1: Station B dials “Paging” answer code, and TRANSFER DDD 3 1:25 PM MON 12 JUL 2010 they are immediately connected. PAGING Station A Paging 1:25 PM MON 12 JUL 2010 STEP 1: Ask calling party to hold. - Page 169 STEP 2: Station A hangs up. Station B and the calling PAGING DDD 3 party are connected. 1:25 PM MON 12 JUL 2010 DDD 3 1:25 PM MON 12 JUL 2010 If Station A hung up STEP 1: Station B dials “Paging” answer code. Station A DT Series rings.
-
Page 170: Boss/Secretary Transfer
BOSS/SECRETARY TRANSFER BOSS/SECRETARY - MW LAMP CONTROL DT730/710 DT330/310 DT730/710 DT330/310 Secretary To Set MW at Boss’ Station STEP 1: Lift handset, press boss’ ringing line. Ask call- With caller on the line ing party to hold. Speaker STEP 1: Lift handset or press key. -
Page 171: Boss Secretary Override
BOSS SECRETARY OVERRIDE Note: The secretary can hang up after taking a mes- DT730/710 DT330/310 sage, and set a message lamp at any time by going off-hook on the boss’ multiline and press- ing the MW-SET key. Example: Station 2000 is boss, Station 2001 is secretary. To Cancel At Boss’... -
Page 172: Do Not Disturb
STEP 3: Press BOSS/SEC OVERRIDE. Receive connect to Trunk A. Ringback Tone. STEP 3: Secretary hears reorder tone, hangs up. Boss’ station STEP 4: Boss can alternate between the two parties number by pressing key. Answer C WAIT 2000 1:25 PM MON 12 JUL 2010 Option 3 STEP 1: If boss does not respond to 3 bursts of tone,... -
Page 173: Call Redirect
CALL REDIRECT To Cancel DT730/710 DT330/310 STEP 1: Press DND. LED goes out. Example: DND CANCEL DT Series Station A views on the DT Series display 1:25 PM MON 12 JUL 2010 the Station Number or Caller ID of an Incoming Call and immediately redirects the call by pressing a Function Key. -
Page 174: Privacy
PRIVACY STEP 2: Station C dials Station A, it rings and displays DT730/710 DT330/310 Station C’s number on the display. While Off-Hook STEP 3: Station A presses the REDIR Soft Key. STEP 1: Press DND. LED lights. STEP 4: REDIRECT is displayed on the LCD, and the STEP 2: Privacy feature prevents interruptions for the call immediately forwards to Station B. -
Page 175: Privacy Release
– OR – Note: DND must be programmed by the Telephony Server Admin. on a Programmable feature key. Example: Using Soft Key DT Series Station A requests entrance into Station STEP 1: Press flashing DND Soft Key. B’s call in progress. PRIVACY CANCEL Speaker STEP 1: Station A lifts handset or presses... -
Page 176: Phonebook
Up to 24 characters can be registered for each name. • SYSTEM PHONEBOOK To Search And Make A Call Example: To Search For “NEC BNET”. STEP 1: Press Pbook soft key while Station is in Idle state. - Page 177 On the Menu screen, select Directory. STEP 3: Enter a name and then press OK soft History key to perform a search. Directory Ex. To enter “NEC”: Tool Press key twice to enter “N”. Back Press key four times to enter “E“.
- Page 178 34567890123456789 Name: NEC More >>> NEC BNET (Display area) DOWN Name: Suzuki Taro(JapanSumida) Number: 01234567890123456789 STEP 6: The registered Phonebook data for “NEC BNET” appears. From this screen, you can make a call by going off-hook or pressing Speaker key.
-
Page 179: Local Phonebook
• LOCAL PHONEBOOK To Add New Data Phonebook Example: Local DT Series Station A registers “NEC” as new name and its Telephone Number. STEP 3: Local Phonebook screen appears. Press Add soft key. STEP 1: Press Pbook soft key or (Directory) while Station is in Idle state. - Page 180 Note: To delete an entered digit, press or Clr soft key. STEP 3: Enter a name (in this example, “NEC” is en- tered) and then press OK soft key. (If STEP 6: “NEC” and its telephone number has been no appropriate data exists, the message “En- added into Local Phonebook.
- Page 181 STEP 5: When “NEC BNET” appears, press or OK soft key. Name: NEC NEC BNET DOWN STEP 6: The registered data for “NEC BNET” ap- pears. From this screen, you can make a call by go- Speaker ing off-hook or pressing...
-
Page 182: To Edit An Entry
To Edit An Entry STEP 5: Enter “use” by using digit keys. After the mod- ification has completed, press OK soft Example: key. To Modify Name “Home” to “House” and Telephone Press key twice to enter “u”. Number “0123456789” to “0123456712”. Press key four times to enter “s“. - Page 183 STEP 7: Press Clr soft key twice to erase “89”. STEP 2: Press DEL soft key. Name: House Name: NEC ABIKO Number: 01234567 Number: 0123456789 <<< EDIT STEP 8: Enter “12” by pressing digit keys and then STEP 3: Press...
- Page 184 Note: More soft key appears in Phonebook data screen STEP 1: Press Pref Soft Key while the target Phone- when the number of characters (name) or digits book data is displayed. (telephone number) are exceeding displayable limit (Up to 17 characters or digits can be displayed at a time).
- Page 185 Available Characters In Local Phonebook LOWERCASE CHARACTER Digit The following tables show available characters in Local ∗ Code Phonebook. w SP ∗ UPPERCASE CHARACTER Digit ∗ Code à è ì ñ ù T W SP ∗ β á é í ò...
-
Page 186: Call History
CALL HISTORY Series) and then press or OK soft key. DT730/710 DT330/310 (or press key.) There are two types of Call History features. On the one History hand, the history data is stored in the system memory. On the other hand, the history data is stored in the Directory memory of the telephone (see 7.CALL HISTORY... - Page 187 STEP 4: If the call history data has name information, To Make A Call With Prefix the name is displayed as follows: STEP 1: Press >>> soft key while the history data to Name :NEC ABIKO which you want to add a prefix. Number :01234531300 More...
- Page 188 STEP 2: Enter a desired name and then press OK soft 1:03 PM MON 12 JUL 2010 key. 31300 <<< (In this example, “NEC ABIKO” is entered.) Pref Note: If you want to exit Call History, press END soft Add name: key.
- Page 189 STEP 3: The telephone number stored on the call his- tory is displayed. The telephone number can be changed if necessary. Press OK soft key to add the displayed data to Local Phone- book. Name :NEC ABIKO Number :31300...
- Page 190 This page is for your notes.
-
Page 191: To Add New Data
IRECTORY PERATION Note: Directory feature is available for DT730 Series This chapter explains about Personal Directory function ITL-8LDE-1 only. DT710/DT330/DT310 of DT730 Series. By using Personal Directory function, Series does not support the directory feature. you can make a call with simple operation. STEP 2: Select Personal. - Page 192 [Directory] [Edit] [Edit] Search Name Name Edit Group Group Setting Tel #1 Own Number Tel #2 Delete All Tel #3 ↓ ↓ Back Tel #4 Company Name Note: If the Personal/Terminal directory contains 500 Ring Tone entries, the following screen appears. Illumination [Edit] Directory is full.
- Page 193 or OK soft key. [Group Select] • Press key. Default [Edit] Colleagues VIPs Ken Kobus Family Group Friends Tel #1 Group 6 Tel #2 Tel #3 Group 20 Tel #4 ↓ ↓ Back Company Name Ring Tone Note: Each group name can be changed from the Illumination Group Setting screen.
- Page 194 or Next soft key. • Press key, and then press or Next soft [Edit] key. In this example, Company is selected. Ken Kobus Colleagues [Category] Tel #1 Company Tel #2 Mobile Tel #3 Voice Mail Tel #4 Home Company Name Others Ring Tone ↓...
- Page 195 A maximum of four telephone numbers can be set to an entry. If Enable is selected here, the tele- [Edit] phone number which is being edited will be given top priority. In that case, the telephone number is Ken Kobus automatically selected when you make a call with- Colleagues out specifying a specific telephone number.
- Page 196 STEP 14:The display goes back to the Edit screen. Se- lect Ring Tone. [Ring Tone] Select an item by either of the following operations. Automatic • Highlight an item by using , and then press Default or OK soft key. •...
- Page 197 • For DT730 Series [Edit] [Illumination] Ken Kobus Automatic Colleagues Default 31300 Disable Tel #2 Tel #3 Green Tel #4 Yellow Blue Automatic Light Blue Illumination Purple White Save Back Rotation ↓ Back STEP 17:Select a desired color of the Call Indication lamp.
- Page 198 ually, select Memory ID on the screen of Note: You can set illumination type for calls routed to the specified name (calling party) here. Illumina- the previous step, and then enter a desired tion type can be set for “Name”, “Group” and memory number (0 - 499).
-
Page 199: To Change Group Name
TO CHANGE GROUP NAME DT730 [Group] Default STEP 1: Open the Directory screen (see TO ADD DATA). Colleagues VIPs STEP 2: On the Directory screen, select Group Family Setting. Friends Group 6 Select an item by either of the following operations. •... - Page 200 [Group Name Set] Input a group name. Default Option Back Note: Up to 32 characters can be entered as a group- name. For details on character entry method, see HOW TO INPUT CHARACTERS in chapter 4. STEP 6: Display returns to the Group screen. Make sure that the new group name takes effect.
-
Page 201: To Find A Registered Data
TO FIND A REGISTERED DATA [Search] DT730 Group • To Search by Group Name Name STEP 1: Open the Directory screen (see TO ADD Tel Number DATA). Others ↓ Back STEP 2: Select Search on the Directory screen. Select an item by either of the following operations. STEP 4: Select a target group. - Page 202 phone numbers are assigned to an entry, a top priority telephone number will be dialed. [Detail] [Directory] Ken Kobus Colleagues John Smith 31300 Julia 0800XXXXXX Ken Kobus Tel #3 Detail Option Back Call Tel #4 Note: If no entry is set to the selected group, "No data" is issued.
-
Page 203: To Search By Name
• To Search by Name [Search] STEP 1: Open the Directory screen (see TO ADD Group DATA). Name Tel Number STEP 2: Select Search. Others Select an item by either of the following operations. ↓ ↓ • Highlight an item by using , and then press Back or OK soft key. - Page 204 STEP 5: Select a target name by pressing (Up/ [Detail] down-cursor) Abe Kentaro In the following Directory (Name List) screen, Colleagues you can make a call to the selected party by 31300 pressing or Call soft key. If two or more tele- 0800XXXXXX phone numbers are assigned to an entry, a top Tel #3...
- Page 205 • To Search by Telephone Number [Search] STEP 1: Open the Directory screen (see TO ADD DATA). Group Name STEP 2: Select Search. Tel Number Select an item by either of the following operations. Others • Highlight an item by using , and then press ↓...
- Page 206 [Directory] [Detail] Abe Ichiro Abe Kentaro Abe Kentaro Colleagues Abe Sabro 31300 Detail Option Back Call 0800XXXXXX Tel #3 Note: If there is no entry corresponding to the entered number, "No data" is issued on the screen. Tel #4 STEP 6: To display the detailed data for a specific Automatic name, press Detail soft key while the name is Automatic...
- Page 207 • To Search by Memory ID [Search] STEP 1: Open the Directory screen (see TO ADD DATA). Group Name STEP 2: Select Search. Tel Number Select an item by either of the following operations. Others • Highlight an item by using , and then press ↓...
- Page 208 In the following Detail screen, you can make a call to the selected number by pressing or Call [Memory ID] soft key. Input a Memory number. Back [Detail] Abe Kentaro STEP 6: Select a target name by pressing (Up/ Colleagues down-cursor) 31300 In the following Directory (Name List) screen,...
-
Page 209: Group Setting
• To Search by Category [Search] STEP 1: Open the Directory screen (see TO ADD DATA). Group Name STEP 2: Select Search. Tel Number Select an item by either of the following operations. Others • Highlight an item by using , and then press ↓... - Page 210 Note: If two or more telephone numbers are assigned [Category] to an entry, a top priority telephone number is automatically selected when the Detail screen Company appears. Mobile In the following Detail screen, you can make a call Voice Mail to the selected number by pressing or Call Home...
- Page 211 • To Search by Company Name [Search] STEP 1: Open the Directory screen (see TO ADD DATA). Group Name STEP 2: Select Search. Tel Number Select an item by either of the following operations. Others • Highlight an item by using , and then press ↓...
- Page 212 Note: A distinction is made between upper case and Note: If two or more telephone numbers are assigned lower case characters. For example, "Ken to an entry, a top priority telephone number is Kobus" and "ken kobus" are distinguished as dif- automatically selected when the Detail screen ferent character strings.
- Page 213 • To Search by Alphabet [Search] STEP 1: Open the Directory screen (see TO ADD DATA). Group Name STEP 2: Select Search. Tel Number Select an item by either of the following operations. Others • Highlight an item by using , and then press ↓...
- Page 214 Note: If there is no entry corresponding to the group of [Alphabet] alphabets, "No data" is issued on the screen. STEP 7: To display the detailed data for a specific name, press Detail soft key while the name is highlighted. PQRS Note: If two or more telephone numbers are assigned...
-
Page 215: To Make A Call From Directory
TO MAKE A CALL FROM DIRECTORY Note: If multiple telephone numbers are registered to a DT730 target party, a call is made to the first priority tele- phone number. Note: While Directory screen is being displayed, you • To Make a Call from Detail Screen cannot make a call by dialing a telephone num- ber. -
Page 216: To Add Prefix To Number
TO ADD PREFIX TO NUMBER DT730 [Detail] • To Set Prefix Abe Kentaro When making a call, a prefix can be added to tele- Colleagues phone numbers to be dialed. Prefixes need to be 31300 set in advance. 0800XXXXXXXX Tel #3 STEP 1: Display the Menu screen, and select Setting. - Page 217 [Prefix] [Incoming Call] Prefix 1 Incoming Call Talk Prefix 2 Prefix 3 Display ↓ Back Change Password Security STEP 6: Enter a prefix by using the digit keys. Peripherals Usability After entering the prefix, press or OK soft Config key. ↓...
- Page 218 • To Add Prefix When Making A Call key. STEP 1: Display the Name List screen for a target SubMenu party (see TO FIND A REGISTERED DATA). Prefix Delete One [Directory] Delete All Abe Ichiro Edit Abe Jiro ↓ ↓ Cancel Abe Kentaro Detail...
-
Page 219: To Edit Directory Data
STEP 4: On the Edit screen, the detailed data for the Detail Option Back Call selected name is displayed. Modify the nec- STEP 2: Select a target name and display Sub Menu. essary data by referring to TO ADD NEW DA- Select a target name by pressing... -
Page 220: To Delete All Data
TO DELETE ALL DATA DT730 Note: To cancel the data deletion, press or Back STEP 1: Open the Directory screen (see TO ADD soft key. DATA). STEP 4: After all the directory data is deleted, the dis- STEP 2: Select Delete All. -
Page 221: To Delete A Specific Data
TO DELETE A SPECIFIC DATA DT730 SubMenu Prefix STEP 1: Display the Name List screen for a target party (see TO FIND A REGISTERED DATA). Delete One Delete All [Directory] Edit Abe Ichiro ↓ ↓ Cancel Abe Jiro STEP 4: The following confirmation message appears. Abe Shintaro Press or OK soft key to delete the appro-... - Page 222 STEP 5: After the appropriate directory data is delet- ed, the display changes as follows: [Directory] Deleted. STEP 6: Press or OK soft key.
-
Page 223: Call History Operation
ISTORY PERATION This chapter explains the Call History feature of DT Series. By using Call History, you can make a call with simple operation. Call History feature allows the telephone to register up to 50 records (for DT730 Series)/10 records (for DT330 Series) into its memory. - Page 224 Note: The call history data that is stored in the memory of each telephone cannot be added to Phonebook (both System Phonebook and Local Phonebook) controlled by the system.
-
Page 225: 7.1 For Dt730 Series
7.1 FOR DT730 SERIES or ↑/↓ soft If two or more records exist, use key to display the next/former records. TO VIEW CALL HISTORY DT730 [Incoming] 12/JUL/2010 (MON) 10:00 STEP 1: Display the Menu screen, and select History. Ken Kobus 7205 STEP 2: Select a kind of calls. -
Page 226: To Make A Call From Call History
TO MAKE A CALL FROM CALL HIS- [Incoming] TORY DT730 12/JUL/2010 (MON) 9:58 Abe Kentaro Note: While the history data is displayed, you cannot make a call by dialing a telephone number. Tel: 7207 ↓ Option (CASE 1) ↓ Back STEP 1: Display call history data of a target telephone STEP 2: On the above screen, press HELP key or Op- number (see... - Page 227 Note: When making a call from Call History, a prefix can be added to the dial number. In that case, select 3 Prefix on the SubMenu (indicated at STEP 2 of CASE 2) to display the Prefix screen. On the Prefix screen, choose a prefix to be added to the dial number.
-
Page 228: To Add Call History Data To Directory
TO ADD CALL HISTORY DATA TO SubMenu DIRECTORY DT730 Call Directory Add STEP 1: Display call history data of a target telephone Prefix number (see TO VIEW CALL HISTORY). Delete One The following is an example when history data of Delete All an Incoming Call is displayed. - Page 229 key. [Category] [Priority Flag] Company Disable Mobile Enable Voice Mail Home ↓ Prev Others STEP 6: The following Edit screen is displayed. ↓ Back Next “31312” has been registered to Tel #1. Selectable categories are as follows: “TO ADD NEW DATA”...
-
Page 230: To Edit Directory Data From Call History
TO EDIT DIRECTORY DATA FROM CALL HISTORY SubMenu DT730 Call Directory Add STEP 1: Display call history data of a target telephone Prefix number (see TO VIEW CALL HISTORY). Delete One The following is an example when history data of Delete All an Incoming Call is displayed. - Page 231 [Directory] [Directory Search] Abe Kentaro Group Kimura Name Ken Kobus Tel Number ↓ Back Others ↓ Back Note: If there is no corresponding data, "No data" will be displayed on LCD. STEP 5: Select a group. STEP 7: Select a registration destination. In this exam- In this example, Colleagues is selected.
- Page 232 STEP 8: Select a Category to which the telephone number belongs. [Priority Flag] In this example, Company is selected. Disable Select an item by either of the following operations. • Highlight an item by using , and then press Enable or OK soft key.
-
Page 233: To Delete All Data
TO DELETE ALL DATA STEP 4: After all history data is deleted, the display DT730 changes as follows. Press or OK soft key. STEP 1: Display the Menu screen, and select History. STEP 2: Select All Delete. [Delete History] Select an item by either of the following operations. All History data has been deleted. -
Page 234: To Delete A Specific Data
TO DELETE A SPECIFIC DATA DT730 SubMenu STEP 1: Display call history data of a target telephone Call number referring to TO VIEW CALL HISTO- Directory Add Prefix The following is an example when a history data of Delete One Incoming Calls is displayed. - Page 235 STEP 4: After the appropriate call history data is delet- ed, the display changes as follows. Press or OK soft key. [Incoming] Deleted.
-
Page 236: 7.2 For Dt330 Series
7.2 FOR DT330 SERIES [Menu] TO VIEW CALL HISTORY Call History DT330 Directory • TO VIEW DATA OF INCOMING CALL/ Settings OUTGOING CALL Back STEP 1: While indicating the current time on LCD, STEP 3: Select a kind of calls. press key to open the Menu screen. - Page 237 STEP 4: The history data of the last received call is Note: To go back to name display, press key. For displayed. If name information of the caller the telephone without the cursor key, switching exists, the name is displayed as follows: between “name”...
- Page 238 • TO VIEW DATA OF MISSED CALL ONLY STEP 3: The history data of the last received call is STEP 1: While indicating the current time on LCD, displayed. If name information of the caller press key to open Shortcut screen. exists, the name is displayed as follows: [Incoming Calls] 10.
-
Page 239: To Make A Call From Call History
TO MAKE A CALL FROM CALL HIS- TORY DT330 STEP 1: Display the call history data of the target tele- phone number (see TO VIEW CALL HISTO- RY). The following is an example when the history data of an incoming call is displayed. [Incoming Calls] 10. -
Page 240: To Delete All Data
TO DELETE ALL DATA STEP 3: Press Del soft key. The display changes as DT330 follows: STEP 1: Select Call History on the Menu screen. [Incoming Calls] Select an item by either of the following operations. Delete All • Highlight an item by using , and then press or OK soft key. -
Page 241: To Delete A Specific Data
TO DELETE A SPECIFIC DATA DT330 STEP 1: Display the call history data which you want to delete (see TO VIEW CALL HISTORY). The following is an example when the history data of an incoming call is displayed. [Incoming Calls] 10. - Page 242 This page is for your notes.
-
Page 243: Specifications
PECIFICATIONS TECHNICAL SPECIFICATIONS The following shows the technical specifications of DT 300 Series. Telephone Type 24D/12D 87 × 43mm, 168 × 58 dot matrix, 28-digit 4-line 90 × 28mm, Display (LCD) None 24-digit × 3-line * 8LD has two LCDs. Display Color Monochrome (with no shades of gray) Character on LCD... - Page 244 The following shows the technical specifications of DT 700 Series. Telephone Type 24D/12D 8LDE 87 × 43mm, 224 × 96 dot matrix, 28-digit 5-line 90 × 28mm, Display (LCD) None 168 × 41 dot matrix, * 8LD has two LCDs. Monochrome (with Display Color Gray scale (with 8 shades of gray)
-
Page 245: Menu List For Dt730 Series
MENU LIST FOR DT730 SERIES Menu Item Description For firmware version 5.0.0.0 or later with a Home URL registered. Menu Press to display the Menu screen. Menu History To view Call History data. Also, you can add the history data to the directory. To access directory feature. - Page 246 Menu Item Description For firmware version before 5.0.0.0. Menu key while indicating the current time on LCD. Press Menu History To view call history data. Also, you can add the history data to the directory. Directory To access directory feature. There are the following three types of directory features: Personal Directory, Phonebook and Corporate Directory.
- Page 247 Menu List For History Menu Item Description Default Value History 1 Missed Displays the history of missed calls. You can also make a call from this menu. 2 Outgoing Displays the history of outgoing calls. You can also make a call from this menu. 3 Incoming Displays the history of incoming calls.
- Page 248 Menu List For Directory Menu Item Description Default Value Directory Directory → From Menu screen, select Personal. 1 Personal Displays the Directory controlled by the telephone. 1 Search Search the personal directory. 1 Group Select a group as a search condition. 2 Name Enter the target name and perform a search.
- Page 249 Menu Item Description Default Value 3 Group Setting Change a group name. 1. Default 2. Colleagues 3. VIPs Select a desired group name to be changed. 4. Family 5. Friends 6. Group 6 - 20. Group 20 1 Name Enter a new group name. 2 Ring Tone Select a ringer tone type per group.
- Page 250 Menu List For Setting Menu Item Description Default Value Setting 1 User Setting Make the user setting of DT Series. 1 Incoming Call Settings for incoming call. 1 Ring Volume Not used. 2 Offhook Ring Enable/Disable Off-hook ringing. Enable 3 Headset Ring Enable/Disable the ringing of headset.
- Page 251 Menu Item Description Default Value 3 Screen Saver Sets Screen Saver related data. 1 Screen Saver Enable/Disable Screen Saver. Disable Mode 2 Wait Time Set the Wait Time to launch Screen Saver 120min 4 Back Light Enable/disable the backlights of LCD and digit keys. Automatic (Enable) 5 Font Size...
- Page 252 Menu Item Description Default Value 2 Download Set the data required for the file downloading. 1 Download Files Download the files for Music on Hold, ringer tone and 1 Hold Music Download a file for Music on Hold. MOH.wav 2 Ring Tone Download files for ringer tones 1.
-
Page 253: Menu List For Itl-8Lde-1
MENU LIST FOR ITL-8LDE-1 Menu Item Description For firmware version 5.0.0.0 or later with a Home URL registered. Menu Press Menu to display the Menu screen. History To view Call History data. Also, you can add the history data to the directory. To access directory feature. - Page 254 Menu List For History Menu Item Description Default Value History 1 Missed Displays the history of missed calls. You can also make a call from this menu. 2 Outgoing Displays the history of outgoing calls. You can also make a call from this menu. 3 Incoming Displays the history of incoming calls.
- Page 255 Menu List For Directory Menu Item Description Default Value Directory Directory → From Menu screen, select Personal. 1 Personal Displays the Directory controlled by the telephone. 1 Search Search the personal directory. 1 Group Select a group as a search condition. 2 Name Enter the target name and perform a search.
- Page 256 Menu Item Description Default Value 3 Group Setting Change a group name. 1. Default 2. Colleagues 3. VIPs Select a desired group name to be changed. 4. Family 5. Friends 6. Group 6 - 20. Group 20 1 Name Enter a new group name. 2 Ring Tone Select a ringer tone type per group.
- Page 257 Menu List For Setting Menu Item Description Default Value Setting 1 User Setting Make the user setting of DT Series. 1 Incoming Call Settings for incoming call. 1 Ring Volume Not used. 2 Offhook Ring Enable/Disable Off-hook ringing. Enable 3 Ring Tone Select a ringer tone for External Call and Internal Call.
- Page 258 Menu Item Description Default Value 3 Screen Saver Sets Screen Saver related data. 1 Screen Saver Enable/Disable Screen Saver. Disable Mode 2 Wait Time Set the Wait Time to launch Screen Saver 120min 4 Back Light Enable/disable the backlights of LCD and digit keys. Automatic (Enable) 5 Font Size...
- Page 259 Menu Item Description Default Value 2 Download Set the data required for the file downloading. 1 Download Files Download the files for Music on Hold, ringer tone and 1 Hold Music Download a file for Music on Hold. MOH.wav 2 Ring Tone Download files for ringer tones 1.
-
Page 260: Menu List For Dt710 Series
MENU LIST FOR DT710 Series Menu Item Description Menu key while indicating the current time on LCD. Press Menu Not used. Tool To make the user setting of DT Series. Setting To make the configuration setting of DT Series. For details, please contact Config the system administrator. - Page 261 Menu List For Setting Menu Item Description Default Value 2 Setting 1 User Setting Make the user setting of DT Series. 1 Incoming Call Settings for incoming call. 1 Offhook Ring Enable/Disable Off-hook ringing. Enable 2 Ring Tone Select a ringer tone for External Call and Internal Call. Automatic Automatic / Tone Type 1~14 (Tone Type1)
- Page 262 Menu Item Description Default Value 1 Download Files Download the files for Music on Hold, ringer tone and 1 Hold Music Download a file for Music on Hold. MOH.wav 2 Download Address Enter an IP address of the FTP/TFTP server. 0.0.0.0 3 Protocol Select a protocol of the server (either FTP or TFTP).
-
Page 263: Menu List For Dt330 Series
MENU LIST FOR DT330 Series Menu Item Description Menu key while indicating the current time on LCD. Menu Press To view call history data. Call History PHONEBOOK To access Phonebook feature. For details, see in chapter Directory To make the user setting of DT Series. Settings Menu List For Call History... - Page 264 This page is for your notes.
-
Page 265: Web Programming
ROGRAMMING OUTLINE Web Programming allows you to configure the terminal settings of DT Series from the PC. An Internet browser (Internet Explorer, etc.) is used to access Web Programming. It is not necessary to install any special application software onto the PC. Note: This feature is only available for DT700 Series. -
Page 266: To Login
TO LOGIN Follow the steps below to open the Web Programming. Internet browser STEP 1: Start up on the PC. STEP 2: Enter IP address of the target DT700 Series on the address toolbar and then press Enter key. STEP 3: The Web Programming Login screen appears. Enter a user name (type “USER”) and a password (Note 1), then click Note: Enter the same password used when logging into the DT700 Series. - Page 267 Note: For IP address of DT Series, contact the System Administrator. Note: When the login screen does not appear, check the LAN connection status and entered IP address. If the problem persists, please contact the system administrator. STEP 4: The following Web Programming Home screen appears.
-
Page 268: To Logout
TO LOGOUT Follow the steps below to exit the Web Programming. Logout STEP 1: Click at the lower left of the screen. STEP 2: The confirmation message appears. Click to log out of Web Programming. Back STEP 3: The display changes as follows. Click... - Page 269 STEP 4: After the Web Programming Login screen is displayed, close the Internet browser. Note: Make sure to perform the logout operation after the data setting of the telephone. Note: When 15 minutes have passed leaving the PC without operation after log in to Web Programming, you are forcibly logged out from the Web Programming.
-
Page 270: How To Operate
HOW TO OPERATE As an example of setting method on the Web Programming, the following explains how to change the ringer tone for external call. Web Programming includes the same menu configuration as "Setting" of DT700 Series terminal. For details on each menu item, see SETUP WITH MENU KEY FOR DT700 SERIES 3.TERMINAL SETUP. - Page 271 Printed in Japan 1108-050...