Samsung DS-5000 User Manual
Ds-5000 series for officeserv 100/500/7000 series
Hide thumbs
Also See for DS-5000:
- Quick reference manual (11 pages) ,
- User manual (626 pages) ,
- User instructions (368 pages)
Table of Contents

Related Manuals for Samsung DS-5000


Summary of Contents for Samsung DS-5000
- Page 1 DS-5000 Series Keyset User Guide...
- Page 2 DS 5000 Series User Guide For OfficeServ 100, OfficeServ 500, and ™ ™ OfficeServ 7000 Series ™ 05/2009...
- Page 3 Samsung Telecommunications America reserves the right without prior notice to revise information in this guide for any reason. Samsung Telecommunications America also reserves the right without prior notice to make changes in design or components of equipment as engineering and manufacturing may warrant.
-
Page 4: Table Of Contents
TABLE OF CONTENTS ABOUT THIS BOOK ..................1 THINGS YOU SHOULD KNOW ..........2–8 ASSEMBLING YOUR KEYSET ............9 DS 5000 KEYSETS SETUP ..............10 OUTSIDE CALLS Making an Outside Call ....................11 Answering an Outside Call..................11 Universal Answer ......................11 Recall/Flash ........................12 Busy Line Queuing with Callback ................12 Canceling Callback ......................12 INTERCOM CALLS Calling Other Stations ....................13... - Page 5 DIALING FEATURES Speed Dialing ........................24 Programming Personal Speed Dial Numbers ..........24–25 One Touch Speed Dialing....................25 Last Number Redial ......................25 Manual Retry with Redial ....................26 Save Number with Redial....................26 Chain Dialing........................26 Automatic Redial/Retry....................26 Pulse to Tone Changeover ..................27 Memo Redialing......................27 PAGING AND MESSAGING Making an Internal Page....................28 Making an External Page ....................28 All Page ..........................28...
- Page 6 CUSTOMIZING YOUR KEYSET AME Password ........................39 Auto Camp-On ........................39 Select Ring Tone ......................39 Change Your Passcode ....................39 Set Answer Mode (Intercom) ..................40 Set Answer Mode (CO) ....................40 Automatic Hold ......................40 Headset Operation ......................40 Hot Keypad ........................41 Key Confirmation Tone ....................41 Rejoining a Page ......................41 Ring Preference ......................41 Auto Answer CO Calls ....................42...
- Page 7 Outgoing Call Log ....................58 Incoming Call Log ....................58 Speed Dial........................59 Directory Dial ......................59 Forward Set ......................59 Alarm Reminder .......................60 Samsung Voicemail ..................60 Subscriber Services Menu Diagram..............62–63 Accessing your Mailbox ....................65 Getting Started .......................65 Listen to your Messages .....................65 Subscriber Services Menu ..................65 Listening to Old or New Messages .................66...
-
Page 8: About This Book
ABOUT THIS BOOK Samsung’s new DS 5000 Series is part of the OfficeServ 100, OfficeServ 500, and OfficeServ 7000 Series. The DS 5000 keysets incorporate an LCD screen, which provides important infor- mation for the user, to make using the keyset easier and more convenient. -
Page 9: Things You Should Know
THINGS YOU SHOULD KNOW USER ORIENTATION The DS Series keysets incorporate buttons or “keys” that are used to access or acti- vate the many features of your office phone system. The DS 5021D keysets incor- porate 21 programmable buttons. These 21 buttons are arranged in three rows of seven across the face of the keyset. -
Page 10: Volume Controls
Some simple rules to remember: • Any steady LED indicates the line or feature is in use. • A fast flashing green LED indicates a new call ringing in. • A slow flashing green or red LED indicates a call is on hold. •... -
Page 11: Conference Button
CONFERENCE BUTTON The CONFERENCE button allows the user to set up a call with up to 5 parties (sta- tion or trunk). TRANSFER BUTTON Transfer is used to send any call to another extension in one of two ways. You can do a screened transfer by informing the other extension who is calling or you can do a blind transfer without notification. -
Page 12: Feature Access Codes
• SEND BUTTON: If the station is programmed for Enblok Dial Mode, when dialing an outside telephone number or internal station number, you must press the SEND button to initiate the call. This button is also used when reviewing recently received or called numbers and answering incoming calls. When reviewing recently received calls, continue to press the SEND button for more than 2 seconds and the last outside number called will be redialed. -
Page 13: System Tones
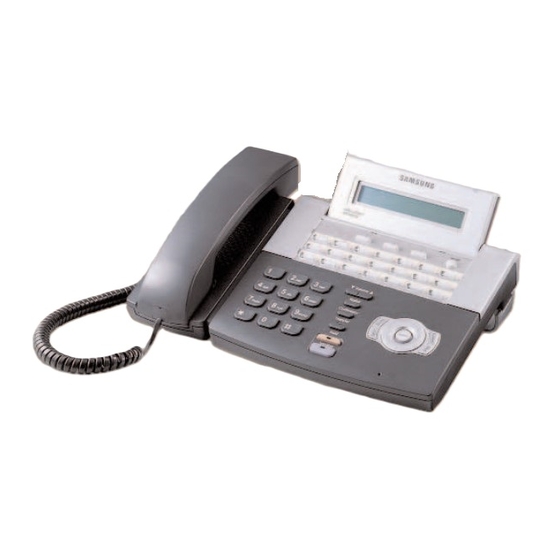
SYSTEM TONES The system provides several tones to assist you. Some of these tones are already familiar to you. Intercom Dial Tone—A steady tone that indicates you can begin dialing. DIAL TONE CONTINUOUS Ringback Tone—Indicates the station you dialed is ringing. RINGBACK TONE—1000 ms ON/3000 ms OFF CONTINUOUS Busy Tone—Indicates the station you dialed is busy. - Page 14 DS 5021D Soft Button Programmable Buttons (21) LCD Panel Status Indicator Scroll Button Speaker Volume Button Keyset Support Redial Button Navigation Button Dial Button Microphone Speaker Button Conference Button Hold Button Transfer Button DS 5014D Programmable Buttons (14) Soft Button LCD Panel Status Indicator Speaker...
- Page 15 DS 5007S Soft Button LCD Panel Status Indicator Scroll Button Programmable Keyset Buttons (7) Support Volume Button Redial Button Conference Button Transfer Button Hold Button Dial Button Microphone Speaker Button DS 5064B AOM 64 PROGRAMMABLE KEYS WITH RED LIGHTS Used to call stations directly, to indicate busy conditions of other stations, for One Touch dialing and many other system features.
-
Page 16: Assembling Your Keyset
ASSEMBLING YOUR KEYSET • Place the keyset face down on a flat surface. • Insert notched ends of the support bracket into the channels located in the upper section of the bottom panel. Push towards the top of the keyset to lock •... -
Page 17: Ds 5000 Keysets Setup
DS 5000 SETUP MENU STRUCTURE The SETUP MENU is configured as follows: 1. INFORMATION Outgoing Incoming Log Speed Dial Directory Dial Forward Set Alarm Reminder NAVIGATING THE MENUS When programming within various menu options, information can be entered via the dial pad keys using [0]-[9] and [,] dial keys, as well as utilizing the navigation button assembly. -
Page 18: Outside Calls
OUTSIDE CALLS MAKING AN OUTSIDE CALL • Lift the handset and press an idle outside line button, line group button or dial a line access code to receive dial tone—OR—press an idle outside line button, line group button or dial a line access code to receive dial tone through the speaker—OR—press SPEAKER, receive intercom dial tone and dial a line access code. -
Page 19: Recall/Flash
RECALL DIAL TONE Press the NEW button to disconnect your existing call, wait for dial tone and then make a new call on the same line. NOTE: If this button does not appear on your keyset, the FLASH button may be programmed to recall dial tone. -
Page 20: Intercom Calls
INTERCOM CALLS CALLING OTHER STATIONS • Dial the extension number or group number. • Wait for the party to answer. If you hear a brief tone burst instead of ringback tone, the station you called is set for Voice Announce or Auto Answer. Begin speaking immediately after the tone. -
Page 21: Busy Station Callback
BUSY STATION CALLBACK When you call another station and receive a busy signal: • Press the CBK button, if programmed, or dial 44. • When the busy station becomes free, your keyset will ring. • Lift the handset or press SEND to call the now idle station. NOTES: A callback will be canceled if not answered within 30 seconds. -
Page 22: Calling Your System Operator
CALLING YOUR SYSTEM OPERATOR • Dial 0 to call your system operator or group of operators. • If you want to call a specific operator, dial that person’s extension number. NOTE: If the Hot Keypad feature has been turned off, you must first lift the hand- set or press the SPEAKER button before you begin dialing. -
Page 23: Call Processing
CALL PROCESSING SYSTEM HOLD • When you are connected to any call, press HOLD. The call will flash green at your keyset. If this call appears on a line button at other keysets, it will flash red at those keysets. •... -
Page 24: Transferring Calls
• If you do not answer this recall within a pre-programmed period of time, it will go to the system operator. CONSULTATION HOLD When you are talking on an outside line and it is necessary to consult with anoth- er extension: •... -
Page 25: Transfer With Camp-On
first station to hang up, simply press another DSS button. OR Press the CALL button or C.O. line button to return to the outside party and begin the transfer process again. When you are transferring a call to a keyset set for Voice Announce or Auto Answer, the transferred call will always ring. -
Page 26: Conference Calls
• Lift the handset or press the SEND button to answer. NOTE: Intercom calls will not go on Automatic Hold. CONFERENCE CALLS You may conference up to five parties (you and four others) in any combination of outside lines and internal stations in any order. •... -
Page 27: Forwarding Calls
FORWARDING CALLS You may forward your calls to another station, group of stations or an external telephone number. Program a destination for the type of forwarding you want as detailed below. If you have FWD ALL, FWD BUSY and FWD NO ANSWER buttons, press one to turn that forward feature on. -
Page 28: Forward Follow Me
FORWARD BUSY/NO ANSWER If you have both a Forward on Busy destination and a Forward No Answer desti- nation programmed, you may set both of these at the same time: • Dial 604. • Receive confirmation tone and hang up. NOTE: If the Hot Keypad feature has been turned off, you must first lift the handset or press the SPEAKER button before you begin dialing. -
Page 29: Call Pickup
• Dial 0 to cancel current condition OR Dial 1-5 to select the forward type OR Press UP or DOWN to select the forward type. Press the right soft key to move the cursor. • Dial the destination number (e.g., 202) OR Press UP or DOWN to select the destination Press the right soft key to move the cursor •... -
Page 30: Privacy Release
PRIVACY RELEASE This feature will allow another station to join in our conversation by releasing pri- vacy on the C.O. from your phone. To Release Privacy: While you are talking on a C.O. line and you wish to have other internal parties (or up to three) join the conversation. -
Page 31: Dialing Features
DIALING FEATURES All “DIALING FEATURES” instructions are written to support Overlap Dialing mode. This is the technical name for dialing from a telephone as it has been for many years. In recent years the cell phone industry has changed the cell phones to use Enblock Dialing. -
Page 32: One Touch Speed Dialing
For the purposes of pro- A B C D E F gramming speed dial num- bers, the programmable but- tons are known as A, B, C, D, E and F. • The A button is not used. • The B button inserts a flash. -
Page 33: Manual Retry With Redial
MANUAL RETRY WITH REDIAL While you are on an outside call listening to a busy signal and you want to redial the same number dialed. • Press the REDIAL button. This will hang up your existing call and manually redial the same number dialed. You can repeat this operation for a limited number of attempts. -
Page 34: Pulse To Tone Changeover
• When the called party answers, lift the handset or press the flashing SPEAK- ER to begin speaking. NOTES: If you make another call, auto-redial is canceled. To cancel a retry, lift and replace the handset. PULSE TO TONE CHANGEOVER When making an outside call on a dial pulse line, press #. -
Page 35: Paging And Messaging
PAGING AND MESSAGING MAKING AN INTERNAL PAGE To make an announcement through the keyset speakers in the idle condition: • Lift the handset. • Press the PAGE button or dial 55. • Dial the desired zone number 0, 1, 2, 3 or 4. •... -
Page 36: Meet Me Page
If allowed by your system administrator you may be able to initiate a page from a speakerphone by pressing the PAGE key or dialing 55 without lifting the handset. MEET ME PAGE • Lift the handset. • Press the Meet Me Page (MMPG) button or dial 54. •... -
Page 37: Messages-Set And Cancel
• Receive page tone and dial a desired page zone number. • Make announcement indicating your extension number or the line number. Hang up. To retrieve an automatically parked call: • Dial 10 plus the number that was announced. If you have a PAGPK button, press it and dial the number that was announced. -
Page 38: Returning Messages
RETURNING MESSAGES • Press the MESSAGE button or dial 43. The first station that left a message will be called automatically. If that station does not answer, your MESSAGE light will stay on. • Repeat until all messages have been returned in the order received. •... -
Page 39: Convenience Features
CONVENIENCE FEATURES DO NOT DISTURB Use this feature when you want to block calls to your keyset. • While on-hook, press the DND button or dial 401. The DND button lights steady red to remind you of this mode. • To cancel DND, press the DND button again or dial 400. -
Page 40: Established Call Pickup
ESTABLISHED CALL PICKUP To pick up an established call in progress at a single line extension connected to a computer modem on your PC. • Press the EP button for that station on your keyset and the call is automati- cally moved to your keyset. -
Page 41: Door Phone Calls
ANSWERING THE DOOR PHONE When you are programmed to receive calls from a door phone: • You will receive three short rings repeated. • Lift the handset or press SEND button. You are connected to the door phone. • If an electric door lock release is installed, dial 13 to unlock the door. CALLING THE DOOR PHONE/ ROOM MONITOR You may call the door phone and listen to what may be happening outside or in... -
Page 42: Group Listening
To transfer all calls to the Secretary: • Press the DIVERT button while the phone is idle.The LED will be lit and all calls will ring the secretary. The secretary can call the BOSS in the DIVERT mode but all other users will ring the secretary (the secretary can override the boss’... -
Page 43: Locking Your Keyset
LOCKING YOUR KEYSET You can lock your keyset to control misuse of your phone while you are away. You can unlock it when you return. Your default station passcode is 1234. LOCKED OUTGOING LOCKED ALL CALLS UNLOCKED Hold Button LED Flashes Hold Button LED Solid Make outside calls NO-ACCESS DENIED... -
Page 44: Ohva Block
then you will hear the announcement on the speaker, if you are talking on the handset. If you are using the speakerphone the announcement will always be heard through the speaker. To make an off-hook voice announcement: • Dial the extension number or press the DSS button. •... - Page 45 NOTE: If the Hot Keypad feature has been turned off, you must first lift the hand- set or press SPEAKER button. The IN/OUT button can include an extender to indicate the specific group that this button will affect. This means that if you are in multiple groups, you can de- cide for which groups you will receive calls.
-
Page 46: Customizing Your Keyset
This will prevent unauthorized users from listening to your messages being left. The passcode is the same as your station passcode. This feature only applies if there is an Samsung Voicemail card installed in the system and your keyset has a programmed AME button. -
Page 47: Set Answer Mode (Intercom)
SET ANSWER MODE (INTERCOM) You can receive internal calls in one of three modes (see Answering Intercom Calls under Intercom Calls for descriptions): • While on-hook, press TRANSFER and then dial 103. • Dial 0 for Ringing, 1 for Auto Answer or 2 for Voice Announce. •... -
Page 48: Hot Keypad
Your keyset may be equipped with a Headset mode button. If it is so equipped pressing this button while the light is out will cause the keyset to enter headset mode and the light will illuminate to indicate this. Pressing the button while the light is lit will cause the keyset to return to handset mode and the light will go out. -
Page 49: Auto Answer Co Calls
AUTO ANSWER CO CALLS This option will allow CO calls that directly ring your phone to auto answer. When a CO call arrives at your station and this option set for ON your phone will sound two beeps, the same as when a screened transfer is completed, and you will be connected to the CO call. -
Page 50: Enblock Dialing
ENBLOCK DIALING This option allows you to dial digits then press the SEND button to make the call (like a cellphone). • While the handset on-hook press TRANSFER then dial 110. • Dial 161 to turn Enblock Dialing ON or 160 to turn it off. •... - Page 51 To turn a MOBEX port ON or OFF: • Press TRANSFER and then dial 126. • Dial your station pass code. • Dial the number of the port you wish to configure (1-5) (you may also use the Volume Up and Volume Down keys to select a port and press the right soft key to confirm).
-
Page 52: Display Features
DISPLAY FEATURES INTERACTIVE DISPLAY KEYS The three keys below the display are substitutes for dedicated feature keys and ac- cess codes. Pressing one of these buttons has the same effect as pressing a pro- grammable button. These buttons are called soft keys as their functions are not fixed.They change to present you with the best options for that call condition.The use of soft keys allows the programmable buttons to be used for more DSS and speed dial buttons. -
Page 53: Call Log
CALL LOG (See also Special Application Menu-Outgoing Call Log) The system can log both incoming and outgoing calls placed from or to your tele- phone. You must have a LOG button programmed on your keyset and assigned a review list. Each IN and OUT list can be up to 50 numbers maximum. -
Page 54: Call Progress Displays
CALL PROGRESS DISPLAYS During everyday call handling, your keyset display will provide information that is helpful and in some cases invaluable. Displays like [CALL FROM 203], [TRANSFER TO 202], [701: RINGING], [TRANSFER FM 203], [708 busy], [Camp on to 204], [Recall from 204], [Call for 501], [message frm 204] and [FWD ALL to 204] keep you in- formed of what is happening and where you are. -
Page 55: Viewing Message Indications
VIEWING MESSAGE INDICATIONS You can view all of your message indications before you return them: • With the handset on-hook, press the MESSAGE button with the red flashing light. • The first station that left a message indication will be displayed. •... -
Page 56: Personal Speed Dial Names
DIAL 7 DIAL 8 DIAL 9 DIAL , NOTES: When the character you want appears on the same dial pad key as the previ- ous character, press UP to move the cursor one space to the right. Other symbols are available for DIAL #. To cancel an individual alarm and reminder message: •... -
Page 57: Managing Key Assignments
MANAGING KEY ASSIGNMENTS You can view your key assignments and add extenders to some of your program- mable keys for easy one touch operation of frequently used features. • While on-hook, press TRANSFER and then dial 107. • Use the VOLUME buttons to scroll through all of your programmable buttons OR press the programmable button to which you want to add the extender. -
Page 58: Text Messaging
TEXT MESSAGING This feature allows two digital keyset users to respond to each other with prepro- grammed text messages. After receiving an Off Hook Voice Announcement or Station Camp-On, you may respond with a text message while continuing to talk and listen to your outside party.The other station can view this message and take the appropriate action or respond back with another text message. - Page 59 Press TRANSFER Transfer: RETURN Dial 205 205:busy OHVA CAMP ON OHVA to 205 OHVA from 201 TMSG REJECT Wait for reply GIVE THE CALL TMSG:01 SEND Dial 03 or press twice ASK THEM TO HOLD TMSG:03 SEND ASK THEM TO HOLD Wait for reply TMSG EXIT...
-
Page 60: Caller Id
CALLER ID WHAT IS CALLER ID? Caller ID is the name given to the telephone company-provided feature that de- livers the telephone number and sometimes the name of the person calling your phone. There are two types of Caller ID; the first delivers the calling party’s tele- phone number only and the second (sometimes referred to as “Deluxe”... -
Page 61: Ani
NO CID DSP Caller ID Digital Signal Processors (CIDDSP’s) are resources in the OfficeServ 100, OfficeServ 500, and OfficeServ 7000 Series systems required for receiving CID data. If there are no CIDDSP’s available at the time a call comes in, this is the message you will see on your display. -
Page 62: Viewing The Next Caller Id Call
VIEWING THE NEXT CALLER ID CALL In the event that you have a call waiting or a camped-on call at your keyset, you can press the NEXT button to display the Caller ID information associated with the call in queue at your keyset. Either the CID name or CID number will show in the display depending on your Name/Number selection. -
Page 63: Caller Id
INQUIRE CALLER ID PARK/HOLD INFO If you are informed that an incoming call is on hold or has been parked for you, you may view the Caller ID information before you retrieve the call.This may influ- ence how you choose to handle the call. From an idle keyset: •... - Page 64 • If you have entries in your review list, the most recent call will be shown first. • You can now CLEAR this entry, OR Use NND to view more information about this call, OR Press DIAL to call this person back, OR Press SCROLL and then press STORE to save this number in a personal speed dial bin.
-
Page 65: Special Application Menu
SPECIAL APPLICATION MENU Below are instructions for additional call processing and special applications that can be accomplished via the LCD programming. These features and functions can be accessed by pressing the MENU button. Follow the user instructions below to utilize these features and functions. After pressing the MENU button, use the direction button to scroll to the desired menu option. -
Page 66: Speed Dial
• Press END to exit programming. 3. SPEED DIAL: Allows you to search through Station and System Speed Dial Numbers. You may dial the number directly from the displayed status. • Scroll or dial option number 3. Speed Dial. • Press ENTER. -
Page 67: Alarm Reminder
2. ALL FWD NO. 3. BUSY FWD NO. 4. NOANS FWD NO. 5. DND FWD NO. 0. FWD CANCEL • Press ENTER. • Scroll to or dial 1. FORWARD TYPE and scroll to or dial the desired for- ward type. •... -
Page 68: Samsung Voicemail
This section describes how to setup and use the various features available to a Subscriber. A Subscriber is a person that has been authorized access to the vari- ous features and services available in the Samsung Voicemail. Please review this section carefully before you use your Authorized Features and Services, known as Subscriber Services. -
Page 69: Subscriber Services Menu Diagram
Samsung Voicemail Subscriber Services Menu SVMi-8 Subscriber Calais Executary NOTE: All options shown MAY NOT be authorized. If an option is not available please speak to your system administrator. *Change Playback Volume and Speed not available on the OfficeServ 7100 or... - Page 71 [Subscribers calling from Cell Phones or outside of the office environment] • Dial the phone number that will be answered by the Samsung Voicemail. The main greeting will answer. • At the main greeting dial [#] plus your Subscriber (or mailbox) number (Subscriber and Mailbox numbers will usually match your extension number).
-
Page 72: Accessing Your Mailbox
[3] to listen to saved messages. Note: After you enter your password, if “Autoplay of New Messages”is enabled and you have new messages the Samsung Voicemail will begin to play them auto- matically. A subscriber can control this feature. From the Subscriber Services Menu [6] [5] toggles “Autoplay of New Messages”... -
Page 73: Listening To Old Or New Messages
PLAY MENU OPTIONS EXIT TO AUTO ATTENDANT PERSONAL SERVICES LISTENING TO OLD OR NEW MESSAGES Play / replay the message you just heard. Play the previous message. Save the message you just heard and listen to the next message. Delete the message you just heard and listen to the next message. Reply to the message. -
Page 74: Record And Send A Message
Change playback speed of the recording. [Not available on OS 7100 or OS IP-UMS] There are two levels of speed during playback. Dialing this code will toggle between the two speeds. Play options. Pressing this key will play all the menu options available to you from this point. -
Page 75: Access Manager
The Access Manager allows the subscriber to set a number of options for when, where and how, and/or if the Samsung Voicemail contacts you when a caller dials your extension number. All of the options are toggled on/off based on their cur-... - Page 76 The Caller will hear “Forwarding to”“{Subscriber Name}” before actually being forwarded. Call Screening If this is turned on, the caller will be asked their name and the Samsung Voicemail will play this name to you before the transfer, giving you an option to accept or reject the call.
-
Page 77: Personal Greetings
then play your primary, No Answer greeting during the day (when you are available) and will NOT ring your extension but simply play your Night greet- ing during the night (when you are not available). Note: This does NOT use the Day and Night schedules of the phone system. It is solely controlled by the Subscriber’s Availability Schedule. - Page 78 Example:“Hi this is John Smith. I'm sorry I am not available to answer your call. If someone else can help you, please enter the extension number now. Or, to leave me a message, press 1.” Busy Greeting Played to a caller when you are already talking to someone on your extension or the telephone at your Designated Location.
-
Page 79: Mailbox Administration
Message Alert When this function is activated, the Samsung Voicemail will call any outside or inside telephone number, after each message is left in your voice mailbox. To hear your message at the remote location when the voicemail calls you, after you pick up the telephone and answer you will be instructed that there is a message and to enter your password. - Page 80 Select this option to recover ("undelete") previously delet- ed messages, during this period of time. Undelivered Retrieval When this function is activated, the Samsung Voicemail will allow you to recall any messages you have sent that have NOT yet been picked up by the recip- ient.
-
Page 81: Message Broadcast
This useful feature will allow you to cancel any messages that have NOT yet been picked up by the recipient. Auto Play New Messages If this option is enabled, after you enter your password correctly any new messages will immediately begin to play.To enable (or if already enabled tog- gle and disable) this feature: ■... -
Page 82: Personal Services
All other times you will be considered unavailable. Place a Direct Call Allows you to place a direct call out of the Samsung Voicemail from any- where. You may either dial the number or dial a single digit 1-5 that corre-... -
Page 83: Personal Administration Settings
Directory Name, you will not be included in the Dial by Name Directory. Extended Prompting Use this option to drastically reduce the number of prompts played in the subscriber interface (mailbox prompts). Change this setting only if you are very familiar with the user operation of the Samsung Voicemail. -
Page 84: Keyset User Features
Note: Remember if you know what digits to press, you can enter them at any time you do not have to wait to be prompted. This feature can be toggled on/off at anytime. Also if it is off you will be prompted within each subscriber menu to press zero for more options. -
Page 85: Call Record
If the password option is turned on, while a message is being left, press the flash- ing AME indicator and enter your station password (not your Samsung Voicemail password). You will then hear the message being left. -
Page 86: Shortcuts
If you have new messages, in addition to the Terminal Status Indicator (TSI) you will be able to use the keyset displays and soft keys to communicate with the Samsung Voicemail. E-MAIL GATEWAY (EMG) The E-Mail Gateway feature integrates your voicemail box with your email client. - Page 87 If the caller is also a subscriber on the system and the E-Mail Gateway is set up with a valid "Reply To" address, the Subscriber's name will also appear in the "From" field. Otherwise, the "From" field will display the name of the Samsung voicemail system sending the message.
- Page 88 E-Mail Server. • When full synchronization of messages between Voicemail Box and E-mail Inbox is required, ask your Samsung representative about the OfficeServ IP- UMS. This is an Internet Protocol based fully synchronized Unified Messaging System.
-
Page 89: Personal Speed Dial Numbers
PERSONAL SPEED DIAL NUMBERS CODE NAME TELEPHONE NUMBER _________________________ _________________________ _________________________ _________________________ _________________________ _________________________ _________________________ _________________________ _________________________ _________________________ _________________________ _________________________ _________________________ _________________________ _________________________ _________________________ _________________________ _________________________ _________________________ _________________________ _________________________ _________________________ _________________________ _________________________ _________________________ _________________________ _________________________ _________________________ _________________________ _________________________ _________________________ _________________________ _________________________ _________________________ _________________________... - Page 90 PERSONAL SPEED DIAL NUMBERS CODE NAME TELEPHONE NUMBER _________________________ _________________________ _________________________ _________________________ _________________________ _________________________ _________________________ _________________________ _________________________ _________________________ _________________________ _________________________ _________________________ _________________________ _________________________ _________________________ _________________________ _________________________ _________________________ _________________________ _________________________ _________________________ _________________________ _________________________ _________________________ _________________________ _________________________ _________________________ _________________________ _________________________ _________________________ _________________________ _________________________ _________________________ _________________________...
- Page 91 Features & Specifications Line Groups Feature Access Codes 10 + xxx Pick Up A Parked Call 9 Local/LCR 12 + xxx Pick Up A Held Call 800 ____________________________ Door Lock Release 801 ____________________________ 16 + xxx Speed Dialing 802 ____________________________ Save And Redial Number Station Groups New Call (Recall)