OWNER'S GUIDE
READ AND SAVE THESE INSTRUCTIONS
Record Model No. and Serial No. of this dehumidifier in space provided below. These numbers are
printed on the nameplate located behind the bucket.
M odel No. ___________________________________________________
Serial No. ____________________________________________________
IM PORTA NT: Keep a copy of your bill of sale. The date on the bill establishes the warranty period
should service be required. If service is performed, it is in your best interest to obtain and keep all
receipts.
Register Your Product
The self-addressed PRODUCT REGISTRATION CARD should be filled in completely, signed, and
returned to the Frigidaire Company.
2
3
3
3
4
6
7
8
8
9
Operate dehumidifier only as instructed in this Owner's Guide. These instructions are not meant to
cover every possible condition and situation that may occur. Common sense and caution must be
used when installing, operating, and maintaining any appliance.
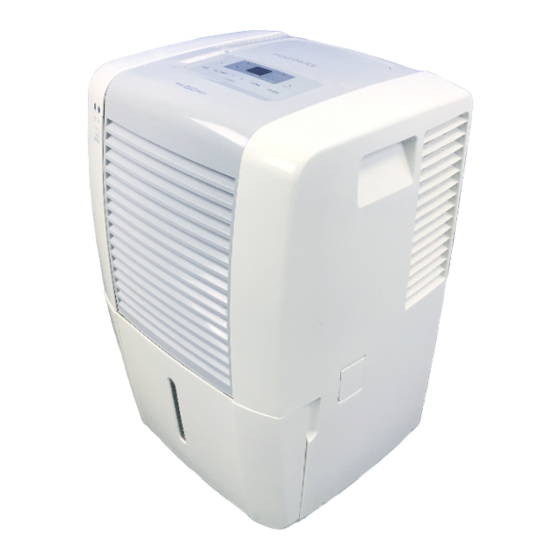
DEHUMIDIFIER
Contents
P/N 66166042
Table of Contents

Related Manuals for Frigidaire 66166042


Summary of Contents for Frigidaire 66166042
-
Page 1: Table Of Contents
OWNER’S GUIDE READ AND SAVE THESE INSTRUCTIONS Record Model No. and Serial No. of this dehumidifier in space provided below. These numbers are printed on the nameplate located behind the bucket. M odel No. ___________________________________________________ Serial No. ____________________________________________________ IM PORTA NT: Keep a copy of your bill of sale. The date on the bill establishes the warranty period should service be required. -
Page 2: W Arranty
Your product is protected by this warranty Your appliance is warranted by Electrolux. Electrolux has authorized Frigidaire Consumer Services and their authorized servicers to perform service under this war- ranty. Electrolux authorizes no one else to change or add to any of these obligations under this warranty. Any obligations for service and parts under this war- ranty must be performed by Frigidaire Consumer Services or an authorized Frigidaire servicer. -
Page 3: Important Safety Instructions
IM PORTA NT: 1. Dehumidifier m m ust b b e o o perated i i n a a n e e nclosed a a rea t t o b b e m m ost e e ffective. Close a a ll d d oors, w w indow s, a a nd o o ther o o utside o o penings t t o t t he r r oom. T T he... -
Page 4: Operation & Features
OPERATION & FEATURES Allow the unit to reach room temperature before operating. To begin operating the dehumidifier, follow these steps: 1. Plug the power cord into a properly grounded 115 volt AC outlet. Note the POWER indicators will illuminate. 2. To turn the unit on press the ON/OFF button. The unit will run in the factory setting of CONTINUOUS and high fan speed.After a few seconds the unit will... - Page 5 3. After a few days when the Relative Humidity has declined, press the HUMIDITY + or - buttons to choose a value between 35% to 80%, so the room is kept at a comfortable concentration.Pressing the + or - buttons will change the humidity selection in 5% increments.If at any time you want to return to the CONTINUOUS Mode, pressing the HUMIDITY - button will lower the Relative Humidity through the 5% increments until the Continuous indicator is lit and the display reads CO.
-
Page 6: Fault Codes
7. To shut the unit down, press the ON/OFF button. Note: the power indicator will still be lit when the unit is turned off. Only removing the plug will extinguish these lights. FAULT CODES If the display reads "F1" or "F2", a sensor has failed. Contact your Authorized Frigidaire Service Center. -
Page 7: Removing Collected Water
REMOVING COLLECTED WATER 1. Emptying the Bucket: a. When the bucket is full the unit will shut down and the BUCKET FULL indicator light will illuminate. b. Do not move the unit at this point otherwise water may spill on the floor. c. -
Page 8: Care And Cleaning
2. Continuous Drainage: a. For constant drainage operation, you will need a garden hose and a drain nearby to discharge the water into. b. Remove the bucket from the unit and set aside. c. Lift up the side flap located on the left side of the unit as looking from the front. (fig.1) d. -
Page 9: Void Service Checklist
Dehumidifier is not turned on. Turn unit on. W indows or doors near dehumidifier are open to outdoors. Close all windows or doors to outside. Area to be dehumidified is too large. Check with your dealer to see if capacity is adequate.