Sony HANDYCAM Operating Manual
Digital hd video camera recorder
Hide thumbs
Also See for HANDYCAM:
- How to use manual (28 pages) ,
- Connection manual (14 pages) ,
- How to use manual (116 pages)
Table of Contents
Available languages
Available languages
Quick Links
Additional information on this product and
answers to frequently asked questions can be
found at our Customer Support Website.
De plus amples renseignements à propos de ce
produit et des réponses aux questions fréquemment
posées sont disponibles sur le site Web de
l'Assistance à la clientèle.
http://www.sony.net/
Printed on 70% or more recycled paper.
Imprimé sur papier recyclé à 70 % ou plus.
2012 Sony Corporation
Printed in China
Digital HD Video
Camera Recorder
Caméscope
numérique HD
Please also refer to :
Consultez également :
http://www.sony.net/SonyInfo/Support/
HDR-CX250/CX260V/CX580V/PJ260/PJ260V/PJ580/PJ580V/
PJ600/PJ600V/XR260V
4-416-298-21(1)
Operating Guide
US
Mode d'emploi
FR
Chapters
Table of Contents

Related Manuals for Sony HANDYCAM


Summary of Contents for Sony HANDYCAM
- Page 1 Web de l’Assistance à la clientèle. http://www.sony.net/ Printed on 70% or more recycled paper. Imprimé sur papier recyclé à 70 % ou plus. HDR-CX250/CX260V/CX580V/PJ260/PJ260V/PJ580/PJ580V/ 2012 Sony Corporation Printed in China PJ600/PJ600V/XR260V...
- Page 2 Record the serial number operating and maintenance in the space provided below. Refer to these (servicing) instructions in numbers whenever you call upon your Sony the literature accompanying dealer regarding this product. the appliance. Model No. HDR- Serial No.
-
Page 3: Important Safety Instructions
IMPORTANT SAFETY INSTRUCTIONS SAVE THESE INSTRUCTIONS. DANGER - TO REDUCE THE RISK OF FIRE OR ELECTRIC SHOCK, CAREFULLY FOLLOW THESE INSTRUCTIONS. Read these instructions. Keep these instructions. Heed all warnings. Follow all instructions. Do not use this apparatus near water. ... - Page 4 Representative plug of power supply cord of countries/regions around the world. A Type B Type BF Type B3 Type C Type SE Type O Type (American (British Type) (British Type) (British Type) (CEE Type) (CEE Type) (Ocean Type) Type) The representative supply voltage and plug type are described in this chart. Depend on an area, Different type of plug and supply voltage are used.
- Page 5 Countries/regions Voltage Frequency (Hz) Plug type Thailand C/BF Vietnam Oceania Countries/regions Voltage Frequency (Hz) Plug type Australia New Zealand 230/240 North America Countries/regions Voltage Frequency (Hz) Plug type Canada Central America Countries/regions Voltage Frequency (Hz) Plug type Bahamas 120/240 Costa Rica Cuba 110/220 Dominican (rep)
-
Page 6: Read This First
Be sure to charge the battery pack using a batteries to the collection and genuine Sony battery charger or a device that recycling location nearest you. can charge the battery pack. Keep the battery pack out of the reach of small ... - Page 7 Declaration of Conformity Trade Name: SONY UL is an internationally recognized safety Model No.: HDR-PJ260V organization. Responsible Party: Sony Electronics Inc. The UL Mark on the product means it has Address: 16530 Via Esprillo, San Diego, been UL Listed. CA 92127 U.S.A.
-
Page 8: About Language Setting
can radiate radio frequency energy and, About language setting if not installed and used in accordance The on-screen displays in each local language with the instructions, may cause harmful are used for illustrating the operating interference to radio communications. procedures. -
Page 9: Learning More About The Camcorder ("Handycam" User Guide)
illustration purposes are captured using a digital still camera, and therefore may appear “Handycam” User Guide is an on-line different from images and screen indicators that manual. Refer to it for in-depth instructions actually appear on your camcorder. And, the on the many functions of the camcorder. -
Page 10: Table Of Contents
Read this first..................6 Learning more about the camcorder (“Handycam” User Guide)....9 Parts and controls. - Page 11 Recording images with the selected image quality........40 Selecting the image quality of movies (Recording mode)..
- Page 12 Saving images with an external device Disc creation guide................58 The devices on which the created disc can be played back.
-
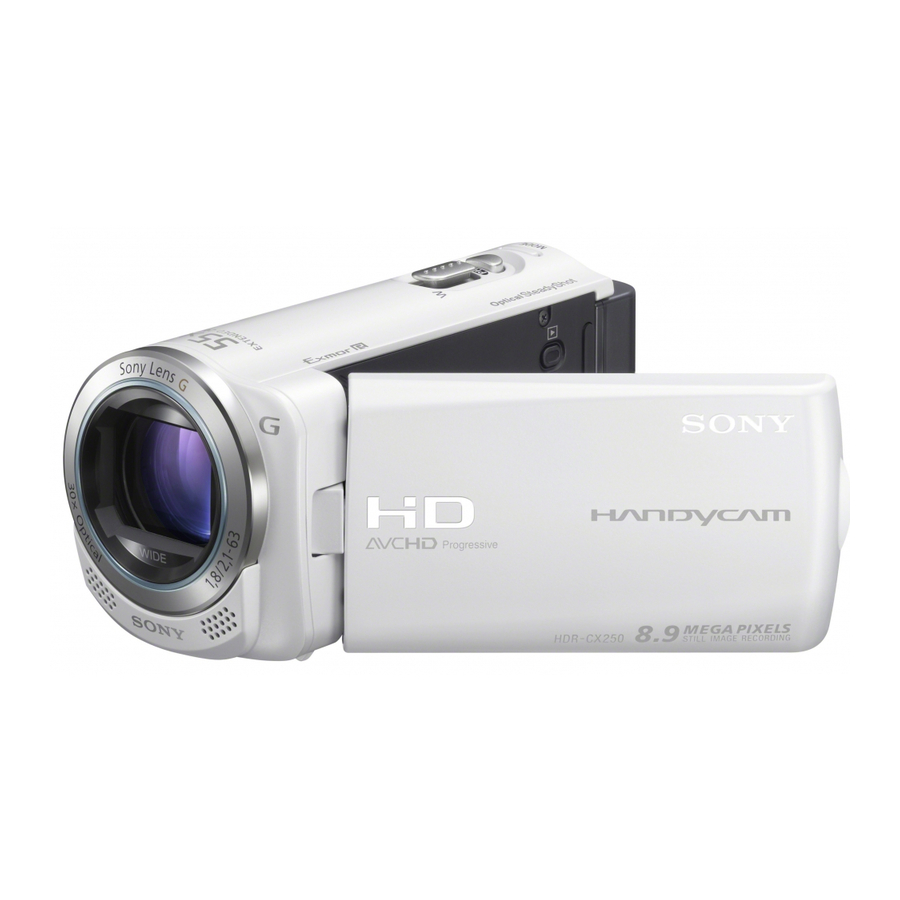
Page 13: Parts And Controls
Parts and controls HDR-PJ600/PJ600V Figures in ( ) are reference pages. HDR-CX250/CX260V HDR-XR260V HDR-CX580V/PJ580/PJ580V Active Interface Shoe (HDR-CX580V/ PJ580/PJ580V/PJ600/PJ600V) Lens (G lens) HDR-PJ260/PJ260V Flash (HDR-CX580V/PJ580/PJ580V/ PJ600/PJ600V)/Video light (HDR- CX580V/PJ580/PJ580V) Built-in microphone Remote sensor/Infrared port (HDR- PJ260/PJ260V/PJ580/PJ580V/PJ600/ PJ600V) ... - Page 14 LCD screen/Touch panel (23, 24) If you rotate the LCD panel 180 degrees, you HDR-CX580V/PJ260/PJ260V/PJ580/ can close the LCD panel with the LCD screen PJ580V/PJ600/PJ600V/XR260V facing out. This is convenient during playback operations. Speakers (HDR-CX580V/PJ260/PJ260V/ PJ580/PJ580V/PJ600/PJ600V/XR260V) Projector lens (49) (HDR-PJ260/PJ260V/ PJ580/PJ580V/PJ600/PJ600V) ...
- Page 15 HDR-CX580V/PJ260/PJ260V/PJ580/ RESET button PJ580V Press RESET using a pointed object. Press RESET to initialize all the settings including the clock setting. (headphones) jack (HDR-CX580V/ PJ260/PJ260V/PJ580/PJ580V/PJ600/ PJ600V/XR260V) (microphone) jack (PLUG IN POWER) HDMI OUT jack (47) ...
- Page 16 HDR-CX580V/PJ260/PJ260V/PJ580/ Built-in USB Cable (20) PJ580V Memory card access lamp (25) Tripod receptacle Attach a tripod (sold separately: the length of the screw must be less than 5.5 mm (7/32 in.)). Memory card slot (25) BATT (battery) release lever (21) To fasten the grip belt HDR-PJ600/PJ600V/XR260V...
- Page 17 To remove the lens hood, turn the securing ring STOP button of the lens hood in the opposite direction from DISPLAY button (28) that of the arrow. Transmitter Remove the lens hood when you operate ...
-
Page 18: Getting Started
Getting started Supplied Items The numbers in ( ) are the supplied Lens hood (only for HDR-CX0V/PJ0/PJ0V/PJ00/ PJ00V) (1) quantity. Camcorder (1) AC Adaptor (1) Wireless Remote Commander (only for HDR-PJ0/ PJ0V/PJ0/PJ0V/PJ00/PJ00V) (1) Power cord (Mains lead) (1) Rechargeable battery pack NP-FV0 (1) HDMI cable (1) “Operating Guide”... -
Page 19: Charging The Battery Pack
Charging the battery pack Close the LCD screen and attach the battery pack. Battery pack Connect the AC Adaptor () and HDR-PJ600/ the power cord (mains lead) () to PJ600V/XR260V your camcorder and the wall outlet (wall socket). The CHG (charge) lamp turns on. ... -
Page 20: Charging The Battery Using Your Computer
You can charge the battery by connecting the Built-in USB Cable to a wall outlet (wall socket) using an AC-UD10 USB charger/AC Adaptor (sold separately). You cannot use a Sony CP- AH2R, CP-AL, or AC-UP100 portable power supply device (sold separately) to charge the camcorder. -
Page 21: To Remove The Battery Pack
To remove the battery pack Close the LCD screen. Slide the BATT (battery) release lever () and remove the battery pack (). To use a wall outlet (wall socket) as a power source Make the same connections as those for charging the battery pack. Even if the battery pack is attached, the battery pack is not discharged. -
Page 22: Charging The Battery Pack Abroad
Charging the battery pack abroad You can charge the battery pack in any countries/regions using the AC Adaptor supplied with your camcorder within the AC 100 V - 240 V, 50 Hz/60 Hz range. Do not use an electronic voltage transformer. -
Page 23: Turning The Power On, And Setting The Date And Time
Turning the power on, and setting the date and time Open the LCD screen of your camcorder and turn the power You can also turn on the camcorder by pressing POWER (p. 15). Select the desired language, then Touch the button on the select [Next]. - Page 24 To turn off the power Close the LCD screen or press the POWER button (p. 15). To adjust the angle of the LCD panel First open the LCD panel 90 degrees to the camcorder (), and then adjust the angle ...
-
Page 25: Preparing The Recording Media
Preparing the recording media The recording media that can be used are displayed on the screen of your camcorder as following icons. Default recording medium Alternative recording medium Memory card — HDR-CX250 HDR-CX260V/CX580V/ Internal memory Memory card PJ260/PJ260V/PJ580/ PJ580V HDR-PJ600/PJ600V/ Internal hard disk Memory card XR260V... -
Page 26: To Eject The Memory Card
To eject the memory card Open the cover and lightly push the memory card in once. Notes To ensure stable operation of the memory card, it is recommended to format the memory card with your camcorder before the first use (p. 69). Formatting the memory card will erase all the data stored on it and the data will be irrecoverable. -
Page 27: Recording/Playback
Recording/Playback Recording In the default setting, movies and photos are recorded on the following media. Movies are recorded with high definition image quality (HD). HDR-CX250: Memory card HDR-CX260V/CX580V/PJ260/PJ260V/PJ580/PJ580V/PJ600/PJ600V/XR260V: Internal recording media Recording movies Open the LCD screen and press MODE to turn on the (Movie) lamp. -
Page 28: Screen Indicators During Recording
Press PHOTO lightly to adjust the focus, then press it fully. When the focus is adjusted properly, AE/AF lock indicator appears on the LCD screen. To display items on the LCD screen Items on the LCD screen disappear if you do not operate the camcorder for a few seconds after you turn the camcorder on or switch between the movie recording and photo shooting modes. - Page 29 Tracking focus (37) Zoom, Remaining battery Counter (hour: minute: second), Capturing a photo, Recording/playback/editing media (92) Tracking focus cancel button (37) Intelligent Auto button (38) Audio mode (68), Audio Level Display (68) Approximate number of recordable photos, Aspect ratio (16:9 or 4:3), Photo size (L/M/S) ...
-
Page 30: Zooming
The maximum continuous recordable time of movies is about 13 hours. When a movie file exceeds 2 GB, the next movie file is created automatically. The flash does not work while the (Movie) lamp is lit (HDR-CX580V/PJ580/PJ580V/PJ600/PJ600V). The following states will be indicated if data is still being written onto the recording media after recording ... - Page 31 The minimum possible distance between camcorder and subject while maintaining sharp focus is about 1 cm (about 13/32 in.) for wide angle and about 80 cm (about 31 1/2 in.) for telephoto. You can magnify images using optical zooming, unless [ SteadyShot] is set to [Active].
-
Page 32: Playback
Playback You can search for recorded images by date and time of recording (Event view) or location of recording (Map view) (HDR-CX260V/CX580V/PJ260V/PJ580V/PJ600V/XR260V). Open the LCD screen and press button on the camcorder to enter the playback mode. You can enter the playback mode by ... -
Page 33: Playing Movies And Photos From A Map
Event name Recorded time/number of photos To go back to the Event Switch Image Type button View screen Movie Previous/next Photo Change to the movie/ photo recording mode Last played image Reduced-size images which enable you to view many images at the same time on an index screen are ... - Page 34 Select the desired image When you use the map data for the first time A message appears asking you to confirm whether you agree with the terms of the license agreement of the map data. You can use the map data by touching [Yes] on the screen after agreeing to the terms of the license agreement (p.
-
Page 35: Operating Buttons While Playing
Operating buttons while playing Items on the LCD screen disappear if you do not attempt to operate the camcorder for a few seconds. To display the items again, touch the LCD screen. While playing a movie Volume Delete Context Next To stop To fast-forward Previous... - Page 36 (photo) Delete Context Next Previous To start/stop slide show during playback, movies are played as fast as about 5 times about 10 As you repeat selecting times about 30 times about 60 times. Select during pause to play movies slowly. ...
-
Page 37: Advanced Operations
Advanced operations Recording people clearly Recording the selected subject clearly (Face Priority) Your camcorder can track a face you select and adjust the focus, exposure, and skin tone of the face automatically. Touch one of the faces targeted. Recording voices clearly (Closer Voice) Your camcorder detects the face of a person and records the voice clearly. -
Page 38: Capturing Smiles Automatically (Smile Shutter)
Recording movies in various situations record a music concert, set [Closer Voice] to Selecting the suitable setting [Off]. automatically for the recording situation (Intelligent Auto) [Face Detection] (p. 67) Your camcorder records movies after Capturing smiles automatically selecting the most suitable setting for the (Smile Shutter) subjects or the situation automatically. -
Page 39: Recording Movies In Dim Places (Video Light)
Sound detection: Notes Keep a distance of about 0.3 m to 1.5 m (1 The camcorder detects and suppresses the foot to 5 feet) between the camcorder and the wind noise so that the voice of a person or subject. -
Page 40: Recording Images With The Selected Image Quality
Recording images with the selected image quality Recording mode and the media devices to which the images can be Selecting the image quality of copied movies (Recording mode) Recording mode You can switch the recording mode to Types of media select the movie quality when recording HQ/LP high definition image quality (HD) -
Page 41: Changing The Image Quality Of Photos
Recording information on your location (GPS) (HDR- For the standard definition image quality (STD) movies CX260V/CX580V/PJ260V/ [Standard ]: Standard quality, STD 9M (HQ) * PJ580V/PJ600V/XR260V) HDR-CX580V/PJ580/PJ580V/PJ600/PJ600V The default setting The following features are available if you Standard image quality (STD) is fixed to this use the GPS (Global Positioning System) value. -
Page 42: Obtaining A Map Of The Current Location (Triangulating Priority Mode)
GPS triangulating status areas, as the radio signals can best be received in such areas. The map always displays the north at the top. Searching for the satellites Obtaining a map of the current location (triangulating priority mode) Number of dots changes This feature is useful for checking a map of your current location while traveling. -
Page 43: Checking The Triangulating Status
satellites with the satellite icons () that Checking the triangulating appear on the satellite map. status When the camcorder succeeds in The camcorder displays the status of the triagulating your location, the triangulating GPS signal reception when you are unable gauge turns to green. -
Page 44: Enjoying A Digest Of Your Movies (Highlight Playback)
(HD) movies and photos, For details on locations or situations where similar to a short movie. radio signals cannot be received, refer to the “Handycam” User Guide. Press (View Images) (p. 32). Rotate the LCD panel to direct the GPS antenna ... -
Page 45: Saving Highlight Playback In Hd Image Quality ( Scenario Save)
Playback scenes in standard definition After the music file is transferred to the camcorder, if you cannot play the music, the image quality (STD) and share it music file may be damaged. Delete the music (upload it to the web, etc.). ... -
Page 46: Converting The Data Format To Std Image Quality (Highlight Movie)
starts again, select Select the desired operation Scenario Save]. when the item has been saved. Selecting [Share] allows you to To play back a saved scenario upload the Highlight movie to the [Playback Function] Select Web using the built-in “PlayMemories ... -
Page 47: Playing Images On A Tv
Playing images on a Connection methods and the image quality viewed on the TV screen differ depending on what type of TV is connected, and the connectors used. Connecting to a non- Connecting to a high high definition 16:9 definition TV * A/V Remote (wide) or 4:3 TV HDMI OUT jack *... -
Page 48: Enjoying 5.1Ch Surround Sound
source (p. 21). definition image quality (HD) movies recorded When movies are recorded with standard in 5.1ch sound is automatically output in 5.1ch definition image quality (STD), they are played sound. The sound of standard definition image back in standard definition image quality (STD) quality (STD) movies is converted to 2ch. -
Page 49: Using The Built-In Projector (Hdr-Pj260/Pj260V/Pj580/Pj580V/Pj600/Pj600V)
“Photo TV HD” standard. “Photo TV HD” allows for highly-detailed, photo-like depiction of subtle textures and colors. By connecting Sony’s Photo TV HD- compatible devices using an HDMI cable a whole new world of photos can be This screen appears the first time you use enjoyed in breathtaking HD quality. - Page 50 To turn off the projector, press Adjust the focus of the projected PROJECTOR. image using the PROJECTOR FOCUS lever. Notes Be careful of the following operations or PROJECTOR FOCUS lever situations while using the projector. Make sure not to project images towards the ...
-
Page 51: Editing
Editing Editing on your camcorder Notes Some basic editing operations can be done on the camcorder. If you want to perform advanced editing operations, install the “Expanded Feature” for the built-in “PlayMemories Home” software. You cannot restore images once they are ... -
Page 52: Capturing A Photo From A Movie
Select the point where you want Select the point where you want to divide the movie into scenes to capture a photo using using , and then select and then select A: Returns to the beginning of the selected movie A: Returns to the beginning of the selected B: Adjusts the capturing point with more movie... -
Page 53: Saving Movies And Photos With A Computer
DVD/Blu-ray For Mac The built-in “PlayMemories Home” software is not supported with Mac computers. To import images from the camcorder to your Mac and play them, use the appropriate software on your Mac. For details, visit the following URL. http://www.sony.co.jp/imsoft/Mac/... -
Page 54: Preparing A Computer (Windows)
Preparing a computer (Windows) multi-boot environment. Step 1 Checking the computer 64-bit editions and Starter (Edition) are not system supported. Windows Image Mastering API (IMAPI) Ver.2.0 or newer is required to use disc creation function, etc. Starter (Edition) is not supported. Microsoft Windows XP SP3 /Windows Vista Faster processor is recommended. - Page 55 Guide) on the software or visit the been created using the built-in “PlayMemories PlayMemories Home support page (http:// Home” software to DVD players or recorders, www.sony.co.jp/pmh-se/). as these devices do not support the AVCHD standard. If you do, you may not be able to Notes remove the disc from these devices.
- Page 56 To create a Blu-ray disc, the “BD Add-on Software” must be installed. Visit the following URL to install the software. http://support.d-imaging.sony.co.jp/ BDUW/ Your computer must support the creation of Blu-ray discs. BD-R (unrewritable) and BD-RE (rewritable)
-
Page 57: Starting The "Playmemories Home" Software
To use this software, you must download it from the following URL and install it on your computer. The “PlayMemories Home” software starts up. For Windows: http://www.sony.co.jp/ Double-click the ““PlayMemories imsoft/Win/ Home” Help Guide” short-cut For Mac: http://www.sony.co.jp/imsoft/ Mac/ icon on the computer screen to see how to use “PlayMemories... -
Page 58: Saving Images With An External Device
Saving images with an external device Disc creation guide You can save high definition image quality (HD) movies using an external device. Select the method to be used according to the device. External devices Connecting cable Page DVDirect Express DVD writer Saving images on a DVD disc Built-in USB cable of with high definition image quality... -
Page 59: The Devices On Which The Created Disc Can Be Played Back
The devices on which the created disc can be played back DVD disc with high definition image quality (HD) AVCHD format playback devices, such as a Sony Blu-ray disc player or a PlayStation DVD disc with standard definition image quality (STD) Ordinary DVD playback devices, such as a DVD player. -
Page 60: Creating A Disc With The Dvd Writer Or Recorder
2 Select the recording medium containing Refer to the instruction manual supplied with the device connected. the movie(s) you want to save (HDR- Sony DVD writer may not be available in some CX260V/CX580V/PJ260/PJ260V/PJ580/ countries/regions. PJ580V/PJ600/PJ600V/XR260V). 3 Select the image quality of the disc you Creating a disc with DVDirect will create. -
Page 61: Creating A High Definition Image Quality (Hd) Disc With A Dvd Writer
Disconnect the USB cable or the AC Adaptor Notes Subject the camcorder or the DVDirect Always maintain the firmware of the Sony Express to mechanical shock or vibration DVDirect (DVD Writer) to its latest version. Eject the memory card from the camcorder ... -
Page 62: Your Camcorder
When dubbing is finished, stop the recording device, and then your camcorder. Notes You cannot copy images to recorders connected with an HDMI cable. A/V Remote Since copying is performed via analog data Connector transfer, the image quality may deteriorate. High definition image quality (HD) movies ... -
Page 63: Saving Images On An External Media Device
Saving images on an external media device file. Please wait.] is displayed on the LCD screen. If [Repair Img. DB F.] is displayed on the You can save movies and photos on an camcorder screen, select external media device (USB storage devices), such as an external hard disk Select [Copy.] on the camcorder drive. - Page 64 For details on available external media devices, device go to the Sony support website in your country/region. 1 Select [Play without copying.] in step 2. The number of scenes you can save on the ...
-
Page 65: Customizing Your Camcorder
Customizing your camcorder Using menus The camcorder has various menu items under each of 6 menu categories. Shooting Mode (Items for selecting a shooting mode) p. 67 Camera/Mic (Items for customized shooting) p. 67 Image Quality/Size (Items for setting up image quality or size) p. 68 Playback Function (Items for playback) ... - Page 66 To find a menu item quickly The [Camera/Mic] and [Setup] menus have sub-categories. Select the sub-category icon so that the LCD screen displays the list of menus in the sub-category selected. Sub-category icons When you cannot select a menu item Grayed out menu items or settings are not available.
-
Page 67: Menu Lists
Menu lists Shooting Mode Movie .......... Records movies. Photo ........... Shoots photos. Smth Slw REC ......Records smooth slow-motion movies. Golf Shot ........Divides two seconds of fast movement into frames which are then recorded as a movie and photos. Keep the subject in the white frame in the center of the screen when recording. - Page 68 Microphone Closer Voice ..... Detects human faces and records the associated voice clearly. Blt-in Zoom Mic ..... Records movies with vivid sound appropriate to the zoom position. Auto Wind NR ....Recognizes the recording conditions and reduces the wind noise....
- Page 69 Format ....... Deletes and formats all data on the recording media. Repair Img. DB F..... Repairs the image database file on the recording media (p. 73). File Number ..... Sets how to assign the file number to photos. Playback Settings Data Code ......
- Page 70 Auto Area ADJ* ..... Corrects time differences automatically by acquiring the current location information from the GPS system. HDR-CX580V/PJ580/PJ580V/PJ600/PJ600V HDR-CX580V/PJ260/PJ260V/PJ580/PJ580V/PJ600/PJ600V/XR260V HDR-CX580V/PJ580/PJ580V HDR-CX260V/CX580V/PJ260V/PJ580V/PJ600V/XR260V HDR-CX260V/CX580V/PJ260/PJ260V/PJ580/PJ580V/PJ600/PJ600V/XR260V HDR-PJ260/PJ260V/PJ580/PJ580V/PJ600/PJ600V HDR-PJ600/PJ600V/XR260V...
-
Page 71: Others/Index
Change the setting of [Eco Mode] (p. 69), your data. or turn on the power again. See the “Handycam” User Guide (p. 9) for Charge the battery pack (p. 19). details on the symptoms of your camcorder, and ... -
Page 72: Self-Diagnosis Display/Warning Indicators
Total number of movie scenes or photos your Sony dealer or local authorized Sony exceeds the recordable capacity of your service facility. In this case, when you camcorder (p. 75, 78). Delete unnecessary contact them, give them all the numbers of images (p. - Page 73 both hands and record the image. However, note that the camera-shake warning indicator does not disappear. The battery pack is nearly used up. The drop sensor function (p. 69) is activated, The battery pack temperature is high. Change ...
-
Page 74: Recording Time Of Movies/Number Of Recordable Photos
Recording time of movies/number of recordable photos HDR-PJ600/PJ600V (unit: minute) “HD” stands for high definition image Continuous Typical recording Battery pack quality, and “STD” stands for standard recording time time definition image quality. Image quality NP-FV50 (supplied) Expected time of recording and NP-FV70 playback with each battery pack NP-FV100... -
Page 75: Expected Recording Time Of Movies
HDR-CX250/CX260V Expected recording time of (unit: minute) movies Battery pack Internal recording media (HDR- Image quality CX260V/CX580V/PJ260/PJ260V/ NP-FV50 (supplied) PJ580/PJ580V/PJ600/PJ600V/XR260V) NP-FV70 NP-FV100 HDR-CX260V/XR260V HDR-CX580V/PJ580/PJ580V High definition image quality (HD) in h (hour) and min (minute) (unit: minute) Recording time Battery pack Recording mode HDR-CX260V HDR-XR260V... - Page 76 Standard definition image quality (STD) in h (hour) and Recording time min (minute) Recording mode HDR-CX580V/ HDR-PJ580 PJ580V Recording time Recording mode [Highest 2 h 45 min 3 h 5 min HDR-PJ260 HDR-PJ260V Quality (2 h 45 min) (3 h 5 min) 3 h 45 min 3 h 5 min [Standard...
-
Page 77: Memory Card
(20) (40) (90) (180) You can change the recording sound format with [Audio Mode] (HDR-CX580V/PJ260/PJ260V/ (10) (25) (60) (120) (245) PJ580/PJ580V/PJ600/PJ600V/XR260V) (p. 68). When using a Sony memory card. (15) (40) (80) (165) (330) Notes (35) (75) (155) (310) -
Page 78: Expected Number Of Recordable Photos
640 360 dots/16:9 card may vary depending on the recording 640 480 dots/4:3 conditions. Notes The unique pixel array of Sony’s ClearVid and the image processing system of Sony’s BIONZ allows still image resolution equivalent to the sizes described. -
Page 79: About Handling Of Your Camcorder
Sometimes this malfunction cannot be repaired. If any solid object or liquid gets inside the casing, unplug your camcorder and have it checked by a Sony dealer before operating it any further. Built-in USB Cable Avoid rough handling, disassembling, ... -
Page 80: Moisture Condensation
Wash off any liquid that may have contacted protection features of the camcorder being your skin. activated in such situations. In this case, an If any liquid gets in your eyes, wash with indicator appears on the LCD screen. ... -
Page 81: When The Camcorder Is Connected To A Computer Or Accessories
towards the remote sensor to operate your We recommend using genuine Sony accessories. camcorder (p. 13). Genuine Sony accessories may not be available When no commands have been sent from the in some countries/regions. Wireless Remote Commander within a certain period, the light blue frame disappears. -
Page 82: Lcd Screen
In this case, replace the battery with outlet (wall socket) using the supplied AC a Sony CR2025 lithium battery. Use of another battery may present a risk of fire or explosion. Adaptor during the operation. -
Page 83: Rechargeable Battery
alcohol, chemical cloths, repellent, insecticide How to charge the pre-installed and sunscreen rechargeable battery Handling the camcorder with above substances on your hands Connect your camcorder to a wall outlet Leaving the casing in contact with rubber or (wall socket) using the supplied AC vinyl objects for a long period of time Adaptor, and leave it with the LCD screen... -
Page 84: Specifications
Specifications Gross: Approx. 5 430 000 pixels System Effective (movie, 16:9) Signal format: NTSC color, EIA standards Approx. 2 230 000 pixels HDTV 1080/60i, 1080/60p specification Effective (photo, 16:9): Movie recording format: Approx. 2 230 000 pixels HD: MPEG-4 AVC/H.264 AVCHD format Effective (photo, 4:3): Ver.2.0 compatible Approx. - Page 85 HD: 2.7 W STD: 2.5 W The unique pixel array of Sony’s ClearVid HDR-PJ600/PJ600V: and the image processing system (BIONZ) allow still image resolution HD: 3.9 W STD: 3.6 W equivalent to the sizes described. HDR-XR260V: SteadyShot] is set to [Standard] or HD: 3.5 W STD: 3.2 W...
- Page 86 2 5/8 in. 4 5/8 in.) (w/h/d) including the Storage temperature: ‒20 C to +60 C (‒4 °F to projecting parts +140 °F) 90 mm 82 mm 151.5 mm (3 5/8 in. Dimensions (approx.): 48 mm 29 mm ...
- Page 87 PlayStation 3 “InfoLITHIUM” is a trademark of Sony from PlayStation Store (where available.) Corporation. “x.v.Color” is a trademark of Sony Corporation. The application for PlayStation 3 requires “BIONZ” is a trademark of Sony Corporation. ...
-
Page 88: Products (Hdr-Cx260V/Cx580V/Pj260V/Pj580V/Pj600V/Xr260V)
LICENSE. If you do not agree to copy under “Limitation on Reverse Engineering, to the terms of this LICENSE, SONY is unwilling to Decompilation and Disassembly” Paragraph above), license the SOFTWARE to you. In such event, the... - Page 89 LIMITATION OF LIABILITY “applets”, incorporated into the SOFTWARE), and IN THIS SECTION SONY, ITS AFFILIATES, ITS any copies of the SOFTWARE, are owned by SONY, AND THEIR RESPECTIVE SUPPLIERS AND licensors and suppliers to SONY and their respective SONY’S LICENSORS SHALL BE COLLECTIVELY affiliates (such licensors and suppliers to SONY, REFERRED TO AS “SONY”...
- Page 90 2010 SOFTWARE delivered or otherwise furnished shall be marked and embedded the “Notice of Use” as Greece designated by SONY and/or its affiliates and shall be treated in accordance with such notice. Copyright Geomatics Ltd. Copyright and trademark information Hungary 1993-2011 NAVTEQ...
-
Page 91: Screen Indicators
Screen indicators Japan The following indicators appear when you change the settings. See page 28 and 35 also for the indicators that appear during recording or playing. Center Left Right Jordan Royal Jordanian Geographic Centre Mexico Bottom Fuente: INEGI (Instituto Nacional de Estadística y Geografía.) Left Norway... - Page 92 Center Flash (67)/Red Eye Reduction (67) Indicator Meaning Slideshow Set Indicators and their positions are approximate Warning (72) and may differ from what you actually see. Some indicators may not appear, depending on Playback mode (35) your camcorder model. ...
-
Page 93: Index
Beep ..........24 Grip belt ........16 “BRAVIA” Sync ......49 Photo Capture ......52 Built-in USB Cable .....20 Photos ..........27 Playback ........32 “Handycam” User Guide .....9 Playing discs ........59 HDMI Cable ........47 Calibration ........82 Playing scenarios ......46 Highlight Movie ......46 Care ..........79 “PlayMemories Highlight Playback .....44... - Page 94 Supplied Items ......18 Thumbnails .........33 Touch panel .........28 Tracking focus ......37 Triangulating .......42 Triangulating priority mode ..42 Tripod...........16 Troubleshooting ......71 TV ..........47 USB .........20, 54 USB Adaptor Cable ....63 USB Connect .......61 USB connection support cable ..........18 VBR ..........77 Video Light ........39 Wall outlet (wall socket) ....21 Warning indicators .....72 Wind noise ........68...
- Page 96 Se reporter à ces numéros lors des l’ e ntretien (la réparation) communications avec le détaillant Sony au de l’appareil dans sujet de ce produit. la documentation Modèle no HDR-...
- Page 97 CONSIGNES DE SÉCURITÉ IMPORTANTES CONSERVEZ CES INSTRUCTIONS. DANGER - AFIN DE RÉDUIRE LES RISQUES D’INCENDIE OU DE CHOC ÉLECTRIQUE, SUIVEZ SCRUPULEUSEMENT CES INSTRUCTIONS. Lisez ces instructions. Conservez ces instructions. Respectez tous les avertissements. Suivez toutes les instructions. ...
- Page 98 Représentation des fiches des cordons d’alimentation CA des pays ou régions du monde Type A Type B Type BF Type B3 Type C Type SE Type O (américain) (anglais) (anglais) (anglais) (CEE) (CEE) (océanien) La tension d’alimentation et le type de fiche représentatifs sont décrits dans le tableau suivant. Il est possible que plusieurs types de fiches et tensions d’alimentation soient utilisés dans une région.
- Page 99 Pays/régions Tension Fréquence (Hz) Type de fiche République de Corée Malaisie Philippines 220/230 Singapour Taïwan Thaïlande C/BF Vietnam Océanie Pays/régions Tension Fréquence (Hz) Type de fiche Australie Nouvelle-Zélande 230/240 Amérique du Nord Pays/régions Tension Fréquence (Hz) Type de fiche Canada États-Unis Amérique centrale Pays/régions...
- Page 100 Afrique Pays/régions Tension Fréquence (Hz) Type de fiche Algérie 127/220 République démocratique du Congo Egypte Ethiopie Kenya C/BF Nigéria C/BF Afrique du Sud 220/230 C/BF Tanzanie C/BF Tunisie...
- Page 101 RECYCLAGE DES ACCUMULATEURS AUX IONS Veillez à recharger la batterie à l’aide d’un DE LITHIUM chargeur Sony authentique ou d’un appareil capable de la recharger. Les accumulateurs aux ions de Tenez la batterie hors de la portée des petits ...
- Page 102 Pour toute question au sujet de cet appareil, conditions suivantes : (1) Cet appareil ne appeler : doit pas générer d’interférences nuisibles Sony Centre d’information à la clientèle et (2) il doit être en mesure d’accepter 1-800-222-SONY (7669). toute interférence reçue, y compris Le numéro ci-dessous concerne seulement les...
- Page 103 No de modèle : HDR-PJ260V Classe B, conformément à la Partie 15 de la Responsable : Sony Electronics Inc. réglementation de la FCC. Adresse : 16530 Via Esprillo, San Diego, Ces critères sont conçus pour fournir CA 92127 É.-U.
- Page 104 À propos du réglage de la langue N’utilisez pas votre caméscope dans des endroits très bruyants Des captures d’ é cran dans chaque langue locale (HDR-PJ600/PJ600V/XR260V). sont utilisées pour illustrer les procédures Lorsque le caméscope est raccordé à d’autres ...
- Page 105 « Handycam ») Dans le présent manuel, la mémoire interne (HDR-CX260V/CX580V/PJ260/PJ260V/ Le Guide d’utilisation du « Handycam » PJ580/PJ580V) et le disque dur (HDR- se trouve dans un manuel en ligne. PJ600/PJ600V/XR260V) du caméscope ainsi Consultez-le pour connaître les instructions que la carte mémoire sont appelés «...
- Page 106 « Handycam »)........
- Page 107 Enregistrement d’images avec la qualité d’image sélectionnée......42 Sélection de la qualité d’image des films (Mode d’enregistrement)... 42 Modification de la qualité...
- Page 108 Enregistrement d’images avec un appareil externe Guide de création de disques..............62 Appareils sur lesquels le disque gravé...
-
Page 109: Pièces Et Contrôles
Pièces et contrôles HDR-PJ600/PJ600V Les chiffres entre parenthèses ( ) correspondent aux pages de référence. HDR-CX250/CX260V HDR-XR260V HDR-CX580V/PJ580/PJ580V Active Interface Shoe (HDR-CX580V/ PJ580/PJ580V/PJ600/PJ600V) Objectif (objectif G) Flash (HDR-CX580V/PJ580/PJ580V/ HDR-PJ260/PJ260V PJ600/PJ600V)/Torche (HDR-CX580V/ PJ580/PJ580V) Microphone intégré Port du capteur à distance ou infrarouge (HDR-PJ260/PJ260V/PJ580/PJ580V/ PJ600/PJ600V) ... - Page 110 Écran LCD ou écran tactile (25, 26) Si vous faites pivoter le panneau LCD de HDR-CX580V/PJ260/PJ260V/PJ580/ 180 degrés, vous pouvez le rabattre avec l’ é cran PJ580V/PJ600/PJ600V/XR260V LCD orienté vers l’ e xtérieur. Cette position est très pratique pour la lecture. ...
- Page 111 Touche MODE Témoin de mode (Film) ou (Photo) (29, 29) Touche RESET Appuyez sur RESET à l’aide d’un objet pointu. Appuyez sur RESET pour réinitialiser tous les réglages, y compris celui de l’horloge. HDR-PJ260/PJ260V/ Prise (casque) (HDR-CX580V/PJ260/ PJ580/PJ580V PJ260V/PJ580/PJ580V/PJ600/PJ600V/ XR260V)
- Page 112 Réceptacle pour trépied Fixez un trépied (vendu séparément : la longueur de la vis doit être inférieure à 5,5 mm (7/32 po)). Fente pour carte mémoire (27) Levier de dégagement BATT (bloc-piles) (23) Fixation de la dragonne HDR-PJ600/PJ600V/XR260V Fixation du pare-soleil (HDR-CX580V/PJ580/ PJ580V/PJ600/PJ600V)
- Page 113 Pour retirer le pare-soleil, tournez sa bague de Touche STOP sécurité dans le sens opposé de la flèche. Touche DISPLAY (30) Retirez le pare-soleil lorsque vous utilisez la Émetteur télécommande (fournie) pour faire fonctionner Touche START/STOP (29) le caméscope.
-
Page 114: Comment Démarrer
Comment démarrer Accessoires fournis Les chiffres entre parenthèses ( ) indiquent Pare-soleil (seulement pour HDR-CX0V/PJ0/PJ0V/ PJ00/PJ00V) (1) les quantités fournies. Caméscope (1) Adaptateur CA (1) Télécommande sans fil (seulement pour HDR-PJ0/ PJ0V/PJ0/PJ0V/PJ00/PJ00V) (1) Câble d’alimentation (1) Bloc-piles rechargeable NP-FV0 (1) Câble HDMI (1) «... -
Page 115: Charge Du Bloc-Piles
Charge du bloc-piles Fermez l’écran LCD et fixez le bloc-piles. Bloc-piles Raccordez l’adaptateur CA () HDR-PJ600/ et le câble d’alimentation () au PJ600V/XR260V caméscope et à la prise murale. Le témoin CHG (Charge) s’allume. Le témoin CHG (Charge) s’ é teint lorsque ... -
Page 116: Charge Du Bloc-Piles À L'aide De Votre Ordinateur
Vous pouvez charger le bloc-piles en branchant le câble USB intégré à une prise murale à l’aide d’un chargeur AC-UD10 USB ou d’un adaptateur CA (vendu séparément). Vous ne pouvez pas utiliser d’appareil d’alimentation électrique portable Sony CP-AH2R, CP-AL ou AC- UP100 (vendu séparément) pour charger votre caméscope. - Page 117 Pour retirer le bloc-piles Fermez l’ é cran LCD. Faites glisser le levier de dégagement BATT (bloc-piles) (), puis retirez le bloc-piles (). Pour utiliser une prise murale comme source d’alimentation Effectuez les mêmes branchements que pour charger le bloc-piles. Le bloc-piles ne se décharge pas même s’il demeure en place.
-
Page 118: Charge Du Bloc-Piles À L'étranger
Charge du bloc-piles à l’étranger L’adaptateur CA fourni avec le caméscope vous permet de charger le bloc-piles dans n’importe quel pays ou région offrant une tension comprise entre 100 V et 240 V CA, 50 Hz et 60 Hz. N’utilisez jamais de convertisseur de tension électronique. -
Page 119: Mise Sous Tension Etréglage De La Date Et De L'heure
Mise sous tension etréglage de la date et de l’heure Ouvrez l’écran LCD de votre caméscope et mettez-le sous tension. Vous pouvez également allumer votre caméscope en appuyant sur POWER (p. 17). Sélectionnez la langue souhaitée, Appuyez sur la touche puis sélectionnez [Suiv.]. - Page 120 Pour éteindre l’appareil Fermez l’ é cran LCD ou appuyez sur la touche POWER (p. 17). Pour ajuster l’angle du panneau LCD Ouvrez d’abord le panneau LCD à 90 degrés par rapport au caméscope (), puis ajustez 90 degrés (max.) l’angle ().
-
Page 121: Préparation Du Support D'enregistrement
Préparation du support d’enregistrement Les supports d’ e nregistrement pouvant être utilisés sont affichés sur l’ é cran de votre caméscope sous la forme des icônes suivantes : Support d’ e nregistrement par Autre support d’ e nregistrement défaut Carte mémoire —... - Page 122 Pour éjecter la carte mémoire Ouvrez le cache et poussez légèrement sur la carte mémoire une fois. Remarques Pour assurer l’ o pération stable de la carte mémoire, on recommande de formater celle-ci avec le caméscope avant la première utilisation (p. 73). Le formatage de la carte mémoire effacera toutes les données qui y sont stockées et celles-ci seront irrécupérables.
-
Page 123: Enregistrement Ou Lecture
Enregistrement ou Lecture Enregistrement Par défaut, les films et les photos sont enregistrés sur le support suivant. Les films sont enregistrés en mode de qualité d’image haute définition (HD). HDR-CX250 : Carte mémoire HDR-CX260V/CX580V/PJ260/PJ260V/PJ580/PJ580V/PJ600/PJ600V/XR260V : Support d’enregistrement interne Enregistrement de films Ouvrez l’écran LCD et appuyez sur MODE pour allumer le témoin (Film). - Page 124 Appuyez légèrement sur la touche PHOTO pour faire la mise au point, puis enfoncez-la complètement. Une fois la mise au point correctement effectuée, le témoin de verrouillage AE/AF apparaît sur l’ é cran LCD. Pour afficher les options sur l’écran LCD Les options sur l’...
- Page 125 Mise au point continue (39) Zoom, autonomie du bloc-piles Compteur (heures : minutes : secondes), prise de photo, support d’ e nregistrement/de lecture/d’ é dition (98) Touche d’annulation de la mise au point continue (39) Touche Automatique intelligent (40) ...
- Page 126 Si des points circulaires blancs apparaissent sur les photos (HDR-CX580V/PJ580/ PJ580V/PJ600/PJ600V) Ces points sont causés par des particules (poussière, pollen, etc.) en suspension près de l’ o bjectif. Lorsqu’ils sont accentués par le flash du caméscope, ils apparaissent comme des points circulaires blancs. Pour réduire les «...
-
Page 127: Zoom
Zoom Utilisez la manette de zoom motorisé pour agrandir ou réduire la taille de l’image. W (grand angle) : vue plus large T (téléobjectif) : vue rapprochée Il est possible de grossir des images à l’aide de Extended Zoom comme suit. Pour HDR-CX250/CX260V/PJ260/PJ260V/ ... -
Page 128: Lecture
Lecture Vous pouvez rechercher des images enregistrées par date et heure d’ e nregistrement (Visualiser évènement) ou par emplacement d’ e nregistrement (Visualiser carte) (HDR-CX260V/CX580V/ PJ260V/PJ580V/PJ600V/XR260V). Ouvrez l’écran LCD et appuyez sur la touche du caméscope pour passer en mode de lecture. Vous pouvez passer en mode de lecture en ... - Page 129 Nom de l’ é vènement Heure d’ e nregistrement/nombre de photos Pour revenir à l’ é cran Touche de changement de Visualiser évènement type d’image Film Précédent/Suivant Photo Passage au mode d’ e nregistrement de films ou de photos Dernière image lue Les «...
- Page 130 Sélectionnez l’image de votre choix Lorsque vous utilisez les données cartographiques pour la première fois Un message s’affiche pour vous demander de confirmer que vous acceptez les modalités du contrat de licence des données cartographiques. Après avoir accepté les modalités d’utilisation de la licence, vous pouvez utiliser les données cartographiques en touchant [Oui] sur l’...
-
Page 131: Touches De Fonctionnement Pendant La Lecture
Touches de fonctionnement pendant la lecture Les options sur l’ é cran LCD disparaissent si vous n’ e ssayez pas de faire fonctionner le caméscope pendant plusieurs secondes. Pour afficher de nouveau les options, touchez l’ é cran LCD. Pendant la lecture d’un film Volume Effacer Contexte... - Page 132 (Photo) Effacer Contexte Suivant Précédent Pour lancer ou arrêter un diaporama Lorsque vous continuez à sélectionner pendant la lecture, les films sont lus à une vitesse d’ e nviron 5 fois environ 10 fois environ 30 fois environ 60 fois la normale. Sélectionnez en mode pause pour lire les films au ralenti.
-
Page 133: Opérations Avancées
Opérations avancées Enregistrer nettement des individus Votre caméscope règle automatiquement la mise au point. Enregistrer nettement le sujet sélectionné (Priorité visage) Votre caméscope peut repérer un visage sélectionné et ajuster automatiquement la mise au point, l’exposition et la couleur de la peau. -
Page 134: Prise Automatique Des Sourires (Obturateur De Sourire)
Enregistrement de films dans des situations diverses Pour enregistrer le son nettement sans interférence, comme lors d’un concert, réglez [Voix plus proche] à [Désactivé]. Sélection automatique du réglage qui convient à la [Détection de visage] (p. 71) situation d’enregistrement (Automatique intelligent) Prise automatique des sourires... - Page 135 Détection du son : Remarques Laissez une distance d’ e nviron 0,3 m à 1,5 m Le caméscope détecte et supprime le bruit (1 pied à 5 pieds) entre le caméscope et le sujet. du vent pour enregistrer nettement la voix La torche produit une forte lumière.
-
Page 136: Enregistrement D'images Avec La Qualité D'image Sélectionnée
Enregistrement d’images avec la qualité d’image Mode d’enregistrement et supports sélectionnée sur lesquels les images peuvent être copiées Sélection de la qualité Mode d’ e nregistrement d’image des films (Mode Types de support d’enregistrement) HQ/LP Sur ce caméscope Vous pouvez changer le mode Support d’enregistrement afin de sélectionner d’... -
Page 137: Modification De La Qualité D'image Des Photos
] : qualité 1440 1080/60i, AVC [Standard HD 9M (HQ) * Nombre de photos pouvant être enregistrées ] : qualité 1440 1080/60i, [Longue durée (p. 83) AVC HD 5M (LP) Pour les films avec une qualité d’image à définition standard (STD) [Standard ] : qualité... -
Page 138: Enregistrement D'information Sur L'emplacement (Gps)
Enregistrement d’information sur l’emplacement (GPS) (HDR-CX260V/CX580V/ PJ260V/PJ580V/PJ600V/ XR260V) Les fonctions suivantes sont disponibles si vous utilisez la fonction GPS (Global Positioning System). État de la triangulation GPS Enregistrement d’information d’ e mplacement sur des films ou des Recherche de photos ([Activé] est le réglage par satellites défaut.) -
Page 139: Affichage D'une Carte De Votre Emplacement Actuel
Si vous ne voulez pas enregistrer Remarques Si vous sélectionnez un certain point sur l’ é cran, l’information relative à la carte affiche la zone ayant ce point comme l’emplacement centre. Sélectionnez afin de repositionner votre emplacement actuel au centre de l’ é cran. ... - Page 140 Vérification des icônes de satellite/ est impossible, reportez-vous au Guide jauge de triangulation du GPS d’utilisation du « Handycam ». Tournez l’ é cran LCD pour orienter l’antenne La couleur des icônes des satellites du GPS GPS vers le ciel.
-
Page 141: Profitez D'un Abrégé De Vos Films (Lecture De Sélection)
Profitez d’un abrégé de vos films (lecture de sélection) Vous pouvez profiter d’un abrégé de films et photos en qualité d’image haute définition (HD), à la manière d’un petit film. Sélectionnez [Votre position] dans le Appuyez sur (Afficher menu pour utiliser le mode de priorité de triangulation (p. - Page 142 A : le caméscope lit de nouveau les Pour effacer les points, sélectionnez scènes de lecture de sélection. [Enlever ts les points]. B : vous pouvez enregistrer les scènes Remarques de lecture de sélection en qualité Les scènes de lecture de Sélection changent ...
-
Page 143: Enregistrement D'une Lecture De Sélection En Qualité D'image Haute
Pour effacer un scénario enregistré, sélectionnez Enregistrement d’une lecture [Supprimer]/[Supp. tout] pendant la de sélection en qualité d’image lecture du scénario. haute définition HD (Enreg. de scénario) Conversion du format de Vous pouvez enregistrer votre lecture de données à la qualité d’image STD Sélection favorite en tant que «... -
Page 144: Lecture Des Images Sur Un Téléviseur
Lecture des images sur un téléviseur Pour lire un film de sélection Les méthodes de raccordement et la qualité d’image sur le téléviseur varient en fonction [Fonction Sélectionnez du type de téléviseur raccordé et des lecture] [Sélection Film] ainsi que connecteurs utilisés. -
Page 145: Profiter D'un Son Ambiophonique 5,1 Canaux
Remarques Consultez aussi le mode d’ e mploi du téléviseur. Utilisez l’adaptateur AC fourni comme source d’alimentation (p. 23). Lorsque l’ e nregistrement a été fait avec une qualité d’image à définition standard (STD), les films sont lus avec une qualité d’image à... - Page 146 Avec un téléviseur de type mono Remarques Si vous tentez d’ é couter un son enregistré en (doté d’une seule prise d’entrée mode 5,1 canaux avec les haut-parleurs sur audio) votre caméscope, il sera automatiquement converti en mode 5,1 canaux et restitué en son Raccordez la fiche jaune du câble de 2 canaux.
-
Page 147: Utilisation Du Projecteur Intégré
Remarques Le raccordement des appareils de Sony L’ é cran LCD s’ é teint lorsqu’une image est projetée. Utilisez la manette de zoom motorisé/ compatibles au mode Photo TV HD à... -
Page 148: Pj600V)
Cet écran apparaît lors de la première Lorsque vous utilisez la télécommande sans fil, utilisez /// pour déplacer le utilisation du projecteur intégré. cadre de sélection et appuyez sur ENTER Ajustez la mise au point de pour commencer la lecture de l’ é lément l’image projetée à... -
Page 149: Édition
Édition Édition sur votre caméscope Remarques Vous pouvez effectuer certaines opérations d’ é dition de base sur le caméscope. Pour des opérations d’ é dition avancées, installez « Fonction développée » pour le logiciel « PlayMemories Home » intégré. Vous ne pouvez pas récupérer les images qui ... -
Page 150: Prise De Photo À Partir D'un Film
Sélectionnez l’endroit où vous Sélectionnez l’endroit où souhaitez diviser le film en vous souhaitez prendre une scènes à l’aide de , puis photo à l’aide de , puis sélectionnez sélectionnez A : Permet de retourner au début du film A : Permet de retourner au début du film sélectionné. -
Page 151: Enregistrement De Films Et De Photos Avec Un Ordinateur
Le logiciel « PlayMemories Home » intégré n’ e st pas pris en charge par les ordinateurs Mac. Pour importer des images du caméscope vers votre Mac et les lire, utilisez le logiciel adapté à votre Mac. Pour plus de détails, rendez-vous à l’adresse suivante. http://www.sony.co.jp/imsoft/Mac/... -
Page 152: Préparation D'un Ordinateur (Windows)
Préparation d’un ordinateur (Windows) Autres Étape 1 Vérification du système Port USB (doit être fourni en équipement informatique standard, Hi-Speed USB (USB compatible 2.0)), disque Blu-ray/graveur DVD. Le système de fichier NTFS ou exFAT est recommandé comme système de fichier pour Microsoft Windows XP SP3 /Windows Vista le disque dur. - Page 153 (Guide d’assistance de « PlayMemories Sous Windows 7, sélectionnez Home ») sur le logiciel ou visitez la page de support PlayMemories Home (http://www. [PlayMemories Home] dans sony.co.jp/pmh-se/). la fenêtre Device Stage. Sous Windows XP/Windows Vista, Remarques sélectionnez [Ordinateur] (sous Veillez à régler [Réglage USB LUN] à [Multiple] ...
- Page 154 AVCHD. Si vous le Utilisez l’adresse Internet suivante pour faites, il pourrait s’avérer impossible de retirer installer le logiciel. le disque. http://support.d-imaging.sony.co.jp/ Ce caméscope enregistre des images en haute définition au format AVCHD. À l’aide BDUW/ du logiciel PC inclus, des images en haute définition peuvent être copiées sur un support...
-
Page 155: Lancement Du Logiciel « Playmemories Home
Pour utiliser ce logiciel, vous devez le télécharger en utilisant l’adresse Internet suivante et l’installer sur votre ordinateur. Le logiciel « PlayMemories Home » Pour Windows : http://www.sony.co.jp/ démarre. imsoft/Win/ Double-cliquez sur l’icône de Pour Mac : http://www.sony.co.jp/imsoft/ raccourci « Guide d’assistance Mac/ de «... -
Page 156: Guide De Création De Disques
Enregistrement d’images avec un appareil externe Guide de création de disques Il est possible d’enregistrer des films avec une qualité d’image haute définition (HD) sur un appareil externe. Sélectionnez la méthode d’enregistrement selon l’appareil. Appareils externes Câble de Page raccordement Graveur DVDirect Express DVD Enregistrement d’images sur un Câble USB intégré... -
Page 157: Appareils Sur Lesquels Le Disque Gravé Peut Être Lu
Appareils sur lesquels le disque gravé peut être lu Disque DVD en qualité d’image haute définition (HD) Appareils de lecture au format AVCHD, par exemple un lecteur de disque Blu-ray Sony ou une PlayStation Disque DVD enregistré avec une qualité d’image à définition standard (STD) Appareils de lecture de DVD ordinaires, comme un lecteur DVD. -
Page 158: Création D'un Disque Avec Le Graveur Dvd
Consultez le mode d’ e mploi fourni avec 1 Sélectionnez [OPT. GRAVURE DIS.] à l’appareil raccordé. l’ é tape 3 précédente. Le graveur DVD Sony n’ e st peut-être pas 2 Sélectionnez le support d’ e nregistrement disponible dans certains pays ou certaines régions. -
Page 159: Création D'un Disque En Qualité D'image À Définition Standard (Std) Avec
Remarques Mettez toujours à jour le micrologiciel du DVDirect Sony (graveur DVD) afin d’utiliser la Création d’un disque en qualité dernière version. Pour obtenir de plus amples d’image haute définition (HD) renseignements, visitez le site Web suivant. - Page 160 Si l’appareil d’ e nregistrement est équipé HDR-CX250/CX260V/CX580V/PJ260/PJ260V/ d’un sélecteur d’ e ntrée, réglez-le sur le PJ580/PJ580V mode d’ e ntrée adéquat. HDR-PJ600/PJ600V/XR260V Raccordez votre caméscope aux prises Raccordez votre caméscope à d’ e ntrée de l’appareil d’ e nregistrement. l’appareil d’enregistrement à...
-
Page 161: Enregistrement D'images Sur Un Support Externe
Enregistrement d’images sur un support externe de la base de données d’images. Veuillez patienter.] est affiché à l’ é cran LCD. Si [Rép.f.base.don.img] est affiché sur Vous pouvez enregistrer des films et l’ é cran du caméscope, sélectionnez des photos sur un support externe (périphériques de stockage USB), tel qu’un Sélectionnez [Copier.] sur l’écran disque dur externe. - Page 162 Pour en savoir plus sur les supports externes compatibles, visitez le site Web Sony de votre 1 Sélectionnez [Lire sans copier.] à l’ é tape 2. pays ou région. Le nombre de scènes que vous pouvez ...
-
Page 163: Personnalisation De Votre Caméscope
Personnalisation de votre caméscope Utilisation des menus Le caméscope comporte diverses options de menu sous chacune des 6 catégories de menu. Mode prise de vue (Options de sélection du mode de prise de vue) p. 71 Caméra/Micro (Options pour prises de vue personnalisées) p. 71 Qualité... - Page 164 Pour trouver rapidement une option de menu Les menus [Caméra/Micro] et [Configuration] ont des sous-catégories. Sélectionnez l’icône de sous-catégorie de sorte que l’ é cran LCD affiche la liste des menus dans la sous-catégorie sélectionnée. Icônes de sous-catégorie Si vous ne pouvez pas sélectionner une option de menu Les options de menu ou les réglages en grisé...
-
Page 165: Listes Des Menus
Listes des menus Mode prise de vue Film ..........Enregistre des films. Photo ........... Prend des photos. ENREG. lent régulier ....Enregistre des films au ralenti. Clip golf ........Divise 2 secondes de mouvement rapide en images qui sont ensuite enregistrées comme un film ou des photos. - Page 166 Attén. yeux rouges..Empêche le phénomène des yeux rouges lorsque vous utilisez un flash. Microphone Voix plus proche .... Détecte des visages humains et enregistre nettement la voix associée. Zoom micro intégré ..Tourne des films avec un son plus vif, approprié à la position du zoom. Réd.
- Page 167 Configuration Réglages support ..Sélectionne le type de support d’ e nregistrement (p. 27). Sélection support* Informations support ... Affiche des informations concernant le support d’ e nregistrement. Formatage ....... Supprime et formate toutes les données sur le support d’ e nregistrement. Rép.f.base.don.img ..
- Page 168 Mode éco ......Règle l’ é cran LCD et la source d’alimentation pour qu’ils s’ é teignent automatiquement. Mode démonstration ... Règle la lecture du film de démonstration sur les fonctions du caméscope. Réglages horloge Régl. date & heure ..Règle la date et l’heure. Réglage zone ....
-
Page 169: Autres/Index
é tudier défaillance technique. le problème. Cependant, votre détaillant Sony ne copie ou ne conserve pas vos données. L’appareil s’éteint soudainement. Reportez-vous au Guide d’utilisation Utilisez l’adaptateur CA (p. 23). du « Handycam » (p. 11) pour en savoir ... - Page 170 Le réglage par défaut entraîne « PlayMemories Home » ne fonctionne automatiquement la mise hors tension du pas correctement. caméscope lorsqu’il est inutilisé pendant Quittez « PlayMemories Home » et deux minutes. Modifiez le réglage de l’ o ption ...
-
Page 171: Codes D'autodiagnostic Ettémoins D'avertissement
Le bloc-piles est presque épuisé. avec votre détaillant Sony ou un atelier de service autorisé par Sony. Dans ce cas, lorsque vous les contacterez, donnez- La température du bloc-piles est élevée. leur tous les chiffres du code d’ e rreur Changez le bloc-piles ou placez-le dans un endroit frais. -
Page 172: Durée D'enregistrement Des Films Et Nombre De Photos Pouvant Être
Durée d’enregistrement des films et nombre de photos pouvant être Le flash présente un problème de enregistrées fonctionnement. « HD » signifie « qualité d’image haute La lumière est insuffisante ; un bougé de définition » et « STD » signifie « qualité caméscope peut facilement se produire. -
Page 173: Bloc-Piles
HDR-PJ260/PJ260V Les durées ont été mesurées à 25 °C (77 °F). 10 °C à 30 °C (50 °F à 86 °F) constitue la plage (en : minutes) de température recommandée. Durée Durée Les durées d’ e nregistrement et de lecture seront ... -
Page 174: Durée Approximative Prévue D'enregistrement Des Films
HDR-PJ600/PJ600V Durée d’ e nregistrement Mode (en : minutes) d’ e nregistrement HDR-CX260V HDR-XR260V Bloc-piles [Longue 5 h 15 min 65 h 30 min durée Qualité de l’image (4 h 20 min) (53 h 30 min) (2 canaux) NP-FV50 (fourni) NP-FV70 Qualité... - Page 175 HDR-PJ600/PJ600V Qualité d’image à définition standard (STD), en heures (h) et en minutes (min) Qualité d’image haute définition (HD), en heures (h) et Durée d’ e nregistrement en minutes (min) Mode HDR-CX580V/ d’ e nregistrement Durée d’ e nregistrement HDR-PJ580 Mode PJ580V d’...
- Page 176 à l’aide de l’ o ption [Mode audio] (HDR-CX580V/PJ260/PJ260V/ (15) (40) (80) (165) (330) PJ580/PJ580V/PJ600/PJ600V/XR260V) (p. 72). Lorsque vous utilisez une carte mémoire Sony. (35) (75) (155) (310) (630) Remarques Qualité d’image à définition standard (STD) La durée d’...
-
Page 177: Nombre Prévu De Photos Pouvant Être Enregistrées
640 360 points/16:9 La matrice de pixels unique du capteur 640 480 points/4:3 ClearVid de Sony et le système de traitement d’image BIONZ de Sony permettent d’ o btenir une résolution d’image fixe qui équivaut aux formats présentés. -
Page 178: À Propos Du Maniement Du Caméscope
Évitez de viser le soleil. Cela pourrait entraîner caméscope, débranchez-le et faites-le vérifier une défaillance du caméscope. Effectuez par un détaillant Sony avant de l’utiliser de des prises de vue du soleil uniquement dans nouveau. des conditions de lumière faible, comme au Évitez toute manipulation brusque de l’appareil,... - Page 179 En cas de fuite de l’ é lectrolyte d’une pile : caméscope et du bloc-piles communiquez avec un atelier de service autorisé par Sony ; Si la température du caméscope ou du bloc- nettoyez la partie de la peau qui est entrée en ...
- Page 180 Sony authentiques. De la condensation peut se former lorsque vous Les accessoires authentiques Sony peuvent transportez le caméscope d’un endroit froid à ne pas être proposés dans votre pays ou votre un endroit chaud (ou l’inverse), ou lorsque vous région.
-
Page 181: Cran Lcd
Dans ce cas, veuillez remplacer la pile par une pile au lithium Retirez la feuille de protection avant d’utiliser la CR2025 de Sony. L’utilisation d’une autre télécommande sans fil. pile peut entraîner un risque d’incendie ou Feuille de protection d’... - Page 182 À propos de l’étalonnage de l’écran de manipuler le caméscope avec les substances mentionnées ci-dessus sur les tactile ([Calibration]) mains ; de mettre en contact le boîtier avec des objets Les touches de l’ é cran tactile peuvent ne en caoutchouc ou en vinyle pendant une pas fonctionner correctement.
- Page 183 Toutefois, même si la pile rechargeable Remarque sur la mise au rebut ou le préinstallée n’ e st pas chargée, le transfert de la carte mémoire fonctionnement du caméscope n’ e st pas Même si vous supprimez les données affecté tant que vous n’ e nregistrez pas la enregistrées sur la carte mémoire ou si date.
-
Page 184: Spécifications
Spécifications Pixels d’ e nregistrement (photo, 16:9) : Système max. 8,9 mégapixels (3 984 2 240) Format du signal : NTSC color, normes EIA Brut : environ 5 430 000 pixels HDTV 1080/60i, 1080/60p spécification Réelle (film, 16:9) Format d’ e nregistrement de film : environ 2 230 000 pixels HD : compatible au format MPEG-4 AVC/ Réelle (photo, 16:9) :... - Page 185 HDR-CX250/CX260V : vitesse d’ o bturation 1/30 seconde) HD : 2,6 W STD : 2,4 W HDR-CX580V/PJ580/PJ580V : La matrice de pixels ingénieuse Sony HD : 3,1 W STD : 2,9 W de ClearVid et le système de traitement HDR-PJ260/PJ260V : d’image (BIONZ) permettent d’...
- Page 186 Consommation d’ é nergie : 18 W 90 mm 82 mm 151,5 mm (3 5/8 po 3 1/4 po 6 po) (l/h/p) incluant les parties Tension de sortie : 8,4 V CC saillantes, le pare-soleil fourni et le bloc-piles Température de fonctionnement : 0 °C à...
- Page 187 Sony Corporation. « BIONZ » est une marque de commerce de Sony Corporation. Rehaussez vos moments de divertissement est une marque déposée de Sony avec votre PlayStation 3 en téléchargeant de Corporation. PlayStation 3 l’application pour PlayStation Store «...
-
Page 188: Contrat De Licence Utilisateur Final Pour Les Données Cartographiques
Si vous n’acceptez pas les termes de cette LICENCE, de façon permanente tous vos droits sous cette SONY n’ e st pas disposé à vous accorder une licence LICENCE uniquement dans le cadre d’une vente ou pour le LOGICIEL. Dans un pareil cas, le LOGICIEL d’un transfert du PRODUIT, à... - Page 189 Confidentialité. Vous acceptez de conserver pour SERA ININTERROMPU OU SANS ERREUR. vous les informations contenues dans le LOGICIEL SONY NE GARANTIT PAS OU NE FAIT AUCUNE qui ne sont pas connues publiquement, et de ne DÉCLARATION CONCERNANT L’UTILISATION, pas divulguer ces informations sans l’accord écrit L’INCAPACITÉ...
- Page 190 Die Grundlagendaten wurden mit Genehmigung der Ces conditions constituent le contrat entier entre zustaendigen Behoerden entnommen. SONY et vous dépendant du sujet de ceci et supplantent dans leur intégralité tous les précédents Grande-Bretagne accords écrits ou oraux existants entre nous Contains Ordnance Survey data ...
-
Page 191: Témoins D'écran
Témoins d’écran Japon Les icônes suivantes apparaissent lorsque vous modifiez les réglages. Voir aussi page 30 et 37 pour les icônes qui apparaissent pendant l’ e nregistrement ou la lecture. Centre Gauche Droite Jordanie Royal Jordanian Geographic Centre Mexique En bas Fuente: INEGI (Instituto Nacional de Estadística y Geografía.) - Page 192 En bas Automatique intelligent (détection de visage/ Icône Signification détection de scène/ Niv. référence micro faible détection de secousses de (72) caméscope/détection du [Réd. bruit vent auto] réglé son) (40) à [Désactivé] (72) Capt. chute désactivé [Voix plus proche] réglé à Capt.
-
Page 193: Index
« PlayMemories Home » ..20, 61 Pare-soleil ........18 votre ordinateur ......22 Guide d’utilisation du Photos ..........29 Code données ......26 « Handycam »......11 « PlayMemories Codes d’autodiagnostic ....77 Home » ......20, 57, 58 Condensation de l’humidité ..86 Heure d’ é té ........25 Priorité... - Page 194 Réparation ........75 RESET ..........17 Sélection Film ......49 Sélection support ......27 Son ambiophonique 5,1 canaux ........51 Spécifications ......90 Support d’ e nregistrement...27 Support externe ......67 Taille d’image ......43 Télécommande sans fil ..19, 87 Témoins d’ é cran ....30, 97 Témoins d’avertissement ....77 Torche...........41 Touches de fonctionnement ..37 Trépied .........18...