
Related Manuals for Miele KWL 1090 S


Summary of Contents for Miele KWL 1090 S
- Page 1 Operating and installation instructions Wine storage unit KWL 1090 S KWL 1630 S KWL 1900 S It is to read these operating instructions before installing or using the machine, to avoid the risk of accident or damage to the machine.
-
Page 2: Table Of Contents
......... 4 . - Page 3 ..........20 .
-
Page 4: Safety Lock
a Safety lock indicator light d On/Off button b Temperature display e Locking button c Controls for setting the temperature f Alarm button upper button: warmer lower button: colder g Interior lighting k Condensate channel and drain hole h Wooden décor strip for descriptive l Active charcoal filter labels i Shelves... - Page 5 Old appliances contain materials which can be reclaimed or recycled. Please The transport and protective packing contact your dealer, your waste collec- has been selected from materials which tion centre or scrap merchant about are environmentally friendly for disposal potential recycling schemes. and can normally be recycled.
- Page 6 This appliance complies with all rele- This appliance contains the coolant vant legal safety requirements. Im- Isobutane (R600a), a gas which proper use of the appliance can, breaks down naturally. It is however however, present a risk of both per- flammable.
- Page 7 The electrical safety of this appli- Do not connect the appliance to ance can only be guaranteed when the mains electricity supply by an continuity is complete between the ap- extension lead. pliance and an effective earthing sys- Extension leads do not guarantee the tem which complies with local and na- required safety of the appliance.
- Page 8 In countries where there are areas which may be subject to infestation by cockroaches or other vermin, pay particular attention to keeping the appli- ance and its surroundings in a clean condition at all times. Any damage which may be caused by cockroaches or other vermin will not be covered by the appliance guarantee.
-
Page 9: Temperature Range
^ Clean the inside of the appliance and ^ Press the On-Off button. the accessories with warm water and The temperature display goes out and a little washing up liquid and then dry the cooling process is switched off. (If with a soft cloth. - Page 10 Wine can be stored at a temperature of The temperature is set using the two between 5 and 18 °C. The optimum buttons next to the temperature display. temperature is around 10 - 12 °C. Most white wines can be consumed at this Press the temperature.
-
Page 11: Humidity Level
If you have adjusted the temperature, The level of brightness can be adjusted to be: – by pressing the alarm but- before ton and whilst holding it in, press the checking the temperature display as it upper button next to the temperature will take this long for the display to display. - Page 12 Wine keeps on maturing, depending on the surrounding conditions. The length of time for which wine can be kept in good condition will therefore depend not only on the temperature but also the air quality. The active charcoal filter and dynamic cooling system maintain the air quality in the appliance.
-
Page 13: Shelves
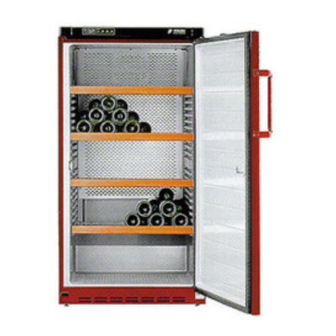
– KWL 1090 S: up to 115 bottles The shelves can support a maximum load of up to 50 kg . The shelves slope – KWL 1630 S: up to 169 bottles slightly towards the rear so that bottles –... - Page 14 Your appliance has been fitted with a warning system which ensures that the temperature cannot rise or fall unno- Once the set temperature has been ticed and impair the wine. The alarm reached in the appliance the alarm tone system is always active. It does not stops and the temperature is displayed need to be activated separately.
- Page 15 Condensate and frost can build up on the back wall of the appliance whilst it is in use. These are automatically re- moved and defrosted by the appliance. The condensate is drained away via a channel and drain hole into an evapora- tion system at the back of the appli- ance.
-
Page 16: Ventilation Gaps
Never use steam cleaning appara- tus to clean the appliance. The ^ A microfibre "E-Cloth" is available steam could attack the electrical from the Miele UK Spare Parts De- components and cause a short cir- partment, Part Number 980 13530, cuit. -
Page 17: Door Seals
Do not use any oils or grease on the door seals as these will cause the seals to deteriorate and become po- rous with time. The door seals should be cleaned reg- ularly with clean water and then wiped dry with a soft cloth. The metal grille at the back of the appli- ance (heat exchanger) should be dusted at least once a year. - Page 18 ^ Check that the fuse is not defective The following can be corrected without and that the mains fuse has not contacting the Miele Service Depart- blown. If it has contact the Miele Ser- ment: vice Department ^ Check whether ventilation gaps have been covered over or become too dusty.
- Page 19 To prevent unnecessary loss of tem- perature it is advisable not to open the door whilst waiting for the appli- There is a technical fault. Call the Miele ance to be serviced. Service Department. The safety lock has been engaged.
- Page 20 In the event of a fault which you cannot correct yourself, or if the appliance is under guarantee please contact: – Your Miele Dealer – The Miele Service Department (see back cover for address). When contacting the Service Depart- ment, please quote the model and se- rial number of your appliance, both of which are shown on the data plate.
- Page 21 The appliance is supplied with a mains The wires in the mains lead are col- cable and moulded plug ready for oured in accordance with the following connection to an a.c. single phase code: 220 – 240 V 50 Hz supply. Green/yellow = earth The fuse rating is 13 amps.
- Page 22 (as applicable to the design of the plug fitted). The correct fuse rating of the replace- ment fuses that are ASTA approved to BS 1362 should be fitted. Replacement fuse covers may be purchased from your local electrical supplier, or Miele Service agent.
-
Page 23: Climate Range
Do not place any appliance which The rear of the appliance can be gives off heat, such as a toaster or placed directly against a wall. However, microwave oven on top of this appli- to ensure sufficient ventilation the venti- ance, as this would increase the ap- lation gaps must not be covered over. -
Page 24: Align The Appliance
^ Remove any cable clips from the rear of the appliance. ^ Check that all parts at the rear of the appliance are unhindered. Remove any hindrance. ^ Carefully push the appliance into po- sition. ^ To align the appliance adjust the feet using the spanner supplied. - Page 25 ^ Remove plugs e and unscrew the The appliance is supplied right hand bracket f. Refit the bracket and hinged. If left hand door hinging is re- quired follow the instructions below. plugs on the opposite side. ^ Turn the door around and fit the door handle c.
- Page 28 Alteration rights reserved / 2102 M.-Nr. 05 454 570 / V KWL 1090 S, KWL 1630 S, KWL 1900 S This paper consists of cellulose which has been bleached without the use of chlorine.