Samsung OFFICESERV DS-5014D User Manual
5000d series enterprise ip solutions officeserv system
Hide thumbs
Also See for OFFICESERV DS-5014D:
- User manual (291 pages) ,
- Quick reference manual (21 pages) ,
- Quick reference manual (10 pages)

Related Manuals for Samsung OFFICESERV DS-5014D


Summary of Contents for Samsung OFFICESERV DS-5014D
- Page 1 SAMSUNG Enterprise IP Solutions OfficeServ User Guide 5000D Series Phones ITP-5021D ITP-5014D DS-5021D DS-5014D...
- Page 2 Publication Information Samsung Telecoms reserves the right without prior notice to re- vise information in this publication for any reason. Samsung Telecoms also reserves the right without prior notice to make changes in design or components of equipment as engi- neering and manufacturing may warrant.
- Page 3 TE Jang ..........................(place and date of issue) (name and signature of authorized person) (Representative in the EU) Samsung Electronics Euro QA Lab. Blackbushe Business Park Saxony Way, Yateley, Hampshire GU46 6GG, UK In-Seop Lee / Manager 2003-05-18 IS Lee ..........
-
Page 4: About This Guide
ABOUT THIS GUIDE This User Guide provides instructions for installing and operating the following Samsung telephones with the Samsung Enterprise IP Solutions OfficeServ system. • ITP-5000D Series IP phones (ITP-5021D and ITP-5014D 2-line LCD IP phones) • DS-5000D Series phones (DS-5021D and DS-5014D 2-line LCD digital... - Page 5 Introduction Do not disassemble or attempt to repair the phone yourself. If a repair is needed, please contact your authorised Samsung dealer. Also, if installing an ITP-5000D Series phone: Take care not to connect the network LAN cable to the PC connection jack.
-
Page 6: Table Of Contents
Contents Chapter Installing Your ITP- or DS-5000D Series Phone ......... 1-1 ITP-5000D Series IP Phone ....................1-1 Checking the Supplied Components................1-1 Connectors on the IP Phone..................1-2 Installing the IP Phone ....................1-2 DS-5000D Series Digital Phone ..................1-6 Checking the Supplied Components................1-6 Installing the Phone......................1-7 Chapter Setting the Working Environment for ITP-5000D Series IP Phones .................. - Page 7 Contents Chapter Basic Features ..................4-1 Button LEDs ..........................4-1 Phone Status Indicator......................4-1 Using Feature Codes......................4-2 Selecting Programmed Functions ..................4-2 Assigning Button Values (Extenders) ................4-3 Controlling Volume Levels....................4-4 Handset Volume......................4-5 Speakerphone Volume....................4-5 Ringer Volume ........................4-6 Selecting the Ring Tone .......................4-6 Changing the Phone Passcode...................4-7 Setting the Answering Mode for Intercom Calls..............4-8 Switching Headset/Handset Mode ..................4-10 Enabling/Disabling Key Confirmation Tone..............4-11...
- Page 8 Holding a Call........................4-25 System Hold........................4-26 Automatic Hold......................4-26 Exclusive Hold ......................4-28 Consultation Hold......................4-29 Hold Recall........................4-30 Retrieving Calls Held at Another Extension ..............4-30 Parking Calls ........................4-31 Transferring Calls .......................4-32 Transfer With Camp-On ....................4-33 Transfer To Voice Mail....................4-33 Call Waiting ........................4-34 Chapter Program Menus ..................5-1 Navigation Buttons.......................5-1 Menu Button........................5-1 Send Button ........................5-1...
- Page 9 Contents Chapter Dialling Features ..................6-1 Speed Dialling ........................6-1 Redial an Outside Number....................6-7 Automatic Redial/Retry ......................6-8 Pulse to Tone Changeover ....................6-8 Conference Calls ........................6-9 Chapter Call Pickup....................7-1 Station Call Pickup .......................7-1 Group Call Pickup.........................7-2 Chapter Call Forwarding ..................8-1 Forwarding All Calls ......................8-2 Forward Busy........................8-3 Forward No Answer......................8-3...
- Page 10 Chapter Special Features................10-1 Do Not Disturb ........................10-1 Muting Your Phone ......................10-3 Background Music......................10-3 Alarm Features........................10-4 Using the Door Phone ......................10-8 Executive/Secretary Hot Line ....................10-9 Group Listening ........................10-10 Locking and Unlocking Your Phone ................10-11 Off-Hook Voice Announcements (OHVA) ...............10-12 In Group / Out of Group ....................10-14 Call Duration Timer......................10-15 Ring Preference ........................10-17 Chapter...
- Page 11 viii Contents List of Figures Figure 1.1 Contents of ITP-5000D Series IP Phone Package ........1-1 Figure 1.2 Base of ITP-5000D Series IP Phone............1-2 Figure 1.3 Contents of DS-5000D Series Phone Package ........1-6 Figure 1.4 Base of DS-5000D Series Phone.............. 1-7 Figure 3.1 Front Panel of the ITP- and DS-5014D Phone .........
-
Page 12: Chapter 1 Installing Your Itp- Or Ds-5000D Series Phone
Chapter Installing Your ITP- or DS-5000D Series Phone This chapter explains how to install your phone. Refer to the appropriate section for ITP-5000D Series IP Phone or DS-5000D Series Digital Phone in this chapter for the phone you are installing. ITP-5000D Series IP Phone Checking the Supplied Components First, open and check the package you have received. -
Page 13: Connectors On The Ip Phone
Chapter 1 Installing Your ITP- or DS-5000D Series Phone Connectors on the IP Phone The base of the phone contains a handset connection jack, power connection jack, LAN connection jack, and a PC connection jack. Power Connection Jack LAN Connection Jack PC Connection Jack Handset Connection Jack Figure 1.2 Base of ITP-5000D Series IP Phone... - Page 14 2. Connect the LAN cable from the network to the LAN connection jack. POWER PC24V 3. Connect the LAN cable from the PC’s network card to the PC connection jack. POWER PC24V Take care not to connect the LAN cable from the network to the PC connection jack on the phone.
- Page 15 Chapter 1 Installing Your ITP- or DS-5000D Series Phone 4. Connect the power adapter cable to the power connection jack. Do not connect the cable to the power outlet yet. The power specification is as follows. Input : AC 240V 50Hz Output : DC 24V 0.4A Use only the supplied adapter cable.
- Page 16 • If using as a wall-mounted phone, insert the support into the slots located in the lower section of the base. – Use the two mounting holes in the upper section of the phone body for wall mounting the phone on screws inserted into the wall. –...
-
Page 17: Ds-5000D Series Digital Phone
Chapter 1 Installing Your ITP- or DS-5000D Series Phone DS-5000D Series Digital Phone Checking the Supplied Components First, open and check the package you have received. If any of the parts is missing or damaged, contact your dealer immediately. The package supplied with the phone includes the following items: Digital phone Phone stand Handset... -
Page 18: Installing The Phone
Installing the Phone The base of the phone contains a handset connection jack and a line cord connection jack. Figure 1.4 Base of DS-5000D Series Digital Phone 1. Plug the handset cord into the handset jack (marked with the symbol) and push the cord inside the recess to secure it. - Page 19 Chapter 1 Installing Your ITP- or DS-5000D Series Phone • If using as a desk-phone, insert the phone stand into the slots located in the upper section of the base. POWER PC24V • If using as a wall-mounted phone, insert the support into the slots located in the lower section of the base.
- Page 20 – The handset hook should also be changed so that the handset is secure when mounted on the wall. Push out the handset hook from the holder, turn it through 180 and push it back into the holder. Installation is complete. Now find out what features your phone supports by going to Chapter 3.
-
Page 21: Chapter Setting The Working Environment For Itp-5000D Series Ip Phones
Chapter Setting the Working Environment for ITP- 5000D Series IP Phones This chapter describes the procedure for starting (“booting”) an IP phone and setting the phone’s operating parameters. Overview of Environment Settings Mode Menu Items The menu structure for setting the phone’s environment is as shown below. TOP LEVEL SUB-LEVEL 1.Information... -
Page 22: Starting The Phone
Chapter 2 Setting the Working Environment for ITP-5000D Series IP Phones Using the Buttons in Edit Mode When entering the edit mode for any menu option, the cursor flashes and you can enter digits using the dial buttons [0] – [9] and [*]. Button functions are listed in the table. -
Page 23: Setting Parameters
Setting Parameters The procedure for setting parameters takes you through the top level menus for Network, Load & Upgrade, System and Server. Network Menu • Select ‘2.Network’. You see: >1.Mode 2.IP • Select ‘1.Mode’. You see: >1.Manual IP 2.DHCP • Select ‘1.Manual IP’ to manually enter the IP, Subnet Mask, and Gateway IP addresses and continue with this section. - Page 24 Chapter 2 Setting the Working Environment for ITP-5000D Series IP Phones • Select ‘2.IP’. You see: Input IP Address xxx.xxx.xxx.xxx If the IP address is set, you can confirm the address displayed by pressing the [Enter] button. (If it is incorrect, use the left arrow button to delete the set address and use the dial buttons [0] to [9], and [*] to enter the correct address, and press the [Enter] button to save and exit.) If the IP address is blank, use the dial buttons [0] to [9], and [*] to set the address...
- Page 25 If the gateway address is blank, use the dial buttons [0] to [9], and [*] to set the address and press the [Enter] button to save and exit. You have now completed the network parameter setup. Press the [End] button to return to the top level menu.
- Page 26 Chapter 2 Setting the Working Environment for ITP-5000D Series IP Phones • To upgrade the phone’s bootrom select ‘3.Upgrade Bootrom’ then ‘1.TFTP server’. Input TFTP Server xxx.xxx.xxx.xxx Enter the IP address of the TFTP server from which the program should be downloaded.
-
Page 27: Verifying Settings And Rebooting
• To set/modify the ID of the phone, select ‘2.ID’. The following screen is displayed. *Input ID Enter the ID as a maximum of 16 digits/characters. • To set/modify the password of the phone, select ‘3.Password’. The following screen is displayed. Enter the password as a maximum of 8 digits (displays as ‘*’). -
Page 28: Chapter 3 Things You Should Know
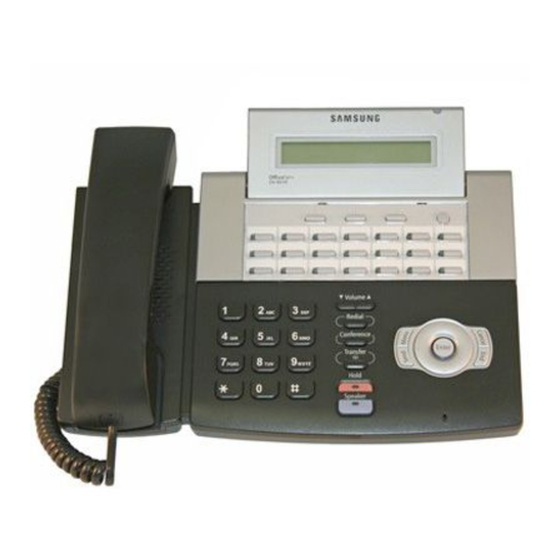
The ITP- and DS-5000D Series of phones comprise the ITP/DS-5021D and ITP/DS-5014D phones. These are 2-line LCD phones that can be used with the Samsung Enterprise IP Solutions OfficeServ System. They are described in detail in this chapter. ITP and DS phones are operated in the same way. However, IP phones enjoy the added benefits of Internet technology to make and receive calls. -
Page 29: Figure 3.2 Front Panel Of The Itp- And Ds-5021D Phone
Chapter 3 Things You Should Know Figure 3.2 Front Panel of the ITP- and DS-5021D Phone • The 14 or 21 programmable buttons can be programmed with desired functions. • Dial keypad buttons for dialling numbers. • Volume buttons to control volume levels for handset, speaker, ring etc. •... -
Page 30: Dial (Keypad) Buttons
• The status indicator displays the status of the phone using red, green, and amber colours. Dial (Keypad) Buttons The dial buttons are used to dial digits [0]-[9], [*] and [#]. Programmable Buttons ITP- and DS-5021D have 21 programmable buttons; ITP- and DS-5014D have 14 programmable buttons. -
Page 31: Volume Buttons
Chapter 3 Things You Should Know Volume Buttons [t and u] The Volume buttons are used to control the volume levels for the handset, speakerphone, ringing bell and background music. The [u] button decreases the volume and the [t] button increases the volume. They are also used to move between menus and features on the LCD panel. -
Page 32: Navigation Buttons
Navigation Buttons These are used to “navigate” through menus and features displayed on the LCD. Menu Button This button is used to display menus of information, such as outgoing and incoming call logs, speed dial numbers, and directory dial numbers. It also allows you to set and display features such as call forwarding and alarm reminder types. -
Page 33: Lcd Panel
For example, if the button is pressed while the phone is idle, the following menu options are shown: 201: SAMSUNG → CALL OTHER ANS A menu option may be selected using the appropriate soft button below it (see Soft Buttons, below). -
Page 34: Microphone
For example, when selecting the CALL menu, use the left soft button; when selecting the OTHER menu, use the centre soft button; and when selecting the ANS menu, press the right soft button. Microphone The small opening below the Navigation buttons is a microphone. You can speak through the microphone without lifting the handset when making a call. -
Page 35: Phone Status Indicator
Chapter Basic Features This chapter describes the basic features of the ITP- and DS-5000D Series phones. It is recommended that you familiarise yourself with these features before using your phone so that operating it will be easier and problem free. If you haven’t already done so, take time to read Chapter 3 which explains the functions of the various buttons on your phone. -
Page 36: Using Feature Codes
Chapter 4 Basic Features Table 4.2 Status Indicator Status of Phone Status Indicator Busy on call / Off-hook Steady red Internal extension ring Flashing red External (C.O.) line ring Flashing green Transferred / held call recalling Flashing amber Message waiting Flashing red Calling denied Fast flashing red... -
Page 37: Assigning Button Values (Extenders)
Assigning Button Values (Extenders) You can add an “extender” to some programmed buttons to make their functions more specific. For example, you could add the extender “4” to the [PAGE] button. Normally, when you press the [PAGE] button, you are asked to enter the page zone to page. -
Page 38: Controlling Volume Levels
Chapter 4 Basic Features How to Add Extenders 1. Press the [Transfer] button. 2. Press [1][0][7]. 3. Select the button for adding the extender. Use the [uVolumet] buttons to scroll through the display of programmable buttons and press the right soft button to select the button (OR you can press the programmable button or enter the number if you know it) 4. -
Page 39: Handset Volume
Handset Volume 1. Pick up the handset and listen to the tone. 2. To increase handset volume, press the [Volumet] button. 3. To decrease handset volume, press the [uVolume] button. Speakerphone Volume 1. Press the [Speaker] button. 2. To increase speakerphone volume, press the [Volumet] button. -
Page 40: Ringer Volume
Chapter 4 Basic Features Ringer Volume 1. To increase ringer volume, press the [Volumet] button while the phone is ringing. 2. To decrease ringer volume, press the [uVolume] button while the phone is ringing. Selecting the Ring Tone One of eight ring tones can be selected. 1. -
Page 41: Changing The Phone Passcode
Changing the Phone Passcode Your pre-assigned extension passcode is 1234. You can change the passcode if needed. 1. Press the [Transfer] button. 2. Press [1][0][1]. 3. Enter the current passcode (e.g. 1234). 4. Enter the new passcode. The passcode must be a 4-digit number (0-9). -
Page 42: Setting The Answering Mode For Intercom Calls
Chapter 4 Basic Features Setting the Answering Mode for Intercom Calls Intercom calls can be answered in one of three modes. You can select whichever mode suits your working preferences: RING MODE: The phone rings and you answer using either the handset or the speakerphone. - Page 43 1. Press the [Transfer] button. 2. Press [1][0][3]. 3. Select ANS MODE or EXEC ANS using the [uVolumet] buttons. 4. Move the cursor by pressing the right soft button. 5. Press [0] (Ring mode), or [1] (Auto Answer mode), or [2] (Voice Announce mode) Select the mode using the [uVolumet] buttons.
-
Page 44: Switching Headset/Handset Mode
4-10 Chapter 4 Basic Features Switching Headset/Handset Mode You can switch between handset mode and headset mode if you have a headset connected to your phone. In headset mode, you answer or end a call by pressing the [Send] or [End] button. 1. -
Page 45: Enabling/Disabling Key Confirmation Tone
4-11 Enabling/Disabling Key Confirmation Tone When you press a dial button, you may hear a short confirmation tone, depending on whether this feature is enabled or disabled. 1. Press the [Transfer] button. 2. Press [1][1][0]. 3. To enable the key confirmation tone, press [0][4][1]; to disable, press [0][4][0]. -
Page 46: Hot Keypad
4-12 Chapter 4 Basic Features Hot Keypad The hot keypad feature allows you to make a call or activate feature codes by pressing the dial buttons directly, without having to pick up the handset or press the [Speaker] button. To turn this feature on or off: 1. -
Page 47: Dialling By Directory Name
4-13 Dialling by Directory Name The online directory of names allows you to find any extension or speed dial number very quickly. Normally, every extension number or speed dial number in the system has a directory name assigned to it (for example, John Smith on extension 201, or Ann Jones on 203). -
Page 48: Assigning/Changing Your Extension Name
4-14 Chapter 4 Basic Features If you program a [DIR] button, you can add the extender 1, 2 or 3, e.g. DIR2, to go straight to the directory you most often use (PERS, SYS or STN). Assigning/Changing Your Extension Name Up 11 alphabetic characters can be assigned as a name to your phone. -
Page 49: Making Intercom Calls
4-15 Making Intercom Calls Calling an Extension Number 1. Pick up the handset and listen for dial tone or press the [Speaker] button. (Remember: you don’t need to do this if the hot keypad feature is switched on.) 2. Dial the extension number (or group number to which the extension belongs). -
Page 50: Busy Extension Callback
4-16 Chapter 4 Basic Features Busy Extension Callback If a called extension is busy, you can set a busy extension callback. When the busy extension becomes free, your phone will ring. When you pick up the handset, the other extension will ring for the user to answer your call. 1. -
Page 51: Busy Extension Camp-On
4-17 Busy Extension Camp-On If a called extension is busy and you don’t want to wait for a callback, you can give the called extension off-hook ring tone and wait for them to answer. Press the [CAMP] button or dial [4][5] or press the soft button corresponding to the CAMP option on the LCD panel. -
Page 52: Answering Intercom Calls
4-18 Chapter 4 Basic Features Answering Intercom Calls Answering Intercom Calls in Ring Mode 1. When the phone rings, pick up the handset or press the [Send] button. 2. To end the call, replace the handset or press the [Speaker] or [End] button Answering Intercom Calls in Voice Announce Mode The phone issues a brief tone and you hear the caller’s message. -
Page 53: Answering Intercom Calls In Automatic Answer Mode
4-19 Answering Intercom Calls in Automatic Answer Mode The phone issues a brief tone and automatically answers the call. 1. Use the speakerphone to talk. For a private conversation, use the handset. 2. To end the call, replace the handset or press either the [End] or [Speaker] button. -
Page 54: Making Outside Calls
4-20 Chapter 4 Basic Features Making Outside (External) Calls Calling Outside Lines—an Overview Outside calls are made via central office (C.O.) lines. To call an outside number you first need to press a programmed line button or line group button or dial the C.O. -
Page 55: Calling Outside Lines Using The Handset
4-21 Entering Authorisation Codes If you are asked to enter an authorisation code when you select an outside line, press the programmed [AUTH] button or the soft button for the AUTH option on the LCD panel. Enter the code using the dial keys. To voluntarily enter a code before making a call, press the [AUTH] button or the [#] button and enter a valid code. -
Page 56: Calling Outside Lines Using The Speakerphone
4-22 Chapter 4 Basic Features Calling Outside Lines Using the Speakerphone 1. Press the [Speaker] button. (Remember: you don’t need to do this if the hot keypad feature is switched on.) 2. Press the outside line access button or dial the access code (e.g., 9). -
Page 57: Busy Line Queuing With Callback
4-23 Busy Line Queuing With Callback If there is no available C.O. line to make your call, you can set a callback to reserve a line. When a line becomes free, your phone will ring. 1. If you receive a busy tone when you select a C.O. line, press the programmed [CBK] button or dial [4][4]. -
Page 58: Cancelling A Callback
4-24 Chapter 4 Basic Features Cancelling a Callback 1. Press the [CBK] button or dial [4][4]. You will hear confirmation tone. 2. Press the [Hold] button. This will cancel the oldest callback you have set. Do this for each callback you wish to cancel. -
Page 59: Answering Outside Calls
4-25 Answering Outside Calls For an incoming outside call, lift the handset or press the [Send] button to answer on the speakerphone. (Also refer to Ring Preference in Chapter 10.) If a call is flashing on a button but not ringing, you must press the flashing button to answer the call. -
Page 60: System Hold
4-26 Chapter 4 Basic Features System Hold 1. While on a call, press the [Hold] button. The call on hold will flash green on a Call button on your phone, and will flash red on the line button on other phones. (Another user can press the flashing red button to take the call off hold if necessary. - Page 61 4-27 To enable the Auto Hold feature: 1. Press the [Transfer] button. 2. Dial [1][1][0]. 3. Dial [0][0][1] to enable, or [0][0][0] to disable, the Auto Hold feature. 4. Press the [Transfer] button to save the setting. You cannot use this feature for holding intercom calls. Intercom calls will be disconnected.
-
Page 62: Exclusive Hold
4-28 Chapter 4 Basic Features Exclusive Hold To place an outside call on hold so that other users cannot access it : 1. Press the [Hold] button twice. 2. The call will flash green on a Call button on your phone and will show a steady red light on other phones. -
Page 63: Consultation Hold
4-29 Consultation Hold You can place an outside call on hold and make a call to another extension for consultation. 1. Press the [Transfer] button; you will hear transfer dial tone. Your call is placed on transfer hold. 2. Dial the extension number. 3. -
Page 64: Hold Recall
4-30 Chapter 4 Basic Features Hold Recall If you leave a call on hold longer than the hold timer set in the system, it will recall your phone. The Call button will show a slow flashing amber light. If you do not answer the recall within a set time, it will go to the system operator. -
Page 65: Parking Calls
4-31 Parking Calls You can park an outside call in one of 10 “parking orbits” (0-9) to be picked up by another user. 1. Press the programmed [PARK] button. Or, press the soft button corresponding to the PARK option on the LCD panel. (If you press a dedicated [PARK] button with an extender for a parking orbit, skip step 2.) 2. -
Page 66: Transferring Calls
4-32 Chapter 4 Basic Features Transferring Calls You can quickly and easily transfer your current call to another extension. A ‘blind’ transfer means you don’t announce the call, unlike a ‘screened’ transfer where you do. 1. While on a call, press the [Transfer] button. 2. -
Page 67: Transfer With Camp-On
4-33 - When the extension answers, you may toggle between the parties by pressing the [Transfer] button. Neither party can hear the other until the transfer is complete. - If you receive No More Calls tone, the extension has no button available to receive another call or is in Do Not Disturb mode. -
Page 68: Call Waiting
4-34 Chapter 4 Basic Features Call Waiting If an outside call or other extension has camped-on to you, your phone will ring and the waiting call’s button will flash green. 1. Press the flashing button to answer the waiting call. 2. -
Page 69: Chapter Program Menus
Chapter Program Menus ITP- and DS-5000D Series phones are equipped with Navigation buttons for easy use of features and menus. This chapter describes the functions of each Navigation button and the procedures for using the various applications that are implemented by the menu buttons. -
Page 70: End Button
Chapter 5 Program Menus End Button This button is used to disconnect calls or to exit the menu mode. Cancel Button The [Cancel] button is used in menu mode to move to the previous menu level. If you press [Cancel] when at the first menu level, you exit menu mode. [Cancel] is also used to erase numbers or characters you enter on the LCD panel. -
Page 71: Main Menu
Main Menu Press the [Menu] button to see the main menu: SELECT MENU 1. OUTGOING LOGS Press the up and down arrow button to scroll through the options 1-6. 2. INCOMING LOGS 3. SPEED DIAL 4. DIRECTORY DIAL 5. FORWARD SET 6. -
Page 72: Viewing And Redialling Recently Called Numbers
Chapter 5 Program Menus Viewing and Redialling Recently Called Numbers Up to 50 of your most recently called numbers can be saved in the system’s memory (your system administrator can tell you what number is set). You can view these numbers and call them again using the menu. 1. -
Page 73: Viewing And Calling Recently Received Numbers
Viewing and Calling Recently Received Numbers Up to 50 of your most recently received numbers can be saved in the system’s memory (your system administrator can tell you what number is set). You can view these numbers and call them using the menu.. 1. -
Page 74: Viewing And Calling System Speed Dial Numbers
Chapter 5 Program Menus 4. To call a speed dial number, move to the number you require and press the [Send] button to make. Viewing and Calling System Speed Dial Numbers You can view and call system speed dial numbers designated by the system administrator. -
Page 75: Viewing And Calling Personal Speed Dial Numbers By Name
Viewing and Calling Personal Speed Dial Numbers by Name You can view and call a personal speed dial number using the name associated with it. 1. Press the [Menu] button to display the main menu . 2. Select [4.DIRECTORY DIAL]. The submenu below is displayed. 1. -
Page 76: Viewing And Calling System Speed Dial Numbers By Name
Chapter 5 Program Menus 4. Scroll through names on the list using the direction buttons or the [uVolumet] buttons. Use the direction buttons to view long numbers that do not fully appear on the LCD. Press the [Cancel] button to return to the previous menu. 5. -
Page 77: Viewing And Calling Extension Numbers By Name
The first system speed dial number found for names starting with the entered letter is displayed, e.g. 00:MARTIN 9 - 4 3 2 3 4 5 6 6 6 2 If there are no names starting with the letter entered, an error message is displayed and you can enter another letter or press [End] to exit menu mode. -
Page 78: Setting Call Forward Type And Destination
5-10 Chapter 5 Program Menus Enter 1st letter The first extension number found for names starting with the entered letter is displayed, e.g. 3 6 4 5 : MARTIN If there are no names starting with the letter entered, an error message is displayed and you can enter another letter or press [End] to exit menu mode. - Page 79 5-11 0. FORWARD TYPE 1. FORWARD ALL 2. FORWARD BUSY 3. FORWARD NO ANS 4. FORWARD DND 3. Select [0.FORWARD TYPE]. The submenu of the available forward types is displayed. 0. FORWARD CANCEL 1. FORWARD ALL 2. FORWARD BUSY 3. FORWARD NO ANS 4.
-
Page 80: Setting Reminder Alarms
5-12 Chapter 5 Program Menus ALL FWD NO. 9 1 2 3 4 5 6 7 Use the direction button to move the cursor in the number input screen. Use the [Cancel] button to erase all entered numbers and re-enter numbers. - Page 81 5-13 1. ALARM TYPE 2. ALARM TIME 4. Select [1. ALARM TYPE], and press the [Enter] button. The submenu for the alarm type is displayed. 0. NOT SET 1. TODAY 2. DAILY Use the direction buttons, or the [uVolumet] buttons, or the relevant dial button to select the alarm type (e.g.
- Page 82 5-14 Chapter 5 Program Menus To Answer an Alarm Answer an alarm by lifting the handset. If you do not answer, the alarm will ring up to four times at short intervals before cancelling. To Cancel an Alarm Select the alarm number as described in the procedure above. Then either select the alarm type as NOT SET or set the alarm time to 0000.
-
Page 83: Chapter Dialling Features
Chapter Dialling Features Dialling features comprise: • Speed dial numbers and names (including one-touch speed dial buttons) • Chain dialling • Redialling numbers • Pulse to Tone dialling changeover • Conference calls Speed Dialling Your system may already have a system list of speed dial numbers for frequently used phone numbers. - Page 84 Chapter 6 Dialling Features A,B,C,D,E, and F buttons are the first six buttons on the bottom line of programmable buttons on both types of phone (ITP-5021D and 5014D). Button Description Toggle between uppercase and lowercase characters when entering speed dial names.
- Page 85 Programming Personal Speed Dial Numbers Your station can be assigned up to fifty speed dial numbers (00-49). Ask the system administrator how many are assigned for you. To program personal speed dial numbers: 1. Press the [Transfer] button and dial [1][0][5]. 2.
- Page 86 Chapter 6 Dialling Features Assigning a Name to a Speed Dial Number A name up to 11 characters can be assigned for each speed dial number. This name is used to dial numbers using the Dialling by Directory Name feature (see Chapter 4).
- Page 87 Dialling Using Speed Dial Numbers You can dial speed dial numbers from the list of system numbers (500-999) created by the system administrator or from the personal list of numbers (00-49) you have created. 1. Press the programmed [SPD] button or dial [1][6]. 2.
- Page 88 Chapter 6 Dialling Features Programming One-touch Speed Dial Buttons You can assign frequently used speed dial numbers to one-touch speed dial buttons for even more convenience. To do this, you must have a programmed [SPD] button for each speed dial you require. 1.
-
Page 89: Redial An Outside Number
Chain Dialling After the speed dial number is pressed, additional number or desired speed dial number can be dialed manually. After the first speed dial number, press the programmed [SPD] button or dial [1][6] and then dial another speed dial number. Alternatively, after the speed dial number, dial the additional numbers manually. -
Page 90: Automatic Redial/Retry
Chapter 6 Dialling Features Automatic Redial/Retry When you make an outside call and receive a busy signal, the system can automatically redial the number for you. It will automatically redial at a pre- programmed interval for up to 99 attempts. 1. -
Page 91: Conference Calls
Conference Calls You can make a conference call with a group of up to five parties, including yourself. These can be other extensions and outside lines in any combination. The OfficeServ system allows some stations to pre-assign up to five conference groups so you can set up a conference call by simply pressing a programmable [Group Conference] button. - Page 92 6-10 Chapter 6 Dialling Features When attempting to add a party to the conference and you are not able to reach them, simply press the [Conference] button again. Programming Conference Groups (Refer to your system administrator to confirm that this option is available to you.) 1.
- Page 93 6-11 Making a Group Conference Call Press the programmed [GCONF] button followed by the group number (1–5). The conference will be set up automatically. You can set up a [GCONF] button for each group by adding extenders (1–5) if preferred.
-
Page 94: Chapter Call Pickup
Chapter Call Pickup This chapter explains how to intercept (pick up) a call that is ringing at another extension. Station Call Pickup If a call rings at another extension and you know the extension number: 1. If the hot keypad feature is switched off, pick up the handset or press the [Speaker] button. -
Page 95: Group Call Pickup
Chapter 7 Call Pickup Group Call Pickup Extensions may be assigned to call pickup groups. If this is the case, when a call rings at another extension, and you know the pickup group number: 1. If the hot keypad feature is switched off, pick up the handset or press the [Speaker] button. -
Page 96: Chapter Call Forwarding
Chapter Call Forwarding This chapter explains how you can forward calls sent to you. The main reasons for doing this are to allow someone else to answer your calls—or to record the calls if you have voice mail set up for you—if you are unable to answer calls for any reason, or to redirect calls to another phone you are temporarily using. -
Page 97: Forwarding All Calls
Chapter 8 Call Forwarding Forwarding All Calls To forward all calls sent to your phone: 1. Dial [6][0][1]. 2. Enter the extension number, group number, or external number where your calls are to be sent 3. Hang up after the attention tone. - The extension receiving the forwarded calls can transfer the call back to your extension. -
Page 98: Forward Busy
Forward Busy To forward calls arriving when you are busy on another call: 1. Dial [6][0][2]. 2. Enter the extension number, group number, or external number where your calls are to be sent. 3. Hang up after the confirmation tone. Forward No Answer To forward calls arriving when you are away from your desk (calls will ring and then be forwarded after a set time):... -
Page 99: Forward Busy/No Answer
Chapter 8 Call Forwarding Forward Busy/No Answer If the Forward Busy and Forward No Answer options are both already set, calls are forwarded to the numbers specified for each of the options. You can select to have both options enabled at the same time. 1. -
Page 100: Forward Follow Me
Forward Follow Me This feature has two purposes. The first is to allow you to transfer calls ringing at your normal extension to the extension you are currently using. The second is to allow you to transfer calls from another extension to your own (called Remote Forwarding). - Page 101 Chapter 8 Call Forwarding To transfer calls from another extension to your extension (Remote Forwarding): 1. Dial [6][0][6]. 2. Dial the number of the extension from which calls are to be forwarded. 3. Hang up after the confirmation tone. Viewing and Changing Call Forward Options You can view or change your Call Forward options from the LCD panel of your phone.
-
Page 102: Chapter 9 Paging And Messaging
Chapter Paging and Messaging This chapter explains how to use the paging and messaging features your system supports. You must use your handset when paging. Internal Page You can make internal announcements to extensions through their speakers. Extensions can be in page zones 1-4. 1. -
Page 103: External Page
Chapter 9 Paging and Messaging External Page You can page externally through external speakers rather than individual phone speakers. There are four external page zones numbered 5-8. 1. Pick up the handset and listen for dial tone. 2. Press the [PAGE] button or dial [5][5], or select the PAGE option from the LCD panel using the soft button. -
Page 104: All Page
All Page You can page simultaneously through all internal and external zones. 1. Pick up the handset and listen for dial tone. 2. Press the [PAGE] button or dial [5][5], or select the PAGE option from the LCD panel using the soft button. -
Page 105: Meet Me Page: Mmpg
Chapter 9 Paging and Messaging Meet Me Page: MMPG If you cannot directly contact someone or they are absent from their desk, you can page them and ask them to call you while you wait off-hook. 1. Pick up the handset and listen for dial tone. 2. -
Page 106: Call Park And Page
Call Park and Page You can transfer an external call to another extension by “parking” the call and notifying the call through paging. This function is useful in a factory or in a large office when you cannot easily contact the person who should receive the call. 1. -
Page 107: Rejoining A Page
Chapter 9 Paging and Messaging Retrieving a Parked Call Press the [PARK] button or dial [1][0]. Then dial the announced number. The parked call is connected. Rejoining a Page This option allows you to listen to remaining parts of internal page announcements after you finish a call. -
Page 108: Setting A Message Waiting Indication
Setting a Message Waiting Indication If a called extension does not answer or the line is busy, you can leave a message waiting indication. This informs the user that you wish to talk with them. 1. Press the [Message] button or dial [4][3]. 2. -
Page 109: Replying To Message Waiting Indications
Chapter 9 Paging and Messaging Replying to Message Waiting Indications If one or more message waiting indications have been left on your phone, your [Message] button LED and keyset status indicator will flash red. Up to five message indications from different extensions may be left. Replying Without Viewing Messages 1. - Page 110 Replying After Viewing Messages You can view all extension numbers leaving indications before replying to them. This way you can reply to them in any order you choose. 1. Press the [Message] button. The first extension that left its number is displayed on the LCD.
-
Page 111: Cancelling Messages
9-10 Chapter 9 Paging and Messaging Cancelling Messages You can cancel message indications you left on other extensions, or that have been left at your extension by others. Press [4][2] and enter: . the extension number where you left the indication, . - Page 112 9-11 Viewing and Selecting a Programmed Message To view and select a set message: 1. Press the [Transfer] button and dial [1][1][5]. 2. Use the [uVolumet] buttons to scroll through the programmed messages. 3. Press the [Transfer] button to select your message. It will display on your LCD panel.
- Page 113 9-12 Chapter 9 Paging and Messaging Creating Your Own Message Personalised messages can be programmed using codes 16 to 20. To create a personalised message on your phone: 1. Press the [Transfer] button and dial [1][1][5]. 2. Dial a code number 16-20 3.
-
Page 114: Chapter Special Features
10-1 Chapter Special Features This chapter describes the following features: Setting Do Not Disturb (DND) mode and One-Time DND Muting your phone Listening to background music Setting appointment reminders/clock alarms Using a door phone Using an executive/secretary hotline Group listening Locking and unlocking your phone Off-hook voice announcements Removing your phone from a group and re-entering... - Page 115 10-2 Chapter 10 Special Features If you want your calls to be answered by someone else while in DND mode, set your phone for Forward DND (see Chapter 8). Cancelling Do Not Disturb 1. Press the programmed [DND] button or dial [4][0][0].
-
Page 116: Muting Your Phone
10-3 Muting Your Phone The Mute feature prevents your voice being heard by the calling/called party. 1. During a call, press the programmed [MUTE] button (the button LED lights), or select the MUTE option from the LCD panel using the soft button (“MUTE” changes to “mute” on the LCD) 2. -
Page 117: Alarm Features
10-4 Chapter 10 Special Features Alarm Features Appointment Reminder/Alarm Clock This feature serves as an alarm clock. Up to three alarms may be set. Each alarm may be set as a one-day (today) alarm or daily alarm. You set a time for each alarm: if set for today it will ring at the set time, unless cancelled;... - Page 118 10-5 Cancel Alarm 1. Press the [Transfer] button. 2. Dial [1][1][2]. 3. Select the alarm number [1], [2] or [3]. 4. Press the [Hold] button. You can set an alarm message to display on the LCD panel when the alarm sounds.
- Page 119 10-6 Chapter 10 Special Features Alarm Messages You can set a 16-character message to display when using the alarm feature (e.g. “Meeting with JS”). 1. Press the [Transfer] button. 2. Dial [1][1][6]. 3. Select the alarm number [1], [2] or [3]. 4.
- Page 120 10-7 Cancel Alarm Message To cancel a message (but not the alarm): 1. Press the [Transfer] button. 2. Dial [1][1][6]. 3. Press the alarm number [1], [2] or [3]. 4. Press the right Soft button twice. 5. Press the [Hold] button to cancel the message. (To cancel the alarm, see Cancel Alarm, above.)
-
Page 121: Using The Door Phone
10-8 Chapter 10 Special Features Using the Door Phone Answering the Door Phone You can answer calls from the door phone or open the door from your phone. 1. A call from the door phone repeats briefly three times. 2. Lift the handset or press the [Speaker] button or the [Call] button to connect to the door phone. -
Page 122: Executive/Secretary Hot Line
10-9 Executive/Secretary Hot Line Phones for executives and secretaries can be connected via a “hot line”. • Either phone can make a call to the other by pressing the [BOSS] button or by selecting the BOSS option on the LCD panel using the soft button. •... -
Page 123: Group Listening
10-10 Chapter 10 Special Features Group Listening While you are on a call using the handset, you can allow others to hear the conversation through your phone’s speaker. 1. Turn on the speaker by pressing the programmed [LISTEN] button or selecting the LISTN option on the LCD panel* using the Scroll button and soft button. -
Page 124: Locking And Unlocking Your Phone
10-11 Locking and Unlocking Your Phone You can lock your phone to prevent its unauthorised use while you are away. You can then unlock the phone when you return. The phone can be prevented from making or receiving any calls (LOCKED ALL option) or from making outside calls only (LOCKED OUT option). -
Page 125: Off-Hook Voice Announcements (Ohva)
10-12 Chapter 10 Special Features Off-Hook Voice Announcements You can make an announcement (OHVA call) through the handset or speaker of a phone that is currently busy on a call. This feature is useful when you have an urgent message to deliver. You must have a programmed [OHVA] button to do this. - Page 126 10-13 Answering an OHVA Call When receiving an OHVA call, you will hear the announcement through your handset or speaker depending on which you are using. In either case, you can answer the call before continuing your current call. 1. Press the flashing [Call] button. This places your current call on hold and allows you to talk to the announcing party.
-
Page 127: In Group/Out Of Group
10-14 Chapter 10 Special Features Secure OHVA This option prevents your phone from receiving OHVA calls via the speaker, for privacy. Any OHVA call is broadcast via the handset only when the SECURE OHVA option is turned on at your phone. 1. -
Page 128: Call Duration Timer
10-15 2. Press the [IN/OUT] button again to remove the phone from the group. The LED goes off. 3. To rejoin the group, press the [IN/OUT] button again. The button lights red. If your phone is in more than one group, you can assign an extension number (extender) to an [IN/OUT] button for each group. - Page 129 10-16 Chapter 10 Special Features 1. While on-hook, press the [Transfer] button. 2. Dial [1][1][0]. 3. Dial [0][1][1] to activate the auto timer or [0][1][0] to deactivate it. 4. Press the [Transfer] button to save settings. Setting Manual Timer To set the timer manually when on a call, you must have a programmed [TIMER] button.
-
Page 130: Ring Preference
10-17 Ring Preference This option, when enabled on your phone, allows you to answer calls simply by lifting the handset or pressing the [Send] or [Call] button. Calls are answered in the order that they arrive at your phone. If Ring Preference is switched off, you must answer calls by pressing the flashing [Call] or line buttons, and you may answer the calls in any order, irrespective of their order of arrival. -
Page 131: Chapter 11 Caller Identification (Clip)
11-1 Chapter Caller Identification (CLIP) Caller ID or Calling Line Identification Presentation (CLIP) is provided by your telephone company and allows you to view numbers and/or names of callers on your LCD panel. If no CLIP information is available for a number, it may be for one of these reasons: - the caller requests that their ID not be sent;... -
Page 132: Viewing Next Caller Clip
11-2 Chapter 11 Caller Identification (CLIP) To select your preference: 1. Press the [Transfer] button. 2. Dial [1][1][9]. 3. Press [1] to view the number first, or [2] to view the name first, or [0] for no display (Or, use the [uVolumet] buttons to select.) 4. -
Page 133: Calling A Stored Number
11-3 Calling a Stored Number To redial a stored number, dial [1][7]. (If the hot keypad feature is switched off, lift the handset or press the [Speaker] button first.) Storing a Caller Number as a Speed Dial Number You can store a caller’s number as a speed dial number in your personal speed dial list. -
Page 134: Viewing Clip For Previous Calls
11-4 Chapter 11 Caller Identification (CLIP) If you are currently on an intercom call or you have cleared the automatic hold feature, you must either disconnect the call or put it on hold. If you perform the above procedure for an external call, the message [call no longer available] will be displayed on screen. -
Page 135: Appendix: Additional Information
Appendix: Additional Information System Feature Codes ITP-5000D series phones have the following default feature codes. You can dial these codes if there are no programmed buttons for the desired features. Be aware that these codes can be changed in programming. If a code does not work as shown here, check with your system administrator for the correct code(s). -
Page 136: Programmed Messages
Appendix Additional Information Dial Code Feature Dial Code Feature Walking class of service 65+ext. no. Directed call pickup Cancel all call forwarding 66+grp. no. Group call pickup 601+no. Set Forward All Calls Universal Answer 602+no. Set Forward Busy Voice Dialler 603+no. -
Page 137: Entering Characters On The Lcd Panel
Entering Characters on the LCD Panel Alphabetic characters are entered on the LCD panel using the dial buttons (button 2=ABC, button 3=DEF, and so on). Press a button the number of times to select the required character (e.g. press “2” three times for “C”). Pressing a different button moves the cursor to the right to allow you to enter the next character.* For example, if the text to enter is “SAM SMITH”, press the number “7”... - Page 138 Appendix Additional Information Press the [#] button to enter special characters. Special characters are displayed in the following order. space & < > → " Switching Between Uppercase and Lowercase Characters Use the “A” button to toggle between uppercase and lowercase characters. The “A”...
- Page 139 Samsung Telecoms (U.K.) Limited Brookside Business Park, Greengate, Middleton, Manchester M24 1GS...