Table of Contents
Available languages
Available languages
Operator's Manual
ROUTER
Double Insulated
Model No.
315.175140
Save this manual for
future reference
CAUTION:
Read and
follow all Safety Rules and
Operating Instructions before
first use of this product.
• Safety
• Features
• Adjustments
• Operation
• Maintenance
• Parts List
Soars,
Roebuck
and Co.,
3333
Beverly
Rd., Hoffman
Estates,
IL 60179
USA
Visit the Craftsman
web page:
www.sears.com/craftsman
972000-975
5-02
®
Table of Contents

Related Manuals for Craftsman 315.175140


Summary of Contents for Craftsman 315.175140
- Page 1 • Operation follow all Safety Rules and • Maintenance Operating Instructions before • Parts List first use of this product. ® Soars, Roebuck and Co., 3333 Beverly Rd., Hoffman Estates, IL 60179 Visit the Craftsman web page: www.sears.com/craftsman 972000-975 5-02...
- Page 2 14-15 • Exploded View and Repair Parts List ...................... 16-17 • Parts Ordering / Service ..........................CRAFTSMAN FULL ONE YEAR WARRANTY ROUTER I:RAFTSMAN If this Router fails to give complete satisfaction within one year from the date of purchase, RETURN IT TO THE NEAREST SEARS STORE IN THE UNITED STATES, and Sears will replace it, free of charge.
- Page 3 Thepurposeof safetysymbols Is to attract your attention to possible dangers. The safety symbols, and the explanations with them, deserve your careful attention and understanding. The safety warnings do not by themselves eliminate any danger. The instructions or warnings they give are not substitutes for proper accident prevention measures.
- Page 4 Do not change the plug in any way. the heavier the cord. • WHEN SERVICING USE ONLY IDENTICAL • OUTDOOR USE EXTENSION CORDS. When tool CRAFTSMAN REPLACEMENT PARTS. is used outdoors, use only extension cords suitable • WHEN USING THIS ROUTER WITH A ROUTER for use outdoors.
- Page 5 • arsenic and chromium from chemically-treated WARNING: Some dust created by power lumber. sanding, sawing, grinding, drilling, and other construction activities contains chemicals known Your risk from these exposures varies, to cause cancer, birth defects or other depending on how often you do this type of work. reproductive harm.
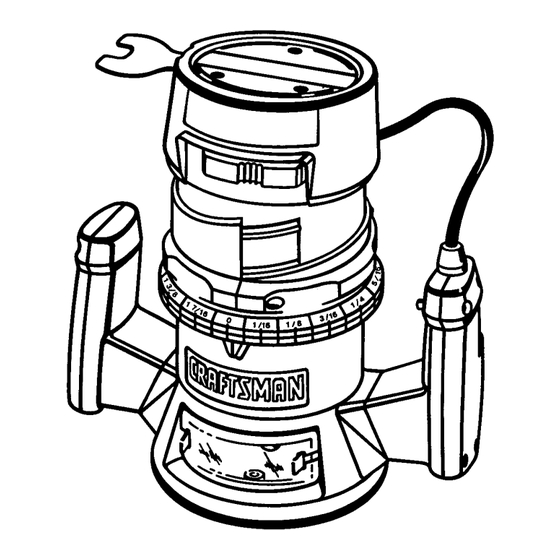
- Page 6 KNOW YOUR ROUTER squeeze the tabs on each end and pull outward. To replace, squeeze the tabs at each end, fit into See Figure 1. opening, then release. For your protection, do not Before attempting to use any tool, familiarize yourself use router without chip shield properly In place.
- Page 7 CUTTER _1= WARNING: Your router should never be COLLET connected to power supply when you are WRENCH assembling parts, making adjustments, installing or removing cutters, cleaning, or when not in use. Disconnecting router will prevent accidental starting that could cause serious personal injury. INSTALLING/REMOVING CUTTERS See Figures 2 and 3.
- Page 8 DEPTH OF CUT ADJUSTMENTS See Figures 4, 5, and 6. We recommend that cuts be made at a depth not exceeding 1/8 in. and that several passes be made to reach depths of cut greater than 1/8 in. • Unplug your router. WARNING: Failure to unplug your router could result in accidental starting causing...
- Page 9 Remain ROUTER TABLES alert and watch what you are doing. Do not operate router when fatigued. The use of Craftsman reuters on router tables offered by other manufacturers has not been investigated for compliance with applicable safety standards. HANDLE WARNING:...
- Page 10 FREEHAND ROUTING WARNING: Do not use large router bits for See Figure 9. freehand routing. Use of large router bits when freehand routing could cause loss of control or create other hazardous conditions that could cause possible serious personal injury. When using a router table, large router bits should be used for edging only.
- Page 11 In addition, it is more difficult to control a router when the bit is scraping instead of cutting. With practically no load on the motor the bit will be revolving at close to top RPM, and will have a much greater than normal tendency to bounce off the sides of the cut (especially if the wood has a pronounced grain with hard and soft areas).
- Page 12 Tomakedeepercutsit is therefore necessary t o ROUTING makeas manysuccessive p asses as required, Whenever you are routing a groove, your travel lowering thebit 1/8inch for each new pass. In order to should be in a direction that places whatever guide save time, do all the cutting necessary at one depth you are using at the rigHt-hand side.
- Page 13 STARTING AND ENDING A CUT Whenever the workpiece thickness together with the INTERNAL ROUTING desired depth of cut (as adjusted by router depth setting) are such that only the top part of the edge is Tilt router and place on workpiece, letting edge of to be shaped (leaving at least a 1/16 inch thick uncut subbase contact workpieoe first.
- Page 14 LUBRICATION WARNING: When servicing, use only identical Craftsman replacement parts. Use of any other All of the bearings in this tool are lubricated with a part may create a hazard or cause product sufficient amount of high grade lubricant for the life of damage.
- Page 15 • Make lead connections to new switch. Push each SWITCH REPLACEMENT lead as far as possible into proper switch See Figures 15and 16. receptacle. Pull on leads to check lead connections • Unplug your router. with lead receptacles. • Locate switch in handle and place leads so they WARNING: Failure to unplug your router could won't be pinched or contact screws when handle...
- Page 16 CRAFTSMAN ROUTER - MODEL NUMBER 315.175140 SEE NOTE "A" NOTE: "A" - The assembly shown represents an Important part of the Double Insulated System. To avoid the possibility of alteration or damage to the System, service should be performed by your near-...
- Page 17 CRAFTSMAN ROUTER- MODEL NUMBER 315.175140 The model number will be found on a plate attached to the motor housing. Always mention the model number | in all correspondence regarding your ROUTER or when ordering repair parts, SEE BACK PAGE FOR PARTS...
- Page 18 For repair of major brand appliances in your own home... no matter who made it, no matter who sold it! 1-800-4-MY-HOM EsM Anytime, day ornight (1-800-469-4663) www.sears.com To bring in products such as vacuums, lawn equipment and electronics for repair, call for the location of your nearest Sears Parts & Repair Center 1-800-488-1222 Anytime, day or night...
- Page 19 Reglas de Seguridad y las • Mantenimiento Instrucciones antes de usar esta herramienta. • Lista de Repuestos ® Sears, Roebuck and Co., 3333 Beverly Rd., Hoffman Estates, IL 60179 Visite la p_gina Web de Craftsman: www.sears.com/craftsman 972000-975 5-02...
- Page 20 • Tabla de Materias ............................• Garantia ................................• Introducci6n ..............................• Reglas para Funcionamiento Seguro ......................• Especificaciones del Producto ........................• Desempaque ..............................• Accesodos ..............................• Caracteristicas ............................... • Ajustes ................................. • Funcionamiento ............................9-13 • Mantenimiento ............................14-15 •...
- Page 21 Estoss|mbolos desegurldad seutilizanpareadvertirle sobreclertosrlesgos posibles. L ossimbolos de segurldad y lasexpllcaclones q ueacompafian e stossimbolosmerecen c uidadosa atencibn y comprenslbn. Lasadvertenclas p orel mismas noelimlnan nlngdnpeligro. L asInstrucclones o lasadvertenclas q uese proporclonan n o reemplazan a lasmedidas adecuadas d eprevenclbn d eaccldentes. SIMBOLO SIGNIFICADO SIMBOLO DE ALERTA SOBRE SEGURIDAD: Indica atenci6n, advertencia o peligro.
- Page 22 100 pies de largo. • CUANDO EFECTUE LABORES DE MANTENIMIENTO Mientras mds pequet_o es el n_mero del calibre, mayor USE SOLAMENTE REPUESTOS CRAFTSMAN es el di_metro del cord6n. AUTENTICOS. • USE CORDONES...
- Page 23 ADVERTENClA: El polvo creado por el lijado • ars6nico y cromo de madera tratada mec_nico, aserrado, rectificado, taladrado y otras qufmicamente. actividades empleadas en construcci6n contiene Su desgo de exposici6n a estos productos varfa productos qufmicos que se sabe causan cdncer, dependiendo de cuan a menudo usted hace este defectos cong6nitos u otros dafios al sistema tipo de trabajo.
- Page 24 CONOZCA SU TUPI la base del tupf. Si es necesario sacar el protector contra astillas, apriete las lengOetasen cada extremo y tire Ver Figura 1. hacia afuera. Para volver a colocar apriete las lengOetas Antes de intentar usar su tupf, familiarfcese con todas las de cada extremo, para que calce en la abertura y caracteristicas de operaci6n y los requerimientosde su61telas.Pare su protecclbn, no use el tupl sin tener...
- Page 25 PARA TUERCADEL FRESA ADVERTENClA: Su tupf no debe estar AFLOJARLA PORTAFRESA enchufado en la fuente de alimentacibn cuando TUERCADEL est_ instalando piezas, haciendo ajustes, .LLAVE_ PORTAFRESA instalando o sacando fresas, Ifmpibndolo o cuando no est', en uso. AI desenchufar el tupf evitard la puesta en marcha accidental que podrfa provocar una lesibn personal grave.
- Page 26 AJUSTES DE LA PROFUNDIDAD DE CORTE Ver Figuras 4, 5 y 6. Recomendamos que los cortes sean hechos a prefundidades no mayores de 1/8 pulg. y que se hagan varias pasadas para hacer cortes m&s profundos de 1/8 pulg. • Desenchufe su tupf.
- Page 27 MESAS DE TUPI Ponga en marcha el tupf y deje que el motoradquiera No se ha investigadoel use de un tupi Craftsman en mesas velocidad, luego gradualmente baje o avance el embolo de otros fabricantes, pare verificar su cumplimiento con las o la fresa hacia la pieza de trabajo.
- Page 28 RECORTE A PULSO ADVERTENCIA: No use una fresa de tupf Ver Figura 9. grande para ranurado a pulso. Si se usa una fresa de tupf grande para el ranurado a pulso puecle perder el control de la herramienta o crear otras situaciones de peligro que puedan posiblemente resultar en lesiones personales graves.
- Page 29 Adem__s,es m_.s dificil controlar un tupi cuando la fresa est,. raspando en vez que recortando. Pr-4,cticamente sin carga en el motor, la fresa girar_l aproximadamente al m&ximo de revoluciones por minuto y tendr& una mayor tendencia normal a rebotar de los lados del corte (especialmente si la madera tiene un grano pronunciado con _treas duras y blandas).
- Page 30 Para hacer cortes m_s profundoses por Io tanto RANURADO necesado hacer tantas pasadas sucesivas come sea Siempre que estd cortando una ranura, su recorddo requerido haciendo descender la fresa 1/8 pulg. en debe ser en el sentido que coloque cualquier gufa que cada nueva paseda.
- Page 31 COMIENZO Y FIN DE UN CORTE Siempre que el grosor de la pieza de trabajo junto con la profundidad deseada del corte (ajustada mediante el CORTE INTERNO ajuste de profundidad del tupf) son tales que solamente Incline el tupf y col0quelo sobra la pieza de trabajo, la parte superior del borde debe set labrada (dejando dejando que el borde de la subbase toque primero la per Io menos una porcibn de 1/16 pulg.
- Page 32 LUBRICACION ADVERTENCIA: Cuando repare la herramienta use solamente repuestos aut_nticos Craftsman. Todos los cojinetes en eeta herramienta hart eido El uso de cualquier otro repuesto puede crear un lubricados con suficiente cantidad de lubricante de alta riesgo o dafiar el producto.
- Page 33 REEMPLAZO DEL INTERRUPTOR como sea posibleen el tomacorriente del interruptor correspondiente. Tire los conductorespara verificar Ver Figuras 15y 16. que las conexiones est_n bien hechas en los • Desenchufe su tup{. tomacorrientes. Ubique el interruptoren la manija y coloque los ADVERTENCIA: Si no se desenchufa el tup{, se conductoresde modo que ellos no vayan a ser...
- Page 34 TUPI CRAFTSMAN- NUMERO DE MODELO 315.175140 VER NOTA "A" NOTA: "A" - El conJunto que se Ilustra representa una parte Importante del Slstema de Alslamlento Doble. Pare evitar la poslbllldad de alteraci6n o daho al slstema, todas las reparaclones deben ser efectuadas por su Centro de Servlclo Sears rods cercano.
- Page 35 TUPI CRAFTSMAN - NUMERO DE MODELO 315.175140 Int_merode modelo se encuentra en una placa situada en la caja del motor. Siempre mencione el nt_mero | de modelo en toda la correspondencia relacionada con su TUPI o cuando solicite repuestos. VER LA ULTIMA PAGINA PARA LAS INSTRUCClONES COMO PEDIR REPUESTOS REPUESTOS Ref.
- Page 36 For repair of major brand appliances in your own home... no matter who made it, no matter who sold it! 1-800-4-MY-HOME Anytime, day or night (1-800-469-4663) www.sears.com To bring in products such as vacuums, lawn equipment and electronics for repair, call for the location of your nearest Sears Parts & Repair Center. 1-800-488-1222 Anytime, day or night www.sears.com...