Epson P-6000 User Manual
Multimedia storage viewer
Hide thumbs
Also See for P-6000:
- User manual (97 pages) ,
- Basics manual (72 pages) ,
- Instruction manual (46 pages)

Related Manuals for Epson P-6000


Summary of Contents for Epson P-6000
- Page 1 User’s Guide NPD3303-00 EN...
-
Page 2: Table Of Contents
Contents Copyright and Trademarks Safety Instructions Safety................10 Warnings, Cautions, and Notes. - Page 3 Copying via the Epson Link2 software........
- Page 4 Setting folders as Private............53 Changing a file's or folder's name.
- Page 5 Using the Features for Music............. 79 Audio equalizer setting.
- Page 6 P-6000 (Model: G971A)........
- Page 7 Electrical............... . 109 Interface.
- Page 8 Epson Corporation’s operating and maintenance instructions. Seiko Epson Corporation shall not be liable for any damages or problems arising from the use of any options or any consumable products other than those designated as Original Epson Products or Epson Approved Products by Seiko Epson Corporation.
- Page 9 Microsoft. General Notice: Other product names used herein are for identification purposes only and may be trademarks of their respective owners. Epson disclaims any and all rights in those marks. Copyright © 2008 Seiko Epson Corporation. All rights reserved.
-
Page 10: Safety Instructions
❏ Do not drop or apply any shock to the viewer. Take care when carrying it, as strong shocks may damage the internal hard disk drive and cause data to be lost. ❏ Epson is not responsible for backing up or recovering data. We recommend that you make your own backup files. - Page 11 ❏ Do not touch the components inside the viewer unless instructed to do so in the user documentation. Never force the viewer’s components into place. Although the viewer is designed to be sturdy, rough handling can damage it. ❏ Never spill liquid onto the viewer. ❏...
- Page 12 ❏ Use only an Epson Lithium-ion battery for the viewer according to the directions in the user documentation. ❏ You can use the following two methods to charge the battery. Connect the viewer (Model: G971A/ G971B) and the AC adapter (Model: A351H). Place the battery in the battery charger (Model: EU-217).
- Page 13 ❏ Charge the battery before using it if it has not been used for a long period. When storing the batteries ❏ When not using the viewer for a long period, remove the batteries from the viewer and store them separately.
- Page 14 ❏ Place the AC adapter near an electrical outlet where the power cord can be easily unplugged. ❏ The AC adapter and power cable provided are designed for use with the viewer. Do not attempt to use them with other electronic devices unless specified. ❏...
- Page 15 ❏ The power cable should be placed so as to avoid abrasions, cuts, fraying, crimping, kinking, and other damage. ❏ If the AC plug does not fit your outlet, have a proper outlet installed by a qualified electrician. ❏ Remove the AC plug from the outlet during lightning storms. For US and Canadian users: Use the included power cord or a 6 to 10 foot UL-approved type SPT-2 or heavier type, 2 18 AWG cord with a 125 V 10 A plug and 125 V 7 A connector.
-
Page 16: Safety Requirements
❏ Unplug the viewer from the power outlet before cleaning it. Use a damp cloth for cleaning and do not use liquid or aerosol cleaners. ❏ Remove the battery from and unplug the viewer and refer servicing to qualified service personnel under the following conditions: The power cable or plug is damaged;... - Page 17 R41A0K180 User’s Guide Appliance connector Use an appliance connector certified to the relevant IEC or BS standards. Certified by member of IECEE CB Scheme. Safety Instructions...
-
Page 18: Chapter 1 Introduction
If this happens, test the format by following the procedure in "Formatting Data in the Viewer" on page 97. If this does not fix the problem, you should contact an authorized Epson service center. Repairs will be chargeable and are not covered by Epson’s warranties. R41A0K180 User’s Guide... -
Page 19: Chapter 2 Getting Started
Chapter 2 Getting Started Parts Front Headphones connector SD Card slot Access lamp CF Card slot CF Card eject button Power switch with Hold function Strap hook Liquid Crystal Display (LCD) R41A0K180 User’s Guide Getting Started... -
Page 20: Back
Back USB connector (slave) USB connector (host) A/V Out connector Cover AC adapter connector Reset button Speaker Battery cover R41A0K180 User’s Guide Getting Started... -
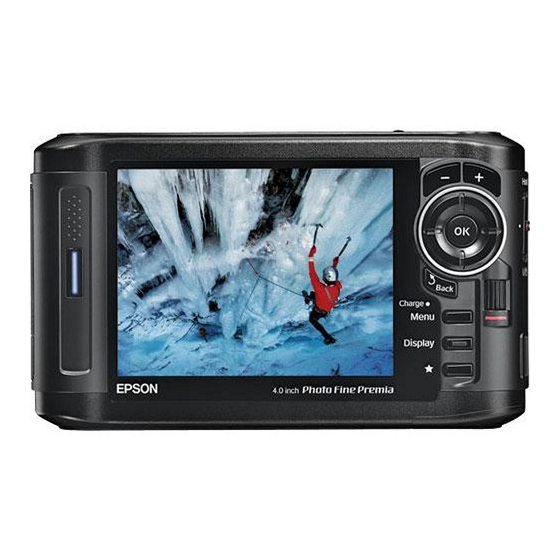
Page 21: Lcd And Control Panel
LCD and control panel - /+ key 4-way ring (Up/ Down/Left/Right key) OK key Wheel key Menu key Display key Charge lamp Back key Illumination lamp (Blue) Press to zoom a photo, and adjust the volume. Press to move the cursor or highlight. You can select an item by pressing this key to the up, down, left, or right. -
Page 22: Setting Up The Viewer
R41A0K180 User’s Guide Setting Up the Viewer This section describes how to turn the power on/off and use the Home screen, and so on. Turning the power on Slide the power switch to as shown below. The power switch will return to the original position. The Illumination lamp turns on. -
Page 23: Turning The Power Off
3. Set the date and time using the 4-way ring. 4. After you finish all settings, select Complete using the Right or Left key, then press the OK key. Note: ❏ If approximately 24 hours passes after removing the battery, the date and time settings may be lost, and will need to be set again. -
Page 24: Holding The Key Operations
Holding the key operations You can deactivate the keys temporarily by sliding the power switch to Hold as shown below. Note: ❏ To release Hold, slide the power switch back to the middle. ❏ Putting the key operations on hold is a useful function when carrying the viewer in your bag while listening to music with the headphones. -
Page 25: About The Software
For details, see "Creating Custom Print" on page 64. About the Software The viewer uses the following specified software. Epson Link2 You can transfer data from the computer to the viewer easily. USB Display Plug-In You can display images from Adobe Photoshop products on the viewer and edit photos while confirming a faithful color representation. -
Page 26: Installing The Software
Installing the software You are required to install the data in the viewer. Connect the viewer to the computer, then install the necessary software. For details about computer connection, see "Connecting the computer" on page 39. Note: ❏ Do not delete the installer (EXE/DMG file) in the viewer’s hard disk. ❏... -
Page 27: Uninstalling The Software
9. When a message appears indicating that installation is complete, click Exit or Restart Now. Note: When Restart Now appears, click the button to restart your computer. For Macintosh users 1. Connect the viewer to the computer. 2. Double-click the viewer’s hard disk icon on the desktop. 3. - Page 28 For Macintosh users 1. Select Custom Install in step 4 of "For Macintosh users" on page 27. 2. Select Epson Link2 or USB Display Plug-In. 3. On the software installation screen, select Uninstall. Note: After a message saying “Your computer needs to be restarted.” appears, click Restart Now to restart your computer.
-
Page 29: Chapter 3 Transferring Data To The Viewer
Chapter 3 Transferring Data to the Viewer Transferring the data of a full memory card or other USB devices to the viewer makes it possible for you to continue taking pictures. Transferring from CF/SD Memory Cards The viewer has a CF Card slot and an SD Card slot. You can copy the data from CF/SD memory cards onto Backup Files. -
Page 30: Inserting Cf/Sd Memory Cards
Note: Commercially available adapters will be required to use other memory cards (miniSD, microSD, RS-MMC, Memory Stick Duo, Memory Stick PRO Duo, xD-Picture Card, and so on). Contact our customer support for details. Inserting CF/SD memory cards Insert a compatible memory card in the CF card slot or the SD card slot. Insert the memory card into the memory card slot with the label side facing the display side of the viewer, then push it fully into the slot. - Page 31 2. For a CF memory card, push the eject button twice. The memory card is pushed out. For an SD memory card, push the memory card down slightly. The memory card is ejected. 3. Pull out the memory card. Note: ❏...
-
Page 32: Copying All Data
Copying all data 1. Insert a CF/SD memory card. Note: According to the screen that appears when inserting the memory card, skip step 2. 2. Select Memory Card in the Home screen using the Up or Down key, then press the OK key. 3. - Page 33 3. Press the OK key to show the data on the memory card. Note: If you are copying or moving only one file, use the 4-way ring to select the target file. 4. Press the Menu key to display the pop up menu, select Copy/Move using the Up or Down key, then press the OK key.
-
Page 34: Transferring From Usb Devices
Only a USB device supporting the USB Mass Storage specification can be used. You can use the following USB storage devices capable of copying: digital cameras, external HDD drives, USB memories, and card reader/writers. You can also use the following Epson Multimedia Storage Viewers: P-2000, P-4000, P-2500, P-4500, P-3000, P-5000, P-6000, and P-7000. -
Page 35: Copying All Data
Copying all data When a USB device, such as a digital camera, containing a DCIM folder is connected, you can copy all of the data to the viewer. You cannot copy all of the data from a USB device that does not contain a DCIM folder in the root folder. -
Page 36: Transferring From The Computer
R41A0K180 User’s Guide 2. Select Connect to USB device using the Up or Down key, then press the OK key. 3. Select Browse USB device using the Up or Down key. 4. Press the OK key to display the data stored on the USB device. 5. -
Page 37: Chapter 4 Transferring Data From The Viewer
Chapter 4 Transferring Data from the Viewer You can transfer data in the viewer to a USB device or computer and save important data. Transferring to USB Storage Devices or CF/SD Memory Cards You can transfer the data of this viewer to USB devices or memory cards. This is useful when you want to back up data in the viewer without using a computer. -
Page 38: Copying Data Within Backup Files
4. Select Select and Copy Files using the Up or Down key, then press the OK key. Note: When selecting only one file to copy, select Copy this File. When moving files, select Move this File or Select and Move Files. 5. -
Page 39: Transferring To The Computer
R41A0K180 User’s Guide 3. Select Connect to USB Devices using the Up or Down key, then press the OK key. 4. Select Copy all Backup Files using the Up or Down key, then press the OK key. The data is copied as folders in Backup Files. Note: You can copy only additional folders as those which have already been copied are not copied again. -
Page 40: Copying Via The Epson Link2 Software
Copying via the Epson Link2 software For Windows Click Start, point to All Programs (or Programs), then select EPSON. Select Epson Link2, then click Epson Link2. Alternatively, click the shortcut icon of the Epson Link2 software on the desktop. -
Page 41: Copying Via The Explorer
Epson Link2 User’s Guide. For Macintosh Double-click the Epson Link2 icon in the Epson Link2 folder. Only data that has not yet been backed up will be copied to the computer automatically. For details, see the online Epson Link2 User’s Guide. - Page 42 R41A0K180 User’s Guide For Macintosh 1. Drag and drop the viewer icon and memory cards (if inserted) to the trash can on the computer screen. 2. Disconnect the USB cable from the computer. 3. Disconnect the USB cable from the viewer. Transferring Data from the Viewer...
-
Page 43: Chapter 5 Viewing Images
The progressive JPEG format is not supported. The viewer supports images in RAW format taken with most digital cameras produced by Nikon, Canon, KONICAMINOLTA, PENTAX, Olympus, FUJIFILM, SONY, and Epson. Contact our customer support for details. The viewer supports only the JPEG preview embedded DNG format. -
Page 44: Displaying Photos Or Videos
Video File Video Codec Format MPEG4 (Advanced Simple Profile) Motion-JPEG MPEG4 (Advanced Simple Profile) Motion-JPEG MPEG4 (Advanced Simple Profile) H.264/AVC (Baseline Profile Level 1.3) Note: ❏ The maximum supportable video file size is 2 GB. ❏ Some data may not be played even if the data is supported by the viewer. Displaying photos or videos When you want to view or edit photos or videos using the viewer, place the data in My Photos or My Videos respectively. -
Page 45: How To See The Contents Screen
1. Select Backup Files, My Photos, or My Videos, in the Home screen using the Up or Down key, then press the Right key. Note: Press the Right key to display the subfolders in the folder. You can easily navigate the folder structure when a subfolder is displayed on the right by selecting a folder with the Up or Down key and then pressing the Right key. - Page 46 Indicates that the file or folder is locked. For details, see "Protecting files or folders" on page 57. Indicates unsupported data, such as a document. Indicates that the file is set with the rating information. Indicates that a Sound Memo has been attached to an image from a digital camera. Indicates the file is in music format.
-
Page 47: Displaying Information
R41A0K180 User’s Guide Files or folders appear in 64 divided thumbnails. Details screen The modify date and file size are displayed. Switching the view mode You can switch between two file display methods. As with the folder display method for computer data and for digital cameras, this method does not display all of the data. - Page 48 Photo For a photo file, no information is displayed first. You can switch to the file information (as below) by pressing Display key. File information (general) Note: ❏ In the over-under exposure preview, about 6% on each end of the brightness range (low and high) throughout the image shows graduated tone reversal allowing you to check exposure level.
-
Page 49: Zooming A Photo
Video For a video file, the progress information is displayed first. You can switch to the file information (as below) by pressing the Display key again. Zooming a photo When viewing images in full screen, you can use the zoom function. The following table describes how the keys work. -
Page 50: Displaying Photo Enhance
Note: ❏ Photos can be rotated automatically if they have automatic rotate information and the viewer setting is set to Auto-Rotation ON. For details, see "Changing the Viewer Settings" on page 83. ❏ You can display the other photos in the folder using the Right or Left key. Displaying photo enhance During full screen display, pressing the Menu key to display the pop up menu, then selecting Enhanced Photo Display Mode enters the photo enhance mode. -
Page 51: Editing Photos
Operation Left/Right Rewind/Fast-forward When you press the Back key to stop playback, the viewer remembers the resume point for the next time you start playback. The next time you start playback, playback starts from 3 seconds before the resume point. If you want to play back the video from the beginning, press the Menu key during playback, select Play Settings (if displayed), Play from Beginning, then press the OK key. -
Page 52: Raw Processing
RAW processing You can process RAW images and then save them in JPEG format. You can make various adjustments when processing. When selecting multiple images, you can process all of the data using the same settings. 1. On the Thumbnail screen, select the RAW image that you want to edit. Or, you can display the RAW image in full screen. -
Page 53: Setting Folders As Private
2. Press the Menu key to display the pop up menu, select Slide Show using the Up or Down key, then press the OK key. The slide show starts. Note: ❏ The slide show effect, duration, and slide show music can be selected. Pressing the Menu key during the slide show enables you to set the slide show settings from the pop up menu. -
Page 54: Changing A File's Or Folder's Name
7. Use the 4-way ring and the private folders, then press the OK key. Note: Pressing the Menu key in the thumbnails screen displays the pop up menu. You can select either Select All or Deselect All, then press the OK key, or select Apply from the pop up menu. Note: To hide the folder set as a private folder, select Hide Private Folders in step 3. -
Page 55: Deleting Files Or Folders
4. The on-screen keyboard appears. Select a letter using the 4-way ring, then press the OK key to input the selected letter. Note: ❏ The cursor can be moved forward/backward by pressing the + or - key. ❏ To delete the last letter input, press the Back key. ❏... -
Page 56: Copying/Moving Files Or Folders
3. Use the 4-way ring and the delete, then press the OK key to complete. Note: Pressing the Menu key in the thumbnails screen displays the pop up menu. You can select either Select All or Deselect All, then press the OK key, or select Apply from the pop up menu. When you want to delete files in full screen, press the Menu key to display the pop up menu, then select Delete to enter the deletion mode. -
Page 57: Protecting Files Or Folders
3. Select Select and Copy Files or Select and Move Files using the Up or Down key, then press the OK key. Note: When selecting only one file to copy or move, select Copy this File or Move this File. 4. -
Page 58: Setting Home Screen Wallpaper Or Folder Icons
4. Use the 4-way ring and the lock, then press the OK key to complete. (Files or folders which have already been locked are displayed with check marks. Pressing the OK key removes the check mark and unlocks the file or folder.) Note: Pressing the Menu key in the thumbnails screen displays the pop up menu. -
Page 59: Using Ratings To Filter Your Photos
❏ You cannot rate data stored on a USB device or memory card. ❏ When a photo file is rated ❏ To edit a file that you rated with the viewer using Adobe Bridge, see the online Epson Link2 User’s Guide. -
Page 60: Setting The Screen Saver
3. Select the filter setting using the Up or Down key. Photos with that star rating or higher are displayed. When you want to cancel filtering, follow the procedures in step 2, and then select Show All. Note: ❏ Folders are always displayed after filtering. ❏... -
Page 61: About The Pop Up Menu
Some functions in Adobe applications are not supported. For details, see the documentation stored in the following location. For Windows: Click Start, select All Programs (or Programs), EPSON, Viewer Tools, USB Display. For Macintosh: Applications: Epson: Viewer Tools: USB Display 1. -
Page 62: For Photo Files
For photo files Rating Filter Display Sets the rating filter. Enhanced Photo Displays photo images utilizing the features of the wide color gamut display. Display Mode Playback Sound Memo Plays back sound memos. Copy/Move Copies/Moves files or folders. Edit Edits such as retouching, RAW processing, rotating photos, locking files, changing the name, and so on. - Page 63 Return to HOME Returns to the HOME screen. Delete Deletes files or folders. Note: Different pop up menus will appear when you press the Menu key, depending on which screen you are viewing. R41A0K180 User’s Guide Viewing Images...
-
Page 64: Chapter 6 Creating Custom Print
Chapter 6 Creating Custom Print You can print photos from this viewer without connecting it to a computer. Simply connect the viewer to a PictBridge compatible printer. You can print out your projects by following the Print Wizard menu screen flows from editing photos to printing them out. -
Page 65: Using The Print Wizard Menu
❏ Maximum data size: 10 MB ❏ Maximum image size: 720 x 480 pixels ❏ Not including animated files To register text, follow the procedure below. 1. On the Home screen, select Settings, using the Up or Down key, then press the OK key. 2. -
Page 66: Creating Custom Print
1. On the Home screen, select Print Wizard using the Up or Down key, then press the OK key. Note: If an unprinted job is stored in the viewer, follow the instructions on the screen. 2. Select the menu you want using the Up or Down key, then press the OK key. Menu Details Create Custom Print... -
Page 67: Retouching A Photo
3. Use the 4-way ring to select the photo you want to edit, then press the OK key. You can select JPEG or RAW data. 4. When a message screen appears, check the contents, and then use the 4-way ring and OK key to proceed. - Page 68 2. If you select Manual Settings, choose the setting item you want to change on the Retouch Additions or RAW Additional Adjustments screen using the Up or Down key, then press the OK key. Note: ❏ The following setting items are available. Brightness, Contrast, Saturation, Color Balance, Monochrome Filter, Sharpness, Noise Reduction, White Balance, Exposure, and Contrast.
-
Page 69: Cropping A Photo
❏ In some cases, you may not be able to display or process RAW data edited by other software applications. Cropping a photo You can make cropping settings for your images. You can crop using fixed ratios or custom settings. 1. -
Page 70: Setting The Layout
5. Your photo with cropping applied is displayed on the Cropping Preview screen. If you want to save the cropped photo, select OK, then press the OK key. If you want to make additional changes, select Additional Adjustments, then repeat steps 3 to When saving the image, the Select Print Layout Size screen is displayed. - Page 71 3. Press the Menu key to make the background color, frame, and water mark settings. Menu Details Background Color Select the background color. Frame Color Select the frame color. Frame Width Select the frame width. Select Watermark Select the Watermark. Edit Watermark You can reduce, enlarge, move, and rotate the water mark.
-
Page 72: Printing Photos
6. When saving the image, a confirmation screen appears asking whether or not you want to save it as a template. Select Yes and press the OK key to name the file and save it as a template. Note: The on-screen keyboard appears and you can enter the template name. For details on the entry method, see steps 4 and 5 in "Changing a file's or folder's name"... - Page 73 2. Connect the other end of the USB cable to the connector on the printer. *USB (Standard-A) Note: ❏ See the printer’s manual for the location of the cable connector on the printer. ❏ Disconnect the USB cable from the viewer when not operating with a computer or printer. ❏...
-
Page 74: Making Copies Of Custom Print
Setting Detail Sets the kind of paper to use. Paper Kind Sets whether or not to print the date when the photo was taken. Print Date Print Mode Sets the print mode. When printing, the image data is automatically corrected and then printed. Color enhance Depending on the printer, you cannot select the paper as the setting is set to Auto. -
Page 75: Printing Contact Sheet
3. Select the file you want to print using the 4-way ring, and select the number of copies using the -/+ key, then press the OK key. Note: By pressing the Menu key, you can select all JPEG, RAW. 4. Select the print layout. 5. -
Page 76: Chapter 7 Playing Music
You can listen to music on the viewer. Transferring Audio Data from the Computer Using the Epson Link2 software is recommended to transfer audio data from the computer to the viewer. 1. After installing the Epson Link2 software, connect the viewer to the computer. For details, see "Connecting the computer"... -
Page 77: Starting Playback
Starting Playback When playing back music, you can select the category or start resume play from the beginning of the previously played track. This function is useful to narrow down your music search. Selecting the category 1. Select My Music in the Home screen using the Up or Down key, then press the OK or Right key. 2. -
Page 78: Resume Play
Resume play 1. Select My Music in the Home screen using the Up or Down key, then press the OK key. 2. Select Resume using the Up or Down key, then press the OK key. You can start resume play from the beginning of the previously played track. Basic operations while playing music Operation Play/Pause... -
Page 79: Using The Features For Music
Always select either Shuffle or Normal Play Order to set the playback order, and select the desired repeat play mode. Repeat setting Select No Repeat Repeat One Song Repeat All Playback order setting Select Shuffle Normal Play Order Using the Features for Music Audio equalizer setting You can select the desired equalizer settings. -
Page 80: Deleting Album Tracks From The Viewer
OK key to complete. Creating a Playlist on the Viewer Not only can you create a Playlist on the Epson Link2 software, you can also create them on the viewer. 1. Press the Menu key to display the pop up menu in a track name list in a category. -
Page 81: To Add Tracks To A Created Playlist
4. The on-screen keyboard appears. Select a letter using the 4-way ring, then press the OK key to input the selected letter. Note: To delete the last letter input, press the Back key. To cancel the operation, select Cancel using the 4-way ring, then press the OK key. -
Page 82: To Change Track Order Of A Created Playlist
To change track order of a created Playlist 1. Open the track list of the Playlist to change the order of. 2. Select a track of which to change the order to move. 3. Press the Menu key to display the pop up menu, then select Change Song Order. 4. -
Page 83: Chapter 8 Customizing Settings
Chapter 8 Customizing Settings You can customize various settings for displaying and copying images, or change the sound setting to make the viewer more useful. Changing the Viewer Settings The settings described in the following table can be configured from Settings. To display the menu, select Settings in the Home screen, then press the OK key. - Page 84 Power Save Backlight Timer Sleep Timer Power Off Timer Screen Saver View Mode Video Out Auto-Rotation Unsupported Files Color Space RAW Image Display Settings Backup Settings Backup Method Process After backup Backup Completion Sound Movie Setting Screen Size Playback Mode Movie Display Mode Sets the time at which the LCD’s backlight will turn off and the LCD will go blank...
- Page 85 Slide Show Effects Duration Slide Show Music Clock Sound Guide Beep Key Beep Volume Watermark Settings LCD Settings LCD Brightness LCD Custom setting Date and Time Date and Time Language Language These settings are also effective for Screen Saver. After changing the setting, reconnect the VIDEO cable. Sets one of the five slide show effects.
-
Page 86: Chapter 9 Viewing On A Tv
Chapter 9 Viewing on a TV Using A/V Out The viewer has an A/V Out connector. You can play slide shows and videos on an external monitor by connecting the viewer to a monitor device, such as a TV, that has a video input connector. Follow the instructions below to view photos or play videos on TV. -
Page 87: Chapter 10 Maintenance
Chapter 10 Maintenance Cleaning the Viewer To keep the viewer operating at its best, you should clean it thoroughly several times a year. Before you perform any maintenance on the viewer, be sure to read the <+ to Important Safety Instructions>, then follow these guidelines. -
Page 88: Charging The Battery
2. Insert the battery into the compartment in the direction of the arrow on the battery sticker. Insert the battery until it clicks and locks in place. 3. Close the battery cover and slide it to the left until it clicks. Charging the battery After installing the battery, connect the AC adapter. -
Page 89: Removing The Battery
2. Connect the AC adapter as shown below, then plug the other end into a power outlet. Charge lamp The Charge lamp lights green during charging. When the battery is fully charged, the Charge lamp turns off. It takes about 3.5 hours to fully charge the battery when the power is off, more time if the viewer is in use. - Page 90 3. Push the catch down. The battery is pushed out. 4. Pull out the battery, then close the battery cover. Warning: Do not carry loose batteries in your pocket. R41A0K180 User’s Guide Maintenance...
-
Page 91: Chapter 11 Troubleshooting
"Formatting Data in the Viewer" on page 97. If this does not fix the problem, send the viewer to an authorized Epson service center. (The data on the viewer will be deleted.) Repairs will be chargeable and are not covered by Epson’s warranties. -
Page 92: Power Supply Problems
Power supply problems The power does not turn on Cause The battery is set incorrectly. The battery has run out. The Charge lamp lights orange Cause The battery is not inserted. The viewer becomes hot. Viewing and playback problems Cannot access data Cause The name of a file or folder is not supported by the set language. -
Page 93: The Data Is Not Displayed
Also, check the codec of the data if you are trying to display a video file. You can convert and transfer video and audio files with the Epson Link2 software. Copy the data again. See "Changing the Viewer Settings" on page 83 and make sure the LCD Brightness setting is set properly. -
Page 94: Sound Breaks Off When The Video Or Audio Is Played
43. For details about audio files, see "Audio file formats supported by the viewer" on page 76. You can convert and transfer video and audio files with the Epson Link2 software. What to do Check the audio codec and the volume. -
Page 95: Cannot Copy
Cannot increase the hard drive capacity of the viewer even if deleting files Cause Check if data was deleted without using the Epson Link2 software on the computer. Even if deleting data in the viewer on the computer, if the data has not been deleted completely, hard drive capacity of the viewer cannot be increased. -
Page 96: Printing Problems
See "Printing photos" on page 72 and reconnect the viewer to the printer. Try to print a different file. Check the EPSON Web site for supported RAW files. What to do Adjust the brightness of the screen or the color temperature of the LCD display. -
Page 97: Formatting Data In The Viewer
R41A0K180 User’s Guide Formatting Data in the Viewer You can delete all of the data from the viewer. Settings in the viewer itself are not deleted. Note: Before formatting, be sure to backup important data to an external hard disk or memory device. 1. -
Page 98: Appendix A Customer Support
Contacting Customer Support Before Contacting Epson If your Epson product is not operating properly and you cannot solve the problem using the troubleshooting information in your product documentation, contact customer support services for assistance. If customer support for your area is not listed below, contact the dealer where you purchased your product. -
Page 99: Help For Users In Europe
Check your Pan-European Warranty Document for information on how to contact EPSON Customer support. Help for Users in Australia Epson Australia wishes to provide you with a high level of customer service. In addition to your product documentation, we provide the following sources for obtaining information: R41A0K180 User’s Guide... -
Page 100: Help For Users In Singapore
(e-mail). Epson Helpdesk Epson Helpdesk is provided as a final backup to make sure our clients have access to advice. Operators on the Helpdesk can aid you in installing, configuring and operating your Epson product. Our Pre-sales Helpdesk staff can provide literature on new Epson products and advise where the nearest dealer or service agent is located. -
Page 101: Help For Users In Thailand
Epson HelpDesk (Phone: (65) 6586 3111) Our HelpDesk team can help you with the following over the phone: ❏ Sales enquiries and product information ❏ Product usage questions or problems ❏ Enquiries on repair service and warranty Help for Users in Thailand Contacts for information, support, and services are: World Wide Web (http://www.epson.co.th) - Page 102 World Wide Web (http://www.epson.co.id) ❏ Information on product specifications, drivers for download ❏ Frequently Asked Questions (FAQ), Sales Enquiries, questions through e-mail Epson Hotline ❏ Sales enquiries and product information ❏ Technical support Phone (62) 21-572 4350 (62) 21-572 4357...
-
Page 103: Help For Users In Hong Kong
To obtain technical support as well as other after-sales services, users are welcome to contact Epson Hong Kong Limited. Internet Home Page Epson Hong Kong has established a local home page in both Chinese and English on the Internet to provide users with the following information: ❏ Product information ❏... -
Page 104: Help For Users In India
603-56288333 Help for Users in India Contacts for information, support, and services are: World Wide Web (http://www.epson.co.in) Information on product specifications, drivers for download, and products enquiry are available. Epson India Head Office - Bangalore Phone: 080-30515000 Fax: 30515005 Epson India Regional Offices:... -
Page 105: Help For Users In The Philippines
For Service (CDMA & Mobile Users) - 3900 1600 (9AM - 6PM) Prefix local STD code Help for Users in the Philippines To obtain technical support as well as other after sales services, users are welcome to contact the Epson Philippines Corporation at the telephone and fax numbers and e-mail address below: Phone: (63) 2-813-6567... - Page 106 R41A0K180 User’s Guide ❏ Sales enquiries and product information ❏ Product usage questions or problems ❏ Enquiries on repair service and warranty Customer Support...
-
Page 107: Appendix B Technical Specifications
Appendix B Technical Specifications Standards and Approvals P-6000 (Model: G971A) U.S. model: FCC Part 15 Subpart B Class B CAN/CSA-CEI/IEC CISPR22 Class B Safety UL 60950-1 CSA C22.2 No.60950-1 European model: EMC Directive EN 55022 Class B 2004/108/EC EN 55024... -
Page 108: Battery (Model: D111A)
European model: Low Voltage Directive EN 60950-1 2006/95/EC EN 55022 Class B EMC Directive EN 55024 2004/108/EC EN 61000-3-2 EN 61000-3-3 Australian model: Safety AS/NZS 60950.1 AS/NZS CISPR22 Class B Battery (Model: D111A) U.S. model: Safety UL2054 European model: EMC Directive EN 55022 Class B 2004/108/EC EN 55024... -
Page 109: Electrical
2.5" HDD (73.8 GB) FAT12/16/32 VFAT supported Dimensions and Height: 88.7 mm (3.5 inches) weight Width: 150 mm (5.9 inches) Depth: 33.1 mm (1.3 inches) Weight: Approx. 428 g (0.94lb) (including the battery) Temperature Operating: 5 to 35°C Humidity (without Operating: 30 to 80% condensation) Non-operating: 10 to 80%... -
Page 110: Interface
Interface USB connector Two USB 2.0 (Mass Storage Class) interface Host: 2.0 Full Speed and High Speed mode (Standard-A) Slave: 2.0 Full Speed and High Speed mode (Mini-B) A/V Out connector Quadruple mini pin jack (Ø 3.5 mm) Headphones 3-pole mini pin jack (Ø 3.5 mm) connector CF Card slot One slot (Type2, 3.3 V) for CompactFlash memory card and MicroDrive... -
Page 111: About Optional Accessories
About Optional Accessories The following options are available for the viewer. optional product product code Lithium-Ion battery B32B81826✽ (Model: D111A) The asterisk (✽ ) is a substitute for the last digit, which varies by country. R41A0K180 User’s Guide Technical Specifications... - Page 112 Changing a file’s name or folder’s name...54 Cleaning the viewer...87 Connecting to the computer...39 Contacting Epson...98 Copying data to Photos or Videos from USB devices...34, 37 Deleting audio files...80 files or folders...55, 56 Disconnecting from the computer...41 File format audio...76...
- Page 113 Private folders...53 Problems, solving contacting Epson...98 Protecting files or folders...57 Rate...59 Resetting the viewer...96 Safety instructions...10 Safety requirements...16 Screen icons...44 switching...46 Screen saver...60 Service...98 Setting backlight timer...84 date and time...85 language...85 power off timer...84 screen saver...84 sleep timer...84 slide show clock...85 slide show duration...85...