Table of Contents

Related Manuals for Epson Digitial Camera


Summary of Contents for Epson Digitial Camera
- Page 1 ®...
- Page 2 FCC COMPLIANCE STATEMENT FOR AMERICAN USERS This equipment has been tested and found to comply with the limits for a class B digital device, pursuant to Part 15 of the FCC Rules. These limits are designed to provide reasonable protection against harmful interference in a residential installation. This equipment generates, uses, and can radiate radio frequency energy and, if not installed and used in accordance with the instructions, may cause harmful interference to radio and television reception.
- Page 3 EasyPhoto and the EasyPhoto logo are trademarks of Storm Software, Inc. General notice: Other product names used herein are for identification purposes only and may be trademarks of their respective owners. EPSON disclaims any and all rights in those marks.
-
Page 4: Table Of Contents
Table of Contents Introduction PhotoPC Features Optional Accessories Minimum System Requirements Where to Get Help Electronic Support Services Where to Get Software Help Registration Safety Instructions Chapter 1: Getting Started Unpacking Your PhotoPC Getting to Know the Camera Installing Batteries Handling Batteries Attaching the Hand Strap Removing the Plastic Film... - Page 5 PhotoPC Macintosh User’s Guide Using Pictures in Your Documents Inserting a Picture with Copy and Paste Inserting a Picture with Drag and Drop Inserting a Picture by Importing Closing EasyPhoto Chapter 4: Working with Your Pictures Using Galleries Adding or Changing Picture Information Finding a Picture Displaying a Gallery as a Slide Show Making Changes with the Workshop...
- Page 6 ® our new EPSON PhotoPC is a revolutionary, easy-to-use digital camera that enables you to take full-color pictures and immediately use them on your Macintosh. thePhotoPC Mac version or the Mac Connectivity Kit and Photo PC Windows version. Either way, you have everything you need, including software that lets you transfer your pictures to your computer’s hard...
-
Page 7: Introduction
Print out your pictures on any color or black and white printer. Introduction Optional Accessories EPSON offers the following optional accessories for enhancing your PhotoPC: 2MB and 4MB PhotoSpan memory modules Universal AC adapter for use with a standard electric outlet. -
Page 8: Where To Get Help
EPSON Accessories at (800) 873-7766 (U.S. sales only). In Canada, call (800) GO-EPSON. If you purchased your PhotoPC outside the United States or Canada, contact your EPSON dealer or the marketing location nearest you for customer support and service. -
Page 9: Where To Get Software Help
Epson Forum on Compuserve CompuServe members can call the Epson America Forum on CompuServe. If you are already a member, simply type GO EPSON at the menu prompt to reach the Forum. If you are not currently a member of CompuServe, you are eligible for a free introductory membership as an owner of an EPSON product. -
Page 10: Registration
Registration Please take a minute to fill out the registration card included with PhotoPC and mail it back to us. This enables you to receive special information on software upgrades, accessories, and new products. You’ll get immediate attention if you have a problem with your PhotoPC. - Page 11 Introduction...
-
Page 12: Chapter 1: Getting Started
222333 Getting Started camera hand strap Mac adapter software PhotoPC cable his chapter helps you get ready to use your PhotoPC. It covers the following: Getting to know the camera Installing the batteries Attaching the hand strap Removing the plastic film batteries Installing your EasyPhoto software Installing the PhotoPC Plug-in. -
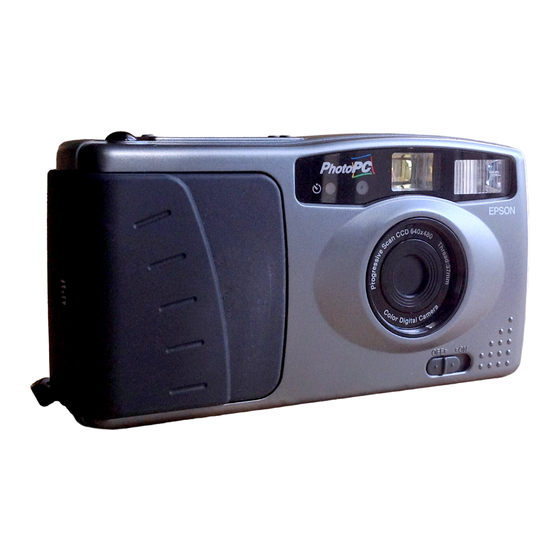
Page 13: Getting To Know The Camera
TITLE Cam1-02.eps EPSON AMERICA, INC. shutter control panel button hand strap holder TITLE Cam1-03.eps EPSON AMERICA, INC. DATE Documentation Department 6/26/95 20770 Madrona Avenue, Torrance, CA 90503... -
Page 14: Installing Batteries
Slide the battery cover lock to the right to release the cover. TITLE Cam1-04.eps EPSON AMERICA, INC. DATE Documentation Department 8/15/95 Grasp the battery cover and pull it away from the camera body as shown. -
Page 15: Handling Batteries
Handling Batteries When your PhotoPC batteries wear out, you can replace them with any of the following: Single-use AA alkaline batteries Single-use AA lithium batteries (longest battery life) Rechargeable AA Ni-Cad batteries (shortest battery life). WARNING To avoid the danger of fire or explosion, do not mix different types of batteries. -
Page 16: Attaching The Hand Strap
Attaching the Hand Strap To attach the hand strap, loop the strap around the holder on the side of the camera as shown below. TITLE 1 07 Removing the Plastic Film To protect the camera from scratches, some parts have been covered with plastic film, as shown in the gray areas below. -
Page 17: Installing The Photopc Plug-In
If you have the PhotoPC Mac Version, use the software diskettes that came in the box with the camera. If you have the Mac Connectivity Kit, make sure you use the diskettes that came in the kit. Follow these steps to install EasyPhoto: Insert EasyPhoto diskette 1 in your diskette drive. -
Page 18: Chapter 2: Taking Pictures With Photopc
Taking Pictures with PhotoPC sing PhotoPC to take pictures is similar to using a traditional “point and shoot” camera. This chapter shows you everything you need to know, including the following information: Turning the camera on and off Saving power with auto shut-off Using the control panel Checking the battery icon Snapping the shutter... -
Page 19: Turning The Camera On And Off
The control panel keeps track of how many pictures you’ve taken and gives you important information about the status of your battery and the settings you’re using. resolution mode pictures remaining timer EPSON AMERICA, INC. Documentation Department 20770 Madrona Avenue, Torrance, CA 90503 (310) 782-0770 pictures taken erase last picture... -
Page 20: Checking The Battery Icon
Checking the Battery Icon Before you take pictures, check the battery icon on the control panel. The icon shows how much battery power you have left, in the following four stages: Full battery power (or AC adapter in use) Battery power is decreasing Battery power is almost out Change batteries The battery icon is not precise, so you should use it only as a guide to... -
Page 21: Taking Pictures In Range
NOTE Remember that the camera shuts off automatically after 60 seconds. To turn the camera back on, slide the power switch OFF, and then ON. Or press the shutter button to turn on the camera. You will have to press the shutter button again to take a picture. Taking Pictures in Range You should be at least 2 feet (60 cm) away from the subject you are photographing. -
Page 22: Flash
AUTO TITLE resolution flash timer Cam2-07.eps EPSON AMERICA, INC. DATE Documentation Department 6/26/95 20770 Madrona Avenue, Torrance, CA 90503 (310) 782-0770 DRAWN BY L.Oliver Flash PhotoPC’s built-in flash has three settings as listed below, which are effective within a range of 3 to 10 feet. Press the flash control button to cycle from one setting to another. -
Page 23: Resolution
Resolution PhotoPC has two resolution settings, high and standard. Press the resolution control button to switch from one setting to the other. The settings appear on the control panel as shown. resolution button High resolution Images are captured at 640 480 pixels. - Page 24 High resolution image Standard resolution image 480 pixels 320 240 pixels Taking Pictures with PhotoPC...
-
Page 25: Timer
7 seconds. Then it flashes 3 times. Taking Pictures with PhotoPC shutter button red timer light TITLE Cam2-14.eps EPSON AMERICA, INC. Documentation Department DATE 6/26/95 20770 Madrona Avenue, Torrance, CA 90503 (310) 782-0770 DRAWN BY L.Oliver... -
Page 26: Erasing Pictures
Erasing Pictures If you don’t want to keep the last picture you took, you can erase it from the camera’s memory. Using a small pointed object such as a ballpoint pen, press the erase button on the top of the camera. The erase icon on the control panel flashes when you press the button. - Page 27 NOTE Depending on the type of images you capture, your camera may hold more than 16 pictures at high resolution or 32 at standard resolution. When you take the last picture, the number of pictures remaining may show one instead of zero. When this happens, you can take an extra picture—or several extra pictures.
-
Page 28: Chapter 3: Using Photopc With Your Macintosh
Macintosh. The universal AC adapter should be available where you bought your PhotoPC. If not, you can order an AC adapter by calling EPSON Accessories at (800) 873-7766 (U.S. sales only). In Canada, call (800) GO-EPSON. - Page 29 EPSON AMERICA, INC. If you’re using the PhotoPC cable that came with the camera, connect it to the Mac adapter cable as shown, and tighten the connector screws.
- Page 30 Locate the modem port or printer port on the back of your Macintosh, marked with these icons: With the arrow on the cable facing up, line up the cable connector with the port on your Macintosh. Then insert the connector. printer port on Macintosh modem port on...
-
Page 31: Transferring Pictures To Your Macintosh
Transferring Pictures to Your Macintosh Once your camera and Macintosh are connected and turned on, you’re ready to transfer your pictures. You can use the EasyPhoto software that came with your PhotoPC Mac Version or in the Macintosh Connectivity Kit. If you haven’t installed the software yet, do it now, following the instructions on 1-5. - Page 32 Click the PhotoPC button and click OK. Your pictures appear one- by-one in the PhotoPC window. Click below a picture to display the date and time when the picture was taken. These are accurate only if you connected the camera to your Macintosh and set the clock before taking the picture.
-
Page 33: Erasing Pictures From Your Camera
Adobe Photo Deluxe) to transfer your pictures. Select PhotoPC as the source when you acquire an image. You will see the PhotoPC window. You may need to transfer your pictures individually or in small groups, rather than all at once. Erasing Pictures from Your Camera After you have viewed your pictures and transferred them to your Macintosh, you can erase them from your camera. -
Page 34: Inserting A Picture With Copy And Paste
You can use three methods to add pictures to your documents: Copy and paste Drag and drop Importing. Inserting a Picture with Copy and Paste You can use this method to insert a picture in any Macintosh application. NOTE If your Macintosh has less than 16MB RAM, you may need to increase your virtual memory setting and the memory allocation for your application. - Page 35 Position the insertion point where you want to add the picture. Choose Paste (or Paste Special) from the Edit menu: Pasting a picture into a word-processing document Using PhotoPC with Your Macintosh A copy of the picture appears in your document:...
-
Page 36: Inserting A Picture With Drag And Drop
Inserting a Picture with Drag and Drop You can use this method with any application that supports it—for ® ® example, Microsoft Word 6.0 or PageMaker give it a try. If it doesn’t work, you can use the copy and paste or importing method. -
Page 37: Inserting A Picture By Importing
Inserting a Picture by Importing If your application can’t import a JPEG file, you need to change the picture’s file type to PICT. See 4-10 for instructions. Then follow these steps: NOTE If your Macintosh has less than 16MB RAM, you may need to increase your virtual memory setting and the memory allocation for your application. -
Page 38: Closing Easyphoto
After you choose the command, you see a document selection dialog box like the following: Locate and select your picture. Click the Insert button. The picture appears in your document. Closing EasyPhoto When you are finished working with your pictures, follow these steps to close EasyPhoto: Choose Quit from the File menu. - Page 39 3-12 Using PhotoPC with Your Macintosh...
-
Page 40: Chapter 4: Working With Your Pictures
Working with Your Pictures sing your EasyPhoto software, you can organize your pictures in galleries, enhance the images with the Workshop, and add visual impact to almost any kind of document with your photos. To find out how to transfer pictures to your Macintosh and insert them in your documents, see Chapter 3. -
Page 41: Using Galleries
Using Galleries When you transfer your pictures from the PhotoPC camera to your Macintosh, they are stored in a gallery, shown on the right. Using the slide show feature, you can turn a gallery into a slick presentation on your screen. You can easily rearrange the pictures in a gallery by clicking and dragging. -
Page 42: Finding A Picture
Follow these steps to add a caption or change a picture’s title: Click the photo to select it. Click the Edit Photo Information button on the toolbar. The Photo Info window appears, as shown: Type title here Type the text you want for the picture’s title or caption. The same picture may have a different title and caption in another gallery. -
Page 43: Displaying A Gallery As A Slide Show
Follow these steps to search for pictures by example: Open the gallery that has the picture you want to use as an example. Choose Find Photos by Example from the Gallery menu. A dialog box like the following appears: Use the scroll bars to display the example photo. Under Where To Look, click In the Current Gallery or In All Galleries. -
Page 44: Making Changes With The Workshop
Making Changes with the Workshop EasyPhoto’s Workshop lets you make the following kinds of changes to your pictures: Cropping Resizing Rotating Adjusting brightness and contrast Adjusting colors Removing red-eye Cutting, copying, pasting, and flipping. To open a picture in a Workshop window, double-click its thumbnail in the gallery. -
Page 45: Cropping
Cropping You can crop your pictures by selecting either a rectangular area or a freehand area to keep; everything outside of the area is cut away. Follow these steps: Click either the Select Rectangle button or the Select Freehand button. Drag the mouse to enclose the area you want to keep. -
Page 46: Adjusting Brightness And Contrast
Adjusting Brightness and Contrast Changing the brightness of a picture lets you make it lighter or darker; changing the contrast adjusts the difference between the picture’s light and dark areas. Follow these steps: Click the Brightness and Contrast button. You see a window like the one to the right: Drag to see a different part... -
Page 47: Removing Red-Eye
Drag the sliders to change the red, green, and blue colors in your picture. The After sample shows you the results of your changes. Click OK to save your changes to the picture. NOTE If you want to change the colors, brightness, or contrast in only one part of your picture, select that part before you make the adjustment. -
Page 48: Cutting, Copying, Pasting, And Flipping
Click the Remove Red-Eye button. You see a window like the one below: Drag to fix red-eye Drag the slider until the eyes look normal in the After sample. Click OK to save your changes to the picture. Cutting, Copying, Pasting, and Flipping You can choose Cut, Copy, or Paste from the Edit menu to take a selected part of one picture and add it to another picture. -
Page 49: Changing Picture File Information
Changing Picture File Information When you work with EasyPhoto, you don’t need to keep track of your picture files. EasyPhoto does it for you. However, you can change a picture’s file name, file type, or move it to a new folder if you want. Follow these steps: In a Workshop window, choose Save Photo As from the File menu. -
Page 50: Chapter 5: Using Advanced Features
Using Advanced Features hen PhotoPC is connected to your Macintosh, you can customize several of the camera’s settings. You can also take pictures by controlling the camera directly from your Macintosh. This chapter describes the following: Getting ready to use advanced features Setting the clock Setting auto shut-off Setting the shutter speed... -
Page 51: Setting The Clock
You can switch between Setup and Controls by clicking on the buttons. NOTE You can also access the Camera Controls windows from the PhotoPC screen. Click the Camera Options button. Drag to customize auto shut-off Click to change date and time, if necessary Using Advanced Features Setting the Clock If you set the clock, PhotoPC automatically records the correct date and... -
Page 52: Setting Auto Shut-Off
Setting Auto Shut-off PhotoPC’s power-saving feature automatically shuts off the camera if you wait more than 60 seconds before taking a picture. You can adjust this time period by connecting the camera to your Macintosh and using PhotoPC Settings. Follow these steps: Connect the camera to your Macintosh as described in Chapter 3 and open the Setup window as described on page 5-1. -
Page 53: Adjusting Port Settings
To set the shutter speed, follow these steps: Connect the camera to your Macintosh as described in Chapter 3 and open the Setup window as described on page 5-1. The Shutter Speed slider is set to Auto. Drag the slider to the left to reduce the shutter speed, or to the right to increase the shutter speed. -
Page 54: Taking Pictures From Your Macintosh
Change the Port setting only if you want to use a different port for the camera or you get an error message. When you change the Port setting, you lose the connection between the camera and your Macintosh. Follow these steps to set the port and speed for your PhotoPC connection: Connect the camera to your Macintosh as described in Chapter 3 and open the Setup window as described on page 5-1. - Page 55 NOTE Taking pictures from your Macintosh with live preview uses a lot of battery power. If you don’t have the PhotoPC AC adapter, you may want to buy it. See Appendix A for more information about obtaining and using the AC adapter. The Auto Shut-off feature remains in effect when the camera is connected to your Macintosh (except when you use live preview).
-
Page 56: Snapping The Shutter
You can click the buttons on your screen to set the resolution, flash, viewfinder window set resolution erase timer, and erase features, just as you use the buttons on the camera. The control panel on your screen displays the same information as the control panel on the camera. - Page 57 Using Advanced Features...
-
Page 58: Chapter 6: Maintenance And Troubleshooting
Maintenance and Troubleshooting our PhotoPC is easy to take care of, and any problems you may have are easy to solve. This chapter covers the following: Caring for the camera Solving camera problems Solving picture problems. If you can’t solve a problem after checking the solutions in this chapter, see page 3 of the Introduction for information on where to get help. - Page 59 Don’t store the camera in the following locations: Where it is exposed to direct sunlight, for example, on a car dashboard Near sources of bright light or high humidity Near heat sources or in a closed car In areas with excessive dirt or dust Where it is exposed to strong vibrations or magnetic fields.
- Page 60 You get an error message when you try to transfer your pictures from the camera to your Macintosh. Make sure the cable is connected correctly, as described on 1. Make sure the camera is turned on and the batteries have enough power.
-
Page 61: Solving Picture Problems
If your pictures look better on the screen than when you print them out, you may need to upgrade your printer. An EPSON color ink jet printer, for example, provides excellent image quality. Your picture is blurry or out of focus. - Page 62 Your picture is too dark (underexposed). You may need to use the flash. Make sure the flash setting is either automatic or forced flash, as described on page 5. If you’re using the flash, make sure your subject is within the range of 3 to 10 feet.
- Page 63 Your pictures don’t look as good as they used to. Your camera’s lens may be dirty or dusty. Try cleaning it as described on page 1. Maintenance and Troubleshooting...
-
Page 64: Appendix A: Using Optional Accessories
Macintosh, you can use the optional AC adapter. The PhotoSpan module and AC adapter should be available where you bought your PhotoPC. You can also order them from EPSON Accessories at (800) 873-7766 (U.S. sales only). In Canada, call (800) GO-EPSON. -
Page 65: Installing Photospan Memory Modules
PhotoPC capacity With 2MB 1MB internal Number of photos PhotoSpan memory A882401 At high resolution At standard resolution CAUTION Once you install a PhotoSpan module, you can’t remove it. Make sure you think about your future needs before you decide whether to install the 2MB module or the 4MB module. - Page 66 Position the module so that the notch is aligned with the rounded corner of the socket. notch Slide the module into the socket at an angle as shown, pressing along the edge until it clicks into place. Press down on the module until it snaps into the retaining clips at the sides of the socket.
-
Page 67: Using The Universal Ac Adapter
Locate the port cover on the side of the camera. Press on the arrows and slide the cover down to open it. TITLE Cam3-01.eps EPSON AMERICA INC Plug the adapter cable into the DC port on the camera. TITLE Cam3-02.eps EPSON AMERICA, INC. -
Page 68: Using Optional Lenses
Plug the end of the power cable into the adapter. Connect the other end of the power cable to an electrical outlet. Using Optional Lenses Although you can use any standard 37 mm video camcorder lens or filter with PhotoPC, lenses manufactured by Tiffen are recommended. Call DC Pro at (800) 522-7835 for ordering information. -
Page 69: Appendix B: Specifications
Specifications Physical Dimensions Width 6.5 in. (166 mm) Height 3.5 in. (88 mm) Depth 1.9 in. (47 mm) Weight 11 oz. (310 g) (without batteries) Power Sources 4 AA batteries (single-use alkaline, single- use lithium, or rechargeable Ni-Cad) Optional universal AC adapter (A883021) Consumption Approximately 100 milliwatt at power-on... -
Page 70: Technical
Technical Product type CCD (charge coupled device) still frame camera Image size 480 pixels (high resolution) 320 240 pixels (standard resolution) Bit depth 16 million colors, 24-bit Serial interface 8-pin DIN (camera); 8-pin DIN (Macintosh) (Cable adapter for RS-232C interface in PhotoPC Mac version) Internal memory 1MB flash memory... -
Page 71: Index
Attaching the hand strap, 1-5 Auto flash setting, 2-5 Auto shut-off, 2-2, 3-3, 5-6 Batteries handling, 1-4 installing, 1-3 power levels, 2-3 BBS Download Service (EPSON), Intro-3 Brightness, adjusting, 4-7 Camera maintenance, 6-1 problems, 6-2 Changing file information, 4-10 Changing picture information, 4-2... - Page 72 5-1 EasyTouch control panel, 2-2 EPSON customer support services, Intro-3 Download Service (BBS), Intro-4 Epson America Forum on CompuServe, Intro-4 Internet FTP Site, Intro-4 World Wide Web, Intro- 3 Erasing picture, 2-9, 3-6 Expanding memory, A-1 Index...
- Page 73 Lens, using, A-5 Live preview, 5-6 Maintenance cleaning, 6-1 storage, 6-2 Online support, Intro-3 Optional lenses, A-5 Organizing your pictures, 4-2 Pasting image from clipboard, 4-9 Photo Workshop, 4-5–9 PhotoPC accessories, Intro-2, A-1–5 advanced features, 5-1 capacity, A-1 connecting camera to computer, 3-1 features, Intro-2 how to take pictures, 2-1 maintenance, 6-1...
- Page 74 Printing, 4-9 Problems, 6-2 Recording time and date, 5-2 Registering PhotoPC, Intro-5 Removing red-eye, 4-8 Removing plastic film, 1-5 Resizing pictures, 4-6 Resolution settings (high and standard), 2-6 Rotating pictures, 4-7 Safety instructions, Intro-5 Saving pictures, 4-9 Searching for pictures by resemblance, 4-4 by words, 4-3 Setting...