owner's
manual
MODEL
NO.
113.17O37O
Serial
Number
Model and serial
numbers may be found
on the side of the
detachable blower. You
should record both
model and serial
numbers in a safe
_lace for future use.
FOR YOUR
SAFETY
r
CRRFTSMRN®
16 GALLON
WET/DRY VAC
WITH DETACHABLE
BLOWER
• assembly
• operating
• repair parts
READ ALL
INSTRUCTIONS
CAREFULLY
Sears,
Roebuck
and Co., Hoflman Estates,
IL. 60179 U.S.A.
Part No. SP6516
J
Printed in U.S.A.
Table of Contents

Related Manuals for Craftsman SEARS 113.170370


Summary of Contents for Craftsman SEARS 113.170370
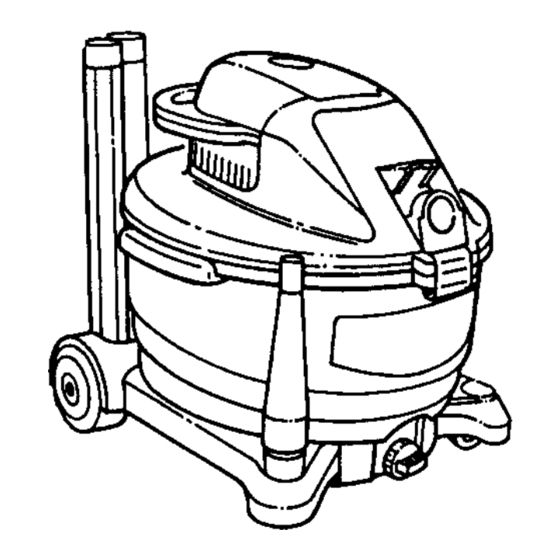
- Page 1 owner's manual MODEL 113.17O37O CRRFTSMRN® Serial Number Model and serial 16 GALLON numbers may be found on the side of the WET/DRY VAC detachable blower. You should record both model and serial WITH DETACHABLE numbers in a safe _lace for future use. BLOWER •...
-
Page 2: Warranty Information
WET/DRY VACS If within one year from the date of purchase, this Craftsman Wet]Dry Vac fails due to a defect in material or workmanship, Sears will repair it, free of charge. If this Craftsman Wet/Dry Vac is used for commercial or rental purposes, this warranty coverage applies for only 90 days from date of purchase. - Page 3 • To reduce the risk of injury from acci- for Servicing Double-insulated Wet/Dry dental starting, unplug power cord Vacs before servicing. Use this Wet/dry Detachable Blower Vac before changing or cleaning filter. as described in this manual. • Do not unplug by pulling on cord. To When using as detached blower: unplug, grasp the plug, not the cord.
-
Page 4: Table Of Contents
Introduction This Wet/Dry Vac is intended for house- Table of Contents hold use only. Item Page IMPORTANT NOTE Warranty Information ......Safety Instructions ......... Please Read Carefully Introduction..........Static Shocks Are Common - In dry Unpacking and Checking areas or when the relative humidity of the Carton Contents ...... -
Page 5: Wheel Assembly
A ccessory Caddy Assembly 1. Unlatch the drum latches on the front and rear of unit. The drum latches hold Accessory Dove Caddy Tail the lid onto the drum. Lift the lid off the drum. Place the lid upside down on a clean smooth surface. - Page 6 Float/Cage Assembly WARNING: For your own safety, Detachable never connect plug to power source outlet until all assembly steps are complete and you have read and understood the safety and operation instructions. Do not operate vac with any parts damaged or missing. 1.
- Page 7 Filter Assembly 1. Carefully slide the filter over the filter cage, sliding it over the center ring cov- ering the 3 slots until the filter stops against the lid. 2. Place the hole in the filter plate over threaded screw of the filter cage. 3.
- Page 8 (Power Head Assembly) Molded 1. Locate the detachable blower of your Plastic Lead Craftsman wet/dry vac. 2. On top of the blower (opposite the han- dle side of the blower); there is molded plastic lead that is used to assist assembling the unit.
-
Page 9: Operation
10 min- If the noise level of this unit is too loud, utes. The clean air rushing through the purchase the Craftsman Noise Muffler; vac will help dry the filter. accessory number 9-16993 found in... - Page 10 Operation (continued) 4. When the liquid in the drum reaches a predetermined level, the float mecha- nism will rise automatically to cut off air- flow. When this happens, turn oft the vac, unplug the power cord, and empty the drum. You will know that the float has risen because vac airflow ceases and the motor noise will become higher in pitch, due to increased motor speed.
- Page 11 To Store Your Accessories Your Craftsman wet/dry vac caddy designed to provide better stability and accessory storage. There are five storage pockets located at the rear of the vac caddy and two storage areas at the front of the storage caddy. Conveniently...
- Page 12 Operation (continued) Moving the Vac Should it become necessary to pick the Handle vac up to move it, the handles may be used on the sides of the dust drum. Do not use the handle located on the detach- able blower to pick up the entire wet/dry vac or the lid assembly.
-
Page 13: Maintenance
The wet/dry vac may also be used for inside of the push button end of the vac blowing using the seven foot hose sup- hose. Assemble the hose to the blower plied with the wet]dry vac. adapter and connect the blower nozzle to Install the blower adapter in the blowing the opposite end of the hose. - Page 14 Maintenance (continued) Cleaning Vac Filter Dry Filter Your filter should be cleaned often to 1. Some removal of dry debris can be maintain peak vac performance. accomplished without removing the filter from the vac by slapping your hand on Be sure to dry the filter before storing or top of the lid while the vac is turned off.
- Page 15 Wet Nozzle farthest from you.) ..To pick up liquids off a smooth surface, use the 2-1/2" wet nozzle accessory sup- plied with your wet/dry vac. To use this 2. Using both hands, lower the nozzle nozzle, simply attach the nozzle to the body onto the insert and squeegee with end of an extension wand.
-
Page 16: Repair Parts
Repair Parts 16 Gallon Wet/Dry Vac With Detachable Blower Model Number 113.170370 Always order by Part Number - Not by Key Number WARNING SERVICING OF DOUBLE-INSULATED WET/DRY In a double-insulated Wet/Dry Mac, two systems of insulation are provided instead of grounding. No grounding means is provided on a double-insulated appliance, nor should a means for grounding be added. - Page 17 Repair Parts...
- Page 18 £RRFTSMRN® Accessories and Attachments Get more versatility from your Craftsman wet/dry vacuum by adding these accesso- ries. Additional wet/dry vac accessories may be purchased at your local Sears retail store or Sears/Craftsman Power and Hand Tool Catalog. 16993 17820 2-1/2"x7' Hose...
- Page 19 16934 Hose Grip 16917 Hose 16930 Hose Lock 16935 Gutter Nozzle Connector Sawdust Collection Series Whole-shop Sawdust Manifold-Type Collection System 29964 Radial Arm Saw Table Saw Dust Dust Collection Kit Collection Kit 29963 29962...
- Page 20 For in-home major brand repair service: Call 24 hours a day, 7 days a week 1-800-4-MY-HOME (1-800-469-4663) Para pedir servicio de reparaci6n a domicilio - 1-800-676-5811 For the repair or replacement parts you need: Call 6 am - 11 pm CST, 7 days a week PartsDi rect 1-800-366-PART (1-800-366-7278)