Table of Contents
Quick Links
Table of Contents

Related Manuals for Emerson EMP413-4


Summary of Contents for Emerson EMP413-4
- Page 1 MP3 Music & Video Player User Guide 4 GB EMP413-4...
- Page 2 MP3 Music & Video Player Quick Start Guide * FULL USER GUIDE PROVIDED ON THE CD 4 GB Stereo Headphones EMP413-4 USB 2.0 Cable Emerson MP3 Video Player Installation CD Quick Start Guide (for battery charging and high speed data transfer)
-
Page 3: Fcc Information
FCC INFORMATION FCC Part 15 This equipment has been tested and found to comply with the requirements for a Class B digital device under Part 15 of the Federal Communications Commission (FCC) rules. These requirements are intended to provide reasonable protection against harmful interference in a residential installation. This equipment generates, uses and can radiate radio frequency energy and, if not installed and used in accordance with the instructions, may cause harmful interference to radio communications. -
Page 4: Copyright Information
INTRODUCTION Congratulations on purchasing the Emerson MP3 Music & Video Player. This manual contains important safety information and correct operation instructions. Before using the player, read this manual thoroughly and keep it for future reference. Copyright Information Trademarks and trade names used in this instruction manual are owned by their respective companies or organizations. -
Page 5: Important Safety Precautions
IMPORTANT SAFETY PRECAUTIONS Always follow these basic safety precautions when using your player. This will reduce the risk of product damage and personal injury. Do not disassemble, repair or modify the player by yourself. Refer servicing to qualified personnel. This device contains a built- in battery, do not dispose of in fire. In the event that the battery is leaking, do not handle the device with your bare hands. - Page 6 FEATURES 1.5” color display 4 GB internal memory USB 2.0 high speed connection Stores and plays music, video, and pictures Text reading (txt format) Digital voice recording (built-in microphone) Folder navigation Rechargeable battery ...
-
Page 7: Locations Of Controls
LOCATIONS OF CONTROLS 1. Headphone jack [PLAY] - Start or stop play / Power On-Off button [MODE] - Return to the main menu / Confirm [POWER] ON / OFF switch -Voice recording 6. USB 2.0 Hi-Speed connector for battery charging and data transfer [PREVIOUS] - Previous track / Fast backwards / Volume down [VOL]... -
Page 8: Connecting To A Computer
PC connection In order to enjoy the multimedia capabilities of your MP3 Player, you have to first copy your favorite files from your PC to it’s internal memory. Connect your MP3 Player to the computer using the included USB 2.0 cable. The device will be detected automatically without installing any driver. -
Page 9: Disconnecting The Usb Cable
Disconnecting the USB cable After completing the file transfer, please disconnect the USB cable the following way: 1. Double click the green arrow “Safely Remove Hardware” in the task bar on the bottom right of the window. 2. Select “USB Device” and click “Stop”. 3. -
Page 10: Charging The Battery
CHARGING THE BATTERY Your MP3 Player has an integrated rechargeable Li-ion battery. It is recommended to fully charge the player before using it for the first time. Recharge the battery by connecting the player to a computer using the included USB 2.0 cable. -
Page 11: Basic Operation
BASIC OPERATION Turning on/off ● To turn on the player, place the [POWER] ● To turn the player off, press and HOLD Adjusting the volume Press the [VOL] button then press the [PREVIOUS] button to decrease the volume, or press the [NEXT] button to increase the volume. Selecting main menu or mode ●... -
Page 12: Transferring Media To The Player
1. Connect the MP3 player to the USB port of your computer. 2. Open “Windows Explorer” or “My Computer”, and locate “Emerson MP3”. 3. Select the files on your computer, and simply move it into “Emerson MP3” in the usual way (drag-and-drop, copy-and-paste). After copying is completed, the data will be available on the MP3 Player. -
Page 13: Using The Music Player
MUSIC Using the music player Select “MUSIC” from the main menu using the and press the [MODE] button to enter Listening to music 1. Use the [PREVIOUS] or [NEXT] buttons to select the music file you wish to listen to and press the [MODE] or [PLAY] button. 2. -
Page 14: Skipping Tracks
Skipping tracks Briefly press the [PREVIOUS] button to go to the previous track. Briefly press the button to skip to the next track. [NEXT] Searching backward or forward within a track Press and HOLD [PREVIOUS] [NEXT] HOLD Press and button to play forward within a track. -
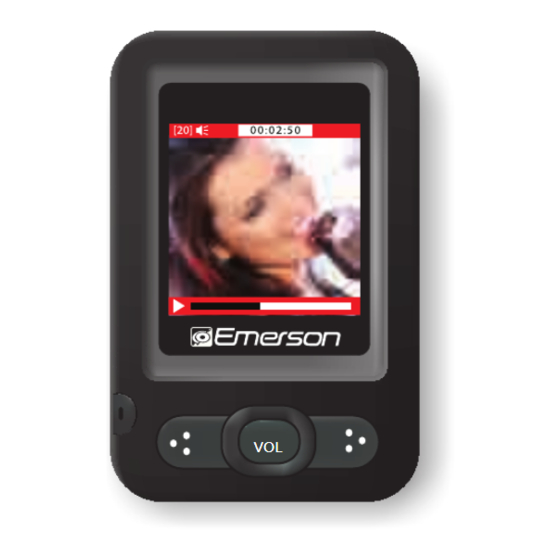
Page 15: Playing Videos
VIDEO Store and playback videos to watch and enjoy anywhere! NOTE: You must convert a video to the correct format before transferring it to the player. See “CONVERTING VIDEOS” (page 16) Playing videos 1. Select “VIDEO” from the main menu using the and press the [MODE] button to enter. -
Page 16: Converting Videos
CONVERTING VIDEOS Before transferring video files to the MP3 Player, you must convert them to the correct format. With the Video Converter software tool you can easily convert your videos to the correct format (128 x 128 resolution) so you can enjoy them on your MP3 Player. - Page 17 Converting videos 1. Connect the MP3 Player to the USB port of your computer (optional). 2. Click on “MP4Tool ”from the “Start ” menu, or the desktop. 3. Click on the “Configurations” drop down window, and then “Advanced configuation”. 4. Click on the “VideoSize” drop down window and select “128 x 128”...
- Page 18 Click on “File’ and then “Select target” to select the destination for the converted video. You can send it directly to your player by selecting “Emerson MP3”, and clicking “OK”, or if you would like to save the video to your computer, we recommend sending it to your “Desktop” where you can easily find the video, and transfer it to your player.
- Page 19 Converting videos 9. Select the name for the file and click “Save”. 10. Click on the “Fast configurator” drop down window, and choose the image quality of the new video. High quality will use more memory and the output file will be bigger. 11.
-
Page 20: Downloading Pictures To The Player
1. Connect the MP3 Player to the USB port of your computer. 2. Open “Windows Explorer” or “My Computer”, and locate “Emerson MP3”. 3. Select the files on your computer, and simply move it into “Emerson MP3” in the usual way (drag-and-drop, copy-and-paste). After copying is completed, the data will be available on the MP3 Player. -
Page 21: Viewing Txt Files
E-BOOK Viewing TXT files 1. Select “E-BOOK” from the main menu using the and press the [MODE] button to enter. [PREVIOUS] [NEXT] 2. Use the buttons to select the TXT file you wish to view, and press the 3. Use the buttons to move to the next or previous page. -
Page 22: Playing Back Recorded Files
RECORD Your MP3 Player is able to perform voice recording with its integrated microphone. Follow the steps below for voice recordings. Recording 1. Select “RECORD” from the main menu using the [PLAY] 2. Press the button to begin recording, and press the 3. -
Page 23: Deleting Files
You can easily delete music, picture or video files by connecting your video player to the computer and selecting “Emerson MP3” from Windows Explorer or “My Computer”, or click on “Open Folder” to view files from the “Auto play” option window, simply select the file and delete it as you would delete any other file from your computer. -
Page 24: Navigating The Settings Menu
SETTINGS The player’s settings can be customized by accessing “SETTINGS” in the main menu. The settings menu consists of several items where various functions can be selected concerning power, language, display, system, etc. Navigating the settings menu 1. Select “SETTINGS” from the main menu using the and press the [MODE] button to enter. -
Page 25: Troubleshooting
TROUBLESHOOTING If you have problems while operating your player, please check the points below before sending it to the service center. Can not power on The battery may be exhausted, please recharge the battery. Files can not be downloaded ... -
Page 26: Specifications
SPECIFICATIONS Display 1.5 inch color LCD Connect with PC USB 2.0 (HIGH SPEED) Built-in memory Power source Built-in Lithium battery Sampling rate Recording Recording format Recording time Earphone Max output MP3 bit rate MP3, WMA WMA bit rate Frequency response Music file format MP1, MP2, MP3, WMA, WAV Video file format... -
Page 27: Limited Warranty
LIMITED WARRANTY In the unlikely event that this product is defective, or does not perform properly, you may within ninety (90) days from your original date of purchase return it to the authorized service center for repair or exchange. TO OBTAIN WARRANTY SERVICE: - Provide proof of the date of purchase within the package (Dated bill of sale) - Prepay all shipping costs to the authorized service center, and remember to insure your return. - Page 28 To obtain service after the warranty period, please e-mail [email protected] with product information, date of purchase and nature of the problem. Customer service will reply to the e-mail with service instructions. Warranty service not provided: This warranty does not cover damage resulting from accident, misuse, abuse, improper installation or operation, lack of reasonable care, and unauthorized modification.
- Page 29 Manufactured by: AIT Inc. Brooklyn, NY 11232 Emerson and the G-Clef logo are registered trademarks of Emerson Radio Corp. Parsippany, New Jersey USA © 2009 AIT Inc. All rights reserved Microsoft, the Windows logo, and Windows Media are either registered trademarks or trademarks of Microsoft...