Table of Contents
Table of Contents

Related Manuals for Hitachi AX-M136i


Summary of Contents for Hitachi AX-M136i
-
Page 2: Important Cautions
Important Cautions Thank you for purchasing this system. Please read these operating instructions before operating the unit. The operating instructions should be retained for future reference. For your safety Laser Product CAUTION This product is equipped with low power la- RISK OF ELECTRIC SHOCK ser equipment. -
Page 3: Correct Handling Of Batteries
DON’T use makeshift stands and NEVER fix legs with wood screws - to ensure complete safety always fit the manufacturer’s approved stand or legs with the fixings provided according to the instructions. DON’T listen to headphones at high volume, as such use can permanently damage your hearing. DON’T leave equipment switched on when it is unattended unless it is specifically stated that it is designed for unattended operation or has a standby mode. -
Page 4: Table Of Contents
Table of Contents Important Cautions ..........................1 For your safety ............................1 Precautions ..............................1 Correct Handling of Batteries ........................2 Package Contents ..........................4 Product Overview ..........................5 The CD/MP3 Player ............................ 5 The Amplifier ............................... 5 Remote Control Overview ........................6 Installation of Battery .......................... -
Page 5: Package Contents
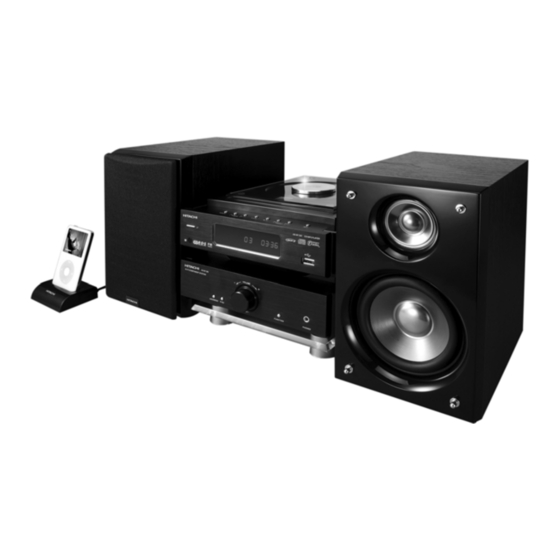
Package Contents Make sure all of the following contents are included. Remote control The unit Speakers x 2 (P.N.: AXM136iP0001) Control cable Speaker cable x2 DAB/FM Antenna (P.N.: AXM136iP0002) (P.N.: AXM136iP0003 (P.N.: AXM136iP0004) Stand Instruction Manual Addendum (P.N.: AXM136iP0005) (P.N.: AXM136iP0006) (P.N.: AXM136iP0007) iPod Dock Adaptor (NANO) (P.N.: AXM136iP0008B) -
Page 6: Product Overview
Product Overview The CD/MP3 Player Remote Sensor Standby Button Vacuum Fluorescent Display (VFD) Display Lens USB Port Disc Door Mode Button Reverse Button D Tuning Backward Button ( -TUNING Fast Forward Button C Tuning Forward Button ( TUNING+ Play/Pause Button BF 10. -
Page 7: Remote Control Overview
Remote Control Overview Standby CD Function Tuner Function Random Intro Scan Preset Equalizer (P-EQ) Clock Next G Preset Up Switch 10. Reverse D Tuning Backward Button 11. Previous H Preset Down Switch 12. Play/Pause BF Confirm 13. Album Up Album Down 14. -
Page 8: Installation Of Battery
Installation of Battery Caution: Be careful when you press the slot of the battery compartment with your fingernails only as this might break them. 1. Press the slot on the battery compartment. 2. Pull out the battery compartment. 3. Replace a new battery (size 2025) correctly and fully insert the battery compartment back to the original position. -
Page 9: Connections
Connections Caution: Make all connections before plugging the system into an AC power outlet. Connecting the Antenna The Antenna Terminal Antenna Connect the supplied DAB/FM antenna to the DAB/FM ANTENNA socket on the rear of the CD player by turning the antenna’s screw cap clockwise. Note: Do not overtighten, this could damage the antenna. -
Page 10: Connecting The Ipod Docking
Connecting the iPod Docking This unit has an external i-Pod docking. You can connect your iPod portable player in the iPod docking. Make sure the dock adaptor is compatible to your iPod. The CD Player iPod Portable Player iPod Docking Docking Cable Connecting Auxiliary Equipment (AUX INPUT) Connect the AUX INPUT sockets on this unit to the line output sockets on the auxiliary equipment... -
Page 11: Connecting The Ac Power Plug
Connecting the AC Power Plug Insert the AC power plug into a wall outlet, and your system is ready to use. Caution: Be sure to unplug the power plug from the outlet when going out or when the system is not in use for an extended period of time. -
Page 12: Sound Quality
Sound Quality Adjusting the Volume To increase or decrease the volume, rotate the Volume Control knob ( ) on the - VOLUME CONTROL + amplifier or press the Volume Up/Down buttons ( ) on the remote control. VOL +/- For private listening, you can connect headphones to the headphone jack, and no sound will come out from the speakers. -
Page 13: Re-Tuning
Re-tuning By re-tuning, you can update your DAB ensemble list all over again. At the completion of scanning, the system will tune to the first service of the first ensemble in the updated ensemble list. Press and hold the Scan button ( ) for 2 seconds or more, the system will start full INTRO/SCAN scan to search for all available Band lll channels again automatically. -
Page 14: Fm Radio
Resetting the system 1. In the DAB mode, press and hold the Display button ( ) until “SYS RESET” appears on the DISPLAY Vacuum Fluorescent Display ( 2. Press the Play/Pause button ( ) to confirm. The system will clear its internal memory and automatically start a quick scan all over again. -
Page 15: Rds (Radio Data System) Reception
RDS (Radio Data System) Reception Many FM stations are broadcasting added data compatible with RDS. This radio set offers convenient functions using such data. Press the Display button ( ) on the remote control repeatedly to select the information that DISPLAY displayed as follows. -
Page 16: Program Play
Program Play 1. Insert a disc and press the ( ) when it starts playing. STOP 2. Press the Program button , “01-P-01” appears. (PROG) 3. Press the Number buttons ( ) or the buttons on the remote control to select the 0-9, +10 desired track number. -
Page 17: Playing Repeatedly
6. Press the Album Up button ( ) or Album Down button ( ) on the remote control to select ALB+ ALB- the next/previous directory, and play the first track of this directory. If the playing is stopped, press the Album Up button ( ) or Album Down button ( ) on the ALB+... -
Page 18: Use The Ipod Portable Player
Do not remove the USB device while it is being accessed. Electrical interference and electrostatic discharges may cause the USB device to malfunction and suffer damage, resulting in data loss. It is strongly recommended that any important data is backed up on a PC to protect against corruption, data loss or device malfunction. -
Page 19: Setting The Daily On Timer
Setting the Daily on Timer You can use the setting timer to make the unit automatically turn on at a certain time everyday from standby. When the setting timer is on, the timer indicator “ ” will be displayed. But the clock must be correctly set for the timer to operate correctly. -
Page 20: Disc Handling
Disc Handling Handling Precautions • Hold the disc by the edges so the surface will not be soiled with fingerprints. (A) Fingerprints, dirt and scratches can cause skipping and distortion. • Do not write on the label side with a ball-point pen or other writing implements. -
Page 21: Troubleshooting
Troubleshooting If you are having a problem with your system, check this list for a possible solution before calling for service. If you cannot solve the problem from the hints given here, or the system has been physically damaged, call a qualified person, such as your dealer, for service. Symptom Possible Cause Action... -
Page 22: Specifications
Specifications System Specification Power Requirements ~ 230V/50Hz DAB Frequency Range (band III) 174.928 - 239.200 MHz FM Frequency Range 87.5 - 108 MHz Power Consumption 60W (ECO Standby 0.7W) Output Power 45W × 2 ≤ 1% Dimensions (CD) 192(W) x 67(H) x 235(D) mm (Amplifier) 192(W) x 62(H) x 242(D) mm Speaker Specifications Impedance... - Page 23 The mark is in compliance with the Waste Electrical and Electronic Equipment Directive 2002/96/ EC (WEEE). The mark indicates the requirement NOT to dispose the equipment including any spent or discarded batteries as unsorted municipal waste, but use the return and collection systems available.
- Page 24 (iPod not included)
- Page 25 (iPod not included)