Table of Contents
Available languages
Available languages
EMERSON AND THE G-CLEF LOGO ARE REGISTERED TRADEMARKS
OF EMERSON RADIO CORP., PARSIPPANY, NEW JERSEY, U.S.A.
TO RECEIVE DIGITAL/ANALOG SIGNAL,
YOU MUST CONNECT ANTENNA.
IF YOU NEED ADDITIONAL ASSISTANCE WITH SETUP OR OPERATING AFTER
READING OWNER'S MANUAL, PLEASE CALL TOLL FREE 1-800-256-2487, OR
VISIT OUR WEB SITE AT http://www.EmersonAudioVideo.com
TM
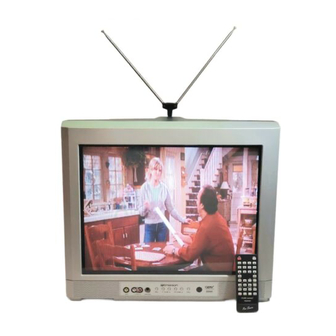
20" Digital / Analog
Television
Owner's Manual
CR202EM8
© 2007 Funai Electric Co., Ltd.
Chapters
Table of Contents

Related Manuals for Emerson CR202EM8


Summary of Contents for Emerson CR202EM8
- Page 1 EMERSON AND THE G-CLEF LOGO ARE REGISTERED TRADEMARKS OF EMERSON RADIO CORP., PARSIPPANY, NEW JERSEY, U.S.A. TO RECEIVE DIGITAL/ANALOG SIGNAL, YOU MUST CONNECT ANTENNA. IF YOU NEED ADDITIONAL ASSISTANCE WITH SETUP OR OPERATING AFTER READING OWNER’S MANUAL, PLEASE CALL TOLL FREE 1-800-256-2487, OR VISIT OUR WEB SITE AT http://www.EmersonAudioVideo.com...
-
Page 2: Introduction
NTRODUCTION WARNING: TO REDUCE THE RISK OF FIRE OR ELECTRIC SHOCK, DO NOT EXPOSE THIS APPLIANCE TO RAIN OR MOISTURE. CAUTION RISK OF ELECTRIC SHOCK DO NOT OPEN CAUTION: TO REDUCE THE RISK OF ELECTRIC SHOCK, DO NOT REMOVE COVER (OR BACK). NO USER SERVICEABLE PARTS INSIDE. -
Page 3: Precautions
15. POWER LINES - An outside antenna system should not be located in the vicinity of overhead power lines or other electric light of power circuits, or where it can fall into such power lines or circuits. When installing an outside antenna system, extreme care should be taken to keep from touching such power lines or circuits as contact with them might be fatal. -
Page 4: Supplied Accessories
NTRODUCTION LOCATION For safe operation and satisfactory performance of the unit, keep the following in mind when selecting a place for its installation: • Shield it from direct sunlight and keep it away from sources of intense heat. • Avoid dusty or humid places. •... -
Page 5: Table Of Contents
Features • DTV/TV/CATV - You can use your remote control to select channels which are broadcast in digital format and conventional analog format. Also, cable subscribers can access their cable TV channels. • Information Display (DTV only) - You can display the title, contents and other information of the current DTV program on the TV screen. -
Page 6: Remote Control Function
NTRODUCTION Remote Control Function POWER AUDIO INFO CHANNEL – /ENT RETURN INPUT MENU SLEEP MUTE SELECT Installing the Batteries Install the batteries (AA x 2) matching the polarity indicated inside battery compartment of the remote control. Battery Precautions: • Be sure to follow the correct polarity as indicated in the battery compartment. Reversed batteries may cause damage to the device. •... -
Page 7: Control Panel
Control Panel MENU VOLUME CHANNEL VIDEO AUDIO HEADPHONE Rear Panel VIDEO S-VIDEO Infrared Sensor Window Receives infrared rays transmitted from the remote control. POWER button (p10) Press to turn the unit on and off. CHANNEL K / L buttons (p12) Press to select channels or move up/down through the main menu items. -
Page 8: Connection
ONNECTION Cables not included. Please purchase the necessary cables at your local store. Basic Connection This section describes how to connect the unit to an antenna, cable/satellite box, etc. Note: • Be sure your antenna or other device is connected properly before plugging in the power cord. [Antenna Cable Connection] When connecting the unit to an antenna or cable TV company (without cable/satellite box) Connect the RF coaxial cable on your home outlet to the antenna input jack of this unit. -
Page 9: External Device Connection
Cables not included. Please purchase the necessary cables at your local store. External Device Connection [S-video or Video Cable Connection (Rear)] S-video connection offers good picture quality for video devices connected to the unit. Video connection offers standard picture quality for video devices connected to the unit. Make the connection as illustrated below. -
Page 10: Initial Setting
NITIAL SETTING These operations are accessible by remote control. Some may also be accessible by controls on the main unit. Initial Setup This section will guide you through the unit’s initial setting which includes selecting a language for your on-screen menu and “AUTO PRESET CH”, which automatically scans and memorizes viewable channels. -
Page 11: Auto Channel Scan
Auto Channel Scan If you switch wires (e.g., between antenna and CATV) or if you move the unit to a diff erent area after the initial setting, or if you recover the DTV channel you deleted, you will need to perform auto channel scan. Before you begin: Make sure if the unit is connected to antenna or cable. -
Page 12: Watching Tv
ATCHING TV Channel Selection Select channels by pressing [CH K /L] or [the Number buttons]. • To select the memorized channels, use [CH K / L] or [the Number buttons]. • To select the non-memorized channels, use [the Number buttons]. To Use [the Number buttons] - When selecting analog channel 12 - When selecting digital channel 12-1... -
Page 13: Switching Each Mode
Switching Each Mode You can easily switch with the remote control to the DTV (ATSC) and TV (NTSC) or to access an external device when they are connected to the unit. Press [DTV/TV] repeatedly to change the input mode. ANALOG MODE DIGITAL MODE Note: •... -
Page 14: Tv Screen Display Mode
ATCHING TV TV Screen Display Mode 2 types of display modes can be selected in the digital mode when the broadcasting station is sending 16:9 video signal. Press [MENU] to display the main menu. MENU Use [CH K / L] to select “DTV SETUP”, then press [VOL X]. -
Page 15: Optional Setting
PTIONAL SETTING Channel Add/Delete The channel add/delete function lets you add the channel that was not added by the auto channel scan due to the reception status at the initial setting. You can also delete the unnecessary channels. Press [MENU] to display the main menu. MENU Use [CH K / L] to select “CHANNEL SETUP”, then press [VOL X ]. -
Page 16: Picture Adjustment
PTIONAL SETTING Picture Adjustment You can adjust brightness, contrast, color, tint and sharpness. Press [MENU] to display the main menu. MENU Use [CH K / L] to select “PICTURE”, then press [VOL X]. e.g.) digital TV mode PICTURE CHANNEL SETUP V-CHIP SETUP LANGUAGE CAPTION... -
Page 17: Dtv Closed Caption
Press [MENU] to exit. MENU Note: • To show the closed caption on your TV screen, broadcast signal must contain the closed caption data. • Not all TV programs and commercials have the closed caption or all types of the closed caption. •... -
Page 18: Dtvcc Style
PTIONAL SETTING DTVCC Style You can change the style of DTV CC such as font, color or size, etc. Press [MENU] to display the main menu. MENU Use [CH K / L] to select “DTV SETUP”, then press [VOL X]. e.g.) digital TV mode PICTURE CHANNEL SETUP... -
Page 19: V-Chip
V-chip V-chip reads the ratings for programs, then denies access to the programs which exceed the rating level you set. With this function, you can block certain programming inappropriate for children. Press [MENU] to display the main menu. MENU Use [CH K / L] to select “V-CHIP SETUP“, then press [VOL X]. - Page 20 PTIONAL SETTING A. TV Rating Use [CH K / L] to select “TV RATING“, then press [VOL X]. e.g.) digital TV mode TV RATING MPAA RATING DOWNLOADABLE RATING CHANGE PASSWORD Use [CH K / L ] to select the desired rating, then press [VOL X] repeatedly to switch between “VIEW”...
- Page 21 B. MPAA Rating MPAA Rating is the rating system created by MPAA (Motion Picture Association of America). Use [CH K / L] to select “MPAA RATING”, then press [VOL X]. e.g.) digital TV mode - V - CHIP SETUP - TV RATING MPAA RATING DOWNLOADABLE RATING...
-
Page 22: Troubleshooting
ROUBLESHOOTING Troubleshooting Guide If the unit does not perform properly when operated as instructed in this owner’s manual, check the following chart once before calling for service. Symptom No power No picture or sound No color Sound OK, picture poor Picture distorted Weak picture Lines or streaks in picture... -
Page 23: Maintenance
Symptom Remedy The entered channel number • Many digital channels have alternate channel numbers. The unit changes the changes automatically numbers automatically to the ones signifying the broadcasting stations. These are the numbers used for analog broadcasts. Remote control does not work •... -
Page 24: Glossary
NFORMATION Glossary ATSC Acronym that stands for Advanced Television Systems Committee and the name of the digital broadcasting standards. Aspect Ratio The width of a TV screen relative to its height. Conventional TVs are 4:3 (in other words, the TV screen is almost square); widescreen models are 16:9 (the TV screen is almost twice as wide as its height). -
Page 26: Limited Warranty
FUNAI CORP. will repair this product, free of charge in the USA in the event of defect in materials or workmanship as follows: DURATION: PARTS: FUNAI CORP. will provide parts to replace defective parts without charge for one (1) year from the date of original retail purchase. - Page 27 EMERSON Y EL LOGOTIPO G-CLEF SON MARCAS REGISTRADAS DE EMERSON RADIO CORP., PARSIPPANY, NEW JERSEY, EE.UU. PARA RECIBIR LA SEÑAL DIGITAL/ANALÓGICA, DEBE CONECTAR LA ANTENA. SI NECESITA AYUDA ADICIONAL CON LA INSTALACIÓN O CON EL FUNCIONAMIENTO DESPUÉS DE LEER EL MANUAL DEL USUARIO, LLAME AL TELÉFONO GRATUITO 1-800-256-2487 O VISITE NUESTRO SITIO WEB EN http://www.EmersonAudioVideo.com...
-
Page 28: Importante Para Su Seguridad
NTRODUCCIÓN ADVERTENCIA: PARA REDUCIR EL RIESGO DE INCENDIO O DESCARGA ELÉCTRICA, NO EXPONGA ESTE APARATO A LLUVIA O HUMEDAD. CAUTION RISK OF ELECTRIC SHOCK DO NOT OPEN CUIDADO: PARA REDUCIR EL RIESGO DE DESCARGA ELÉCTRICA, NO RETIRE LA CUBIERTA (NI LA PLACA TRASERA). EL INTERIOR DE ESTE APARATO NO CONTIENE PIEZAS REPARABLES POR EL USUARIO. - Page 29 15. LÍNEAS DE CONDUCCIÓN ELÉCTRICA - Un sistema de antena exterior no debe colocarse en las proximidades de líneas de conducción eléctrica aéreas u otras líneas de conducción de circuitos eléctricos, o de manera que puedan caer sobre dichas líneas o circuitos eléctricos. Cuando se instale un sistema de antena exterior, debe tenerse el máximo cuidado para no tocar dichas líneas o circuitos eléctricos, dado que el contacto podría resultar mortal.
-
Page 30: Accesorios Suministrados
NTRODUCCIÓN UBICACIÓN Para un funcionamiento seguro y un rendimiento satisfactorio de la unidad, tenga en cuenta lo siguiente a la hora de seleccionar un lugar para su instalación: • Debe protegerlo de la luz solar directa y mantenerlo apartado de fuentes de calor intenso. •... -
Page 31: Características
Características • DTV/TV/CATV - Puede utilizar su mando a distancia para seleccionar canales emitidos en formato digital y formato analógico convencional. Además, los suscriptores de cable pueden acceder a sus canales de televisión por cable. • Pantalla de Información de Programas (solamente DTV) - Puede visualizar el título, el contenido y otra información del actual programa DTV en la pantalla del televisor. -
Page 32: Función De Mando A Distancia
NTRODUCCIÓN Función de Mando a Distancia POWER AUDIO INFO CHANNEL – /ENT RETURN INPUT MENU SLEEP MUTE SELECT Instalación de las Pilas Instale las pilas (AA x 2) de manera que coincida la polaridad indicada en el interior del compartimento de las pilas del mando a distancia. -
Page 33: Panel De Control
Panel de Control MENU VOLUME CHANNEL VIDEO AUDIO HEADPHONE Panel Trasero VIDEO S-VIDEO Ventana del Sensor de Infrarrojos Recibe los rayos infrarrojos transmitidos desde el mando a distancia. Botón POWER (p. 10) Presione para activar y desactivar la unidad. Botones CHANNEL K / L (p. 12) Presione para seleccionar canales o desplazarse arriba/abajo por los elementos del menú... -
Page 34: Conexión
ONEXIÓN Cables no incluidos. Deberá adquirir los cables necesarios en su establecimiento local. Conexión Básica En esta sección se describe cómo conectar la unidad a una antena, caja de cable/satélite, etc. Nota: • Asegúrese de que su antena u otro dispositivo está conectada correctamente antes de enchufar el cable de alimentación. [Conexión de Cable de Antena] Cuando conecte la unidad a una antena o una empresa de televisión por cable (sin caja de cable/satélite) Conecte el cable coaxial RF de su toma de corriente a la toma de entrada de antena de esta unidad. -
Page 35: Conexión De Dispositivo Externo
Cables no incluidos. Deberá adquirir los cables necesarios en su establecimiento local. Conexión de Dispositivo Externo [Conexión de Cable de S-video o de Vídeo (Trasera)] Conexión de S-video ofrece una buena calidad de imagen para dispositivos de vídeo conectados a la unidad. Conexión de vídeo ofrece una calidad normal de imagen para dispositivos de vídeo conectados a la unidad. -
Page 36: Ajuste Inicial
JUSTE INICIAL Se puede acceder a estas operaciones mediante el mando a distancia. Algunas también pueden ser accesibles mediante los mandos de la unidad principal. Configuración Inicial Esta sección le guiará a través del ajuste inicial de la unidad, que incluye la selección de un idioma para sus menús de pantalla y “PREA. -
Page 37: Exploración Automática De Canales
Exploración Automática de Canales Si cambia los cables (por ejemplo, entre antena y CATV) o si mueve la unidad a una zona diferente después del ajuste inicial, o si recupera el canal DTV eliminado, tendrá que realizar la exploración automática de canales. Antes de empezar: Asegúrese de que la unidad está... -
Page 38: Selección De Canal
ARA VER LA TELEVISIÓN Selección de Canal Seleccione los canales presionando [CH K / L] o [los botones numéricos]. • Para seleccionar los canales memorizados, utilice [CH K / L] o [los botones numéricos]. • Para seleccionar los canales no memorizados, utilice [los botones numéricos]. -
Page 39: Para Cambiar Entre Cada Modo
Para Cambiar entre Cada Modo Puede cambiar fácilmente entre DTV (ATSC) y TV (NTSC) o acceder a un dispositivo externo con el mando a distancia cuando estén conectados a la unidad. Presione [DTV/TV] repetidamente para cambiar el modo de entrada. MODO ANALÓGICO MODO DIGITAL Nota:... -
Page 40: Modo De Visualización De Pantalla Del Televisor
ARA VER LA TELEVISIÓN Modo de Visualización de Pantalla del Televisor En el modo digital pueden seleccionarse 2 tipos de modos de visualización, cuando la emisora envíe una señal 16:9. Presione [MENU] para mostrar el menú principal. MENU Utilice [CH K / L] para seleccionar “AJUSTE DEL DTV”, y presione [VOL X]. -
Page 41: Ajuste Opcional
JUSTE OPCIONAL Agregar/Borrar Canales La función de agregar/borrar canales le permite agregar el canal que no se haya agregar mediante la exploración automática de canales debido al estado de la recepción en el ajuste inicial. También puede eliminar los canales innecesarios. Presione [MENU] para visualizar el menú... -
Page 42: Ajuste De Imagen
JUSTE OPCIONAL Ajuste de Imagen Puede ajustar el brillo, el contraste, el color, el matiz y la nitidez. Presione [MENU] para visualizar el menú principal. MENU Utilice [CH K / L] para seleccionar “IMAGEN”, y presione [VOL X]. p. ej.) modo TV digital IMAGEN AJUSTE DE CANAL AJUSTE DE V-CHIP... -
Page 43: Subtítulos Cerrados En Dtv
Presione [MENU] para salir. MENU Nota: • Para mostrar los subtítulos cerrados en la pantalla de su televisor, la señal de emisión debe contener los datos de los subtítulos cerrados. • No todos los programas y anuncios de TV contienen subtítulos cerrados o todo tipo de subtítulos cerrados. -
Page 44: Estilo Dtvcc
JUSTE OPCIONAL Estilo DTVCC Puede cambiar el estilo de DTV CC, por ejemplo fuente, color o tamaño, etc. Presione [MENU] para visualizar el menú principal. MENU Utilice [CH K / L] para seleccionar “AJUSTE DEL DTV”, y luego presione [VOL X]. p. -
Page 45: V-Chip
V-chip V-chip lee las clases de los programas, y niega el acceso a los programas que exceden el nivel de clasifi cación establecido. Con esta función, puede bloquear determinados programas inapropiados para niños. Presione [MENU] para visualizar el menú principal. MENU Utilice [CH K / L] para seleccionar “AJUSTE DE V-CHIP”, y luego presione [VOL X]. - Page 46 JUSTE OPCIONAL A. Clase de TV Utilice [CH K / L] para seleccionar “CLASE DE TV”, y luego presione [VOL X]. p. ej.) modo TV digital CLASE DE TV CLASE DE MPAA CLASE DESCARGADA CAMBIAR CÓDIGO Utilice [CH K / L ] para seleccionar la clasificación deseada y luego presione [VOL X] repetidamente para cambiar entre “MIRAR”...
- Page 47 B. Clase de MPAA Clase de MPAA es el sistema de clasifi cación creado por la MPAA (Motion Picture Association of America). Utilice [CH K / L] para seleccionar “CLASE DE MPAA” y luego presione [VOL X]. p. ej.) modo TV digital - AJUSTE DE V-CHIP - CLASE DE TV CLASE DE MPAA...
-
Page 48: Solución De Problemas
OLUCIÓN DE PROBLEMAS Guía de Solución de Problemas Si la unidad no funciona correctamente cuando se siguen las instrucciones de este manual del usuario, compruebe la siguiente tabla antes de llamar al servicio técnico. Síntoma No hay corriente • Asegúrese de que el cable de alimentación está enchufado. •... -
Page 49: Mantenimiento
Síntoma Solución El mando a distancia no funciona • Compruebe la conexión de antena o de cable con la unidad principal. • Compruebe las pilas del mando a distancia. • Compruebe si hay algún obstáculo entre la ventana del sensor de infrarrojos y el mando a distancia. -
Page 50: Información
NFORMACIÓN Glosario ATSC Acrónimo de Advanced Television Systems Committee (Comité de sistemas avanzados de televisión) y el nombre de unas normas de emisión digital. Contraseña Un número almacenado de 4 dígitos que permite el acceso a las funciones de control parental. -
Page 52: Garantía Limitada
FUNAI CORP. reparará este producto, de forma gratuita en Estados Unidos, en caso de defecto de materiales o fabricación, del modo siguiente: DURACIÓN: PIEZAS: FUNAI CORP. suministrará piezas de repuesto de las piezas defectuosas de forma gratuita durante un (1) año desde la fecha de compra minorista original. Dos (2) años para tubo de imagen. Determinadas piezas están excluidas de esta garantía.