
Related Manuals for Electrolux 5995421640


Summary of Contents for Electrolux 5995421640
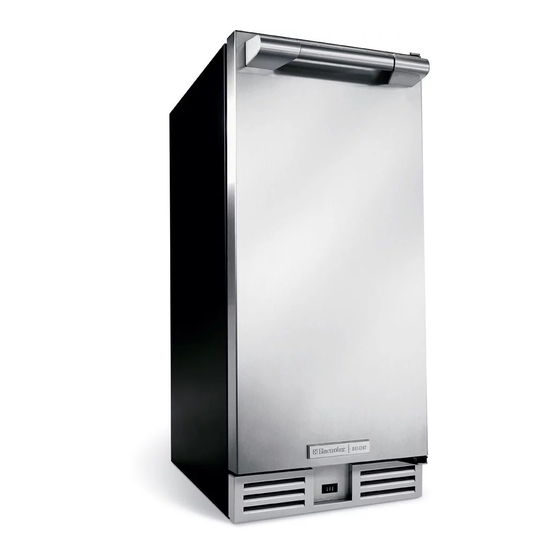
- Page 1 U s e & C a r e G u i d e U s e & C a r e G u i d e U s e & C a r e G u i d e I c e M a k e r 5995421640 Dishwasher...
-
Page 2: Finding Information
Finding Information PLEASE READ AND SAVE THIS GUIDE Thank you for choosing Electrolux, the new premium brand in home appliances. Attach your sales This Use & Care Guide is part of our commitment to customer satisfaction and receipt to this product quality throughout the service life of your new ice maker. -
Page 3: Warranty Registration Card
NOTE Registering your product with Electrolux enhances our ability to serve you. You can register online (at the Internet address below) or by dropping your Product Registration Card in the mail. Complete and mail the Product Registration Card as soon as possible to validate the registration date. -
Page 4: Table Of Contents
Finding Information TABLE OF CONTENTS Finding Information ... 2 Please Read And Save This Guide ... 2 Make A Record For Quick Reference ... 2 Warranty Registration Card ... 3 Questions? ... 3 Table Of Contents ... 4 Safety ... 5 Important Safety Instructions ... -
Page 5: Safety
IMPORTANT SAFETY INSTRUCTIONS Safety Precautions Do not attempt to install or operate your unit until you have read the safety precautions in this manual. Safety items throughout this manual are labeled with a Danger, Warning or Caution based on the risk type. Definitions This is the safety alert symbol. -
Page 6: General Precautions
DO NOT use any type of heater to defrost. • Use only genuine Electrolux replacement parts. Imitation parts can reduce ice rate, cause water to overflow from ice maker mold, damage the unit, and may void the... -
Page 7: Installation
Installation INSTALLATION DIMENSIONS 24” 14 - 15/16” (61) (37.9) 34 - 1/8” (86.7) FULL RETRACT 5” WATER HEIGHT (12.7) VALVE WATER DRAIN WATER 21 - 3/4” OUTLET (55.2) Figure 1... -
Page 8: Drain Installation
Model E15IM60E can be installed using a gravity drain or can use a factory installed or equivalent drain pump. Follow these guidelines when installing drain lines to prevent water from flowing back into the ice maker storage bin and/or potentially flowing onto the floor causing water damage: Gravity Drain •... - Page 9 WARNING WARNING Back panel serves as a guard. DO NOT put your hands inside the ice maker cabinet or attempt to touch any components except the discharge tube during testing. Failure to follow this warning could result in serious personal injury or death.
-
Page 10: Drain Pump Connection
Electrolux EIMP60 drain pump. The Electrolux EIMP60 drain pump is available through your Dealer, or direct from Electrolux with complete installation instructions. If a pump other than the Electrolux EIMP60 drain pump is to be used, it must meet the following specifications: •... -
Page 11: Site Preparation
The unit must be located to allow clearance for water, drain and electrical connections in the rear of the ice maker. Connect the unit to a grounded and polarized 115 VAC, 60 Hz, 15 A circuit (normal household current). - Page 12 DOOR). All units require zero clearance when installed flush with a cabinet or wall (see Figure 4). Electrolux stainless steel models require a minimum 2-3/4 inch handle clearance when installed against a wall or cabinet that extends beyond the front edge of the unit (see Figure 5).
-
Page 13: Water Supply Connection
Connect sufficient tubing to the unit to allow the unit to be moved for cleaning and servicing. However, make certain that the tubing is not pinched or damaged during installation. • Electrolux recommends the use of copper tubing for installation. WATER CONNECTION UL103_CO Figure 7... - Page 14 Water Supply Connection Figure 8 UL134 Figure 9 Figure 10 Locate the compression fitting and ferrule packed in the unit. Slide the compression fitting and ferrule over the 1/4 inch water supply line. Do not use thread sealing compound or tape. Using two wrenches, tighten the compression fitting on the supply line (see Figure 8).
-
Page 15: Leveling
(see Figure 11). If the ice maker is not level, adjust the feet on the corners of the unit as necessary (see Figure 12). Check the levelness after each adjustment and repeat the previous steps until the unit is level. -
Page 16: Door Reversal
Door Reversal REVERSING THE DOOR (SOME MODELS) All Electrolux units may be left or right hand opening. The door opening is easily reversed by moving the hinge hard-ware to the opposite side (see Figure 13). To reverse the door: Figure 13... - Page 17 Remove top hinge (3 screws), reinstall hinge screw pin, and remount on opposite side BOTTOM (see Figure 17). Remove the two door closer inserts from the existing bottom hinge and install as shown on the new bottom hinge (see Figure 18). Remove existing bottom hinge (3 screws) and remount on opposite side TOP.
-
Page 18: Door Adjustment
Door Adjustment ADJUSTING THE DOOR Your door is aligned at the factory before shipment. Occasional re-adjustment may be necessary, especially if an overlay panel is installed. The following procedure will correct for up to 1/4" alignment. The door should never be flush with the top of the cabinet. Even when level, the top edge of the door will be 1/8"... - Page 19 If door edge opposite the hinges needs to move up, move plate toward outside of door. If door edge needs to move down, move plate toward inside of door (see Figure 23). Repeat until top edge of door is parallel with top of cabinet and tighten screws securely.
-
Page 20: Built-In Installation
Built-In Installation INSTALLING A BUILT-IN Your Electrolux product has been designed for either free-standing or built-in installation. When built-in, your ice maker does not require additional air space for top, sides or rear. However, the front grille must NOT be obstructed. -
Page 21: Start-Up
INITIAL START-UP Once installation and leveling is complete, the unit is ready for initial start-up and operation. Your unit is shipped in the OFF position, however, you may turn it ON/ OFF using the cycle selector switch located in the access panel above the grille (see Figure 26). -
Page 22: Normal Operation
Ice Cube Thickness Your Electrolux ice maker uses advanced technology to make ice that is crystal clear. This technology cascades a flow of water over a chilled ice mold that is mounted vertically so no water sits in it. -
Page 23: Ice Dispsenser Operation And Care
WARNING WARNING WARNING WARNING WARNING Disconnect power to the ice maker before making any ice thickness adjustments. To adjust: Disconnect power to the unit. Remove the screws securing the front access panel (see Figure 29). Operation Figure 28 1/16"... - Page 24 Ice thickness adjustment dial can be rotated 1/4 to 1/2 turn on the number dial. Allow the ice maker to stabilize for 24 hours before making further adjustments. Since ice cubes in any given batch will vary, choose cubes from the sample area for comparison when making adjustments (see Figure 31).
-
Page 25: Maintenance
SPECIAL CONSIDERATIONS • For best performance, keep the unit out of direct sunlight. • Turn the unit OFF and dispose of any ice cubes if the unit will not be used for 5 days or more. Prop door open to allow for air circulation and prevent mold and mildew. -
Page 26: Interior Cleaning
Follow exterior cleaning instructions. Interior Cleaning - As Required Disconnect power to the ice maker. Open the door and remove any ice from the storage bin. Wipe down the interior and storage bin with a solution of non-abrasive mild soap or detergent and warm water. -
Page 27: Condenser Cleaning
WARNING WARNING WARNING WARNING Disconnect electric power to the ice maker before cleaning the condenser. To remove and replace the grille for access to the condenser fins follow this procedure (see Figure 32): Remove the screws at each end of the grille. -
Page 28: Self Cleaning
UTION UTION Use only Electrolux Ice Machine Cleaner (part number EIM30046). It is a violation of Federal law to use this solution in a manner inconsistent with its labeling. Use of any other cleaner can ruin the finish of the evaporator and will void the warranty. -
Page 29: Inlet Screen Cleaning
Make sure the drain system is working properly and the drain hose is not pinched or kinked. Pour one gallon of cool, fresh water into the ice bin. The water should drain freely. If your ice maker is equipped with a drain pump, the pump should drain the ice bin. -
Page 30: Storage, Vacation And Moving
Drain water from the water trough and drain line by removing the overflow tube (see Figure 34). Clean the ice maker and storage bin before next use. Prop door open to allow for air circulation and prevent mold and mildew. -
Page 31: Troubleshooting
BEFORE YOU CALL FOR SERVICE If the unit appears to be malfunctioning, read through Normal Operation first. If the problem persists, check the Troubleshooting Guide. Locate the problem in the guide and refer to the cause and its remedy before calling for service. The problem could be something very simple which can be solved without a service call. -
Page 32: If Service Is Required
Troubleshooting Troubleshooting – What to check when problems occur Problem Poor ice quality (soft or unclear). Unit produces shallow or incomplete cubes, or the ice fill pattern on the evaporator is incomplete. Water leaking from under the unit. Ice storage bin full of water. IF SERVICE IS REQUIRED If the need for service arises, contact the dealer from whom the unit was purchased. -
Page 33: Warranty Information
State of Alaska) In the U.S.A., your appliance is warranted by Electrolux Home Products, Inc. We authorize no person to change or add to any of our obligations under this warranty. Our obligations for service and parts under this warranty must be performed by us or an authorized Electrolux Home Products, Inc.