Table of Contents
Table of Contents

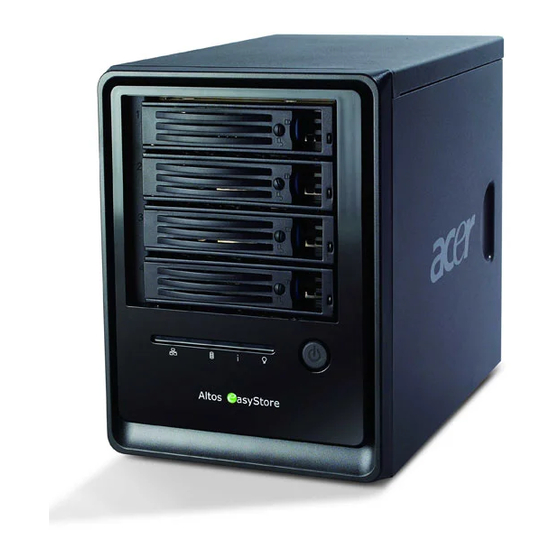
Related Manuals for Acer Altos EasyStore


Summary of Contents for Acer Altos EasyStore
- Page 2 Acer Incorporated. Acer and the Acer logo are registered trademarks of Acer Inc. Other company’s product names or trademarks are used herein for identification purposes only and belong to their respective companies.
-
Page 3: Table Of Contents
Chapter Chapter 1 Introducing Your Storage System Chapter 2 Getting Started Initializing your storage system Installing the Console Starting the Console Initializing the disks Configuring your storage system Accessing the Manager Accessing the Manager using the Console Accessing the Manager using a Web browser Logging in to the Manager Navigating the Manager Viewing information about your storage system... - Page 4 Chapter Expanding the shared storage Reconfiguring the disks Viewing system status information Logging out of the Manager Shutting down the storage system Chapter 4 Working with Shared Folders Windows users Linux users Mac users Accessing shared folders using FTP Disconnecting from shared folders Windows users Linux users Mac users...
- Page 5 Chapter Swapping hard disks Transferring hard disks to a new storage system Appendix A: Software Specifications Appendix B: Configurations Appendix C: Hardware Specifications Technical Assistance Glossary Altos easyStore Manual...
-
Page 6: Related Documentation
Preface This guide provides you with the following information: An overview of the Altos easyStore and instructions for setting it up to provide shared storage space to users in your network Information about advanced features for configuring your storage system Instructions for installing and using DiskSafe Express to back up your networked computer disks to the storage system and recover that data as... - Page 7 Preface Altos easyStore Manual...
-
Page 8: Introducing Your Storage System
Introducing Your Storage System ALTOS EASYSTORE is an intelligent network storage solution for small and medium- sized offices and home network environments. It provides up to 2 TB of hard disk space for both shared files and backups of your computer hard disks, offering an ideal way to distribute and protect important data. - Page 9 Chapter 1 Introducing Your Storage System Additional accessories The storage system supports up to two USB disks, which can be purchased separately. Notes: Only USB disks are supported. USB hubs and other USB devices are not supported. Any USB disk must be formatted before you can use it with the storage system, and only the first partition of a FAT or FAT32 file system will be recognized.
-
Page 10: Chapter 2 Getting Started
Chapter 2 Getting Started Getting Started Getting started with your storage system involves the following general steps: 1. Set up your storage system. This involves attaching any optional USB devices, attaching the storage system to your network, and powering up the system. 2. - Page 11 Chapter 2 Getting Started 6. Access the shared folders. For information about this step, refer to “Accessing shared folders.” 7. Protect your computer hard disks. This involves installing DiskSafe Express on each computer that you want to protect and specifying which hard disks or partitions to back up and how often backups should occur. For information about this step, refer to Chapter 5, "Protecting Local Disks."...
-
Page 12: Initializing Your Storage System
Chapter 2 Getting Started Initializing your storage system Altos easyStore comes with four hard disks drive, they are already initialized. You must install the Storage System Console on a computer in the same subnet as your storage system and use that application to connect to the storage system. Installing the Console You can install the Console on any computer that runs one of the following operating systems:... - Page 13 Chapter 2 Getting Started 3. On the welcome page, click Next. 4. If you agree to the terms of the license agreement, click Yes. 5. Enter your name and company name and then click Next. Altos easyStore Manual...
- Page 14 Chapter 2 Getting Started 6. Click Next to install the Console in the displayed location, or click Browse to select or specify a different location and then click Next. 7. Review your selections and click Next. Altos easyStore Manual...
- Page 15 Chapter 2 Getting Started 8. To install the Console, click Finish. If you want to start the Console immediately after it is installed, select the Launch Storage System Console check box before you click Finish. Altos easyStore Manual...
-
Page 16: Starting The Console
Chapter 2 Getting Started Starting the Console Once you have installed the Console (as described in “Installing the Console”), you can use the following procedure to start it. Note: If the storage system is not directly connected to your computer and your network does not have a DHCP server, you must change the IP address of your computer to use the same subnet as the storage system. - Page 17 Chapter 2 Getting Started Note: If you connect a storage system to the network after the Console has already scanned it, or if you subsequently change the IP address of the storage system, you must click Discover Storage Systems to scan the network again and update the tree in the left pane.
-
Page 18: Initializing The Disks
Chapter 2 Getting Started Initializing the disks Once you have installed the Console (as described in “Installing the Console”), started it, and connected to the storage system (as described in “Starting the Console”), the System Initialization page displays: If all the hard disks have not been detected, or if you want to add, remove, or re-order the disks at this time, insert or remove the disks one at a time and click Scan after each action. - Page 19 Chapter 2 Getting Started The firmware is uploaded to the hard disks. When this process is complete, the storage system restarts. Note: The operating system and storage system software are installed on each disk in your storage system to ensure that the failure or removal of any one disk will not cause the entire storage system to fail.
-
Page 20: Configuring Your Storage System
Chapter 2 Getting Started Configuring your storage system Once your storage system has been initialized (as described in “Initializing your storage system”), follow these steps to run the System Setup wizard and perform the necessary initial configuration: 1. If you have not already installed the Storage System Console, install it (as described in “Installing the Console”) and start it (as described in... - Page 21 Chapter 2 Getting Started The End User Software License Agreement page displays: 3. If you agree to the terms, select the I accept the license agreement check box and then click Next. The Host Name page displays: 4. Click Next to accept the default storage system name (Storage), or enter whatever name you prefer and then click Next.
- Page 22 Chapter 2 Getting Started When you click Next, the Date/Time page displays: 5. Specify the current date, time, and time zone, and then click Next. The time should be expressed in 24-hour format. For example, 2:00 P.M. would be entered as 14:00:00. Note: The storage system time does not automatically change to reflect daylight savings time.
- Page 23 Chapter 2 Getting Started 6. By default, if your network has a DHCP server, the storage system obtains its IP address from that server. If your network does not have a DHCP server, or if the storage system is directly attached to your computer, the default IP address and subnet mask are used.
- Page 24 Chapter 2 Getting Started If you want to change the disk configuration, select the desired RAID level and then click Next. (For detailed information about the different RAID levels, refer to Appendix B, "Disk Configurations.") When you click Next, the Disk Space Distribution page displays: 8.
- Page 25 Chapter 2 Getting Started 9. On the confirmation message, click OK. The Configuration page displays and the system is configured according to the settings you specified. Once the configuration is complete, the system restarts. 10. After the storage system restarts, you can access the Manager, add users, and create shared folders.
-
Page 26: Accessing The Manager
Chapter 2 Getting Started Accessing the Manager Once you have initialized and configured your storage system (as described in “Initializing your storage system” “Configuring your storage system” ), you can access the Manager to add users, create shared folders, and perform other tasks related to managing your storage system. -
Page 27: Accessing The Manager Using A Web Browser
Chapter 2 Getting Started Accessing the Manager using a Web browser To access the Manager using a Web browser: 1. From any computer in your network, run Microsoft Internet Explorer 6.0 or Firefox 1.06 or newer, enter the following in the address bar, and then press Enter: https://storage_system where storage_system is the name or IP address of the storage system. -
Page 28: Logging In To The Manager
Chapter 2 Getting Started Logging in to the Manager To ensure that your connection to the storage system is secure, the HTTPS protocol is used, and only individuals who know the administrator user name and password can view or change any of the storage system settings. To log in to the Manager: 1. -
Page 29: Navigating The Manager
Chapter 2 Getting Started Navigating the Manager Once you log in to the Manager, the Home page displays: Altos easyStore Manual... - Page 30 Chapter 2 Getting Started The top of the Home page (and every page in the Manager) displays a navigation bar that lets you access all the features of the storage system: Home—Displays information about your storage system, including how the storage space is being used and which users are connected.
-
Page 31: Viewing Information About Your Storage System
Chapter 2 Getting Started Viewing information about your storage system The Home page can display two different views: Storage Status and Connection Status. You can switch from one view to the other by clicking the desired button on the Home page. Storage Status—Displays information about the total storage capacity on the storage system, how much disk space is allocated for shared folders, how much is currently used by backups, and how much is available for either. - Page 32 Chapter 2 Getting Started Connection Status—Displays a list of the Windows and Mac OS X users who are currently connected to shared folders, including which shared folder they are accessing and when they logged on. Notes: If anyone accessed a shared folder using the guest user name (which is described in more detail in “Adding users”), guest displays in the Users...
-
Page 33: Adding Users
Chapter 2 Getting Started Adding users Note: By default, the storage system uses local authentication mode. If your site uses Active Directory, you might want to use Active Directory authentication mode instead. Since all user data and all shared folder assignments are deleted when you switch from one mode to another, it is recommended that you decide which mode you want to use before proceeding. - Page 34 Chapter 2 Getting Started The Users & Computers page displays: 2. Click Add. 3. Select the type of user that you want to add, and then click Next. The operating system used by the user determines which option you should choose—Windows/Mac OS X user (CIFS) or Linux/Other Mac user (NFS).
- Page 35 Chapter 2 Getting Started The page that displays next varies, depending on the user type you selected. Windows/Mac OS X user (CIFS) Linux/Other Mac user (NFS) Altos easyStore Manual...
- Page 36 Chapter 2 Getting Started 4. Enter the requested user information and click Done: For this type of user Do this Windows/Mac OS X Enter the user name and password for accessing the shared user (CIFS) folders. (You must enter the password a second time to confirm it.) The user name can be up to 20 characters long and can include letters and numbers.
-
Page 37: Creating Shared Folders
Chapter 2 Getting Started Creating shared folders By default, the storage system includes a shared folder named public. In local authentication mode, all users are automatically assigned to this folder and can create, modify, or delete files there (unless you change the list of authorized users or their access rights as described in “Assigning users to shared folders”... - Page 38 Chapter 2 Getting Started 2. Click Add. 3. In the Shared folder name text box, enter a unique name for the shared folder, and then click Next. This name can be up to 64 characters long and can contain letters, numbers, hyphens, underlines, and spaces.
- Page 39 Chapter 2 Getting Started For any shared folder or USB disk, you can specify which users can access it and what level of access they have. When you add a user to the list of authorized users for a shared folder or USB disk, that change takes effect immediately.
-
Page 40: Managing Shared Folders
Chapter 2 Getting Started Managing shared folders When you click Shared Folders in the navigation bar, the page displays a list of shared resources, including both shared folders and USB devices. When you select an item in the Shared folders list, the users and groups that can access that item display in the Users with access list. - Page 41 Chapter 2 Getting Started Notes: You cannot delete the public folder. You cannot delete the contents of a USB disk using the Shared Folders page. To remove the USB disk from the storage system, use the Manager to discon- nect it.Then physically unplug the USB disk from the storage system. Even after you physically unplug the USB disk, it remains in the Shared fold- ers list.
-
Page 42: Assigning Users To Shared Folders
Chapter 2 Getting Started Assigning users to shared folders 1. In the navigation bar, click Shared Folders. 2. In the Shared folders list, select the shared folder or USB disk whose user access you want to change. 3. Click Assign Access, select the user that you want to assign and change the access level. -
Page 43: Chapter 3 Managing Your Storage System
Managing Your Storage System The Web-based storage system Manager enables you perform a number of tasks to help you get the most from your storage system: Managing users—Add, modify, or remove users; put users into groups; or change the authentication mode. Managing shared folders—Create shared folders, rename existing shared folders, change which users can access existing shared folders or their access... -
Page 44: Managing Users
Chapter 3 Managing Your Storage System Managing users When you click Users in the navigation bar, the Users & Computers page displays. This page displays a list of all currently configured Windows and Mac OS X users, as well as all Linux and other Mac computers. (In this guide, the term user refers to both individuals and computers.) By default, the storage server uses local authentication mode, which means that you can add, modify, or remove all types of users at any time. -
Page 45: Modifying Users
Chapter 3 Managing Your Storage System Modifying users In local authentication mode, for Windows and Mac OS X users you can change the password used to access the shared folders, but not the user name. This change will not affect current connections, but will take effect the next time the person tries to connect to a shared folder. - Page 46 Chapter 3 Managing Your Storage System The page that displays next varies, depending on the type of user you selected. Windows/Mac OS X user (CIFS) Linux/Other Mac user (NFS) Altos easyStore Manual...
-
Page 47: Removing Users
Chapter 3 Managing Your Storage System 4. Make the desired change and click OK: For this type of user Do this Windows/Mac OS X Enter the password for accessing the shared folders. (You must user (CIFS) enter the password a second time to confirm it.) Note: If the user name and password specified here are the same as the person’s Windows user name and password, the... -
Page 48: Working With Groups
Chapter 3 Managing Your Storage System Working with groups Windows and Mac OS X users can be put into groups, which makes it easier to give several users access to the same shared folder at once. When you click Users in the navigation bar and click Groups in the left pane, the page displays a list of all currently configured groups. - Page 49 Chapter 3 Managing Your Storage System 3. Click Add. Note: If the storage system uses Active Directory authentication mode, this button displays dimmed. 4. In the Group name text box, enter a unique name for the group. This name can be up to 15 characters long and can include letters, numbers, hyphens, and underlines.
- Page 50 Chapter 3 Managing Your Storage System a. To select multiple, contiguous users, hold down the Shift key and select the first user, then select the last user. All users between the first and last selected user are selected. To select multiple, non-contiguous users, hold down the Ctrl key as you select each user.
- Page 51 Chapter 3 Managing Your Storage System 4. Click Edit. Note: If the storage system uses Active Directory authentication mode, this button displays dimmed. 5. Specify which users should belong to this group, and then click OK: To do this Do this Add all users to the Click Add All Users.
-
Page 52: Changing The Authentication Mode
Chapter 3 Managing Your Storage System Removing a group In local authentication mode, removing a group does not remove the users that are members of that group; it simply means that the group will no longer appear in the Groups list on the Groups page. The users remain listed on the Users & Computers page. - Page 53 Chapter 3 Managing Your Storage System In local authentication mode, the storage system authenticates all users who try to connect to shared folders, and you can add, modify, or remove all types of users (both Windows/Mac OS X and Linux/other Mac users). By default, the storage system uses local authentication mode.
- Page 54 Chapter 3 Managing Your Storage System You can change the authentication mode at any time, but you must provide the administrator password to do so. Caution: Changing the authentication mode deletes all your existing user data and shared folder assignments. However, if any users are currently accessing shared folders, they will remain connected until they disconnect from the shared folders or shut down their computer.
- Page 55 Chapter 3 Managing Your Storage System 5. If you’re currently using Active Directory authentication mode, Local authentication mode is selected by automatically, and Active Directory authentication mode displays dimmed. Click Finish. All your existing user data and user assignments are deleted, and you can add new users (as described in “Adding users”) and assign them to shared folders (as described in “Assigning...
- Page 56 Chapter 3 Managing Your Storage System 9. In the User name text box, enter the name of a user who has privileges to access the Active Directory tree. When accessing the Active Directory server, this name will be appended with the fully qualified domain name shown on this page.
- Page 57 Chapter 3 Managing Your Storage System Note: If the storage system time and Active Directory server time differ by more than five minutes, an error message displays. You must adjust the storage system time, time zone, or both to ensure that they match (as described in “Changing the system settings”).
- Page 58 Chapter 3 Managing Your Storage System All the current users and groups associated with the selected organizational unit are imported into the storage system and appear on the Users & Computers and Groups pages. At this point, you can assign these users and groups to shared folders (as described in “Assigning users to shared folders”).
- Page 59 Chapter 3 Managing Your Storage System 3. Make the desired changes, if any, and click Apply: To change this Do this The IP address of the In the Primary server IP address text box, enter the IP primary Active Directory address of your primary Active Directory server.
- Page 60 Chapter 3 Managing Your Storage System 1. In the navigation bar, click Users. 2. In the left pane, click either Users & Computers or Groups. 3. Click Synchronize. The page displays the progress of the synchronization. Notes: Your storage system supports only 128 users and 128 groups. If the selected organizational unit on your Active Directory server currently exceeds these maximums, the excess users or groups will not be added to the storage system.
-
Page 61: Managing Shared Folders
Chapter 3 Managing Your Storage System Managing shared folders When you click Shared Folders in the navigation bar, the page displays a list of shared resources, including both shared folders and USB devices. When you select an item in the Shared folders list, the users and groups that can access that item appear in the Users with access list. -
Page 62: Assigning Users To Shared Folders
Chapter 3 Managing Your Storage System Assigning users to shared folders For any shared folder or USB disk, you can specify which users can access it and what level of access they have. When you add a user to the list of authorized users for a shared folder or USB disk, that change takes effect immediately. - Page 63 Chapter 3 Managing Your Storage System The page that displays next varies, depending on which type of user you selected. Windows/Mac OS X user (CIFS) Linux/Other Mac user (NFS) Altos easyStore Manual...
- Page 64 Chapter 3 Managing Your Storage System 5. Specify which users should be able to access this shared folder or USB disk, and then click OK: To do this Do this Allow selected users to In the Unauthorized users list, select the user(s) who access to the shared should be able to access the shared resource and then folder or USB disk...
-
Page 65: Deleting A Shared Folder
Chapter 3 Managing Your Storage System Deleting a shared folder Once you have created a shared folder, you can delete it at any time. When you delete a shared folder, any users who are currently accessing it are immediately disconnected from it. Caution: Deleting a shared folder deletes all the subfolders and files in that shared folder. -
Page 66: Managing Backups
Chapter 3 Managing Your Storage System Managing backups Once the users have used DiskSafe Express to back up their computer hard disks to the storage system (as described in Chapter 5, "Protecting Local Disks," ), the Backups page displays a list of each computer that has done this, the size of each protected disk, the date and time of all available backups, and the backup disk ID (the number used to identify the backup on both the storage system and on the Status page in DiskSafe Express). -
Page 67: Changing The Recovery Password
Chapter 3 Managing Your Storage System For booting remotely, you can also specify the MAC address to use (if you want to remotely boot a computer using a different computer’s backup) and the backup to boot from. In addition, when a user removes protection for a disk, the existing backups are not deleted. - Page 68 Chapter 3 Managing Your Storage System To configure remote boot: 1. In the navigation bar, click Backups. 2. In the Computer name list in the Remote boot group box, select the name of the computer whose backup you want to remotely boot from. 3.
-
Page 69: Deleting A Backup
Chapter 3 Managing Your Storage System Deleting a backup You can delete all backups of a given disk, but you cannot delete just an individual backup from a specific date and time. Note: If you delete all backups of all disks for a particular computer, that computer no longer displays on the Backups page. - Page 70 Chapter 3 Managing Your Storage System 3. Click Delete Client. 4. When prompted to confirm the deletion, click OK. All backups of all disks associated with this computer are deleted, and the computer name is also deleted from the storage system. Note: If you delete a client and the user did not previously remove protection...
-
Page 71: Setting Up E-Mail Alerts
Chapter 3 Managing Your Storage System Setting up e-mail alerts The Alerts page allows you to set up the storage system to notify up to three people via e-mail if a problem occurs—for example, if one of the disks fails, or if insufficient space is available for creating new files or performing a backup: To take advantage of this feature, you must have access to an SMTP e-mail server, either within your own network or through an Internet service provider. - Page 72 Chapter 3 Managing Your Storage System 2. Specify whether or not the storage system should send e-mail notifications when a problem occurs by selecting or clearing the Send e-mail notifications check box. If you select this option, you must provide the fully qualified domain name or IP address of your e-mail server and at least one e-mail address.
- Page 73 Chapter 3 Managing Your Storage System 10. To confirm that the configuration is correct, click Test E-mail, and click OK on the confirmation message. This sends a test message to the specified recipients. If they do not receive the test message, make sure that all the entries on this page are correct. You might also have to modify the network settings (such as the gateway to use).
-
Page 74: Upgrading The Firmware
Chapter 3 Managing Your Storage System Upgrading the firmware The Firmware page displays the current version of the firmware that is installed on your storage system. It also allows you to upgrade it if newer firmware becomes available. For additional security, you must enter your administrator password in order to upgrade the firmware. - Page 75 Chapter 3 Managing Your Storage System 4. In the Administrator password text box, enter the password that you use for logging in to the Manager. 5. Click Upgrade. 6. If you are upgrading from version 1.0 or 1.1, click Continue to delete all home folders and proceed with the upgrade.
-
Page 76: Disconnecting Usb Devices
Chapter 3 Managing Your Storage System Disconnecting USB devices The USB page displays a list of all USB devices that are currently attached to the storage system, including the type of device it is, the manufacturer, and the name. USB disks are identified by the names usbdisk1 and usbdisk2. (These names cannot be changed.) When you plug a USB device into the storage system, the storage system automatically detects it and adds that device to the USB page. -
Page 77: Changing The System Settings
Chapter 3 Managing Your Storage System Changing the system settings The System page displays the settings that you specified when you initially configured the storage system, such as the storage system name, and the current date and time. In local authentication mode, you can change any of these settings at any time. In Active Directory authentication mode, you can change any of these settings except the storage system name. - Page 78 Chapter 3 Managing Your Storage System 3. Make the desired changes: To change this Do this The storage system name In the Storage system name text box, enter the new name to use for the storage system. This name can be up to 15 characters long and can include letters, numbers, and hyphens.
-
Page 79: Changing The Network Settings
Chapter 3 Managing Your Storage System Changing the network settings The Network page displays the network settings that were set when you initially configured the storage system. Altos easyStore Manual... - Page 80 Chapter 3 Managing Your Storage System You can change these settings at any time. Note: Changing the IP address or subnet mask can have several effects: Access to the Manager will be temporarily disrupted. If you access the Manager using a Web browser and an IP address, you will need to use the new IP address.
- Page 81 Chapter 3 Managing Your Storage System To change this Do this The IP address of the If your network includes a gateway, and if the port on the gateway storage system uses a specified IP address rather than obtaining one from the DHCP server, enter the IP address of the default router in the Gateway IP address text boxes.
- Page 82 Chapter 3 Managing Your Storage System To change this Do this The packet size for Specify whether or not to transfer larger data packets transferring data between the storage system and the computers in your network by selecting or clearing the Jumbo Frames check box.
-
Page 83: Reconfiguring Your Storage System Disks
Chapter 3 Managing Your Storage System Reconfiguring your storage system disks The Disks page displays information about all the hard disks that are currently installed in your storage system: This page includes the following details: The disk configuration (that is, whether the disks use a linear or RAID configuration, and the RAID level) The overall status of the disks: Normal—All the disks are working properly. -
Page 84: Expanding The Shared Storage
Chapter 3 Managing Your Storage System The current status of each disk: Linear or RAID n—The disk is working properly as part of the specified configuration. New—The disk has been added to the storage system but is not currently being used. Spare—The disk is acting as a spare disk for the RAID. -
Page 85: Reconfiguring The Disks
Chapter 3 Managing Your Storage System 3. In the Administrator password text box, enter your password for logging in to the Manager. 4. Click Expand Shared Storage. The Expand Shared Storage page displays: 5. Specify how much disk space to add to the space that is currently allocated for shared folders. - Page 86 Chapter 3 Managing Your Storage System To change the disk configuration: 1. In the navigation bar, click Advanced. 2. In the left pane, click Disks. 3. In the Administrator password text box, enter your password for logging in to the Manager. 4.
- Page 87 Chapter 3 Managing Your Storage System The Disk Space Distribution page displays: 7. To accept how the disk space will be proportioned for shared folders and backups (only 200 MB will be allocated for shared folders), click Finish. If you want to allocate more space for shared folders, select Allocate more space for shared folders and then specify how much space to allocate (either All available disk space or Specified disk space).
- Page 88 Chapter 3 Managing Your Storage System The screen displays the progress of the process: When this process is complete, the storage system restarts. 9. Close the browser window. After the system has restarted, you can access the Manager and re-create your users and shared folders (as described in “Adding users”...
-
Page 89: Viewing System Status Information
Chapter 3 Managing Your Storage System Viewing system status information When you click Advanced in the navigation bar and click System Status in the left pane, you can view many of the operational parameters of your storage system, including CPU usage, memory usage, the amount of time that the storage system has been running, the current fan speed, the temperatures of the CPU and disks, the IP address of the gateway (which you can change as described in “Changing the... -
Page 90: Logging Out Of The Manager
Chapter 3 Managing Your Storage System Logging out of the Manager When you have finished using the Manager, it is recommended that you log out to ensure that unauthorized individuals do not make changes to the storage system. To log out: 1. -
Page 91: Shutting Down The Storage System
Chapter 3 Managing Your Storage System Shutting down the storage system To shut down the storage system, you can press the power button on the unit itself, or you can shut the system down remotely using the Manager. To ensure that you don’t shut down the system accidentally, you must enter your administrator password to do this. -
Page 92: Working With Shared Folders
Working with Shared Folders Accessing shared folders Once you have added users and created shared folders (as described in “Adding users” “Creating shared folders”), the users need to perform some simple steps to be able to access those folders. The procedure for doing this varies, depending on the user’s operating system. - Page 93 Chapter 4 Working with Shared Folders Using My Computer/Windows Explorer To access a shared folder using My Computer/Windows Explorer: 1. Open My Computer/Windows Explorer. 2. From the Tools menu, click Map Network Drive. The Map Network Drive dialog box displays: The exact appearance of this dialog box varies, depending on your operating system.
- Page 94 Chapter 4 Working with Shared Folders 5. To automatically connect to this shared folder each time you log on to Windows, select Reconnect at logon. If you clear this option, you must repeat this procedure each time you want to access the shared folder.
- Page 95 Chapter 4 Working with Shared Folders As soon as you start the Console, it automatically scans the network for storage systems. This might take a few minutes. As soon as the scan is complete, the left pane displays a tree view of all the storage systems it found: Note: If you connect a storage system to the network after the Console has already scanned it, or if you change the IP address of the storage system, you...
- Page 96 Chapter 4 Working with Shared Folders The storage system name expands to display all the available shared folders: Notes: All shared folders appear in the left pane. However, you can access only the ones that you are authorized to use. If your storage system uses Active Directory authentication mode, you must physically create a guest account in order to use and create shared folders.
-
Page 97: Linux Users
Chapter 4 Working with Shared Folders 4. In the Drive list, select the drive letter that you want to assign to the shared folder. 5. To automatically connect to this shared folder each time you log on to Windows, select Reconnect at logon. If you clear this option, you must repeat this procedure each time you want to access the shared folder. -
Page 98: Mac Users
Chapter 4 Working with Shared Folders 3. Mount the desired shared folder by entering the following command: mount storage_system:/nas/NASDisk-00002/folder /my_directory where storage_system is the IP address of the storage system, folder is the name of the shared folder, and my_directory is the name of the directory that you created in step 1. - Page 99 Chapter 4 Working with Shared Folders 6. To access the shared folder, double-click the icon on the desktop. Other Mac operating systems For information about accessing a shared folder using NFS on a Mac running an operating system older than OS X, please refer to your Mac documentation. Altos easyStore Manual...
-
Page 100: Accessing Shared Folders Using Ftp
Chapter 4 Working with Shared Folders Accessing shared folders using FTP If you enabled the storage system to act as an FTP server (as described in “Changing the network settings”), all Windows and Mac OS X users can use a Web browser to access the public folder. -
Page 101: Disconnecting From Shared Folders
Chapter 4 Working with Shared Folders Disconnecting from shared folders If you need to reconfigure the disks in your storage system or shut it down for any reason, all users should disconnect from the shared folders to ensure that the process proceeds smoothly. -
Page 102: Linux Users
Chapter 4 Working with Shared Folders Linux users To disconnect from a shared folder using LInux: Unmount the desired shared folder by entering the following command: umount /my_directory where my_directory is the name of the local directory. For example, if you mounted the shared folder using the following command: mount 192.168.0.101:/nas/NASDisk-00002/public /my_directory you would unmount it using the following command: umount /my_directory... -
Page 103: Protecting Local Disks
Protecting Local Disks Even if most of your data is stored and protected on your storage system, your operating system files, applications, and many other files still reside on each individual computer in your network. If one of those local disks fails, it can take many hours to re-install and reconfigure the operating system and applications on a new or repaired hard disk, and some files might be completely lost. - Page 104 Chapter 5 Protecting Local Disks Whenever you want to recover data from the storage system, you can do so quickly and easily. If you need to recover just a few files or folders, you can access the desired backup and copy what you need back to your local disk. If you need to recover an entire data disk or partition (that is, a disk or partition that does not contain any of the files needed to run the operating system), you can do so using DiskSafe Express.
-
Page 105: Getting Started
Chapter 5 Protecting Local Disks Getting started System requirements Each computer where DiskSafe Express is installed must have the following: One of the following operating systems: Microsoft Windows XP Home Edition or Professional (Service Pack 2) Microsoft Windows Server 2003 (SP1) Microsoft Windows 2000 Professional, Server, or Advanced Server with Service Pack 4 An enabled network interface card... -
Page 106: Additional Prerequisites
Chapter 5 Protecting Local Disks Additional prerequisites In addition to the system requirements, the following criteria must be met: You must be logged on as an administrator to install DiskSafe Express and run it for the first time. However, after you have run the application once as an administrator, you can subsequently run it when logged on as a user. -
Page 107: Installing Disksafe Express
Chapter 5 Protecting Local Disks 6. On the page with installation options, click Next. (Initiator Service and Software Initiator are selected by default.) 7. If a message box displays telling you to configure the settings in the Control Panel, click OK. Note: You do not have to configure the Microsoft iSCSI Initiator. - Page 108 Chapter 5 Protecting Local Disks 4. If Microsoft .NET Framework 1.1 is already installed, go to step 7. If this component is not currently installed, click Yes to install this component. (You cannot install DiskSafe Express without first installing Microsoft .NET Framework 1.1.) When you click Yes, the setup utility for Microsoft .NET Framework 1.1 starts: 5.
- Page 109 Chapter 5 Protecting Local Disks The license agreement displays: 8. If you agree to the terms of the license agreement, select I accept the terms of the license agreement and then click Next. 9. Click Next to install DiskSafe Express in the displayed location. Altos easyStore Manual...
- Page 110 Chapter 5 Protecting Local Disks Alternatively, you can click Browse, select or enter a different location, click OK, and then click Next. Note: It is strongly recommended that you install DiskSafe Express on the partition that you boot from (that is, where Windows is installed, typically C:). If you install it on a non-system partition of your system disk, you will not be able to recover that partition using the DiskSafe Express application window.
-
Page 111: Starting Disksafe Express
Chapter 5 Protecting Local Disks 11. After you restart your computer, click OK on the welcome message. The Add License dialog box displays: 12. Enter the key code for licensing the product and click OK. If your computer has an Internet connection, the license is activated automatically. - Page 112 Chapter 5 Protecting Local Disks If you did not protect a disk after installing DiskSafe Express and restarting your computer, you are prompted to do so the first time you run this application. For information about this wizard, refer to “Protecting your disks”.
-
Page 113: Activating Your License
Chapter 5 Protecting Local Disks Activating your license When you install DiskSafe Express and restart your computer, you are prompted to license the product. If your computer has an Internet connection, the license is activated automatically. However, if your Internet connection was temporarily down or if your computer has no Internet connection, your license was not activated. - Page 114 Chapter 5 Protecting Local Disks 4. If you did not save the file to a shared folder, take the floppy disk or USB disk to a computer with Internet and e-mail access. 5. From the computer that has Internet and e-mail access, e-mail the license file to the following address: [email protected] 6.
-
Page 115: Protecting Your Disks
Chapter 5 Protecting Local Disks Protecting your disks After you install DiskSafe Express and restart your computer, the Protect a Disk wizard runs automatically. Using this wizard, you can specify which disk or partition you want to back up, where the backups should be stored, when automatic backups (if any) should occur, and what password you want to use with the recovery CD or booting remotely. - Page 116 Chapter 5 Protecting Local Disks If your hard disk is divided into multiple partitions, this list displays one item for the entire hard disk, and one item for each partition. If your computer has multiple hard disks, this list displays an item for each entire disk and an item for each partition on each disk.
- Page 117 Chapter 5 Protecting Local Disks 3. When the Add Storage System dialog box displays, DiskSafe Express automatically scans your subnet for storage systems. Any storage systems that are detected appear in the Discovered storage systems list. From the Discovered storage systems list, select the storage system where you want to back up the selected disk.
- Page 118 Chapter 5 Protecting Local Disks 4. From the Backup locations list, select the storage system to use for backups of this disk or partition. (The first backup location in the list is selected by default.) If you want to scan the network for new storage systems, or add a new one manually, click Add and repeat step 3.
- Page 119 Chapter 5 Protecting Local Disks 5. If you previously protected this disk and removed protection, specify whether or not you want to re-use the existing backup or create a new one. If you select Re-use the existing backup, you must select which backup to re-use from the list.
- Page 120 Chapter 5 Protecting Local Disks 6. Specify when you want backups to occur. For example, if you want backups to occur every day, select Daily from the Recurrence list. If you want backups to occur once a week, select the day of the week from the Recurrence list.
- Page 121 Chapter 5 Protecting Local Disks 7. Specify whether or not to back up your disk as soon as you finish the wizard by selecting or clearing the Back up now check box, and then click Next. If you clear this option, the disk will be backed up at the next scheduled time or the next time you perform a manual backup.
- Page 122 Chapter 5 Protecting Local Disks 9. Review all your selections and click Finish. If you selected the Back up now check box, the backup will begin as soon as you click Finish, and you can review its progress on the Status page in DiskSafe Express.
-
Page 123: Manually Backing Up Your Disk
Chapter 5 Protecting Local Disks Manually backing up your disk Once you protect a disk, it is automatically backed up at regular intervals (unless you chose Not Scheduled from the Recurrence list when you completed the schedule). You can also back up a disk manually as long as a backup or recovery is not currently occurring. -
Page 124: Stopping A Backup Or Recovery In Progress
Chapter 5 Protecting Local Disks Stopping a backup or recovery in progress Once a backup or recovery starts, you can stop it at any time—for example, if you notice that your system is not responding as quickly as you’d like, and you want to free up processing capabilities for other tasks. -
Page 125: Changing The Backup Schedule
Chapter 5 Protecting Local Disks Changing the backup schedule When you protect a disk, you specify when you want backups to occur. However, you can change this schedule at any time as long as the Status page indicates that the Status is Normal. - Page 126 Chapter 5 Protecting Local Disks The schedule change takes effect immediately, and the date and time of the next scheduled backup displays in the Next backup area. Altos easyStore Manual...
-
Page 127: Receiving Event Notifications
Chapter 5 Protecting Local Disks Receiving event notifications When you install DiskSafe Express, the DiskSafe Express Agent is also installed. This program starts automatically whenever you start your computer, and the Agent icon displays in your system tray. When the Agent is running, a pop-up message displays whenever a backup-related problem occurs (for example, if a scheduled backup did not occur because the storage system was not running). -
Page 128: Changing The Recovery Password
Chapter 5 Protecting Local Disks Changing the recovery password When you protect a disk, you specify what password to use for recovering the disk using the recovery CD or when you remotely boot from a backup on the storage system. You can change this password at any time as long as the Status of the backup is Normal. - Page 129 Chapter 5 Protecting Local Disks 3. Click Recovery Password. The Reset Recovery Password dialog box displays. 4. In the Recovery password text box, enter the desired password. This password must be 12–16 characters long. It cannot contain multi-byte words. This means you can only enter ASCII character whose code value is less than 128.
-
Page 130: Enabling Or Disabling Remote Boot
Chapter 5 Protecting Local Disks Enabling or disabling remote boot If you need to recover your system disk or partition, using the recovery CD is recommended (as described in “Recovering a system disk using the recovery CD” ). However, if your computer does not support the recovery CD but does support the PXE protocol, you can remotely boot your computer from a backup on the storage system and then recover your system disk. -
Page 131: Enabling Remote Boot
Chapter 5 Protecting Local Disks When you enable remote boot, your network connection will be temporarily interrupted. It is recommended that you enable remote boot when this will not adversely affect any network applications that you might be running. If remote boot is successfully enabled, a new backup is created automatically. Once you have enabled remote boot, if you subsequently want to boot remotely using a different network interface card (NIC), you must first disable remote boot and then enable it again, specifying the other NIC. - Page 132 Chapter 5 Protecting Local Disks 4. Click Enable. A message displays, advising you that your network connection will be temporarily interrupted. 5. Click Yes to allow the temporary network interruption. (Your network connection will be restored immediately after this process is complete.) On the Enable Remote Boot dialog box, the Details area shows the progress of the enabling process.
-
Page 133: Disabling Remote Boot
Chapter 5 Protecting Local Disks Disabling remote boot Disabling remote boot restarts your computer automatically. It is recommended that you save and close any open files on your system before you do this. To disable remote boot: 1. From the Action menu, click Disable Remote Boot. A progress bar displays, indicating the progress of the process. -
Page 134: Recovering Data
Chapter 5 Protecting Local Disks Recovering data With DiskSafe Express, there are several ways to recover data from your backups. The best method to use depends on what you want to do and the capabilities of your computer: Recover specific files or folders—If you accidentally permanently deleted a file or folder that you want to recover, or if you just want to retrieve some information from a file that you changed, you can access the backup that contains the desired data and copy it to your local disk. - Page 135 Chapter 5 Protecting Local Disks Alternatively, if your computer does not support the recovery CD but does support the PXE protocol, you can boot your computer from a backup on the storage system and then recover your system disk. For more information, refer “Recovering a system disk while booting remotely”.
-
Page 136: Recovering Files Or Folders
Chapter 5 Protecting Local Disks Recovering files or folders To recover selected files or folders from a backup: 1. Click Restore. 2. In the Protected disk list, select the disk that contains the files or folders that you want to recover. 3. - Page 137 Chapter 5 Protecting Local Disks Notes: If the first drive letter after your local disks is mapped to a shared network folder, you must use Disk Management to change the drive letter assigned to the backup view so that you can access it. For example, if your system disk is mapped to C:, your CD-ROM drive is mapped to D:, and a shared network folder is mapped to E:, and you view a backup, you will continue to see the shared network folder when you...
-
Page 138: Recovering A Data Disk
Chapter 5 Protecting Local Disks Recovering a data disk You can recover a data disk or partition only as long as DiskSafe Express is not installed on that disk or partition, the disk or partition is not currently being backed up, and no backup view is open. - Page 139 Chapter 5 Protecting Local Disks 3. In the Backups list, select the backup that you want to recover. 4. Click Restore Disk. 5. If you are restoring a partition, and at least one other partition on the same disk is also protected, a message displays, advising you that protection will be stopped for that partition during the recovery process.
-
Page 140: Recovering A System Disk Using The Recovery Cd
Chapter 5 Protecting Local Disks Recovering a system disk using the recovery CD When you use the recovery CD, you boot your computer from that CD rather than from your local hard disk. The recovery CD has a menu-style user interface. When responding to the prompts, use the arrow keys to highlight the desired item, use the space bar to select or clear options (an displays in the brackets when the option is selected), and press Enter... - Page 141 Chapter 5 Protecting Local Disks If no supported NIC is found, you can gather information about your computer and send it to Technical Support to see if an updated recovery CD or an appropriate driver is available. To do this, select Save, insert a formatted floppy disk or USB disk into your computer, and select the appropriate option (Save to Floppy Disk or Save to USB Disk).
- Page 142 Chapter 5 Protecting Local Disks 7. If your computer is a member of a Windows domain, enter the domain name in the Domain Name field. (If your computer is not a member of a Windows domain, leave this field blank.) Initially, the recovery CD will attempt to connect to the storage system using only the computer name.
- Page 143 Chapter 5 Protecting Local Disks 11. In the right column, select the date and time of the backup that you want to recover. Caution: Selecting a backup with a specific date/time stamp is strongly recommended. In most cases, selecting Latest Backup is the same as selecting the backup in the list with the most recent date/time stamp.
- Page 144 Chapter 5 Protecting Local Disks 14. Select the local disk where you want to recover the data, and select Next. Note: If you replaced the original hard disk, the new disk must be at least as large as the original disk. In addition, if you are recovering a system disk, the system to which you are recovering the data must be identical to the original system.
- Page 145 Chapter 5 Protecting Local Disks 19. When the completion screen displays, review the results and do one of the following: To do this Do this Recover another disk Select Recover Another Disk. or partition If you want to recover a different backup of the same computer from the same storage system, select No to retain the current configuration settings and return to step 10.
-
Page 146: Recovering A System Disk While Booting Remotely
Chapter 5 Protecting Local Disks Recovering a system disk while booting remotely If your computer meets the necessary prerequisites, you can remotely boot it from a backup on your storage system and recover your system disk or partition. You can recover only your most recent backup. - Page 147 Chapter 5 Protecting Local Disks Recovering the disk To recover a system disk or partition while booting remotely: 1. Start your computer. 2. Use the appropriate procedure for your computer to configure it to boot from the NIC. For example, you might press F12 when the boot menu displays. For more information, refer to the documentation for your computer.
- Page 148 Chapter 5 Protecting Local Disks 10. Click Restore. The Protected disk list displays the disk or partition that you are currently booting from. 11. In the Backups list, select the most recent backup. You cannot recover any backup except the most recent one. Note: If no backups appear in this list, the backup that you booted from is not using the same recovery password as the storage system.
- Page 149 Chapter 5 Protecting Local Disks The Restore dialog box displays. 13. Specify whether you are recovering to the original disk or a new disk. If you are recovering to a new disk, select the desired disk from the list. Then click Restore.
-
Page 150: Removing Protection
Chapter 5 Protecting Local Disks Removing protection If you no longer want to back up a particular disk or partition, you can remove protection as long as a recovery is not currently in progress for that disk or partition. (If a recovery is in progress, you must cancel it or wait until it completes before you can remove protection.) Note: If you plan to delete a protected partition, be sure to remove protection... -
Page 151: Software Specifications
Software Specifications Operating System Linux Kernel 2.6.10 Network Service DHCP client/server (default IP address for Port 1 is 192.168.0.101) Supported Web Browsers Microsoft Internet Explorer 6.0 Firefox 1.06 or newer RAID Standard RAID 0 RAID 1 RAID 5 RAID 5 + spare RAID 10 File-Sharing Protocols CIFS/SMB... - Page 152 Disk Configurations Your storage system supports various types of disk configurations, including RAID (redundant array of independent disks), a disk subsystem that can increase performance, provide data protection, or both. Linear—A linear configuration is similar to using multiple hard disks in a regular computer.
- Page 153 Appendix B Disk Configurations You can use RAID 5 only if your storage system has at least three disks. If the disks are not the same size, the smallest of the disks determines how much disk space is available for data. For example, if one disk is 300 GB, one is 400 GB, and one is 500 GB, only 300 GB from each disk can be used.
-
Page 154: Adding Hard Disks
Appendix B Disk Configurations Adding hard disks The effect of adding hard disks to your storage system varies, depending on the disk configuration you chose when you configured the system and the current state of the existing disks. For example, in a linear configuration, you can add a new disk at any time, and data can be written to that disk as soon as it is added. -
Page 155: To A Linear Or Normal Raid Configuration
Appendix B Disk Configurations Adding hard disks to a linear or normal RAID configuration To add a hard disk to a linear or normal RAID configuration: 1. Insert the hard disk into the storage system. You can do this whether the storage system is powered on or off. 2. - Page 156 Appendix B Disk Configurations When you click Add New Disk, the following page displays: 4. Take the desired action: To do this Do this Add the disk to a linear configuration Click Add. or use it as a spare for a normal The Disks page indicates the current state of three-disk RAID 5 configuration the disk configuration.
-
Page 157: To A Degraded Raid Configuration
Appendix B Disk Configurations Adding hard disks to a degraded RAID configuration To add a hard disk to a degraded RAID configuration: 1. Insert the hard disk into the storage system. You can do this whether the storage system is powered on or off. 2. -
Page 158: Removing Hard Disks Or Responding To Disk Failure
Appendix B Disk Configurations Removing hard disks or responding to disk failure The effect of removing hard disks from your storage system or disk failure varies, depending on the disk configuration you chose when you configured the system and the current state of the existing disks. For example, in a linear configuration, when you remove a disk or a disk fails, the data associated with that disk is no longer available, but the data on all the other disks remains available. -
Page 159: Responding To Raid Degradation
Appendix B Disk Configurations If you remove one or more viable disks and cause the entire RAID to fail, you can shut down the storage system, re-install the same disks, and then restart the storage system. As long as you re-install the original disks, the storage system should be able to resume proper operation, although the integrity of the data cannot be guaranteed. -
Page 160: Responding To Raid Failure
Appendix B Disk Configurations Take the appropriate action: To do this Do this Scan the storage system again Click Scan. and update the information on the page Re-install the same disk or install Click Shut Down. a new disk After the storage system shuts down, install the disk and then restart the system. - Page 161 Appendix B Disk Configurations Take the appropriate action: To do this Do this Scan the storage system again Click Scan. and update the information on the page Re-install the same disk Click Shut Down. After the storage system shuts down, re-install the same disk and then restart the system.
- Page 162 Appendix B Disk Configurations Swapping hard disks If you’re using RAID 5 + spare or RAID 10, you can move the hard disks from one slot to another whether or not the storage system is running. However, if you do this when the storage system is running, you can swap only two disks, and you must restart the system after you swap the disks.
- Page 163 Appendix B Disk Configurations Transferring hard disks to a new storage system If your storage system unit fails but the hard disks themselves are viable, you can transfer your existing hard disks to a new storage system, thereby preserving all your existing data.
-
Page 164: Hardware Specifications
Appendix C Hardware Specifications FEATURE DESCRIPTION Platform Processor Intel® 80219 IOP Max.Speed 600 MHz System Memory Technology DDR-SDRAM Socket 184-pin unbuffered DIMM x 1 256MB default, 512MB max Storage Interface Embedded OS Intel® 8MB NOR Flash Storage Capacity Hard Drive bays x 4, up to 2 Terabytes Hard Drive Support Serial ATA Interface [4 headers], Intel®... - Page 165 Appendix C Front Panel Rear Panel Altos easyStore Manual...
- Page 166 Technical Assistance For technical assistance, contact your local dealer or distributor. You may also access the website (http://support.acer-euro.com) for information on how and where to contact the service centers available in your area. Prior to contacting us, we ask that you first check the electronic product documentation for assist- ance.
- Page 167 Glossary backup view A backup that has been assigned a drive letter and can be opened and explored using My Computer/Windows Explorer Console The Windows-based application that enables you to discover all the storage systems on your subnet, view their version and network information, access the Manager, and map drive letters to shared folders data disk or A hard disk or partition of a hard disk that is not used to run the computer operating...
- Page 168 Glossary system disk or A hard disk or partition of a hard disk that the computer boots from partition user An individual or computer that can access a shared folder on the storage system Altos easyStore Manual...