Table of Contents
Quick Links
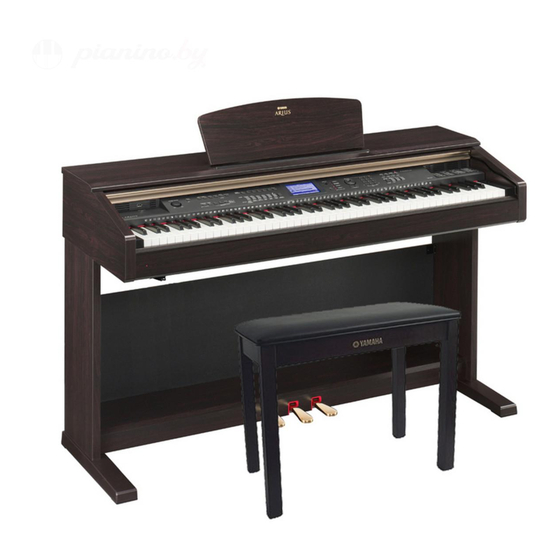
For information on assembling the keyboard stand, refer to the instructions at the end of this manual.
IMPORTANT — Check your power supply —
Make sure that your local AC mains voltage matches the voltage specified on the name plate on the bottom panel. In some areas a voltage
selector may be provided on the bottom panel of the main keyboard unit near the power cord. Make sure that the voltage selector is set for
the voltage in your area. The voltage selector is set at 240V when the unit is initially shipped.
To change the setting use a "minus" screwdriver to rotate the selector dial so that the correct voltage appears next to the pointer on the
panel.
Weitere Informationen über die Montage des Keyboard-Ständers erhalten Sie in den Anweisungen am Ende dieses Handbuchs.
WICHTIG — Überprüfen Sie Ihren Netzanschluss —
Vergewissern Sie sich, dass die Spannung in Ihrem örtlichen Stromnetz mit der Spannung übereinstimmt, die auf dem Typenschild auf der
Unterseite des Instruments angegeben ist. In bestimmten Regionen ist auf der Unterseite des Keyboards in der Nähe des Netzkabels ein
Spannungswähler angebracht. Vergewissern Sie sich, dass der Spannungswähler auf die Spannung Ihres lokalen Stromnetzes eingestellt
ist. Dieser Spannungswähler ist bei Auslieferung auf 240 V eingestellt. Sie können die Einstellung mit einem Schlitzschraubenzieher ändern.
Drehen Sie dazu den Wählschalter, bis der Pfeil auf dem Instrument auf die richtige Spannung zeigt.
Pour obtenir des informations sur l'assemblage du support du clavier, reportez-vous aux instructions à la fin de ce manuel.
IMPORTANT — Contrôler la source d'alimentation —
Vérifiez que la tension spécifiée sur le panneau inférieur correspond à la tension du secteur. Dans certaines régions, l'instrument peut être
équipé d'un sélecteur de tension situé sur le panneau inférieur du clavier à proximité du cordon d'alimentation. Vérifiez que ce sélecteur est
bien réglé en fonction de la tension secteur de votre région. Le sélecteur de tension est réglé sur 240 V au départ d'usine. Pour modifier ce
réglage, utilisez un tournevis à lame plate pour tourner le sélecteur afin de mettre l'indication correspondant à la tension de votre région vis
à vis du repère triangulaire situé sur le panneau.
Para información sobre el montaje del soporte del teclado, consulte las instrucciones al final de este manual.
IMPORTANTE — Verifique la alimentación de corriente —
Asegúrese de que tensión de alimentación de CA de su area corresponde con la tension especificada en la placa de características del
panel inferior. En algunas zonas puede haberse incorporado un selector de tensión en el panel inferior de la unidad del teclado principal,
cerca del cable de alimentación. Asegúrese de que el selector de tensión esté ajustado a la tensión de su área. El selector de tension se
ajusta a 240V cuando la unidad sale de fábrica. Para cambiar el ajuste, emplee un destornillador de cabeza "recta" para girar el selector de
modo que aparezca la tensión correcta al lado del indicador del panel.
Owner's Manual
Bedienungsanleitung
Mode d'emploi
Manual de instrucciones
EN
DE
FR
ES
Table of Contents

Related Manuals for Yamaha Arius YDP-V240


Summary of Contents for Yamaha Arius YDP-V240
- Page 1 Owner’s Manual Bedienungsanleitung Mode d’emploi Manual de instrucciones For information on assembling the keyboard stand, refer to the instructions at the end of this manual. IMPORTANT — Check your power supply — Make sure that your local AC mains voltage matches the voltage specified on the name plate on the bottom panel. In some areas a voltage selector may be provided on the bottom panel of the main keyboard unit near the power cord.
- Page 2 SPECIFICATIONS SUBJECT TO CHANGE: The information contained in this manual is believed to be cor- rect at the time of printing. However, Yamaha reserves the right to change or modify any of the specifications without notice or obligation to update existing units.
- Page 3 Yamaha Corporation of America or its subsidiaries. of other electronic devices. Compliance with FCC regulations does * This applies only to products distributed by YAMAHA CORPORATION OF AMERICA. (class B) IMPORTANT NOTICE FOR THE UNITED KINGDOM Die Seriennummer dieses Produkts befindet sich an der...
- Page 4 AC outlet. Then have the accumulated on it. instrument inspected by qualified Yamaha service personnel. • Use only the supplied power cord/plug. • Never insert or remove an electric plug with wet hands.
- Page 5 USB storage devices/external media. Yamaha cannot be held responsible for damage caused by improper use or modifications to the instrument, or data that is lost or destroyed. Always turn the power off when the instrument is not in use.
-
Page 6: Copyright Notice
This product incorporates and bundles computer programs and contents in which Yamaha owns copyrights or with respect to which it has license to use others’ copyrights. Such copyrighted materials include, without limitation, all computer software, style files, MIDI files, WAVE data, musical scores and sound recordings. -
Page 7: About This Owner's Manual And Data List
Implementation Chart, from the Yamaha Manual Library. Connect to the Internet, visit the following website, type the model name of your instrument (such as “YDP-V240”) in the Model Name text box, then click the Search button. Yamaha Manual Library http://www.yamaha.co.jp/manual/ Accessories The package includes the following items. -
Page 8: Special Features
Special Features GHS (Graded Hammer Standard) keyboard with matte black keytops Graded Hammer Standard keyboard with matte black keytops on the instrument, feature graded key weight and response throughout the keyboard range. They respond to a heavier touch in the low range of the keyboard and a lighter touch in the higher range of the keyboard, thus providing natural grand- piano type playability. -
Page 9: Table Of Contents
Contents Introduction Backup and Initialization Copyright Notice ............... 6 Backup..................65 Logos..................6 Initialization ................65 About this Owner’s Manual and Data List ........ 7 Basic Operation Accessories ................7 Basic Operation ..............66 Special Features ..............8 The Displays ................68 Setting Up MAIN Display Items .............. -
Page 10: Setting Up
Setting Up Key Cover ■ To open the key cover: CAUTION Lift the cover slightly, then push and slide it open. • Hold the cover with both hands when opening or closing it. Do not release it until it is fully opened or closed. Be careful to avoid catching fingers (yours or others, especially children’s) between ■... -
Page 11: Connecting To A Computer (Usb To Host Terminal)
Setting Up Connecting to a Computer (USB TO HOST terminal) Connect the instrument’s USB TO HOST terminal to USB TO HOST the USB terminal of a computer, and you can transfer terminal Computer performance data and song files between the two (page 104). -
Page 12: Using Headphones
Setting Up Using Headphones Connect a pair of headphones to one of the [PHONES] jacks. Two [PHONES] jacks are provided. You can connect two sets of standard stereo head- phones. (If you are using only one pair of headphones, you can plug them into either jack.) Bottom surface Standard stereo phone plug Using the Headphone Hanger... -
Page 13: Maintenance
Setting Up Maintenance To keep your instrument in optimum condition, we recommend that you periodically follow the maintenance points below. ■ Instrument and Bench Maintenance ■ Tuning When cleaning the instrument, use a soft, dry or slightly Unlike an acoustic piano, the instrument does not need damp cloth. -
Page 14: Panel Controls And Terminals
Panel Controls and Terminals Front Panel PEDAL Voice Category List (page 126) Style Category List (page 134) Song Category List (page 35) Music Database List (page 135) TO HOST Owner’s Manual... -
Page 15: Front Panel
Panel Controls and Terminals ¸ Display (pages 68, 69) #0 #1 Front Panel q Power switch ( @0 [CONTRAST] knob ......... page 69 ) ........page 11 w [MASTER VOLUME] control ...pages 11, 66 @1 [EXIT] button........... page 68 e [DEMO] button.........page 32 @2 [SONG] button ........ -
Page 16: Changing The Display Language
Changing the Display Language Quick Guide This instrument allows you to select English or Japanese as the display language. The default display language is English, but if you switch to Japanese the lyrics, file names, demo display, and some messages will be displayed in Japanese where appropriate. -
Page 17: Try Playing A Variety Of Instrument Voices
Try Playing a Variety of Instrument Voices In addition to piano, organ, and other “standard” keyboard instruments, this instrument has a large range of voices that includes guitar, bass, strings, sax, trumpet, drums and percussion, sound effects … a wide vari- ety of musical sounds. -
Page 18: Play Two Voices Simultaneously-Dual
Try Playing a Variety of Instrument Voices Play Two Voices Simultaneously—DUAL You can select a second voice which will play in addition to the main voice when you play the keyboard. The second voice is known as the “dual” voice. Press the [DUAL ON/OFF] button. -
Page 19: Play Different Voices With The Left And Right Hands-Split
Try Playing a Variety of Instrument Voices Play the keyboard. Two voices will sound at the same time. Try selecting and playing a range of dual voices. Press the [EXIT] button to return to the MAIN display. Play Different Voices with the Left and Right Hands—SPLIT In the split mode you can play different voices to the left and right of the keyboard “split point”. -
Page 20: Play The Grand Piano Voice
Try Playing a Variety of Instrument Voices Select the desired split voice. Watch the highlighted split voice and rotate the dial until the voice you want to use is selected. The voice selected here becomes the split voice which will play to the left of the keyboard split point. For this example try selecting the “042 Folk Guitar”... -
Page 21: Using The Pedals
Try Playing a Variety of Instrument Voices Using the Pedals The instrument has three foot pedals that produce a NOTE • The pedal functions do not range of expressive effects similar to those produced affect Split voice. by the pedals on an acoustic piano. NOTE •... -
Page 22: Fun Sounds
Fun Sounds This instrument includes a range of drum kits and unique sound effects you can use for entertainment. Laughter, babbling brooks, jet fly-bys, eerie effects, and much more. These sounds can be a great way to enhance the mood at parties. Drum Kits Drum kits are collections of drum and percussion instruments. -
Page 23: The Metronome
The Metronome The instrument includes a metronome with adjustable tempo and time signature. Play and set the tempo that is most comfortable for you. Start the Metronome Turn the metronome on and start it by pressing the [MET- RONOME ON/OFF] button. To stop the metronome, press the [METRONOME ON/OFF] button again. -
Page 24: Setting The Number Of Beats Per Measure, And The Length Of Each Beat
The Metronome Setting the Number of Beats per Measure, and the Length of Each Beat In this example we’ll set up a 5/8 time signature. Press and hold the [METRONOME ON/OFF] button for longer than a second to select the function “Time Signa- ture–Numerator”. -
Page 25: Setting The Click Bell Sound
The Metronome Setting the Click bell sound This allows you to select whether the click sound has a bell accent, or plays only a click sound. Press the [FUNCTION] button. Use the CATEGORY [ ] and [ ] buttons to select the Bell item. -
Page 26: Playing Styles
Playing Styles This instrument has an auto accompaniment feature that produces accompaniment (rhythm + bass + chords) in the style you choose to match chords you play with your left hand. You can select from 160 dif- ferent styles covering a range of musical genres and time signatures (see page 134 for a complete list of the available styles). -
Page 27: Play Along With A Style
Playing Styles Play Along with a Style You learned how to select a style rhythm on the preceding page. Here we’ll see how to add bass and chord accompaniment to the basic rhythm to produce a full, rich accom- paniment that you can play along with. Press the [STYLE] button and select the desired style. - Page 28 Playing Styles When sync start is on, the bass and chord accompaniment included in a style will start playing as soon as you play a note to left of the keyboard split point. Press the button a second time to turn the sync start function off.
- Page 29 Playing Styles Styles Are More Fun When You Understand Chords Chords, created by playing multiple notes at the same time, are the basis for harmonic accompaniment. In this section we’ll take a look at sequences of different chords played one after another, or “chord sequences.”...
- Page 30 Playing Styles Recommended Style 148 Piano Boogie —3-chord boogie-woogie— Press the [INTRO/ENDING/rit.] button. Press the [INTRO/ENDING/rit.] button. This progression provides varied harmonic backing with just three chords. When you get a feel for the progression in the score, try changing the order of the chords! Recommended Style 096 Bossa Nova —Bossa nova with jazz-style chords—...
-
Page 31: Playing Auto-Accompaniment Chords
Playing Styles Playing Auto-accompaniment Chords There are two ways of playing auto-accompaniment chords: ● Easy Chords ● Standard Chords The instrument will automatically recognize the different chord types. The function is called Multi Fingering. Press the [ACMP ON/OFF] button to turn auto-accompaniment on (page 27). The keyboard to the left of the split point (default: 054/F#2) becomes the “accompaniment range”. -
Page 32: Using Songs
Using Songs With this instrument the term “song” refers the data that makes up a piece of music. You can simply enjoy listening to a demo song and 29 internal songs, or use them with just about any of the many functions provided—the performance assistant technology feature, lessons, and more. -
Page 33: Select And Listen To A Song
Using Songs Select and Listen to a Song Press the [SONG] button The song selection display will appear. The currently selected song number and name will be highlighted. The currently selected song number and name NOTE Select a song. • You can also play songs you have recorded yourself (User Select a song after referring to the preset song category list on page 35. -
Page 34: Song Fast Forward, Fast Reverse, And Pause
Using Songs Song Fast Forward, Fast Reverse, and Pause These are just like the transport controls on a cassette deck or CD player, letting you fast forward [FF], rewind [REW] and pause [PAUSE] playback of the song. PAUSE Press the fast Press the fast for- Press the pause reverse button to... -
Page 35: Song List
Using Songs Song List These 30 songs include songs that effectively demonstrate the instrument’s Easy Song Arranger feature, songs that are ideally suited for use with the performance assistant technology feature, and more. The “Sug- gested Uses” column provides some ideas as to how the songs can most effectively used. Category Name Suggested Uses... -
Page 36: Types Of Songs
Using Songs Types of Songs The following three types of songs can be used by this instrument. ● Demo Song and Preset songs (the 30 songs built into the instrument) ........Song numbers 001–030. ● User Songs (recordings of your own performances) ....Song numbers 031–035. ●... -
Page 37: Displaying The Song Score
Using Songs Displaying the Song Score This instrument is capable of display the scores of songs. Scores are displayed for the 30 internal preset songs as well as songs in SMF format stored in a USB fl ash memory or the instrument’s internal flash memory. Select a song. -
Page 38: Display The Lyrics
Using Songs Display the Lyrics If a song contains lyric data, the lyrics can be made to appear on the display. No lyrics will be displayed for a song that contains no lyric data even if the [LYRICS] button is pressed. Select a song. -
Page 39: The Easy Way To Play Piano
The Easy Way to Play Piano This instrument includes a performance assistant technology feature that lets you play along with a song and sound like a great pianist (even though you might be making lots of mistakes)! In fact, you can play any notes and still sound good! You could even just tap one key and the results would be a beautiful melody. -
Page 40: Chord Type-Play With Both Hands
The Easy Way to Play Piano CHORD Type—Play with Both Hands Press the [P.A.T. ON/OFF] button. This turns on the performance assistant technology feature. The currently selected type is shown in the MAIN display when the per- formance assistant technology feature is on. The currently selected type Select the CHORD type. - Page 41 The Easy Way to Play Piano Press the [START/STOP] button. Song playback will begin. The basic pattern will play repeatedly. Listen to the basic pattern for four measures while getting a feel for the basic pattern, then begin play- ing yourself from the fifth measure. The keys you should play will be shown in the display.
-
Page 42: Chord/Free Type-Applying The Chord Type To The Left Hand Only
The Easy Way to Play Piano CHORD/FREE Type—Applying the Chord Type to the Left Hand Only Press the [P.A.T. ON/OFF] button. This turns on the performance assistant technology feature. The currently selected type is shown in the MAIN display when the per- formance assistant technology feature is on. - Page 43 The Easy Way to Play Piano Press the [START/STOP] button. Song playback will begin. The left-hand keys you should play will be shown on the display. Play on the keyboard. Play to the right of the split point with your right hand, and to the left of the split point with your left hand.
-
Page 44: Melody Type-Play With One Finger
The Easy Way to Play Piano MELODY Type—Play with One Finger See page 48 for some hints on how to play melodies. Press the [P.A.T. ON/OFF] button. This turns on the performance assistant technology feature. The currently selected type is shown in the MAIN display when the per- formance assistant technology feature is on. - Page 45 The Easy Way to Play Piano Press the [START/STOP] button. Song playback will begin. Because the Melody type has been selected, the song melody will not sound. You can enjoy playing the melody yourself (step 5). Song start! Play on the keyboard. To begin, try to feel the rhythm of the song.
-
Page 46: Chord/Melody-Chord Type With The Left Hand, Melody With The Right
The Easy Way to Play Piano CHORD/MELODY—Chord Type with the Left Hand, Melody with the Right Press the [P.A.T. ON/OFF] button. This turns on the performance assistant technology feature. The currently selected type is shown in the MAIN display when the per- formance assistant technology feature is on. - Page 47 The Easy Way to Play Piano Press the [START/STOP] button. Song playback will begin. The basic pattern will repeat. Listen to eight measures while memoriz- ing the basic pattern. It’s your turn to play the part from the ninth mea- sure.
- Page 48 The Easy Way to Play Piano Use the Performance Assistant to Play Like a Pro! Here are a few hints for using the Chord type. If you select Chord/Free or Chord/Melody, the left-hand section of the keyboard becomes the Chord type section, so use these hints on the left- hand section of the keyboard.
- Page 49 The Easy Way to Play Piano Make Use of the Score in the Melody Type. If you want to play the melody with the correct rhythm, use the onscreen score feature. Displaying the Score. After performing steps 1 to 4 on page 44, press the [SCORE] button. The melody score will appear.
-
Page 50: Select A Song For A Lesson
Select a Song For a Lesson Yamaha Education Suite You can select song you like and use it for a left-hand, right-hand, or both-hands lesson. You can also use songs (only SMF format 0/1) transferred to the instrument from a computer. (page 107) During the lesson you can play as slowly as you like, and you can even play wrong notes. -
Page 51: Lesson 1-Waiting
Select a Song For a Lesson Lesson 1—Waiting In this lesson, try playing the correct notes. Play the note shown in the display. The song will wait until you play the right note. Select a song for your lesson. Press the [SONG] button, and rotate the dial to select the song you want to use for your lesson. - Page 52 Select a Song For a Lesson Start Lesson 1. Press the LESSON [START] button to select Lesson 1. Each time the LESSON [START] button is pressed the lesson modes are selected in sequence: Lesson 1 → Lesson 2 → Lesson 3 → Off → Lesson 1 ... An explanation of the selected lesson will appear on the display for a few seconds before the lesson begins.
- Page 53 Select a Song For a Lesson ● Shifting the keyboard left or right. The hidden ( ) areas of the keyboard can be brought into view by pressing the [+] or [-] button. The displayed range (61 keys) Actual keyboard range is 88 keys 61 keys of the keyboard’s range are shown on the display.
-
Page 54: Lesson 2-Your Tempo
Select a Song For a Lesson Lesson 2—Your Tempo Learn to play the correct notes with the correct timing. Song playback tempo will vary to match the speed you are playing at. The song will slow down when you play wrong notes, so you can learn at your own pace. -
Page 55: Lesson 3-Minus One
Select a Song For a Lesson Lesson 3—Minus One Here’s where you can perfect your technique. The song will play at the normal tempo, minus the part you have chosen to play. Play along while listening to the song. Select the song and part you want to practice (steps 1 and 3 on page 51). -
Page 56: Practice Makes Perfect-Repeat And Learn
Select a Song For a Lesson Practice Makes Perfect—Repeat and Learn Use this feature when you want to start again just ahead of a section on which you made a mistake, or to repeatedly practice a section you find difficult. Press the [REPEAT &... -
Page 57: Play Using The Music Database
Play Using the Music Database You want to play music in your favorite style, but you’re not sure how to select the best voice and style for the type of music you want to play ... simply select the appropriate style from the Music Database. The panel settings will automatically be adjusted for the ideal combination of sounds and style! Press the [MUSIC DATABASE] button. -
Page 58: Change A Song's Style
Change a Song’s Style In addition to each song’s default style, you can select any other style to play the song with the Easy Song Arranger feature. This means that you can play a song that is normally a ballad, for example, as a bossa nova, as a hip-hop tune, etc. - Page 59 Change a Song’s Style Listen to the song. Press the [START/STOP] button to begin playback of the song. Move NOTE • When playing song numbers on to the next step while the song is playing. 010, 011, and 020 to 030 while using the Easy Song Arranger, melody tracks will be automati- cally muted and no melody will...
-
Page 60: Record Your Own Performance
Record Your Own Performance You can record up to 5 of your own performances and save them as user songs 031 through 035. Once your performances have been saved as user songs they can be played in the same way as the internal songs. -
Page 61: Recording Procedure
Record Your Own Performance Recording Procedure From the MAIN display press the [SONG] button, then use the dial to select the user song number (031–035) you want to record to. Rotate the dial to select a song number between 031 and 035. - Page 62 Record Your Own Performance Recording will start when you play on the keyboard. You can also start recording by pressing the [START/STOP] button. NOTE • If the memory becomes full dur- The current measure will be shown on the display during recording. ing recording a warning mes- sage will appear and recording will stop automatically.
-
Page 63: Song Clear-Deleting User Songs
Record Your Own Performance ● To Record Other Tracks Repeat steps 2 through 5 to record any of the remaining tracks. By selecting an unrecorded track—SONG MEMORY buttons [1]–[5], [A]—you can record the new track while listening to previously recorded tracks (the border around the track number will appear in the display). -
Page 64: Track Clear-Deleting A Specified Track From A User Song
Record Your Own Performance Press the [+] button to clear the song. The clear-in-progress message will appear briefly on the display while the song is being cleared. Track Clear—Deleting a Specified Track from a User Song This function lets you delete a specified track from a user song. From the SONG SELECT display select the user song (031–035) you want to clear. -
Page 65: Backup And Initialization
Backup and Initialization Backup The following settings are always backed up, and are maintained even when the power is turned off. If you want to initialize the settings, use the Initialize operation as explained below. ● The Backup Parameters • Registration Memory •... -
Page 66: Basic Operation
Basic Operation Basic Operation Overall control is based on the following simple operations. Press a button to select a basic function. Use the dial to select an item or value. Start a function. Start a function. Select a basic function. Select an item or value. - Page 67 Basic Operation Use the dial to select an item or value When you select a basic function, the item corresponding to that function will be listed in the display. You can then use the dial or the number buttons [0]–[9] to select the desired item. The currently selected item is high- lighted in the display.
-
Page 68: The Displays
Basic Operation The Displays ● Display Names All operations are carried out while watching the display. A number of display types are provided for differ- ent modes and functions. The name of the current display appears at the top of the display. ●... -
Page 69: Main Display Items
Basic Operation MAIN Display Items The MAIN display shows all of the current basic settings: song, style, voice. It also includes a range of indicators that show the on/off status of a range of functions. * Adjust the LCD CONTRAST control on the panel of the instrument for optimum display legibility. -
Page 70: Play With A Variety Of Effects
Reference Play with a Variety of Effects Adding Harmony This feature adds harmony notes to the main voice. Press the [HARMONY ON/OFF] button to turn Harmony feature on. To turn Harmony off, press the [HARMONY ON/OFF] button again. The currently selected harmony type Use the dial to select a harmony type. -
Page 71: Adding Reverb
Play with a Variety of Effects Adding Reverb Reverb lets you play with a rich concert hall type ambience. When you select a style or song the optimum reverb type for the voice used is automatically selected. If you want to select a different reverb type, use the procedure described below. Refer to the Effect Type List on page 138 for information about the available reverb types. -
Page 72: Adding Chorus
Play with a Variety of Effects Adding Chorus The chorus effect creates a thick sound that is similar to many of the same voices being played in unison. When you select a style or song the optimum chorus type for the voice used is automatically selected. If you want to select a different chorus type, use the procedure described below. -
Page 73: Adding Dsp
Play with a Variety of Effects Adding DSP DSP is term of abbreviated form of Digital Signal Processor. The DSP effect can be added to the Main and Dual Voices. These range from reverb-like ambience effects to distortion and other dynamic processing tools that let you enhance the sound, or completely transform it. -
Page 74: Adding Sustain
Play with a Variety of Effects Adding Sustain This function adds sustain to the keyboard voices. Use it when you want to add sustain to the voices at all times, regardless of damper operation. The sustain function does not affect split voice. Press the [FUNCTION] button to call up You can then use the [+] and [-] buttons the FUNCTION display. -
Page 75: Handy Performance Features
Handy Performance Features Tap Start You can start the song/style by simply tapping the [TEMPO/TAP] button at the required tempo—4 times for time signatures in 4, and three times for time signatures in 3. You can change the tempo during song playback by pressing the button just twice. -
Page 76: One Touch Setting
Handy Performance Features One Touch Setting Sometimes selecting the ideal voice to play with a song or style can be confusing. The One Touch Setting feature automatically selects a well-balanced voice for you when you select a style or song. Simply select voice number “000”... -
Page 77: Select A Sound Type
Handy Performance Features Select a Sound Type Select a sound type for the internal speakers from piano sound or style sound. Press and hold the [PIANO PRESET] button for longer than a second. Hold for longer than a second. The currently selected sound type will appear. The currently selected sound type. -
Page 78: Pitch Controls
Handy Performance Features Pitch Controls ◆ Large Pitch Changes (Transpose) ◆ Small Pitch Changes (Tuning) The overall pitch of the instrument can by shifted The overall tuning of the instrument can by shifted up or down by a maximum of 1 octave in semitone up or down by a maximum of 100 cents in 1-cent increments. -
Page 79: Style (Auto-Accompaniment) Functions
Style (Auto-accompaniment) Functions Basic operation of the Style (auto-accompaniment) feature is described on page 26 of the Quick Guide. Here are some other ways you can play the styles, the style volume adjustment proce- dure, how you can play chords using the styles, and more. Pattern Variation (Sections) This instrument features a wide variety of style “sections”... - Page 80 Style (Auto-accompaniment) Functions Press the [STYLE] button and then Press the [MAIN/AUTO FILL] button. select a style. Press the [ACMP ON/OFF] button to turn auto accompaniment on. The name of the selected sec- tion—MAIN A or MAIN B—will be displayed. Press the [INTRO/ENDING/rit.] button.
- Page 81 Style (Auto-accompaniment) Functions Press the [MAIN/AUTO FILL] button. ● Synchro Stop When this function is selected the accompaniment style will only play while you are playing chords in the accompaniment range of the keyboard. Style playback will stop when you release the keys.
-
Page 82: Setting The Split Point
Style (Auto-accompaniment) Functions Setting the Split Point The initial default split point is key number 054 (the F#2 key), but you can change it to another key using the procedure described below. Split point (054: F#2) (C3) (C4) (C5) (C6) (C7) (A-1) (C0) -
Page 83: Play A Style With Chords But No Rhythm (Stop Accompaniment)
Style (Auto-accompaniment) Functions Play a Style with Chords but No Rhythm (Stop Accompaniment) When auto accompaniment is on (the ACMP ON icon is showing) and Synchro Start is off, you can play chords in the left-hand accompaniment range of the keyboard while the style is stopped and still hear the accompaniment chords. -
Page 84: Chord Basics
Style (Auto-accompaniment) Functions Chord Basics Two or more notes played together constitute a “chord”. The most basic chord type is the “triad” consisting of three notes: the root, third, and fifth degrees of the corresponding scale. A C major triad, for example, is made up of the notes C (the root), E (the third note of the C major scale), and G (the fifth note of the C major scale). - Page 85 Style (Auto-accompaniment) Functions ■Recognized Standard Chords ● ● ● ● ● ● ● ● ● ● ● ● ● ● ● ● ● ● ● ● ● ● ● ● ● ● ● ● ● ● ● ● ● ● ● All chords in the chart are “C-root”...
-
Page 86: Playing Styles Using The Entire Keyboard
Style (Auto-accompaniment) Functions Playing Styles Using the Entire Keyboard In “Play Along with a Style” on page 27 we described a method of playing styles in which chords were detected only to the left of the keyboard split point. By making the settings described below, however, chord detection for style accompaniment occurs over the entire range of the keyboard, allowing for even more dynamic style performance. -
Page 87: Looking Up Chords Using The Chord Dictionary
Style (Auto-accompaniment) Functions Looking Up Chords Using the Chord Dictionary The Dictionary function is essentially a built-in “chord book” that shows you the individual notes of chords. It is ideal when you know the name of a certain chord and want to quickly learn how to play it. Press and hold the LESSON [START] Press the “M7”... -
Page 88: Song Settings
Song Settings Song Volume Press the [FUNCTION] button. Song volume item Can be set between 000 and 127 Use the CATEGORY [ ] and [ ] but- Use the dial to set the song volume tons to select the Song Volume item. between 000 and 127. -
Page 89: Muting Independent Song Parts
Song Settings Muting Independent Song Parts Each “track” of a song plays a different part of the song—melody, percussion, accompaniment, etc. You can mute individual tracks and play the muted part on the keyboard yourself, or simply mute No track number ... no data. tracks other than the ones you want to listen to. -
Page 90: Memorize Your Favorite Panel Settings
Memorize Your Favorite Panel Settings This instrument has a Registration Memory feature that lets you save your favorite set- tings for easy recall whenever they’re needed. Up to 16 complete setups can be saved (8 banks of two setups each). 8 Banks Up to 16 presets (eight banks of two each) can... -
Page 91: Recalling A Registration Memory
Memorize Your Favorite Panel Settings Recalling a Registration Memory Press the [MEMORY/BANK] button. A ● Settings That Can be Saved to the Registra- bank number will appear in the display tion Memory when you release the button. • Style settings* Style number, Auto Accompaniment ON/OFF, Split Point, Style settings (Main A/B), Style Volume, Tempo, Chord Fingering... -
Page 92: The Functions
The Functions The “Functions” provide access to a range of detailed instrument parameters for tun- ing, setting the split point, and adjusting the voices and effects. Take a look at the func- tion list starting on the opposite page. There are 49 function parameters in all. When you locate a function you want to set up, simply select the function’s display name and adjust as required. - Page 93 The Functions ● Function Setting List Category Function Item Range/Settings Description Style Volume 000–127 Determines the volume of the Style. VOLUME Song Volume 000–127 Determines the volume of the Song. Transpose -12–+12 Determines the pitch of the instrument by semitone increments. Tuning -100–+100 Sets the pitch of the instrument’s sound in 1-cent increments.
- Page 94 The Functions Category Function Item Range/Settings Description Harmony Type 01–26 Determines the Harmony type. (See the list on page 137) HARMONY Harmony Volume 000–127 Determines the volume of the Harmony effect. CHORD, CHORD/FREE, Determines the performance assistant technology feature type. (See the list P.A.T.
-
Page 95: Saving And Loading Data
Saving and Loading Data USB flash memory is a memory medium used for storing data. When a USB flash memory is inserted in this instrument’s USB TO DEVICE terminal, registered settings can be saved from or loaded into the instrument. USB flash mem- ory can also be used to transfer Song, Style, and Music Database files to the instru- ment, where they can be selected and used in the same way as the internal data. -
Page 96: Precautions When Using The Usb To Device Terminal
The instrument does not necessarily support all commer- well as read data from the connected device. cially available USB devices. Yamaha cannot guarantee NOTE operation of USB devices that you purchase. Before pur- •... -
Page 97: Formatting Usb Flash Memory
Saving and Loading Data Formatting USB Flash Memory New USB flash memory must be formatted before they can be used by this instrument. Press the [EXECUTE] button again, or CAUTION the [+] button, and the format operation • If you format a USB flash memory that already contains data, all of will begin. -
Page 98: Saving Registration Memory Data To Usb Flash Memory
Saving and Loading Data Saving Registration Memory data to USB Flash Memory This operation saves Registration Memory data as a “User File” to a USB flash memory device. The User File name will have a “.usr” extension which will not appear in the instrument’s display. Make sure that a properly formatted USB flash memory has been properly connected to the instrument’s USB TO... -
Page 99: Save A User Song To Usb Flash Memory
Saving and Loading Data Save a User Song to USB Flash Memory This operation saves a user song (song numbers 031–035) to USB flash memory. Make sure that a properly formatted Change the file name as necessary. USB flash memory has been properly Refer to “Saving Registration Memory data to connected to the instrument’s USB TO USB Flash Memory”... -
Page 100: Loading Files From A Usb Flash Memory
Saving and Loading Data Loading Files from a USB Flash Memory User files as well as Style, Song, and Music Database files residing on a USB flash memory can be loaded into the instrument. Use the dial to select the file you want CAUTION to load. -
Page 101: Deleting Data From A Usb Flash Memory
Saving and Loading Data Deleting Data from a USB Flash Memory This procedure deletes User, Style, Song, and Music Database files from a USB flash memory. Make sure that the USB flash memory Use the dial to select the file you want containing the file(s) you want to delete to delete. -
Page 102: Delete User Data From The Instrument
Saving and Loading Data Delete User Data from the Instrument This procedure deletes the User Song as well as Style, Song, and Music Database files transferred from an external device such as a computer. This operation does not erase the preset data. Press the FILE CONTROL [MENU] button. -
Page 103: Connections
Connections Connectors TO HOST q USB TO DEVICE terminal w USB TO HOST terminal This terminal allows connection to USB stor- This terminal allows direct connection to a per- age devices. Refer to “Precautions when using sonal computer. Refer to “Connecting a Per- the USB TO DEVICE terminal”... -
Page 104: Connecting A Personal Computer
Connections Connecting a Personal Computer The following functions become available when this instrument is connected to a computer. ● Performance data can be transferred between the instrument and the computer (page 105). ● Files can be transferred between the instrument and the computer (page 107). ■... -
Page 105: Transferring Performance Data To And From A Computer
Connections Transferring Performance Data to and from a Computer By connecting the instrument to a computer, the instrument’s performance data can be used on the com- puter, and performance data from the computer can be played on the instrument. ● When the instrument is connected with computer, it transmits/receives performance data. -
Page 106: Remote Control Of Midi Devices
Connections ■PC Mode Press and hold the [DEMO] button for ● ● ● ● ● ● ● ● ● ● ● ● ● ● ● ● ● ● ● longer than a second so that the PC A number of MIDI settings need to be made when Mode item appears. -
Page 107: Initial Send
Connections Initial Send This function lets you send the panel setup data to a computer. Before you record performance data to a sequencer application running on your computer, it is a good idea to first send and record the panel setup data before the actual performance data. - Page 108 Connections ■Use Musicsoft Downloader At this point you can select a Style or Music Data- base file on the computer or CD-ROM and transfer To Transfer Songs From the it to the instrument in the same way as a song file. Accessory CD-ROM To the Instrument’s flash memory ●...
- Page 109 Connections ■Transfer a Backup file from Close the window to end the Musicsoft Downloader. the instrument to a computer ● ● ● You can use the Musicsoft Downloader to transfer NOTE • End the Musicsoft Downloader to playback the file transferred from “Backup”...
-
Page 110: Troubleshooting
Appendix Troubleshooting ■ For the Instrument Problem Possible Cause and Solution When the instrument is turned on or off, a popping This is normal and indicates that the instrument is receiving electrical sound is temporarily produced. power. Using a mobile phone in close proximity to the instrument may pro- When using a mobile phone, noise is produced. - Page 111 Troubleshooting Problem Possible Cause and Solution The wrong notes sound when the keyboard is Perhaps the performance assistant technology is turned on. played. Press the [PERFORMANCE ASSISTANT] button to turn it off. The ACMP indicator does not appear when the Is the [STYLE] button lit? Always press the [STYLE] button first when [ACMP ON/OFF] button is pressed.
-
Page 112: Messages
Messages LCD Message Comment Indicates the failure in reading or writing from/to the media or the flash Access error! memory. Displayed while erasing all data in the flash memory. Never turn the power All Memory Clearing... off during data transmission. Are you sure? Confirms whether Song Clear or Track Clear is executed or not. - Page 113 Messages LCD Message Comment Communication with the USB device has been shut down because of the OverCurrent overcurrent to the USB device. Disconnect the device from the USB TO DEVICE terminal, then turn on the power of the instrument. Overwrite ? Confirms whether overwriting is executed or not.
-
Page 114: Keyboard Stand Assembly
Keyboard Stand Assembly CAUTION • Be careful not to confuse parts, and be sure to install all parts in the correct direction. Please assemble in accordance with the sequence given below. • Assembly should be carried out by at least two persons. •... - Page 115 Keyboard Stand Assembly Attach the adjuster to C. Attach B. Align the tip of the adjuster with the screw Place the lower side of B on each foot of D and hole, then screw in the adjuster all the way E, then attach the upper side to D and E.
- Page 116 Keyboard Stand Assembly Mount A. Connect the pedal cord and the power cord. Place your hands at least 15 cm from either end of A when positioning it. Insert the pedal cord plug to the pedal connec- tor from the rear. Attach the cord holders to B, then clip the cord into the holders.
- Page 117 Keyboard Stand Assembly ■ After completing the assembly, please Set the adjuster. check the following. Rotate the adjuster until it comes in firm con- • Are there any parts left over? tact with the floor surface. ➔ Review the assembly procedure and correct any errors. •...
-
Page 118: Index
Index Panel controls and terminals Alphabetical order +/– ..........15, 67 ............68 A-B Repeat ...........88 Easy Chords ......... 31 0–9 ..........15, 67 Accessories ..........7 Easy Song Arranger ......58 A-B REPEAT ......... 15, 88 ACMP ...........27 Effect Type List ......... 138 ACMP ON/OFF ...... - Page 119 Index Melody Score ........37 Specifications ........144 Melody type (performance Split Chorus Level ........93 assistant technology) ....39, 44 Split Octave ..........93 Melody Voice ......... 59, 89 Split Pan ..........93 Messages ..........112 Split Point ........19, 82 Metronome ........... 23 Split Reverb Level ........93 MIDI ...........
-
Page 120: Scores
Scores Scores / Noten / Partitions / Partituras This demo is an example of how the Easy Song Arranger can be used to change styles throughout a piece. q q q q =123 Song No. (Function Demo for Easy Song Arranger) Hallelujah Chorus Owner’s Manual / Bedienungsanleitung / Mode d’emploi / Manual de instrucciones... - Page 121 Scores / Noten / Partitions / Partituras Owner’s Manual / Bedienungsanleitung / Mode d’emploi / Manual de instrucciones...
- Page 122 Scores / Noten / Partitions / Partituras This score is provided with the intent that the pitch will be corrected by the performance assistant technol- ogy feature. If you play the “Play These Notes” part using the performance assistant technology feature, the part will be corrected and played so that it matches the backing part.
- Page 123 Scores / Noten / Partitions / Partituras Owner’s Manual / Bedienungsanleitung / Mode d’emploi / Manual de instrucciones...
- Page 124 Scores / Noten / Partitions / Partituras This score is provided with the intent that the pitch will be corrected by the performance assistant technol- ogy feature. If you play the “Play These Notes” part using the performance assistant technology feature, the part will be corrected and played so that it matches the backing part.
- Page 125 Scores / Noten / Partitions / Partituras Owner’s Manual / Bedienungsanleitung / Mode d’emploi / Manual de instrucciones...
-
Page 126: Voice List
• La liste des voix comporte des numéros de changement de programme MIDI pour chaque voix. Utilisez ces der- bre maximal de 64 voix à la fois, indépendamment des fonc- niers pour commander le YDP-V240 à partir d’un périphé- tions utilisées. L’accompagnement automatique fait appel à un rique MIDI. - Page 127 Voice List / Voice-Liste / Liste des voix / Lista de voces ● Panel Voice List / Verzeichnis der Bedienfeld- Bank Select MIDI Voice Program Voices / Liste des voix de panneau / Voice Name Change# Lista de voces del panel (0–127) (0–127) (1–128)
- Page 128 Voice List / Voice-Liste / Liste des voix / Lista de voces ● XGlite Voice/XGlite Optional Voice* List / Liste Bank Select MIDI Voice Program der XGlite-Voices/optionale XGlite-Voices* / Voix Voice Name Change# XGlite/liste des voix* XGlite en option / Lista de (0–127) (0–127) (1–128)
- Page 129 Voice List / Voice-Liste / Liste des voix / Lista de voces Bank Select MIDI Bank Select MIDI Voice Program Voice Program Voice Name Voice Name Change# Change# (0–127) (0–127) (0–127) (0–127) (1–128) (1–128) Rotary Organ *268 Synth Bass 2 Dark Slow Rotary Modular Synth Bass Fast Rotary...
- Page 130 Voice List / Voice-Liste / Liste des voix / Lista de voces Bank Select MIDI Bank Select MIDI Voice Program Voice Program Voice Name Voice Name Change# Change# (0–127) (0–127) (0–127) (0–127) (1–128) (1–128) Breathy Tenor Sax Chorus Bells Baritone Sax Soft Crystal Oboe Air Bells...
- Page 131 Voice List / Voice-Liste / Liste des voix / Lista de voces Bank Select MIDI Voice Program Voice Name Change# (0–127) (0–127) (1–128) Seashore Bird Tweet Telephone Ring Helicopter Applause Gunshot Cutting Noise Cutting Noise 2 String Slap Flute Key Click Shower Thunder Wind...
-
Page 132: Drum Kit List
Drum Kit List Drum Kit List / Drum Kit-Liste / Liste des kits de • “ ” indicates that the drum sound is the same as “Standard Kit 1”. • „ “ bedeutet, dass der Schlagzeugklang gleich „Standard Kit 1“ ist. •... - Page 133 per cussion / Lista de juegos de batería • « » indique que les sonorités de percussion sont identiques à cel- • “ ” indica que el sonido de batería es el mismo que el les de « Standard Kit 1 ». “Standard Kit 1”.
-
Page 134: Style List
Style List Style List / Style-Liste / Liste des styles / Lista de estilos Style No. Style Name Style No. Style Name Style No. Style Name 8BEAT SaturdayNight Quickstep ChartPianoPop DiscoChocolate Tango BritPopRock DiscoHands Pasodoble 8BeatModern SWING&JAZZ Samba Cool8Beat TradJazzPiano1 ChaChaCha Classic8Beat TradJazzPiano2... -
Page 135: Music Database List
Music Database List Music Database List / Musikdatenbankliste / Liste des bases de données musicales / Lista de la base de datos musical MDB No. MDB Name MDB No. MDB Name MDB No. MDB Name MDB No. MDB Name MDB No. MDB Name ALL TIME HITS WatchGrl... -
Page 136: Songs Provided On The Supplied Cd-Rom
Songs Provided On the Supplied CD-ROM Songs Provided On the Supplied CD-ROM / Songs auf der beiliegenden CD-ROM / Morceaux disponibles sur le CD-ROM fourni / Canciones incluidas en el CD-ROM proporcionado File Name Song Name Composer 001Nutcr.mid Danse des Mirlitons from “The Nutcracker” P.I. -
Page 137: Harmony Type List
Harmony Type List Harmony Type List / Liste der Harmony-Typen / Liste des types d’har- monie / Lista de tipos de armonías Harmony Type Description 01(Standard Duet) Harmony types 01–10, 13 are pitch-based and add one-, two- or three-note harmonies to the single-note melody played in the right hand. -
Page 138: Effect Type List
Effect Type List Effect Type List / Effekttypliste / Liste des types ● Reverb Types / Reverb-Typen / Types d’effets Reverb / Tipos de reverberación Type Description HALL1 HALL2 HALL3 HALL4 HALL5 Reverb simulating the acoustics of a hall. HALL M HALL L BASIC HALL LARGE HALL... - Page 139 d’effets / Lista de tipos de efectos ● Chorus Types / Chorus-Typen / Types d’effets Chorus / Tipos de coro Type Description CHORUS1 CHORUS2 CHORUS3 CHORUS4 CHORUS5 CHORUS6 CHORUS7 CHORUS8 Conventional chorus program with rich, warm chorusing. CHORUS FAST CHORUS LITE GM CHORUS1 GM CHORUS2 GM CHORUS3...
- Page 140 Effect Type List / Effekttypliste / Liste des types d’effets / Lista de tipos de efectos ● DSP Types / DSP Typen / Types de DSP / Tipos de DSP Type Description HALL1 HALL2 HALL3 HALL4 HALL5 Reverb simulating the acoustics of a hall. HALL M HALL L BASIC HALL...
- Page 141 Effect Type List / Effekttypliste / Liste des types d’effets / Lista de tipos de efectos Type Description ST 3BAND EQ Stereo EQ with adjustable LOW, MID and HIGH equalization. HM ENHANCE1 Adds new harmonics to the input signal to make the sound stand out. HM ENHANCE2 FLANGER1 FLANGER2...
- Page 142 Effect Type List / Effekttypliste / Liste des types d’effets / Lista de tipos de efectos Type Description V_DST H+TDL1 V_DST H+TDL2 V Distotion and Tempo Delay are connected in series. V_DST S+TDL1 V_DST S+TDL2 COMP MED COMP HEAVY Holds down the output level when a specified input level is exceeded. A sense of attack can also be added to the sound.
- Page 143 Effect Type List / Effekttypliste / Liste des types d’effets / Lista de tipos de efectos Type Description T_TREMOLO Tempo synchronized tremolo. AUTO WAH1 Cyclically modulates the center frequency of a wah filter. AUTO WAH2 AT WAH+DST1 The output of an Auto Wah can be distorted by Distortion. AT WAH+DST2 AT WAH+OD1 The output of an Auto Wah can be distorted by Overdrive.
-
Page 144: Specifications
UD-FD01 * Specifications and descriptions in this owner’s manual are for information purposes only. Yamaha Corp. reserves the right to change or modify prod- ucts or specifications at any time without prior notice. Since specifications, equipment or options may not be the same in every locale, please check with your Yamaha dealer. - Page 145 Owner’s Manual / Bedienungsanleitung / Mode d’emploi / Manual de instrucciones...
- Page 146 Owner’s Manual / Bedienungsanleitung / Mode d’emploi / Manual de instrucciones...
- Page 147 Information for Users on Collection and Disposal of Old Equipment This symbol on the products, packaging, and/or accompanying documents means that used electrical and electronic products should not be mixed with general household waste. For proper treatment, recovery and recycling of old products, please take them to applicable collection points, in accordance with your national legislation and the Directives 2002/96/EC.
- Page 148 Information concernant la Collecte et le Traitement des déchets d’équipements électriques et électroniques. Le symbole sur les produits, l’emballage et/ou les documents joints signifie que les produits électriques ou électroniques usagés ne doivent pas être mélangés avec les déchets domestiques habituels. Pour un traitement, une récupération et un recyclage appropriés des déchets d’équipements électriques et électroniques, veuillez les déposer aux points de collecte prévus à...
-
Page 149: Important Safety Instructions
Explanation of Graphical Symbols The lightning flash with arrowhead symbol within an equilateral triangle is intended to alert CAUTION the user to the presence of uninsulated RISK OF ELECTRIC SHOCK “dangerous voltage” within the product’s DO NOT OPEN enclosure that may be of sufficient magnitude to constitute a risk of electric shock to persons. - Page 150 Niederlassung und bei Yamaha Vertragshändlern in den jeweiligen Bestimmungsländern erhältlich. Pour plus de détails sur les produits, veuillez-vous adresser à Yamaha ou au distributeur le plus proche de vous figurant dans la liste suivante. Para detalles sobre productos, contacte su tienda Yamaha más cercana o el distribuidor autorizado que se lista debajo.
- Page 152 Yamaha Home Keyboards Home Page http://music.yamaha.com/homekeyboard/ Yamaha Manual Library http://www.yamaha.co.jp/manual/ U.R.G., Pro Audio & Digital Musical Instrument Division, Yamaha Corporation © 2009 Yamaha Corporation WR86780 XXXPOXXX.X-01A0 Printed in Indonesia...