Kenwood MGR-A7 Instruction Manual
Digital audio recorder
Hide thumbs
Also See for MGR-A7:
- Quick start manual (4 pages) ,
- Quick start manual (2 pages) ,
- Instruction manual (53 pages)
Table of Contents
Quick Links
Table of Contents

Related Manuals for Kenwood MGR-A7


Summary of Contents for Kenwood MGR-A7
- Page 1 DIGITAL AUDIO RECORDER INSTRUCTION MANUAL MGR-A7 © B60-5781-10/01 (X)
-
Page 2: Table Of Contents
Contents Safety precautions ..........3 Playing music tracks Recording music or voice ......32 Unpacking ............6 Playing recorded music or voice ....33 Selecting music for playback ..... 19 Display during playback ......20 Read Before Use Adjusting the audio Operations available during playback ... 20 Resume function .......... -
Page 3: Safety Precautions
• When connecting ancillary equipment to this unit, read the instruction for the smoke, abnormal odour or noise disappears, consult your dealer or a Kenwood service equipment, switch this unit off and connect the equipment as instructed. Also be sure agent for servicing. - Page 4 Safety precautions • Do not open the case of or modify the AC adapter or this unit. These incorporate high Operating conditions voltage parts inside and opening or modifying them may result in a fi re or electric shock. Temperature: 5 to 35°C. (without condensation) Notes on using through headphones: Caution on condensation •...
- Page 5 Note on disposal/transfer of SD card • Kenwood will not assume any liabilities for the alteration or loss of data caused due to complete discharging of the built-in battery. The "Format" and "Delete" functions of this unit or a PC simply change the fi le management •...
-
Page 6: Unpacking
Unpacking Headphones Recorder USB cable Quick start manual English... -
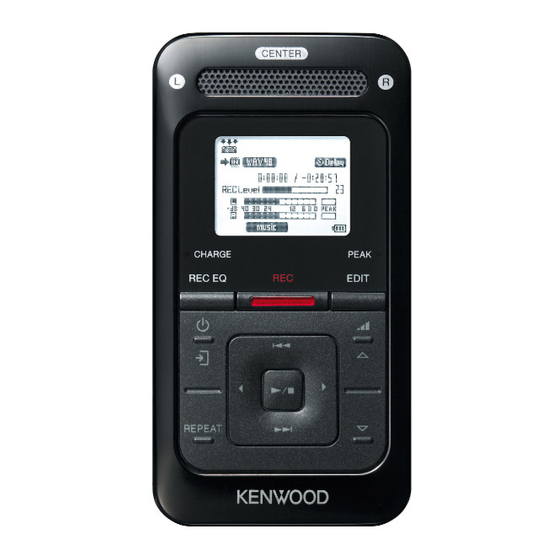
Page 7: Names And Functions Of Parts
Names and functions of parts Built-in microphones Left mic Right mic Center mic Display CHARGE indicator PEAK indicator Microphone input Line input Line output AC adapter connector Phones jack selected). Up button • Press to move the cursor upward. 1 EDIT button Left button Power/Menu button •... - Page 8 Names and functions of parts Strap eyelet USB jack Card cover = MIC MODE switch @ HOLD switch • When the built-in microphones are • Press to defeat all other buttons. This used, set the microphone mode to helps prevent erroneous operation Monaural, 2-Microphone or 3- of this unit when it is carried in a bag, Microphone.
-
Page 9: Flow For Music Playback
Flow for music playback Flow for recording of music or voice Connecting stereo headphones (page 12) Setting the time (page 11) Canceling the HOLD function (page 12) Connecting a microphone or audio component Preparation Preparation Switching Power ON (page 11) (page 25) Recharging Battery (page 13) Selecting the recording mode/Setting the... -
Page 10: Screen Display Items
Screen display items Display during playback Pop-up menu Library screen (page 20) Screen for use in setting the playback-related functions Screen for use in selecting music for playback (page 19) To Home screen Artist name Home screen To Home screen Track title SPRM page 34... -
Page 11: How To Read This Manual/Turning This Unit On/Setting The Time
Clock setting Switching Power ON/OFF Switch this unit ON. Set Year, Month, Day and Hour. Press and hold the Power/Menu button until the KENWOOD Clock setting logo is displayed. For each of Month, Day and Hour, press This unit enters the mode before the last time it was switched to select the desired figure and press OFF. -
Page 12: Connecting Stereo Headphones
Connecting stereo headphones Inserting/removing an SD card Connect the provided stereo headphones to this unit. This unit can play music stored in an SD card or recording music in an SD card. Inserting the SD card Switch this unit off. Press and hold the Power/Menu button until the display is turned off. -
Page 13: Recharging Battery/ Connecting A Pc
Caution • For the PC system requirements, see(page 47). ÷ Refer to your Kenwood stockist for the optional AC adaptor. • Start up the PC before connecting this unit. ÷ The power of this equipment will not be completely cut off from the wall outlet when •... -
Page 14: Capturing Music In Pc
Capturing Music in PC To play music files as tracks of this Player, first rip music files in the PC. Check the checkboxes of the CD tracks to be ripped. This unit can play the following 3 types of music files. Checking the checkbox at the top of the list checks or unchecks all the track •... - Page 15 Capturing Music in PC Using Windows Media Player 10 • For the operating procedures of software including the Windows Media Player, refer to the manuals and help information for the software. Launch the Windows Media Player. • If copy protection is set, when capturing tracks of a music CD into the PC using the Windows Click the [Rip] button on the top.
-
Page 16: Transferring Music From Pc
Transferring Music from PC The obtained music files can then be transferred to this unit. Add the music files to be transferred in the Sync List. Using Windows Media Player 11/10/9 Drag & drop the music file selected from the library into the sync list on the right. Alternatively, right-click to open a pop-up menu and select [Add to ‘Sync List’] (The following steps describes the operation with the Windows Media Player 11/10.) Using Windows Media Player 11... -
Page 17: Data Transfer By Drag & Drop
Transferring Music from PC Data transfer by drag & drop Select "KENWOOD_DAP" (internal memory) or "(SD Card)"/ Open the Windows Explorer and drag & drop the desired file from the PC’s hard disk "KENWOOD_SD" (SD Card). drive to this Player. Copy & paste can also be used for data transfer. Open the removable disk corresponding to this Player. -
Page 18: Deleting Tracks
Deleting tracks The music files transferred from the PC to this unit can be deleted from this unit. Using Windows Media Player 10 Connect this unit to a PC. Using Windows Media Player 11/10/9 (The following steps describes the operation with the Windows Media Player 11/10.) Launch the Windows Media Player. -
Page 19: Selecting Music For Playback
Selecting music for playback Select and play the desired track. Select an intermediate item ("Artist name", for example). Select Artist name = Album title = Track title. Artist The list of the intermediate items is displayed. Artist Select Album title = Track title. Album Artist name Pressing... -
Page 20: Display During Playback
Display during playback Operations available during playback The display shows various information during playback. Left button Up button Tapping shortly: Play mode: Displays the previous list. Each press skips to the beginning Pressing and holding for of the current track or of the more than 1 sec.: previous track (Skip-down). -
Page 21: Various Play Modes
Various play modes The order of playing music files can be selected as shown in the following table. Repeat mode Play mode Select the repeat mode. Each press switches the repeat mode. Normal Plays music in a list. Artist name Track title Random Playback of all of the tracks in the list in a random order, playing every track once. -
Page 22: To Skip An Item
To skip an item Various play modes Played tracks can be skipped on a per-item basis as shown below. Set the end point (point B). Track title Artist skip When a file is selected with the artist name, Artist skip can be used to switch the artists. "A B"... -
Page 23: Adding To/Deleting From The Favorite
Adding to/Deleting from the Favorite Tracks you are particularly fond of can be registered in the Favorite folder for playing Select a track. only the favorite tracks later. Playback starts from the selected track. Favorite Track title Track title Adding to the Favorite Track title Play a track you like and open the pop-up menu. -
Page 24: Varying The Playback Speed
Varying the playback speed The playback speed can be varied in 5 steps. Varying the fast forward/fast reverse speed The fast forward and fast reverse speed can also be varied in 3 steps. Select "FF/FB Speed" from the pop-up menu. Artist name Item skip+ Varying the playback speed... -
Page 25: Connecting A Microphone Or Audio Component
Connecting a microphone or audio component £ Recording from an external audio component or musical instrument In addition to the built-in microphones, an external microphone or audio component can be connected to this unit for recording the music and voice input from it. connected to the line input ¡... -
Page 26: Selecting The Recording Mode/Setting The Microphone Mode
Selecting the recording mode/Setting the microphone mode Recording is possible from the built-in microphones, an external microphone or an Select "Recording" from the home screen. external device. Artist Genre The microphone mode should be set when recording from microphones. Album Year Stereo recording mode using the L/R (omnidirectional) and Center (unidirectional) built-in Track... -
Page 27: Display During Recording
Display during recording Adjusting the recording level During recording from built-in microphones or external microphone When recording voice of a speech from microphones, the recording level can be adjusted so that the volume level is uniform all over the recording (MIC REC LEVEL Recording mode indicator Recording format Recorded file name... -
Page 28: Auto Level Setting (Als) Function
Adjusting the recording level Auto Level Setting (ALS) function Manual recording level adjustment The recording level is set according to the maximum input level. The recording level can also be adjusted manually. For instance, to record a music CD with the optimum recording level, play the section with Adjust the recording level. -
Page 29: Setting The Recording Format
Setting the recording format Setting the recording equalizer The format and bit rate of the recorded file can be selected according to the audio When recording music or voice using the built-in microphones or an external quality requirement. microphone, the recording equalizer can be set according to the recorded sound in order to reduce ambient noise, etc. -
Page 30: Setting The File Recording Destination
Sync recording for starting recording in Setting the file recording destination synchronism with music or voice Select the location for storing the recorded file. This function starts recording or divides the current recorded file into two at the same time as the start of music or voice input. Internal memory Stores the recorded files in the internal memory. -
Page 31: Setting The Detection Level Of Sync Recording
Delayed recording for starting recording Setting the detection level of sync recording after a set delay When sync recording using the built-in microphones or an external microphone is set, When recording audio using the built-in microphones or an external microphone, the the level at which recording starts can be set as described below. -
Page 32: Recording Music Or Voice
Recording music or voice The music or voice input from microphones or an audio component can be recorded as To pause recording: described below. Pressing the 080301123456.wma 080301123456.wma button again Set this unit to record-pause mode. to resume recording. The record-pause ( ) indicator lights up. -
Page 33: Playing Recorded Music Or Voice
Playing recorded music or voice The music or voice recorded from microphones or the line input can be played back as described below. The files are recorded in order of the filenames (recording start date/time). Select "Recorded" from the home screen. Artist Track Album... -
Page 34: Adjusting The Audio
Selecting the sound effects Select one of the 9 modes. Enter Enter SPRM (Supreme) Kenwood-original tone improvement technology, which creates realistic sound by interpolating the high-frequency components that are lost in MP3/WMA (44.1 kHz) audio compression. Sound mode NORMAL Playback in normal tone. -
Page 35: Sound Mode
Adjusting the audio Sound mode Enter the selection. Select "Sound mode" from the pop-up menu. Artist name To Home screen Track title SPRM Sound mode Play mode Add favorite Select the Sound mode. Track title NORMAL BASS POPS ROCK JAZZ Enter Enter To select "Custom sound":... -
Page 36: Viewing Files
Viewing files The list of the music files stored in this unit can be displayed. Select the folder in the lower level. Folder Internal memory Files and folders in the selected folder are Internal memory Audio data displayed. Folder1 RECORD Pressing plays all of the files in the File001.mp3... -
Page 37: Deleting Tracks
Deleting tracks The files in this unit can be deleted as described below. Place the cursor on the file to be deleted. Internal memory Folder Folder1 Folder1 Audio data Folder1-1 Folder1-1 Folder1-2 Folder1-2 File1-01.mp3 File1-01.mp3 File1-02.mp3 File1-02.mp3 Folder File1-03.mp3 File1-03.mp3 RECORD File001.mp3 File002.mp3... -
Page 38: Moving A Recorded File
Moving a recorded file The files recorded with this unit can be moved between the internal memory and SD Select the recorded file to be moved. card. When a file is moved, the file in the original location is deleted. Place the cursor on the file to be moved. -
Page 39: Dividing A Recorded File
Dividing a recorded file A music or voice file in the WAV format recorded with this unit can be divided by Play the file (.wav) to be divided. creating another file and adding numbers to the files newly created by division. Unknown Line Recorded... -
Page 40: Sleep Timer And Alarm Timer
Sleep timer and alarm timer The sleep timer makes it possible to switch this unit OFF after the set period of time. To set the alarm timer: The alarm timer makes it possible to generate an alarm (beep tone) after the set period Specify the timer period. -
Page 41: Various Setups
Various setups Function items that can be set Some function items of this unit including the display brightness and auto power OFF • Indicator • Language function can be set as desired. Sets whether the REC and PEAK indicators Select the language used for the displayed are displayed red. -
Page 42: Formatting/Resetting The Settings
Formatting/Resetting the settings Formatting can be used to delete all of the music and other files stored in this unit. To format this unit: Resetting is used to reset the settings performed using the setting menus to the Select either Internal memory or SD card. settings made before this unit left the factory. -
Page 43: Setting The Prioritized Drive
Setting the prioritized drive When this unit is connected with USB connection, the internal memory and the SD card are recognized as separate drives. When this unit is connected to a USB-compatible stereo component and this can recognize only either the internal memory or the SD card, the unrecognized drive can be recognized by changing the prioritized drive. -
Page 44: Setting The Menu Language
Setting the menu language Select the language used for the display. Select "Settings" from the home screen. Artist Genre Album Year Track Folder Favorite Recorded 1 sec. or Genre Recording more Year Settings Select "Language". Settings Lighting time LCD Contrast Auto power off... -
Page 45: Connection Of External Components
Connection of external components The Line output can be used to connect an external component such as a speaker with Connecting to the USB connector built-in amplifier. The USB connector can be used to connect an external component such as a stereo set USB-compatible stereo/ with USB capability. -
Page 46: Digital Audio Player Link
Digital Audio Player Link When this unit is connected to a Kenwood audio component with the Digital Audio Player Link compatibility, playback of this unit can be controlled from the external audio component. Digital Audio Player 1 Switch this unit ON. -
Page 47: Specifications
: 3.5 mm stereo mini jack MP3 (128 kbps): Approx. 19 hours 48 kHz • Kenwood follows a policy of continuous : 6.0 + 6.0 mW/ 16 Ω WMA (128 kbps): Approx. 19 hours Bit rate: 32 - 320 kbps advancements in development. -
Page 48: Glossary
Glossary Error messages DRM (Digital Rights Management): Tag data: Message Remedy Technology for protecting the copyright of Information on each audio file, including File system error An error occurred in the file system of this unit. the music title, artist name, album name digital audio and video data by limiting the Format this unit (page 42). -
Page 49: Troubleshooting
The SD card contains a large number of files or folder levels. For the battery replacement, contact your nearest Kenwood service agent. This unit checks all of the files in the SD card in the beginning, so it may take a long time if the SD card contains a large number of files. -
Page 50: Forced Formatting
Troubleshooting Forced formatting Forced formatting procedure When this unit displays a message such as "Please wait" and does not accept the If an SD card is inserted, this procedure formats it together with the internal memory. user operation, there may be an error in the file system. In this case, perform forced Caution formatting of this unit to return it to the default status. -
Page 51: Notes On Disposal
Removing the Rechargeable Battery (Built-in Battery) Before Disposal IMPORTANT: Never attempt to open this unit besides when disposing of it. For replacement of the built-in battery, contact your nearest Kenwood service agent. 1 Open the SD card cover. 5 Using a precision screwdriver (+),... - Page 52 Trademark Information ÷ "Microsoft" and "Windows Media" are trademarks or registered trademarks of Microsoft Corporation in the USA and other countries. ÷ "Adobe Reader" is a trademark of Adobe Systems Incorporated. ÷ SDHC logo is a trademark. Other system names and product names are also trademarks or registered trademarks of their respective developers.