Cisco 1841 - 3G Bundle Router Hardware Installation Manual
Hardware installation guide
Hide thumbs
Also See for 1841 - 3G Bundle Router:
- User manual (29 pages) ,
- Datasheet (11 pages) ,
- Configuration manual (198 pages)
Table of Contents
Quick Links
See also:
Configuration Manual
Table of Contents
Troubleshooting

Related Manuals for Cisco 1841 - 3G Bundle Router


Summary of Contents for Cisco 1841 - 3G Bundle Router
- Page 1 Cisco 1800 Series Integrated Services Routers (Modular) Hardware Installation Guide Americas Headquarters Cisco Systems, Inc. 170 West Tasman Drive San Jose, CA 95134-1706 http://www.cisco.com Tel: 408 526-4000 800 553-NETS (6387) Fax: 408 527-0883 Text Part Number: OL-5876-03...
- Page 2 You can determine whether your equipment is causing interference by turning it off. If the interference stops, it was probably caused by the Cisco equipment or one of its peripheral devices. If the equipment causes interference to radio or television reception, try to correct the interference by using one or more of the following measures: •...
-
Page 3: Table Of Contents
Interface Numbering on the 1861 Integrated Services Router 2-10 Specifications 2-11 Regulatory Compliance 2-11 Preinstallation Requirements and Planning for Cisco 1800 Series Routers (Modular) C H A P T E R Safety Recommendations Safety with Electricity Preventing Electrostatic Discharge Damage General Site Requirements... - Page 4 Items in the Box for the Cisco 1841 Router Items in the Box for the Cisco 1861 Integrated Services Router Items not Included in the Box for the Cisco 1861 Integrated Services Router Required Tools and Equipment for Installation and Maintenance...
- Page 5 Contents Cable Connection Procedures for Cisco 1800 Series Routers (Modular) C H A P T E R Power Connections Connecting WAN and LAN Cables Ports and Cabling Connection Procedures and Precautions Connecting to a Console Terminal or Modem Connecting to the Console Port...
- Page 6 C H A P T E R Cisco Interface Cards Installation Guide Related Product Documentation Installing WICs, VWICs, and HWICs Installing and Replacing CompactFlash Memory Cards on Cisco 1800 Series Routers C H A P T E R (Modular) 10-1...
-
Page 7: Introduction To Cisco 1800 Series Routers (Modular) Hardware Documentation
This documentation describes the Cisco 1800 series (modular), currently consisting of the Cisco 1841 router and the Cisco 1861 integrated services router (ISR). With the exception of when the Cisco 1861 ISR is specifically mentioned, all information in this Note document describes the Cisco 1841 router. -
Page 8: Audience
Describes how to install your Cisco 1841 1800 Series Routers (Modular) router on a desktop and how to mount your Cisco 1861 ISR on a wall or in a rack. Cable Connection Procedures for Cisco Describes how to connect your Cisco 1841... -
Page 9: Conventions
Chapter 1 Introduction to Cisco 1800 Series Routers (Modular) Hardware Documentation Conventions Conventions This documentation uses the conventions listed in Table 1-2 to convey instructions and information. Table 1-2 Document Conventions Convention Description boldface font Commands and keywords. italic font Variables for which you supply values. - Page 10 Safety Warnings Note The title Regulatory Compliance and Safety Information for Cisco 1840 Routers refers to a specific chassis model: the Cisco 1840. The Cisco 1841 router received compliance certification under the chassis model Cisco 1840. The same regulatory compliance and safety information for the Cisco 1841 router is applicable to the Cisco 1861 ISR.
- Page 11 Chapter 1 Introduction to Cisco 1800 Series Routers (Modular) Hardware Documentation Safety Warnings Warnung WICHTIGE SICHERHEITSHINWEISE Dieses Warnsymbol bedeutet Gefahr. Sie befinden sich in einer Situation, die zu Verletzungen führen kann. Machen Sie sich vor der Arbeit mit Geräten mit den Gefahren elektrischer Schaltungen und den üblichen Verfahren zur Vorbeugung vor Unfällen vertraut.
- Page 12 Chapter 1 Introduction to Cisco 1800 Series Routers (Modular) Hardware Documentation Safety Warnings Varning! VIKTIGA SÄKERHETSANVISNINGAR Denna varningssignal signalerar fara. Du befinner dig i en situation som kan leda till personskada. Innan du utför arbete på någon utrustning måste du vara medveten om farorna med elkretsar och känna till vanliga förfaranden för att förebygga olyckor.
- Page 13 Chapter 1 Introduction to Cisco 1800 Series Routers (Modular) Hardware Documentation Safety Warnings Aviso INSTRUÇÕES IMPORTANTES DE SEGURANÇA Este símbolo de aviso significa perigo. Você se encontra em uma situação em que há risco de lesões corporais. Antes de trabalhar com qualquer equipamento, esteja ciente dos riscos que envolvem os circuitos elétricos e familiarize-se com as práticas padrão de prevenção de acidentes.
- Page 14 Chapter 1 Introduction to Cisco 1800 Series Routers (Modular) Hardware Documentation Safety Warnings Cisco 1800 Series Routers (Modular) Hardware Installation Guide 1-12 OL-5876-03...
-
Page 15: Related Documentation
Introduction to Cisco 1800 Series Routers (Modular) Hardware Documentation Related Documentation Related Documentation The Cisco IOS software that runs your Cisco 1800 series router includes extensive features and functionality. For information that is beyond the scope of this document, or for additional information, Table 1-3. -
Page 16: Cisco One-Year Limited Hardware Warranty Terms
Your formal Warranty Statement, including the warranties and license agreements applicable to Cisco software, is available on Cisco.com. Follow these steps to access and download the Cisco Information Packet and your warranty and license agreements from Cisco.com. -
Page 17: Searching For Cisco Documents
Searching for Cisco Documents Replacement, Repair, or Refund Policy for Hardware Cisco or its service center will use commercially reasonable efforts to ship a replacement part within ten (10) working days after receipt of a Return Materials Authorization (RMA) request. Actual delivery times can vary, depending on the customer location. - Page 18 Chapter 1 Introduction to Cisco 1800 Series Routers (Modular) Hardware Documentation Obtaining Documentation and Submitting a Service Request Cisco 1800 Series Routers (Modular) Hardware Installation Guide 1-16 OL-5876-03...
-
Page 19: Chapter 2 Overview Of Cisco 1800 Series Routers (Modular)
8 0 0 S e ri e s The Cisco 1861 ISR, which is part of the Cisco 1800 series ISR family, is a unified communications solution for small- to medium-sized businesses and enterprise small branch offices that provides voice,... -
Page 20: Hardware Features
Specifications, page 2-11 • • Regulatory Compliance, page 2-11 Hardware Features This section describes the basic features of Cisco 1800 series routers. It contains the following: Product Serial Number Location, page 2-3 • Cisco 1800 Series Routers (Modular) Hardware Installation Guide OL-5876-03... -
Page 21: Product Serial Number Location
• Chassis Security, page 2-8 • Product Serial Number Location The serial number label for the Cisco 1841 router and the Cisco 1861 ISR is located on the rear of the chassis, underneath interface card slot 0. (See Figure 2-4.) -
Page 22: Interfaces On The Cisco 1841 Router
Interfaces on the Cisco 1861 Integrated Services Router The Cisco 1861 Integrated Services Router comes with various possible configurations, based on built-in ports and other hardware features of the Cisco 1861 Integrated Services Router and organized by model. Table 2-1 lists the labels and descriptions for the WAN, LAN, voice interface card (VIC), and other interfaces, along with the values for these interfaces in the preconfigured router software configuration. -
Page 23: Removable And Interchangeable Modules
VIC3-4FXS/DID and 0-3 port 0/2/0 to 0/2/3 * Only one optional VIC can be factory installed in a Cisco 1861 Integrated Services Router. Removable and Interchangeable Modules Various optional modules can be installed in the router to provide specific capabilities. These modules can be installed either by inserting them into slots on the chassis, or by opening the chassis and plugging them into connectors inside the chassis. -
Page 24: Led Indicators
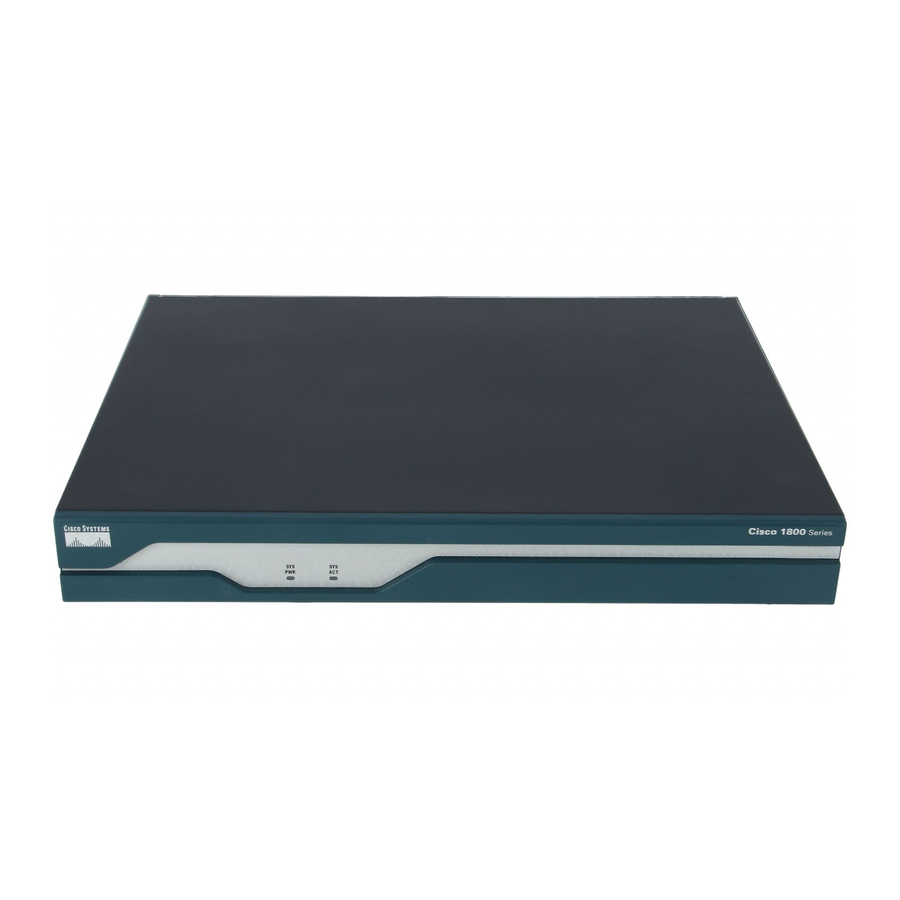
128 MB LED Indicators Table 2-5 summarizes the LED indicators for the Cisco 1841 router that are located in the router bezel or chassis, but not in the interface cards. For descriptions of the LEDs in the interface cards, see Cisco Interface Card Installation Guide. -
Page 25: Chassis Ventilation
On indicates presence of an AIM in the internal AIM slot. Back Figure 2-5 summarizes the LED indicators for the Cisco 1861 ISR that are located in the router bezel. Figure 2-5 LEDs on the Front Panel of the Cisco 1861 Integrated Services Router... -
Page 26: Chassis Security
Chassis Views Note If the lithium battery in a Cisco 1841 router should fail, the router must be returned to Cisco for repair. Do not replace the battery yourself. Although the battery is not intended to be field replaceable, the safety agencies require the following warning be included in this document. -
Page 27: Interface Numbering
Slot 1 (WIC, VWIC—data only, or HWIC) Interface Numbering Each individual interface (port) on a Cisco 1841 router is identified by a number. A Cisco 1841 router contains the following wide-area network (WAN) and local-area network (LAN) interface types: Two onboard Fast Ethernet LAN interfaces •... -
Page 28: Interface Numbering On The 1861 Integrated Services Router
Interface Numbering on the 1861 Integrated Services Router Interface Numbering on the 1861 Integrated Services Router Each interface (port) on a Cisco 1861 ISR is identified by a number. The Cisco 1861 router contains the following WANLAN interface types: •... -
Page 29: Specifications
UL 60950; CSA 60950; IEC 60950; EN 60950; AS/NZS 3260; NOM-019-SCFI-1998. Regulatory Compliance For compliance information, see Regulatory Compliance and Safety Information for Cisco 1840 Routers document that accompanies the router. Cisco 1800 Series Routers (Modular) Hardware Installation Guide 2-11... - Page 30 Chapter 2 Overview of Cisco 1800 Series Routers (Modular) Regulatory Compliance Cisco 1800 Series Routers (Modular) Hardware Installation Guide 2-12 OL-5876-03...
-
Page 31: Chapter 3 Preinstallation Requirements And Planning For Cisco 1800 Series Routers (Modular)
C H A P T E R Preinstallation Requirements and Planning for Cisco 1800 Series Routers (Modular) This chapter describes the site requirements and equipment needed to install your Cisco 1800 series integrated services router (modular). It includes the following sections: •... -
Page 32: Safety With Electricity
Chapter 3 Preinstallation Requirements and Planning for Cisco 1800 Series Routers (Modular) Safety Recommendations Blank faceplates and cover panels serve three important functions: they prevent exposure to Warning hazardous voltages and currents inside the chassis; they contain electromagnetic interference (EMI) that might disrupt other equipment;... -
Page 33: Preventing Electrostatic Discharge Damage
Chapter 3 Preinstallation Requirements and Planning for Cisco 1800 Series Routers (Modular) General Site Requirements • Never open the enclosure of the router’s internal power supply. If an electrical accident occurs, proceed as follows: • Use caution; do not become a victim yourself. -
Page 34: Site Environment
Chapter 3 Preinstallation Requirements and Planning for Cisco 1800 Series Routers (Modular) Installation Checklist The device is designed for connection to TN and IT power systems. Statement 1007 Warning The AC power supply includes the following features: Autoselects either 110 V or 220 V operation. -
Page 35: Site Log
Chapter 3 Preinstallation Requirements and Planning for Cisco 1800 Series Routers (Modular) Site Log Installation Checklist for Site_____________________________________________ Router Name_______________________________________________________ Task Verified by Date Installation Checklist copied Background information placed in Site Log Site power voltages verified Installation site power check completed... -
Page 36: Inspecting The Router
Inspect all items for shipping damage. If anything appears to be damaged, or if you encounter problems installing or configuring your router, contact customer service. Items in the Box for the Cisco 1861 Integrated Services Router The following items ship with the Cisco 1861 Integrated Services Router: Accessory kit containing: •... -
Page 37: Items Not Included In The Box For The Cisco 1861 Integrated Services Router
Inspect all items for shipping damage. If anything appears to be damaged, or if you encounter problems installing or configuring your router, contact customer service. Items not Included in the Box for the Cisco 1861 Integrated Services Router You may need individual items in this list which are not shipped in the box: •... - Page 38 Chapter 3 Preinstallation Requirements and Planning for Cisco 1800 Series Routers (Modular) Required Tools and Equipment for Installation and Maintenance Cisco 1800 Series Routers (Modular) Hardware Installation Guide OL-5876-03...
-
Page 39: Chapter 4 Chassis Installation Procedures For Cisco 1800 Series Routers (Modular)
C H A P T E R Chassis Installation Procedures for Cisco 1800 Series Routers (Modular) This chapter tells how to physically set up Cisco 1800 series integrated services routers (ISR) (modular). It contains the following sections: • Setting Up the Chassis, page 4-3 •... - Page 40 Interfaces on the Cisco 1861 Integrated Services Router The Cisco 1861 Integrated Services Router comes with various possible configurations, based on built-in ports and other hardware features of the Cisco 1861 Integrated Services Router and organized by model. Table 4-1 lists the labels and descriptions for the WAN, LAN, voice interface card (VIC), and other interfaces, along with the values for these interfaces in the preconfigured router software configuration.
-
Page 41: Setting Up The Chassis
Setting Up the Chassis The Cisco 1841 router and the Cisco 1861 ISR can be installed on a desktop, and can also be mounted on a wall. Select the setup that best meets the needs of your network. These setups are described in the... -
Page 42: Attaching Rack-Mount Brackets
Setting Up the Chassis Note To install a Cisco 1800 series modular-configuration router in a 19-inch rack, use the brackets included in the optional rack-mount kit (SKU: ACS-1841-RM-19=).All Cisco 1841 chassis shipping since Q4FY06 are rack-mountable. Cisco 1841 chassis with the following starting serial numbers have the rack-mount screw holes: FTX1009W0Z3 (United States), FCZ100812UR (Europe, Middle East, and Africa), and FHK100653JL (Asia Pacific). -
Page 43: Installing The Router In A Rack
Chapter 4 Chassis Installation Procedures for Cisco 1800 Series Routers (Modular) Setting Up the Chassis Installing the Router in a Rack After you attach the brackets to the router chassis, use the screws provided with the rack to install the chassis in the rack. -
Page 44: Chassis Grounding
Wall-Mounting the Cisco 1841 Router To mount the Cisco 1841 router on a wall, use two number six, 3/4-inch screws and the mounting features on the bottom of the router. You must provide the screws. We recommend using pan-head or round-head screws. - Page 45 Chapter 4 Chassis Installation Procedures for Cisco 1800 Series Routers (Modular) Setting Up the Chassis Wall-mounting features To mount the router on a wall or other surface, follow these steps: Step 1 Install the two screws 6.00 in. (15.2 cm) horizontally apart on a wall or other vertical surface.
-
Page 46: Wall-Mounting The Cisco 1861 Integrated Services Router
Wall-Mounting the Cisco 1861 Integrated Services Router The Cisco 1861 Integrated Services Router has two keyholes on the bottom of the chassis for mounting the unit on a wall or other vertical surface. The power supply is mounted to the wall by using the wall-mount bracket. -
Page 47: Rack-Mounting The Cisco 1861 Integrated Services Router
Position the end nearest the power cable at the top. Rack-Mounting the Cisco 1861 Integrated Services Router To attach the brackets to the Cisco 1861 Integrated Services Router, perform the following steps. Do not overtorque the screws. The recommended torque is 6 to 8 in-lb (0.7 to 0.9 N-m). - Page 48 To mount the chassis and power supply, use two screws for each side (supplied with the rack) to attach the Cisco 1861 ISR with rack-mount brackets, then attach the power supply with rack-mount bracket to a 19-in. rack. Start the lower pair of screws first, resting the brackets on the lower screws while you insert the upper pair of screws.
-
Page 49: Installing The Chassis Ground Connection
6 ground screw provided on the rear panel of the router. The crimping tool should be one that is recommended by the ring lug terminal manufacturer. Attach the ring terminal to the chassis. The attachment points for the Cisco 1841 router are shown in Step 3 Figure 4-11. -
Page 50: Installing The Chassis Ground Connection On The Cisco 1861 Integrated Services Router
“Cable Connection Procedures for Cisco 1800 Series Routers (Modular)”. Installing the Chassis Ground Connection on the Cisco 1861 Integrated Services Router You must connect the chassis to a reliable earth ground; the ground wire must be installed in accordance with local electrical safety standards. - Page 51 Chapter 4 Chassis Installation Procedures for Cisco 1800 Series Routers (Modular) Installing the Chassis Ground Connection Figure 4-12 Attaching the Ground Wire to the Chassis Connect the other end of the ground wire to a known reliable earth ground point.
- Page 52 Chapter 4 Chassis Installation Procedures for Cisco 1800 Series Routers (Modular) Installing the Chassis Ground Connection Cisco 1800 Series Routers (Modular) Hardware Installation Guide 4-14 OL-5876-03...
-
Page 53: Chapter 5 Cable Information And Specifications For Cisco 1800 Series Routers (Modular)
1800 Series Routers (Modular) This chapter gives cable information and specifications for the console port, auxiliary port, and network ports on your Cisco 1800 series integrated services router (modular). It contains the following sections: • Console and Auxiliary Port Considerations, page 5-1 •... -
Page 54: Auxiliary Port Connections
Only trained and qualified personnel should be allowed to install, replace, or service this equipment. Statement 1030 Ethernet Connections The IEEE has established Ethernet as standard IEEE 802.3. The Cisco 1800 series Ethernet implementations are as follows: 100BASE-T—2-pair Category 5 or unshielded twisted-pair (UTP) straight-through RJ-45 cable. -
Page 55: Serial Connections
The synchronous serial ports available for the router support the following signaling standards: EIA/TIA-232, EIA/TIA-449, V.35, X.21, and EIA-530. You can order a Cisco DB-60 shielded serial transition cable that has the appropriate connector for the standard you specify. The documentation for the device that you want to connect should indicate the standard used for that device. -
Page 56: Distance Limitations
Chapter 5 Cable Information and Specifications for Cisco 1800 Series Routers (Modular) Preparing to Connect to a Network The synchronous serial port can be configured as DTE or DCE, depending on the attached cable (except EIA-530, which is DTE only). To order a shielded cable, contact customer service. See the “Obtaining... -
Page 57: Isdn Bri Connections
Chapter 5 Cable Information and Specifications for Cisco 1800 Series Routers (Modular) Preparing to Connect to a Network ISDN BRI Connections The BRI WICs provide ISDN and BRI connections. BRI WICs are available with either an S/T interface that requires an external Network Termination 1 (NT1), or a U interface that has a built-in NT1. You can install the BRI WICs in any available WIC slots in the chassis. - Page 58 Chapter 5 Cable Information and Specifications for Cisco 1800 Series Routers (Modular) Preparing to Connect to a Network Cisco 1800 Series Routers (Modular) Hardware Installation Guide OL-5876-03...
-
Page 59: Chapter 6 Cable Connection Procedures For Cisco 1800 Series Routers (Modular)
C H A P T E R Cable Connection Procedures for Cisco 1800 Series Routers (Modular) This chapter describes how to connect your Cisco 1800 series integrated services router (modular) to a power source and to networks and external devices. It includes the following sections: •... -
Page 60: Connecting Wan And Lan Cables
• One or two Ethernet cables are typically provided with the router. You can order additional network Note connection cables and transceivers from Cisco. For ordering information, contact Cisco customer service. For cable pinouts, see Cisco Modular Access Router Cable Specifications. -
Page 61: Connection Procedures And Precautions
Your router has asynchronous serial console and auxiliary ports. These ports provide administrative access to your router either locally (with a console terminal or PC) or remotely (with a modem). Cisco provides the following cables and adapters for connecting your router to a console terminal, PC, or modem: One console cable (RJ-45-to-DB-9, blue) •... -
Page 62: Connecting To The Console Port
Connecting to a Console Terminal or Modem Connecting to the Console Port To configure the router through the Cisco IOS CLI, you must connect the router console port to a terminal or PC. The cable required for this connection is included with the router. -
Page 63: Connecting Power To The Cisco 1861 Integrated Services Router
Connect the AC power cord to the the power supply. Step 2 Connect the power interface cable to the power connector port on the back of the Cisco 1861 Integrated Services Router. Cisco 1800 Series Routers (Modular) Hardware Installation Guide... - Page 64 Chapter 6 Cable Connection Procedures for Cisco 1800 Series Routers (Modular) Connecting to a Console Terminal or Modem Cisco 1800 Series Routers (Modular) Hardware Installation Guide OL-5876-03...
-
Page 65: Chapter 7 Power-Up Procedures For Cisco 1800 Series Routers (Modular)
Regulatory Compliance and Note Safety Information for Cisco 1840 Routers. The Cisco 1861 Integrated Services Router supports a maximum of 12 user licenses based on different Note models. Powering Up Cisco 1800 Series Routers The plug-socket combination must be accessible at all times because it serves as the main Warning disconnecting device. -
Page 66: Checklist For Power Up
(Modular).” Power-Up Procedure To power up your Cisco router and verify that it completes its initialization and self-test, follow this procedure. When you have completed the procedure you may begin configuring the router. Cisco 1800 Series Routers (Modular) Hardware Installation Guide... - Page 67 Cisco 1800 Series Router Software Configuration. To view the boot sequence through a terminal session, you must have a console connection to the Cisco Note router before the router powers up. To power up the router, perform the following steps: Make sure that your PC is powered up and connected as described in the “Checklist for Power Up”...
-
Page 68: Verifying The Led Indicators On The 1841 Router
Chapter 7 Power-Up Procedures for Cisco 1800 Series Routers (Modular) Verifying the LED Indicators on the 1841 Router --- System Configuration Dialog --- At any point you may enter a question mark '?' for help. Use ctrl-c to abort configuration dialog at any prompt. -
Page 69: Verifying The Hardware Configuration
Chapter 7 Power-Up Procedures for Cisco 1800 Series Routers (Modular) Verifying the Hardware Configuration Figure 7-1 LEDs on the Front Panel of the Cisco 1861 Integrated Services Router S Y S P O E W L A N Solid green... -
Page 70: Cisco Router And Security Device Manager
Cisco 1800 Series Integrated Services Routers (Modular) Quick Start Guide. Cisco Router and Security Device Manager If the Cisco Router and Security Device Manager (SDM) has been installed on your router, the following messages appear at the end of the startup sequence: yourname con0 is now available Press RETURN to get started. -
Page 71: Powering Up The Cisco 1861 Integrated Services Router
Verify that the AC power cord is connected to the power supply. Step 2 Power up the power supply and the Cisco 1861 ISR, by connecting the power cord plug to a grounded AC outlet. There is no external Power On/Off switch on the power supply. - Page 72 Chapter 7 Power-Up Procedures for Cisco 1800 Series Routers (Modular) Software Components of the Cisco 1861 Integrated Services Router Table 7-2 Cisco 1861 Integrated Services Router Software Components (continued) Software Component Description Benefits Security Protects against Integrated for a robust array of security features.
-
Page 73: Problem Solving
Overview of Cisco Interface Cards for Cisco Access Routers. Note If you cannot locate the source of the problem, contact a Cisco customer service representative for information on how to proceed. For technical support information, see the “Obtaining Documentation and Submitting a Service Request” section on page 1-15. -
Page 74: Troubleshooting The Power And Cooling Systems
If the SYS PWR LED is blinking or continuously green, the power supply is functional. If the SYS PWR LED is not on, see “Cisco One-Year Limited Hardware Warranty Terms” – section on page 1-14. Cisco 1800 Series Routers (Modular) Hardware Installation Guide OL-5876-03... -
Page 75: Environmental Reporting Features
– – Check external cable connections. Make sure that you have a version of Cisco IOS software that supports the card. Check the – software requirements for the affected card, which can be found in the configuration note for the card. -
Page 76: Reading Leds
Warranty Terms” and the “Obtaining Documentation and Submitting a Service Request” sections of the “Introduction to Cisco 1800 Series Routers (Modular) Hardware Documentation” document for warranty and customer service contact information. Reading LEDs The LEDs on the router enable you to determine router performance and operation. The System Power (SYS PWR) LED and the System Activity (SYS ACT) LED are on the front panel;... -
Page 77: System Messages
System Messages This section describes system error and recovery messages that may appear when a Cisco 1800 series router is operated. The Cisco IOS software displays system error and recovery messages on an external device console terminal screen. (For more information, see the “Connecting to the Console Port”... -
Page 78: Recovering A Lost Password
TAC Case Collection Tool and Troubleshooting Assistant. You must have an account on Cisco.com. If you do not have an account or have forgotten your username or password, click Cancel at the login dialog box and follow the instructions that appear. -
Page 79: Chapter 9 Installing Interface Cards In Cisco 1800 Series Routers (Modular)
Do not connect a WAN cable to an interface card until you have completed its installation procedure. Caution The Cisco 1841 router has two interface card slots. Each slot can accommodate a Cisco WIC, VWIC (data only mode), or a single-wide high-speed WIC (HWIC). - Page 80 Installing Interface Cards in Cisco 1800 Series Routers (Modular) Installing WICs, VWICs, and HWICs To install a card in a Cisco 1841 router, follow these steps: Make sure that the router is turned off and is disconnected from power. Step 1...
- Page 81 Chapter 9 Installing Interface Cards in Cisco 1800 Series Routers (Modular) Installing WICs, VWICs, and HWICs Step 5 Insert the card in the slot, and gently push it into the router until the front panel of the card is flush with the back panel of the router.
- Page 82 Chapter 9 Installing Interface Cards in Cisco 1800 Series Routers (Modular) Installing WICs, VWICs, and HWICs Cisco 1800 Series Routers (Modular) Hardware Installation Guide OL-5876-03...
-
Page 83: Installing And Replacing Compactflash Memory Cards On Cisco 1800 Series Routers (Modular)
Installing and Replacing CompactFlash Memory Cards on Cisco 1800 Series Routers (Modular) This chapter describes installing and replacing CompactFlash memory cards in Cisco 1800 series integrated services routers (ISR) (modular). You can perform these procedures when the router has been installed in its working location with all power and interface cables connected. -
Page 84: Removing A Compactflash Memory Card
Chapter 10 Installing and Replacing CompactFlash Memory Cards on Cisco 1800 Series Routers (Modular) Removing a CompactFlash Memory Card To remove a CompactFlash memory card from an external slot, follow these steps: If the CF LED is on or blinking, do not remove the CompactFlash memory card. The router could crash, Caution or the flash memory contents could be corrupted. - Page 85 Chapter 10 Installing and Replacing CompactFlash Memory Cards on Cisco 1800 Series Routers (Modular) Note A small flat-head screwdriver is required to attach the CF-guard. To install the CF-guard, follow these steps: Unpack the CF-guard. Step 1 Slip the CF-guard flap into the notch in the CompactFlash memory slot.
- Page 86 Chapter 10 Installing and Replacing CompactFlash Memory Cards on Cisco 1800 Series Routers (Modular) Cisco 1800 Series Routers (Modular) Hardware Installation Guide 10-4 OL-5876-03...
-
Page 87: Chapter 11 Installing And Upgrading Internal Modules In Cisco 1800 Series Routers (Modular)
This chapter describes how to install or upgrade modules that are located internally within the Cisco 1800 series integrated services routers (modular): memory modules and advanced integration modules (AIMs). You need to remove the cover from the router to install or remove any of these items. -
Page 88: Modules Internal To The Cisco 1841 Router
Modules Internal to the Cisco 1841 Router This section tells how to install a small outline dual in-line memory module (SODIMM) and an advanced integration module (AIM) in the Cisco 1841 router. It contains the following subsections: Opening the Chassis, page 11-2 •... - Page 89 Chapter 11 Installing and Upgrading Internal Modules in Cisco 1800 Series Routers (Modular) Modules Internal to the Cisco 1841 Router Figure 11-1 Removing the Chassis Screw Router cover fastening screw Step 4 Insert a flat-head screwdriver into the slots at the screwdriver pry points and rotate the screwdriver 90 degrees to disengage the top cover from the chassis.
-
Page 90: Locating Modules
Place the router bottom on an antistatic mat, and begin installing memory. Step 7 Locating Modules Figure 11-4 shows where the connector for the SODIMM or the AIM is located on the Cisco 1841 motherboard. Cisco 1800 Series Routers (Modular) Hardware Installation Guide 11-4... -
Page 91: Installing A Sodimm
Chapter 11 Installing and Upgrading Internal Modules in Cisco 1800 Series Routers (Modular) Modules Internal to the Cisco 1841 Router Figure 11-4 Cisco 1841 Interior Ground screw AIM module Interface card slot 0 SODIMM socket USB port Power supply connection... -
Page 92: Installing An Aim
Firmly press the SODIMM into the socket until the spring-loaded clips on the socket snap over the end Step 4 of the SODIMM. Installing an AIM The Cisco 1841 router has the capability to support a single AIM module. To install an AIM, follow the procedure given here. Cisco 1800 Series Routers (Modular) Hardware Installation Guide 11-6... -
Page 93: Accessory Kit To Use
Accessory Kit to Use Some AIMs are provided with multiple accessory kits that contain different configurations of mounting hardware. Mounting hardware for the Cisco 1841 router consists of two machine thread metal standoffs, two machine thread metal screws, and one plastic standoff. - Page 94 Chapter 11 Installing and Upgrading Internal Modules in Cisco 1800 Series Routers (Modular) Modules Internal to the Cisco 1841 Router Figure 11-7 Location of Metal Standoff Attachment Locations System board AIM connector Install the two metal standoffs from the accessory kit into the system board in the metal standoff...
- Page 95 Chapter 11 Installing and Upgrading Internal Modules in Cisco 1800 Series Routers (Modular) Modules Internal to the Cisco 1841 Router Figure 11-8 Plastic Standoff Orientation AIM end Locking end Insert the connector on the AIM into the AIM connector on the system board. See Figure 11-9.
- Page 96 Chapter 11 Installing and Upgrading Internal Modules in Cisco 1800 Series Routers (Modular) Modules Internal to the Cisco 1841 Router Figure 11-9 Connecting the AIM to the System Board Snap-in plastic standoff Metal standoffs Check that the AIM is installed correctly on the system board. See Figure 11-10.
-
Page 97: Applying The Aim Label
Chapter 11 Installing and Upgrading Internal Modules in Cisco 1800 Series Routers (Modular) Modules Internal to the Cisco 1841 Router Figure 11-10 Correctly Installed AIM Applying the AIM Label The AIM label for the chassis might be in the AIM mounting kit, or it might be attached to the label on the AIM card. - Page 98 Chapter 11 Installing and Upgrading Internal Modules in Cisco 1800 Series Routers (Modular) Modules Internal to the Cisco 1841 Router Step 4 Use a number 1 Phillips—screwdriver to reinstall the screw that holds the cover to the chassis. See Figure 11-1.
- Page 99 1-13 on the WEB 1-13 related 1-13 Tables document conventions LEDs on front panel related documents 1-14 Figures troubleshooting rack-mounting the chassis high temperature WICs and VICs high temperature, troubleshooting Cisco 1800 Series Routers (Modular) Hardware Installation Guide IN-1 OL-5876-03...
- Page 100 Index VICs troubleshooting wall-mounting Warnings WAN port voltages WICs troubleshooting Cisco 1800 Series Routers (Modular) Hardware Installation Guide IN-2 OL-5876-03...