HP x280n - MediaSmart Connect - Digital Multimedia Receiver Installation And User Manual
Hp mediasmart connect x280n installation and user guide
Hide thumbs
Also See for x280n - MediaSmart Connect - Digital Multimedia Receiver:
- Limited warranty (32 pages) ,
- Quick setup manual (1 page) ,
- Manual d'installation rapide (1 page)
Table of Contents
Available languages
Available languages
Chapters
Table of Contents

Related Manuals for HP x280n - MediaSmart Connect - Digital Multimedia Receiver


Summary of Contents for HP x280n - MediaSmart Connect - Digital Multimedia Receiver
- Page 1 Installation and User Guide HP MediaSmart Connect x280n...
- Page 2 Wi-Fi Alliance testing as of June 2007. The specifications of the 802.11n WLAN (wireless local area Copyright © 2008 Hewlett-Packard Development Company, L.P. network) are draft specifications and not final. If the final This product incorporates copyright protection technology that is specifications differ from the draft specifications, it may affect the protected by U.S.
- Page 3 HP supports lawful use of technology and does not endorse or encourage the use of our products for purposes other than those permitted by copyright law. WARNING: This symbol is intended to alert the user to the presence of important operating and maintenance The information in this document is subject to change without notice.
-
Page 4: Regulatory And Safety Information
Regulatory and Safety Information WARNING: To reduce the risk of fire or electrical shock, WARNING: Text set off in this manner indicates that do not expose this appliance to rain or moisture. failure to follow directions could result in damage to equipment, loss of information, bodily harm, or loss of life. -
Page 5: Digital Television Transition Notice
Digital Television Transition Interface Statement Notice This equipment has been tested and found to comply with the limits for a Class B digital device, pursuant to Part 15 of the Digital Television Transition Notice: FCC Rules. These limits are designed to provide reasonable After February 17, 2009, a television receiver with only an protection against harmful interference in a residential installation. -
Page 6: Modifications
Consult the dealer or an experienced radio/TV technician modifications to this equipment not expressly approved by the for help. Hewlett-Packard Company may cause harmful interference and This device complies with RSS-210 of the Industry Canada Rules. void the FCC authorization to operate this equipment. -
Page 7: Cables
In order to prevent potential danger, please observe the following instructions when installing, operating, and cleaning the product. To ensure your safety and Hewlett-Packard Company prolong the service life of your product, please read the following Attn: Product Regulations Manager precautions carefully before using the product. - Page 8 Do not install near any heat sources such as radiators, heat Refer all servicing to qualified service personnel. Servicing is registers, stoves, or other apparatus (including amplifiers) required when the apparatus has been damaged in any way, that produce heat. the power-supply, cord, or plug is damaged, liquid has been spilled or objects have fallen into the apparatus, the Do not defeat the safety purpose of the polarized or...
- Page 9 Replacement Parts—When replacement parts are required, Servicing—The user should not attempt to service the be sure the service technician has used replacement parts appliance beyond that described in the operating specified by the manufacturer or which have the same instructions. All other servicing should be referred to qualified characteristics as the original part.
- Page 10 Ventilation—The vents and other openings in the cabinet are Lightning—For added protection for this equipment during a designed for ventilation. Do not cover or block these vents lightning storm, or when it is left unattended and unused for and openings since insufficient ventilation can cause long periods of time, unplug it from the wall outlet.
-
Page 11: Important Information
Important Information Materials disposal The HP MediaSmart Connect must be serviced by an authorized For disposal or recycling information, please contact your local service technician. The HP MediaSmart Connect is not authorities or the Electronic Industries Alliance (EIA) user-serviceable. (http://www.eia.org). Changes can damage your HP MediaSmart Connect and void Cleaning precautions your warranty. -
Page 12: Getting Started
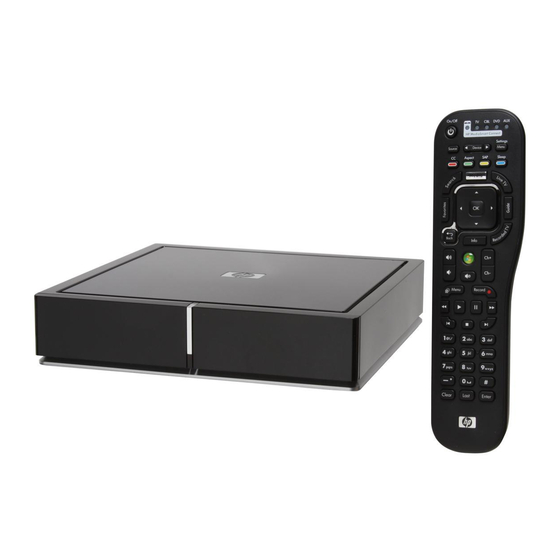
Getting Started Be sure to read all the safety information and precautions before AC power adaptor starting installation. See the following topics: “Regulatory and Safety Information” on page 4 “Important Safety Instructions” on page 7 HDMI (High-Definition Multimedia “Important Information” on page 11 Interface) cable used to connect the HP MediaSmart Connect to Identifying Items in the Box... -
Page 13: Other Cables You May Need
Other cables you may need System requirements Media streaming requires a computer, or NAS (network attached Optional cables storage) with a Digital Living Network Alliance (DLNA)-compliant Component Video Connect video to the HDTV instead of the media server. A home network is also required. All items are sold HDMI cable. -
Page 14: Setup Time
Before you begin, have on hand Some MediaSmart features may not be available on computers with a 64-bit operating system. Your HP MediaSmart Connect and items from the box; see Certain Windows Vista product features require advanced or “Identifying Items in the Box” on page 12. additional hardware. -
Page 15: Installation Steps
Installation Steps Step 3: On your computer, insert the Installation CD. At the computer, insert the Installation CD from the box, and then Step 1: Connect your HDTV to your HP MediaSmart follow the wizard to: Connect. Install the MediaSmart software (automatic). Select the location to place the device. -
Page 16: Hp Mediasmart Connect
Step 1: Connect Your HDTV to The type of network (wired or wireless), and the wireless router location: For more information, see “Chapter 2: Your HP MediaSmart Connect Connecting your HP MediaSmart Connect to your Home Network” on page 35. Selecting a good location Connecting to the HDTV When selecting the location for your HP MediaSmart Connect,... - Page 17 If you have an external sound system: Use an optical audio cable and the Optical Audio (digital) WARNING: Before connecting the HP MediaSmart connector on HP MediaSmart Connect to provide a digital Connect to any other electronic device, unplug each audio signal to a device such as a digital receiver or a device from the AC power outlet.
- Page 18 HDMI connector and external sound Component connector set system Connect the Component cables to the back of your device and to the HDTV, matching the color-coded plugs to the Connect the HDMI cable to the back of your device and to connectors.
- Page 19 Component connector set and external Connecting to your home network sound system (LAN) Connect the Component cables to the back of your device Connect the HP MediaSmart Connect to the router in your and to the HDTV, matching the color-coded plugs to the home LAN: connectors.
- Page 20 Connecting power Installing remote control batteries Connect the AC power adaptor to the connector on your device Insert two AA batteries into the remote control, ensuring that you and to the AC power outlet. The HP MediaSmart Connect place them with the polarity properly aligned. turns on.
- Page 21 Continue with “Step 2: Follow the Setup Wizard on Your HDTV” on page 22. Do not combine different types of batteries (for example, alkaline and carbon-zinc), or old batteries with fresh ones. When installing batteries, be sure to follow the correct polarity, as indicated in the battery compartment.
- Page 22 Step 2: Follow the Setup ® The Installation CD installs the Microsoft Windows Media Player (WMP) software, if it is not already installed. The WMP software Wizard on Your HDTV uses your home network to stream photos, videos, and music to the HP MediaSmart Connect for viewing on your HDTV.
- Page 23 Set up at the TV Press the Device button on the remote control one or more times to light the HP MediaSmart Connect indicator. If necessary, turn on the TV, and then select the input source to view the HP MediaSmart Connect. The TV Resolution screen displays.
- Page 24 Point the remote control at the HP MediaSmart Connect, and follow the onscreen instructions. If you do not see the TV Resolution screen, skip to step 4. To select the resolution: Resolution — what is better: 720p or 1080i? Screen resolution depends on your TV, and in most cases makes little difference.
- Page 25 A wizard guides you through the setup. When prompted, leave the TV as it is, and continue with “Step 3: On Your Computer, Insert the Installation CD” on page 26. To start the wizard after the first time, press Media, select Settings and press OK, select Network and press OK, and then select the type of network connection and press OK.
- Page 26 Step 3: On Your Computer, If your firewall prompts you to allow the installed MediaSmart software programs to communicate, choose Unblock. The Insert the Installation CD program names are: HP MediaSmart Services Gateway Use the installation CD to install the software onto your computer, CinemaNow Media Manager and onto each computer on your network that has media you want to share with HP MediaSmart Connect.
- Page 27 Using the Installation CD Click to authorize Windows Media Player 11 to share media with your HP MediaSmart Connect. For more information about Windows Media Player, see Insert the HP MediaSmart Installation CD from the box into a “Chapter 7: Using Windows Media Player” on CD drive on your computer.
- Page 28 Step 4: Return to Your TV to IMPORTANT: If your wireless network is not listed, select Complete the Setup the Advanced mode and enter it manually. Point the MediaSmart remote control at the HP MediaSmart Connect, press the Right Arrow button to select Next, and Follow the onscreen instructions to finalize the set up of your then press OK.
-
Page 29: Enjoying
Press the Media button on the remote control to display the For information about using the HP MediaSmart Connect, see Media menu. To use the menu, see “Using the Media Menu” “Chapter 3: Using the Remote Control” on page 38. on page 50. -
Page 30: Table Of Contents
Table of Contents Installation Overview ............13 Regulatory and Safety Information ....4 System requirements ............13 Digital Television Transition Notice .........5 Setup time..............14 Interface Statement ...............5 Before you begin, have on hand........14 Modifications ...............6 Installation Steps ..............15 FCC and IC Statements ............6 Step 1: Connect Your HDTV to Your Cables ................7 HP MediaSmart Connect .............16... - Page 31 Step 4: Return to Your TV to Complete the Setup ....28 Chapter 4: Enjoying Music, Photos, Enjoying................29 and Videos .............50 Useful URLs ................29 Using the Media Menu............50 Using context buttons.............51 Chapter 1: Welcome ........33 Searching ..............52 Chapter 2: Connecting your Using Favorites .............52 HP MediaSmart Connect to your Viewing Photos ..............53...
- Page 32 Chapter 5: Using Online Media ...... 65 Using the Extender for Windows Media Center......82 Navigating..............82 Using the Online Media menu..........66 Controlling live TV............82 Setting Up the HP Online Media Services Account....67 Exiting .................83 Using the HP MediaSmart Services Gateway Software ....69 Resetting the Extender or changing the computer ....83 Using the HP Server software..........70 Unavailable Features ............84...
-
Page 33: Hp Mediasmart Connect
Chapter 1: Welcome Congratulations! Your HP MediaSmart Connect brings your digital entertainment Start using your HP MediaSmart Connect right now! To begin the and your treasured photo and music libraries from your computer installation, see “Getting Started” on page 12. and mass storage devices to your high-definition television (HDTV). - Page 34 The HP MediaSmart Connect is a digital media receiver that The HP MediaSmart Connect can also be set up to act as an enables easy browsing of all digital photos, music, and standard Extender for the Windows Media Center, if your computer has a and HD (high-definition) videos that you share from computers Microsoft Windows Vista Home Premium or Ultimate operating and devices on your home network.
-
Page 35: Chapter 2: Connecting Your Hp Mediasmart Connect To Your Home Network
Chapter 2: Connecting your HP MediaSmart Connect to your Home Network Before you can start using your HP MediaSmart Connect you For best wireless performance, HP recommends use of a need to connect it to your home network. You can use either an dual-band IEEE 802.11n Wi-Fi network (access point/router and Ethernet cable or the built in wireless antennas. -
Page 36: Improve Wireless Performance
Improve wireless performance * Your 802.11n router may have a single transmitter at 2.4 GHz or a Walls dramatically reduce the range of a wireless router. It is dual transmitter at both 2.4 GHz and 5 GHz. If it is available, select recommended that your router be placed in a room in the middle the 5 GHz mode for better coverage and performance. - Page 37 802.11n 802.11n Feature Wired LAN 5 GHz* 2.4 GHz* 802.11a 802.11g 802.11b Streaming and viewing high-definition Best Excellent Works but is video (HDTV) at the same time subject to RF recommended recommended recommended (computer with wired connection to interference network) Streaming standard-definition video Best Excellent...
-
Page 38: Chapter 3: Using The Remote Control
Chapter 3: Using the Remote Control Locating Controls and In this section, find the following useful information: “Locating Controls and Connectors” on page 38. Connectors “Identifying the Multifunction Remote Control Buttons” on page 41. The device contains a remote control sensor, a resolution indicator, buttons, connectors, and a drive bay for an optional “Selecting a Device to Control”... - Page 39 Front Front Description (continued) Status indicator Shows the current device status: Status Indicator Eject Lights blue: Device is on. Blinks blue: Device is in standby mode. Lights amber: Device is turning on. Lights red: An error occurred. Remote control Point the remote control at this area to operate sensor the device.
- Page 40 Back Back Description (continued) HDMI Connect the included HDMI cable to the HDTV. Component Power HDMI Component Connect the green, blue, and red Component Video Y, Pb, Pr Video Video cables (and left-right analog audio) to Y, Pb, Pr the HDTV when not using HDMI. Analog Audio Connect left-right audio cables for stereo sound R and L...
-
Page 41: Identifying The Multifunction Remote Control Buttons
Identifying the Multifunction Device selects the controlled device. To enjoy digital media or use the Extender for Windows Media Center feature, the Remote Control Buttons HP MediaSmart Connect must be the controlled device. Settings (Menu) displays the onscreen display (OSD) or settings This section describes each button on the remote control and its menu for the controlled device. - Page 42 Favorites displays the Favorites list or adds the current selection to the list. Arrows move the cursor in the menu screens. OK chooses the highlighted menu option. Guide displays the program guide for the controlled device or in Extender mode, if it is available on your computer. Back goes back one level on the menu.
- Page 43 Rewind reverses the play of the current media for the controlled device. Play starts or resumes play of the current media for the controlled device. Pause suspends play of the current media for the controlled device. Fast-Forward fast-forwards play of the current media for the controlled device.
-
Page 44: Selecting A Device To Control
Selecting a Device to Control To program the remote control for a specific device, see the next section, “Programming the remote control for a TV (device code)” on page 44. To use the Media menu, see “Using the Media Use the remote control to operate the HP MediaSmart Connect or Menu”... - Page 45 Selected Selected device device (indicator) Remote control operates (continued) (indicator) Remote control operates There is no default code, but you can set this HP MediaSmart Your HP MediaSmart Connect (only the to any of the supported device codes. Connect second device for volume mapping can be programmed for this mode).
- Page 46 Press and hold down the Device button on the remote control Enter the first four-digit code for your manufacturer from the for 5 seconds, until the device indicator light blinks, and then listing. If the code is accepted, the device indicator light release the Device button.
- Page 47 Repeat steps 1 through 6 for each device you want to control Locate the brand of your second device and the manufacturer with the remote control. codes. For device manufacturer codes, see the listing on the HP Web site at: This completes programming a primary device.
- Page 48 Programming the device code by using Enter the first four-digit code for your manufacturer from the listing. If the code is accepted, the device indicator light auto setup mode blinks twice. If the code is not accepted, the device indicator light blinks three times.
- Page 49 Point the remote control at the device, and then press and Once the device turns off, press the OK button on the remote release the On/Off button on the remote control once. Wait control to save the code. until the device indicator light stops blinking. If the device turns off, continue with step 6.
-
Page 50: Chapter 4: Enjoying Music, Photos, And Videos
Chapter 4: Enjoying Music, Photos, and Videos Using the Media Menu Press the Media button. The Media menu displays. To operate and use the Media menu: If necessary, turn on the TV, and then select the input source to view the HP MediaSmart Connect. If necessary, press the Device button on the remote control one or more times to light the HP MediaSmart Connect indicator. -
Page 51: Using Context Buttons
Online Media (globe icon), to access online media Continue by selecting items on the displayed menu: services. Press an Arrow button as needed to select an item, and Servers (PC icon, not shown in illustration), to access then press OK. servers. -
Page 52: Searching
Yellow (SAP) displays the search panel. To use the onscreen keyboard: Blue (Sleep) adds the item to the Favorites list. Press the Arrow buttons on the remote control to select an item or key on the onscreen keyboard, and then press Searching OK to enter your selection. -
Page 53: Viewing Photos
Viewing Photos The HP MediaSmart Connect and the Media button on the remote control provide a simple way to connect your TV to your computer or online services. This enables you to do the following: Use this feature to play photos, or to listen to background music while playing a photo slideshow. - Page 54 The screen shows your photos as thumbnail images or as Press OK to view the photo as a full-screen image. Press a list. Back or Stop to return to the thumbnails. Press an Arrow button to select a photo. In full-screen photo view: Press a Channel button to show the next page of photos.
-
Page 55: Watching A Slideshow While Listening To Music
Watching Video Files Watching a slideshow while listening to music Press the Media button on your remote control to display the Follow these steps to listen to your favorite music while playing a Media menu. photo slideshow: Press an Arrow button to select Videos, and then press OK. Press Media, select Music, and then select and start playing Press an Arrow button to select an option for video listings, music as described in “Playing music”... - Page 56 The screen shows your videos as thumbnail images or as a list. While playing a video, press Info to display a window of information for the video file. Press Info again to Press an Arrow button to select a video. close the window.
-
Page 57: Changing Video Options
Listening to Music During video play: Press the Green context button to switch the video Use this feature to play music, or to listen to background music between full screen and original size. while playing a photo slideshow. Press Stop to stop the video. Playing music Press Pause to pause the video. - Page 58 The screen shows your music as thumbnail images or as With music selected, you can press Play to start play. During a list. music play: Press an Arrow button to select a music file. Press Pause to pause the song until you press Play. Press a Channel button to show the next page music.
-
Page 59: Listening To Music While Playing A Slideshow
Viewing USB Photos, Music, When playing back DRM-protected content, license and Videos acquisition may delay play for several seconds. You can view media stored on an USB mass storage device or on Listening to music while playing a an HP Pocket Media Drive (PMD). Media can only be read from the mass storage device. - Page 60 Playback of Digital Rights Management (DRM)-protected content To view media stored on the USB device or stored on a mass storage device is not supported by HP PMD: HP MediaSmart Connect. Insert the device into a USB connector on the HP MediaSmart Connect, or insert the HP PMD into the PMD bay on the front.
-
Page 61: Selecting Servers
Selecting Servers Continue by selecting items: Press an Arrow button as needed to select an item, and You can set the type of Media Services servers displayed, and then press OK. select and view the server media. Or, you can: Press the Back button to go back one menu or to The Media menu shows the number of Media Services stop play. - Page 62 Press an Arrow button to select the type of servers Press an Arrow button to select a server, and then press OK. (All Servers or HP Approved Servers), and then The TV shows the available media on the server. press OK. You can select and play the media.
-
Page 63: Changing Settings
Changing Settings Press an Arrow button to select an option, and then press OK. The options are: Press the Media button on your remote control to display the Network Media menu. Demo Press an Arrow button to select Settings, and then Language press OK. - Page 64 Reset Options (to restart HP MediaSmart Connect or Slideshow return to factory settings) Video You can display this menu option by selecting Settings Servers from the Media menu and choosing Reset Options, or Software Update by pressing the Settings (Menu) button on the remote control and choosing Reset Options.
-
Page 65: Chapter 5: Using Online Media
Chapter 5: Using Online Media The HP MediaSmart Connect provides online access to thousands service you want to use, enter your HP Online Media Services of movies available to rent or own, and the simple HP interface account information, and then the service displays on your screen. enables you to begin watching movies moments after You can browse the service, and purchase (or rent) media and downloading has begun. -
Page 66: Using The Online Media Menu
Using the Online Media menu To use online media services: Press the Media button on your remote control to display the The Online Media option on the Media menu lists the various Media menu. media service providers. Check back periodically as new services Press an Arrow button to select Online Media, and then become available. -
Page 67: Setting Up The Hp Online Media Services Account
Setting Up the HP Online Then, complete the three steps that follow: Step 1: Create your user account on the HP Online Media Services Account Media Services Web site. This step enables you to link the Internet services that can be accessed from your HP MediaSmart This section describes how to register and access online media by Connect. - Page 68 Step 2: Register any existing media service accounts Step 3: At your HP MediaSmart Connect, access your online with HP. During this step, add your existing media service media services. During this step, you log in to your HP Online accounts to your HP Online Media user account so that you Media Services account and access your (registered) media access them through your HP MediaSmart Connect.
-
Page 69: Using The Hp Mediasmart Services Gateway Software
Using the HP MediaSmart The software is loaded onto your computer by the HP MediaSmart Connect Installation CD. Look for the Services Gateway Software icon on the Windows desktop. The HP MediaSmart Services Gateway software (also called the IMPORTANT: The HP MediaSmart Service Gateway HP Server) manages the downloading and storage of movies from software requires a Windows-based operating system;... -
Page 70: Using The Hp Server Software
Using the HP Server software From the HP Server menu, you can: View the current version of the software by selecting the When the software is open on the computer, the About option. HP Server icon appears on the Windows taskbar. If the HP Server icon is not on the taskbar, double-click the View messages, check the download progress, display the HP Server desktop icon. -
Page 71: Using The Hp Server Main Menu
Using the HP Server Main Menu To display the HP Server Main Menu, on the computer, right-click the HP Server icon on the taskbar, and then select HP Server Main Menu. The HP Server Main Menu displays in a browser window on your computer. -
Page 72
What’s New HP Online Media Services This option displays messages such as a message that your movie Click the HP Online Media Services option. A browser download is complete. Click the What’s New option to display window displays the HP Online Media Services Web site. a window that shows current messages of these types: Create your user account on the HP Online Media Services Play messages such as
... -
Page 73: Using Cinemanow Media Manager
Using CinemaNow Media Run Diagnostic Test Manager Click the Run Diagnostic Test option to start a series of diagnostic tests: The CinemaNow Media Manager software (also called CNMM) Checking Server status: Reports results as Server active, is installed onto your PC from the Installation CD. This software or Server paused. -
Page 74: Taskbar Icon Menu Selections
To open CinemaNow Media Manager, from your From the CinemaNow Media Manager menu, you can: computer, right-click the CNMM icon on the taskbar, and Display the CinemaNow Media Manager main menu by select Open Media Manager. selecting the Open Media Manager option. If the CNMM icon is not on the taskbar, double-click the Define settings by selecting the Options option. -
Page 75: Using Cinemanow Media Manager
Using CinemaNow Media Manager Rental movies that have been viewed have a status of Expired. Movies stay on the hard disk drive until you The CinemaNow Media Manager displays in a window on your take action to delete them. computer after selecting Open Media Manager on the taskbar Delete expired movies to free space on your computer icon menu. -
Page 76: Using Cinemanow Media Manager Options
Using CinemaNow Media Manager Options To display the Options menu, select Options on either the taskbar icon menu or from the Tools menu of the CNMM main window. The CinemaNow Media Manager Options menu has screens for each type of setting: General Storage Network... -
Page 77: Chapter 6: Using The Extender For Windows Media Center
Chapter 6: Using the Extender for Windows Media Center Setup of the Extender for Windows Media Center, if you have the Windows Vista Home Premium or Ultimate operating system, A Windows Vista computer can support up to four occurs during installation. (The HP MediaSmart Connect displays Extenders. -
Page 78: Using Digital Media: Mediasmart Versus The Extender For Windows Media Center
Using digital media: MediaSmart Extender for Windows Media Center interface was designed by Microsoft and is similar to Microsoft Media Center interface you versus the Extender for Windows see at the computer. Media Center For MediaSmart mode: To display the Media menu, press the Media button on the remote MediaSmart control. - Page 79 The following table lists some features of using digital media from your HP MediaSmart Connect for MediaSmart mode and for the Extender for Windows Media Center mode. Feature MediaSmart mode Extender mode Compatibility Computer with: Computer with Windows Vista Home Premium or Ultimate Media Center Edition 2005 operating system Windows XP (SP2) operating system or later...
- Page 80 Compatibility Streaming photos, music, and digital videos to your TV To use the Extender for Windows Media Center mode you need a computer running Windows Vista Home Premium or Ultimate. In Both MediaSmart and Extender for Windows Media Center contrast, the Media mode is compatible with a wider range of modes enable you to stream digital photos, music, and videos to computers or other media servers.
-
Page 81: Setting Up For The First Time
Setting Up for the First Time Access online media Both the MediaSmart and the Extender for Windows Media If you skipped the setup during installation, follow these steps: Center modes enable you to access online content directly from your TV. Using the MediaSmart mode, you access Internet-based Press the Media Center Green Start button on the remote services through the Online Media menu. -
Page 82: Using The Extender For Windows Media Center
Using the Extender for Go to the computer. The computer may automatically detect the HP MediaSmart Connect and prompt you to connect it as Windows Media Center an Extender. If it does, continue with step 4. After completing the Extender for Windows Media Center setup at If it does not, open Windows Media Center on your the computer, when you press the Media Center Green Start computer, select Tasks, select settings, and then click... -
Page 83: Exiting
Resetting the Extender or changing Press a Channel button (Ch+ or Ch--) to change the channel when watching live TV. the computer Press Recorded TV to display the Windows Media Center Recorded TV menu. Use the menu to watch pre-recorded TV Use these steps to reset the Extender for Windows Media Center programs. -
Page 84: Unavailable Features
Unavailable Features Select Windows Media Center, and then press OK. To reset the Extender, select Setup Extender, and then Some of the media experience features in Windows Media Center press OK. Follow the onscreen instructions. are not available when using the Extender for Windows Media Center: To change the host computer, select Remove Setup Media Center... - Page 85 Media Center Not available in the Extender for Media Center Not available in the Extender for menu (continued) Windows Media Center menu (continued) Windows Media Center CDs or DVDs Burn to CD Settings Music Burn to DVD Watch DVDs that are inserted in a Color Scheme DVD drive on the Windows Media Automatic Download Options...
-
Page 86: Chapter 7: Using Windows Media Player
Chapter 7: Using Windows Media Player Allowing and choosing folders You can use any UPnP-compliant server program to stream media to the HP MediaSmart Connect. HP recommends and supports to share Windows Media Player 11. During installation, the Windows Media Player 11 software At a shared computer, click the Windows Start button on installs on your computer, if it is not already installed. - Page 87 At the top of the Windows Media Player window, click If there is no Library tab in your Windows Media Player 11 Library, and then click Media Sharing. window, follow these steps: Press the ALT key to display the File menu, click Tools, and then click Options.
- Page 88 Example Windows Vista Media Sharing window The first time you display the Media Sharing window, the HP MediaSmart Connect may appear as an unidentified device. This is normal. Click the Device icon, and then click Allow. For Windows Vista, your home network must be a private network.
- Page 89 To change the default sharing options, click the Settings Click OK to close the Media Sharing window. button in the window. In the Media Sharing - Default Settings At the top of the Windows Media Player window, click window, you can specify how your computer is listed among Library, and then click Add to Library.
- Page 90 Example Advanced Options window Click OK. Wait while Windows Media Player automatically adds the media files from the selected folders to your Windows Media Player Library. The Windows Media Player Library does not copy the media files, but instead creates a link to each. The Library automatically monitors the folders you select, and updates the information when a file is added to, or deleted from, the monitored folders.
-
Page 91: Chapter 8: Troubleshooting
Chapter 8: Troubleshooting Refer to this section if you have startup, remote control, or media Did you program a second device for volume mapping? Turn on problems. the device. I do not see an image. There is no video. Startup questions Are the connections to the TV correct? Double-check that the Can I use an HDMI-to-DVI adaptor to connect the cables are properly inserted into the connectors. - Page 92 If you are using a power strip, make sure it is turned on. Make sure no obstacles are between the remote control and the sensor window on the front of the device. The color is strange, faded, or misaligned. Make sure the remote control is aimed at the device. If you are using the Component connectors for video, make sure the red, blue, and green cables are fully inserted into the proper The remote control does not control other home...
- Page 93 Media questions Make sure a firewall is not blocking the Windows Media Player from the network. Reset the Microsoft firewall settings I press Media on the remote control but nothing in Windows Media Player, or, if you are using another happens.
- Page 94 Check that your home network is a private network, because I cannot find the media files from the HP MediaSmart broadcast services and some UPnP programs may not work Connect that I know are in the folders I share on my through a virtual private network (VPN).
- Page 95 If it is necessary, restart the server from your computer, see “Using When viewing or playing media, the screen freezes. the HP Server software” on page 70. Unplug the HP MediaSmart Connect power adaptor, and then For more information about file formats, see “Supported Media plug it back in.
- Page 96 I try to playback a movie with Digital Rights My USB mass storage device is not recognized. Management (such as a download from CinemaNow) The HP MediaSmart Connect supports only USB mass storage but see an Unsupported format message even though devices with a FAT, FAT32, or NTFS file system.
-
Page 97: Chapter 9: Specifications
Chapter 9: Specifications Connectivity (continued) Connectivity Wired LAN (RJ-45 10/100 Ethernet (802.3) full-duplex Video output (screen 720p, and 1080i resolution on the TV Ethernet) 10/100 Mbps resolution) Wireless LAN Integrated IEEE 802.11n (draft 2.0) HDMI Out HDMI connector internal antennas wireless networking access, compatible Component Out Y, Pb, and Pr connectors... - Page 98 System requirements General Windows-based Media Center Edition 2005 with Rollup 2 Dimensions in D: 8.5 in (215.9 mm), computer inches (mm) W: 8.5 in (215.9 mm), Windows XP Home (32-bit only) with operating H: 1.8 in (45.7 mm) Service Pack 2 or later system Weight 3.5 lb.
- Page 99 System requirements (continued) Environment Also required A home network Operating 32º F to 95º F (0º C to 35º C) at 20% to temperature at 80% RH Broadband service for Internet access humidity (optional): For full functionality, high-speed Internet service is required Storage temperature –4º...
-
Page 100: Supported Media File Types
Supported Media File Types The codec (compressor and decompressor) is the method used to compress and decompress digital media files. Audio/video streams usually incorporate two separate codecs: one for the compressed video and one for the compressed audio. The MPEG IMPORTANT: This device supports the codec file formats codecs include profiles and levels, which are the minimum listed herein;... - Page 101 Examples of file containers are: MPEG-4, part 2, which is the basis for DivX, Xvid, and other low-bit-rate codecs. AVI (.avi) MPEG-4, part 10, also known as H.264 or Advanced QuickTime (.mov or .qt) Video Codec (AVC), which is the basis for HD-DVD and MP4 (.mp4) Blu-ray formats.
- Page 102 Windows Media Codecs. Microsoft has developed a MP4 file format is based on the Apple QuickTime file format, number of codecs, including: but is part of the MPEG-4 standard (MPEG-4, part 14). MP4 files use the .mp4 extension and support a variety of codecs, WMV7 and WMV8, which are early versions of the including the AAC and MPEG-4 (part 2 or part 10) codecs.
-
Page 103: Supported Media
MPG (.mpg) is the simplest possible file container for an For example, your HP MediaSmart Connect supports the playback MPEG video with associated audio. It usually supports of .mp4 files, but Windows Media Player 11 may not. If you do MPEG-2 video (MP@ML or MP@HL) and MPEG-2, Layer II, or not see your .mp4 files in the Windows Media Player Library, Dolby Digital audio. - Page 104 Table of Supported Media (MediaSmart Media mode) File extension Video Audio codecs DRM Support Photos only .jpg JPEG .png .bmp .gif Music only .m4a No Fairplay .mp3 .wma WMA, WMA Pro .wav LPCM .ogg Vorbis OGG Chapter 9: Specifications...
- Page 105 Table of Supported Media (MediaSmart Media mode) (continued) File extension Video Audio codecs DRM Support Audio/video .avi DivX, xvid (MPEG-4, ASP) MP2, MP3, Dolby Digital DivX DRM (2ch, 5.1ch) .divx Up to rev. 6.0 (MPEG-4 ASP) MP2, MP3, DivX DRM Dolby Digital (2ch, 5.1ch) .dvr-ms MPEG-2 video...
-
Page 106: Manufacturer Tv Codes
Manufacturer TV Akai 1002, 1209, 1227, 1233, 1234, Bradford, 1024, 1122 1236, 1451, 1452, 1456, 1499, 1546, Brillian 1241, 1242, 1243 codes 1562, 1575, 1580, 1581, 1585 Brockwood 1004 Albatron 1164 The following is a list of the four-digit Broksonic 1122, 1221, 1232, 1546 Alleron 1026 manufacturer device codes for televisions Candle 1004, 1006, 1007, 1110, 1209... - Page 107 C (manufacturer TV codes Dumont 1004, 1095, 1208 Fisher 1027, 1028, 1029, 1043, 1113, 1230, 1334 Durabrand 1122, 1191, 1217, continued) 1218, 1221 Fujitsu 1026, 1160, 1170, 1181, 1475, 1476, 1477, 1478, 1480 Dwin 1215 Craig 1024, 1122 Funai 1024, 1026, 1122, 1217, 1308, Electroband 1002, 1207 Crosley 1213 1497, 1606...
- Page 108 Havermy 1215 1502, 1558 JBL 1037, 1213 Hello Kitty 1220 Lloyd’s 1606 JC Penney 1004, 1005, 1006, 1007, Hewlett-Packard 1000, 1257, 1415, 1465, Loewe 1037 1009, 1014, 1030, 1031, 1033, 1034, 1474, 1544 Logik 1001 1042, 1049, 1063, 1064, 1107, 1108,...
- Page 109 M (manufacturer Montgomery Ward 1001 Orion 1023, 1121, 1221, 1232 Motorola 1003, 1109, 1215 Panasonic 1003, 1031, 1037, 1106, TV codes continued) 1129, 1140, 1202, 1211, 1219, 1277, MTC 1004, 1005, 1006, 1064, 1279, 1288, 1299, 1304, 1306, 1309, 1209, 1227 Matsushita 1219 1312, 1317, 1325, 1330, 1349, 1350, Multitech 1024, 1122, 1255...
- Page 110 P (manufacturer TV codes Pulsar 1004, 1095, 1208 Samsung 1004, 1005, 1006, 1008, 1013, 1063, 1064, 1065, 1107, 1108, 1127, Quasar 1003, 1031, 1040, 1129, 1211, continued) 1147, 1166, 1172, 1193, 1209, 1218, 1219, 1601, 1603, 1614 1227, 1234, 1236, 1255, 1300, 1302, Radio Shack 1028, 1043, 1122, 1143, Pioneer 1004, 1006, 1052, 1053, 1054, 1346, 1367, 1386, 1388, 1390, 1412,...
- Page 111 S (manufacturer TV codes Teknika 1001, 1004, 1005, 1006, 1007, Squareview 1119, 1217 1008, 1009, 1010, 1011, 1024, 1026, SSS 1004, 1024, 1122 continued) 1045, 1064, 1106, 1107, 1122, 1129, Starlite 1024, 1122 1140, 1213, 1214, 1227, 1229 Superscan 1215, 1266, 1584, 1593 Sharp 1004, 1006, 1008, 1017, 1020, Telecaption 1073 Supre-Macy 1110...
- Page 112 V (manufacturer TV Viking 1110 White Westinghouse 1158, 1221, 1283 Viore 1453 Yamaha 1004, 1005, 1006, 1013, 1167, codes continued) 1176, 1179, 1209 Vizio 1004, 1240, 1260 Zenith 1001, 1004, 1095, 1096, 1097, Wards 1001, 1004, 1005, 1006, 1013, Vector Research 1209 1098, 1208, 1214, 1218, 1221, 1254, 1015, 1021, 1026, 1030, 1037, 1044, Victor 1038, 1115, 1212...
-
Page 113: Index
Index ......41 Numerics audio cable Blue context ....13 .........42 analog (RCA-style) Channel ......97 10/100 Ethernet ......13 ........43 digital (optical) Clear .... 14 64-bit operating system ........51 auto setup mode for remote control context ..2 802.11n (IEEE wireless standard) ...... - Page 114 ........42 ........43 Mute Clear button ........43 Next closing the Windows Media cable ......83 Center window .........43 numbers .... 13 analog audio (RCA-style) ........ 65 CNMM ........42 ....... 18 Component ........74 ........41 icon On/Off ..13 digital audio cable (optical) ........ 96 ........43 codec Pause...
- Page 115 ..98 ......19 DLNA-compliant media servers Ethernet documentation and Installation CD Expired rental movies in ......3 dangerous voltage ....... 12 ......75 in the box CinemaNow ......63 Demo option (menu) ......100 Dolby Digital Extender for Windows device ....34 Media Center Download Queue ........44...
- Page 116 ..... 41 ..26 Green context button HP MediaSmart Services Gateway ...72 Green Start button HP Online Media Services ......64 factory setting ........51 ......70 icon Main Menu Failed to play media content ....... 42 Guide button using software from the .........95 message ......69...
- Page 117 ......23 ........38 HP Server indicator IR sensor ........70 ......41 ...14 icon device ISP (Internet Service Provider) ......71 ......45 ......12 Main Menu device lights items, in the box ....69 ........39 HP Server on the taskbar status ......65 ........
- Page 118 .........43 message Next button ..95 ........91 Failed to play media content no sound ....42 main menu, Media button ..72 ..........3 movie download complete note ....50 main menu, Media menu ....96 ......59 unsupported format NTFS file system ..45 manufacturer device codes ......
- Page 119 ....... 50 optical pictures icon ........40 ......... 43 audio Play button ......51 question mark icon .......97 ........57 audio connector play music ......17 ..59 connecting playing DRM-protected content ....13 digital audio cable playlist ......43 Record button ......52 options using Favorites .......42 Recorded TV button...
- Page 120 ...47 ......... 97 ........63 programing for volume mapping RJ-45 Settings ......44 ........19 ........63 programming router options ..45 ....... 73 ....41 programming device codes Run Diagnostic Test Settings (Menu) button ....46 programming reset setup ....29 ......26 response to buttons at the computer .....106 .........23 ......
- Page 121 status viewing ......73 .....53 checking server photos, slideshow ... 96 unsupported format message .........39 indicator slideshow while listening updates ......55 to music .........43 Stop button ....... 65 accepting ........55 ......99 videos storage temperature ........22 UPnP ......42 .........66 Volume button subscription ..
- Page 122 ..22 Windows Media Player wizard ..34 ........25 Windows Vista Home Premium setup ....34 ........27 Windows Vista Ultimate sharing ....14 wired WPA passphrase ......16 ........ 51 network type wrench icon ........28 setup wireless ........40 antennas ....97 Y, Pb, and Pr connectors ......16 ....
- Page 123 Installation et Manuel de l’utilisateur HP MediaSmart Connect x280n...
- Page 124 Cupertino, CA 95015-4010 de Microsoft Corporation aux États-Unis. Le logo Windows et Windows Vista sont des marques de commerce Copyright © 2008 Hewlett-Packard Development Company, L.P. ou des marques déposées de Microsoft Corporation aux États-Unis et/ ou dans d’autres pays/régions.
- Page 125 CERTIFIÉ Wi-Fi 802.11n basé sur Draft 2.0 ATTENTION : L’encadré indique que le non-respect de Draft 2.0 fait référence à la version de la norme IEEE 802.11n pas ces instructions présente des risques pour le matériel et encore homologuée utilisée pour tester le Wi-Fi Alliance de juin 2007. les informations qu’il contient.
- Page 126 Informations sur la réglementation et la sécurité AVERTISSEMENT : Afin d’éviter tout risque de choc AVERTISSEMENT : L’encadré indique qu’il y a risque de électrique, n’enlevez ni le capot ni le panneau arrière. dommages matériels, de perte d’informations et de blessures graves, voire mortelles, si les instructions ne Le téléviseur ne contient aucune pièce réparable par sont pas suivies correctement.
- Page 127 Notice sur la transition vers un AVERTISSEMENT : Ne placez pas l’appareil sur un téléviseur numérique chariot, un support, un trépied, une patte de fixation ou une table instables. Il pourrait tomber, causer des blessures graves et subir des dommages importants. Notice sur la transition vers un téléviseur numérique : Utilisez uniquement un meuble roulant, un support, Après le 17 février 2009, un téléviseur équipé...
- Page 128 Normes d’interface Cet appareil est conforme à la norme RSS-210 d’Industry Canada. Les radars haute puissance sont accordés aux utilisateurs Ce matériel a été testé et jugé conforme aux normes de la classe principaux (ils ont donc la priorité) des bandes 5250 à 5350 B concernant les équipements numériques, selon l’article 15 de la MHz et 5650 à...
-
Page 129: Normes De La Fcc Et De L'ic
FCC, toute modification de cet équipement non approuvée Cet équipement fonctionnera avec une fréquence de 5,15 à 5,25 expressément par la Hewlett-Packard Company peut engendrer GHz, et en intérieur uniquement. une interférence dangereuse et annuler l’autorisation de la FCC relative à... - Page 130 Consignes de sécurité Nettoyez l’appareil uniquement avec un chiffon microfibre. Humidifiez au besoin le chiffon avec un peu d’eau. N’utilisez importantes jamais de solvants ou de solutions nettoyantes abrasives pour nettoyer cet appareil. Vous risqueriez de l’endommager L’électricité remplit de nombreuses fonctions utiles, mais si on sérieusement.
- Page 131 10 Veillez à ce que l’on ne marche pas sur le cordon 15 Surcharge électrique : ne surchargez pas la capacité d’alimentation ou qu’on ne l’écrase pas, plus particulièrement électrique des prises murales, des rallonges ou des prises aux alentours des raccordements électriques et des prises de multiples intégrées pour éviter tout risque d’incendie ou de courant et à...
- Page 132 19 Branchez le bloc d’alimentation à une prise de courant Aération : les évents et autres ouvertures d’aération du cadre électrique dans un endroit où le connecteur du bloc sont destinés à l’aération uniquement. Ne les recouvrez et ne d’alimentation est accessible facilement, au cas où les obstruez pas car une aération insuffisante risquerait de l’alimentation devrait être débranchée.
-
Page 133: De Hp
Informations sur le recyclage : Afin d’éviter les risques d’incendies, ne jamais placer une bougie ou tout autre type de flamme au-dessus ou à programme Planet Partners proximité du récepteur. Pour éviter les risques d’incendie ou de choc électrique, de HP veillez à... -
Page 134: Précautions De Nettoyage
Précautions de nettoyage Débranchez le HP MediaSmart Connect avant tout nettoyage. L’utilisation de solvants, comme l’alcool, ou de matières abrasives comme les lingettes humidifiées ou traitées chimiquement, peut altérer la peinture. N’exposez pas l’appareil à des gaz volatiles ou à des fluides comme les pesticides. -
Page 135: Identification Des Éléments Présents Dans L'emballage
Introduction Veillez à bien lire toutes les informations de sécurité et les Adaptateur d’alimentation CA précautions d’usage avant de commencer l’installation. Reportez- vous aux rubriques suivantes : « Informations sur la réglementation et la sécurité » à la page 4 Câble HDMI (High-Definition Multimedia Interface) utilisé... -
Page 136: Configuration Requise
Présentation de l’installation Autres câbles dont vous pourriez avoir besoin Cette section présente la configuration requise, la durée de la configuration, les éléments nécessaires et les quatre étapes de Câbles en option Utilisation l’installation du HP MediaSmart Connect. Composantes vidéo Raccorder la vidéo au téléviseur haute définition, à... -
Page 137: Durée De La Configuration
® Le Conseiller de mise à niveau Windows Vista peut vous aider à Système d’exploitation Windows Vista Édition Familiale déterminer les fonctionnalités de Windows Vista qui peuvent Basique (32 bits/64 bits) fonctionner sur votre ordinateur. Pour télécharger l’outil, visitez le Système d’exploitation Windows Vista Édition Familiale site Web de Microsoft à... -
Page 138: Tapes De L'installation
REMARQUE : Pour une connexion réseau sans fil, vous Si vous utilisez une connexion câblée (Ethernet), raccordez le pourriez avoir besoin des éléments suivants : périphérique à votre réseau domestique. Le nom ou SSID (service set identifier) de votre réseau et les Raccordez le périphérique à... -
Page 139: Choix D'un Bon Emplacement
Étape 1 : Raccordez votre Permettre au Lecteur Windows Media 11 de partager des médias avec le HP MediaSmart Connect. téléviseur haute définition à Enregistrer votre périphérique auprès de HP. votre HP MediaSmart Connect Créer gratuitement votre compte services Média en ligne HP. Reportez-vous à... - Page 140 Longueur de l’adaptateur d’alimentation : choisissez un Pour une connexion vidéo optimale au téléviseur, utilisez le emplacement avec un accès facile à la prise de courant connecteur HDMI et le câble HDMI fournis. électrique. Si vous avez un récepteur de son d’ambiance raccordé au Longueur des câbles et éloignement des périphériques : téléviseur haute définition, raccordez le HP MediaSmart Connect vérifiez que les câbles puissent atteindre le téléviseur, et les...
- Page 141 Connecteur HDMI Choisissez les instructions d’installation qui correspondent à votre utilisation du connecteur vidéo du téléviseur haute définition et du Branchez le câble HDMI à l’arrière de votre périphérique puis au système audio externe. téléviseur. Connecteur vidéo Instructions d’installation HDMI «...
- Page 142 Connecteur HDMI et système audio Jeu de connecteurs en composantes externe Branchez les câbles en composantes à l’arrière de votre périphérique puis au téléviseur haute définition, Branchez le câble HDMI à l’arrière de votre périphérique conformément aux couleurs des fiches des connecteurs. puis au téléviseur haute définition.
- Page 143 Jeu de connecteurs en composantes et Raccordement à votre réseau système audio externe domestique (réseau local) Branchez les câbles en composantes à l’arrière de votre Raccordez le HP MediaSmart Connect au routeur dans votre périphérique puis au téléviseur haute définition, réseau local : conformément aux couleurs des fiches des connecteurs.
- Page 144 Alimentation Branchez l’adaptateur d’alimentation CA au connecteur sur IMPORTANT : Le HP MediaSmart Connect n’a aucun votre périphérique puis à la prise de courant électrique. Le bouton d’alimentation, appuyez sur le bouton On/Off HP MediaSmart Connect se met sous tension. (Marche/Arrêt) de la télécommande pour le mettre en mode veille et pour le sortir de ce mode, ou débranchez l’adaptateur d’alimentation pour l’éteindre...
- Page 145 Refermez le capot. Ne mélangez pas différents types de piles (alcalines et carbone-zinc par exemple) ou de vieilles piles avec des piles neuves. Lorsque vous insérez les piles, assurez-vous que la polarité est correcte comme indiqué dans leur compartiment. Une inversion de la polarité...
- Page 146 Étape 2 : Suivez l’assistant Pour un réseau sans fil, vous devez connaître le nom ou SSID, ainsi que les informations de sécurité (la clé WEP ou la phrase de d’installation de votre passe WPA) du réseau. téléviseur haute définition ®...
-
Page 147: Configurer Le Téléviseur
Configurer le téléviseur Appuyez une ou plusieurs fois sur le bouton Device (Périphérique) de la télécommande pour allumer le témoin HP MediaSmart Connect. Si nécessaire, allumez le téléviseur puis sélectionnez la source d’entrée pour afficher le HP MediaSmart Connect. L’écran de résolution du téléviseur s’affiche. REMARQUE : l’écran de résolution du téléviseur ne s’affiche pas si la résolution est automatiquement détectée. - Page 148 Orientez la télécommande vers le HP MediaSmart Connect, et suivez les instructions. Si vous ne voyez pas l’écran de résolution du téléviseur, passez à l’étape 4. Pour sélectionner la résolution : Quelle est la meilleure résolution, 720p ou 1080i ? La résolution d’écran dépend de votre téléviseur, et bien souvent ne fait que peu de différence.
- Page 149 Un assistant vous guide pour la configuration. Lorsque vous y êtes invité, laissez le téléviseur tel quel et poursuivez avec « Étape 3 : Insérez le CD d’installation dans votre ordinateur » à la page 28. Pour démarrer l’assistant par la suite, appuyez sur Media (Média), sélectionnez Settings (Paramètres) et appuyez sur OK, sélectionnez Network (Réseau), appuyez sur OK, puis sélectionnez le type de connexion...
-
Page 150: Sur Votre Ordinateur
Étape 3 : Insérez le CD Si votre pare-feu vous invite à autoriser les programmes logiciels MediaSmart à communiquer, choisissez Débloquer. Les noms d’installation dans votre des programmes sont : ordinateur HP MediaSmart Services Gateway CinemaNow Media Manager Utilisez le CD d’installation pour installer le logiciel sur votre ordinateur, et sur chaque ordinateur de votre réseau renfermant IMPORTANT : Acceptez toujours les mises à... - Page 151 Utilisation du CD d’installation Cliquez pour permettre au Lecteur Windows Media 11 de partager des médias avec le HP MediaSmart Connect. Pour plus d’informations concernant le Lecteur Insérez le CD d’installation du HP MediaSmart fourni dans le Windows Media, reportez-vous à la section « Chapitre 7 lecteur de CD de votre ordinateur.
- Page 152 Étape 4 : Retournez à votre Pour la saisie, utilisez le clavier virtuel : téléviseur haute définition Appuyez sur un bouton fléché de la télécommande pour pour terminer l’installation sélectionner un élément ou une touche sur le clavier virtuel, puis appuyez sur OK. Orientez la télécommande MediaSmart vers le HP MediaSmart Connect, appuyez sur le bouton fléché...
- Page 153 Profiter Suivez les instructions à l’écran pour finaliser la configuration du réseau. L’assistant vérifie le réseau, l’adresse IP et l’accès Internet via le réseau. Pour plus d’informations concernant le Vous pouvez maintenant profiter des médias numériques sur votre raccordement de votre périphérique à votre réseau téléviseur haute définition.
- Page 154 Adresses utiles Pour plus d’informations concernant l’utilisation du HP MediaSmart Connect, reportez-vous à la section « Chapitre 3 : Utilisation de la télécommande » à la page 41. Visitez les sites Web HP suivants : Pour plus d’informations concernant la lecture de médias Pour obtenir plus d’aide, des documents pratiques, les FAQ numériques, reportez-vous à...
-
Page 155: Table Des Matières
Table des matières Présentation de l’installation..........14 Informations sur la réglementation et Configuration requise ............14 la sécurité............4 Durée de la configuration ..........15 Notice sur la transition vers un téléviseur numérique....5 Ce dont vous devez vous munir avant de commencer ..15 Normes d’interface ...............6 Étapes de l’installation ............16 Modifications ...............7 Étape 1 : Raccordez votre téléviseur haute définition à... - Page 156 Étape 4 : Retournez à votre téléviseur haute définition pour Chapitre 4 : Profiter de la musique, des terminer l’installation ............30 photos et des vidéos ........54 Profiter ................31 Utilisation du menu Media (Média)........54 Adresses utiles..............32 Utilisation des boutons contextuels ........56 Recherche ..............56 Table des matières ..........33 Utilisation des favoris ............57...
- Page 157 Chapitre 5 : Utilisation du menu Online Utilisation de l’Extender pour Windows Media Center ....87 Media (Média en ligne) ........69 Navigation..............87 Contrôle de la télévision en direct ........88 Utilisation du menu Online Media (Média en ligne) ....70 Sortie ................88 Configuration du compte Services Média en ligne HP .....71 Réinitialisation de l’Extender ou changement Utilisation du logiciel HP MediaSmart Services Gateway ..73 d’ordinateur ..............89...
-
Page 158: Chapitre 1 : Bienvenue
Chapitre 1 : Bienvenue Félicitations ! Votre HP MediaSmart Connect permet de transférer vos Profitez tout de suite de votre HP MediaSmart Connect ! Pour divertissements numériques et vos photos et musiques préférées de commencer l’installation, reportez-vous à la section « Introduction » votre ordinateur et vos périphériques de stockage de masse vers à... - Page 159 Le HP MediaSmart Connect est un récepteur média numérique Le HP MediaSmart Connect peut également être configuré pour qui permet de parcourir facilement les photos numériques, servir d’Extender pour le Windows Media Center, si votre les musiques, ainsi que les vidéos standard et HD (haute définition) ordinateur a un système d’exploitation Microsoft Windows Vista que vous partagez entre ordinateurs et périphériques sur votre Édition Familiale Premium ou Édition Intégrale.
-
Page 160: Chapitre 2 : Connexion De Votre Hp Mediasmart Connect À Votre Réseau Domestique
Chapitre 2 : Connexion de votre HP MediaSmart Connect à votre réseau domestique Avant de pouvoir utiliser votre HP MediaSmart Connect, vous En vue des meilleures performances sans fil, HP recommande devez le connecter à votre réseau domestique. Vous pouvez l’utilisation d’un réseau Wi-Fi IEEE 802.11n à... -
Page 161: Améliorer Les Performances Sans Fil
Améliorer les performances Les routeurs 802.11n* et 802.11a de 5 GHz offrent davantage de canaux et sont moins soumis aux interférences Wi-Fi. Parfois, sans fil le fait d’orienter les antennes de votre routeur ou de placer le routeur à au moins 18 pouces (457 mm) du sol peut améliorer Les murs réduisent considérablement la portée d’un routeur sans votre réception. - Page 162 réseau local 802.11n 802.11n Fonction câblé 5 GHz* 2,4 GHz* 802.11a 802.11g 802.11b Transmission et affichage simultanés Optimale Excellente Fonctionne Déconseillée Déconseillée Déconseillée de la vidéo haute définition (HDTV) mais est (ordinateur avec connexion câblée soumise à des au réseau) interférences radio Transmission de vidéo à...
-
Page 163: Chapitre 3 : Utilisation De La Télécommande
Chapitre 3 : Utilisation de la télécommande Emplacements des commandes Dans cette section, vous trouverez les informations utiles suivantes : « Emplacements des commandes et des connecteurs » à la et des connecteurs page 41. « Présentation des boutons de la télécommande multifonction Le périphérique présente un télécapteur, un témoin de résolution, »... - Page 164 Façade avant Façade avant Description (suite) Permet de connecter un périphérique de stockage de masse USB (Universal Serial Bus) en option. Témoin d’état Affiche l’état actuel du périphérique : Voyant bleu : le périphérique est sous tension. Bleu clignotant : le périphérique est en mode veille.
- Page 165 Façade arrière Façade arrière Description (suite) Sortie audio Branchez un câble optique pour avoir du son numérique numérique sur un système audio externe. (optique) HDMI Branchez le câble HDMI fourni au téléviseur haute définition. Composantes Branchez les câbles de composantes vidéo vidéo vert, bleu et rouge (et audio analogique Y, Pb, Pr...
-
Page 166: Présentation Des Boutons De La Télécommande Multifonction
Les témoins affichent le périphérique commandé par la IMPORTANT : Les antennes du réseau local sans fil télécommande : HP MediaSmart Connect, TV, CBL, DVD, et AUX. sont internes au HP MediaSmart Connect et peuvent Source affiche le menu Source pour le périphérique commandé. connecter le périphérique à... - Page 167 Sleep (Veille) (contextuel bleu) sélectionne l’heure de mise Media (Média) affiche le menu Media (Média). En mode Extender, cela arrête la lecture du média et quitte le mode Extender. hors tension du téléviseur en mode TV. Dans le menu Media (Média), cela a une action spécifique sur le menu ou élément Live TV (TV en direct) affiche la TV en direct pour le en cours.
- Page 168 Channel (Canal) (Ch+, Ch–) déplace une page vers le haut ou Device Menu (Menu Périphérique) affiche le contenu ou le le bas dans les listes de médias. Sélectionne la chaîne supérieure menu DVD pour le périphérique commandé. ou inférieure pour le périphérique commandé (comme le tuner Record (Enregistrement) démarre l’enregistrement pour le TV de votre ordinateur en mode Extender, s’il est disponible).
-
Page 169: Sélection D'un Périphérique À Commander
Les touches numériques permettent de saisir des nombres. Dans Pour utiliser la télécommande, orientez-la vers le télécapteur certains menus, elles vous permettent également de sélectionner situé à l’avant du périphérique commandé. Le capteur du un nombre ou un caractère en appuyant dessus une ou plusieurs HP MediaSmart Connect se trouve au milieu de la façade avant fois pour faire défiler, puis en appuyant sur Entrée. -
Page 170: Programmation De La Télécommande Pour Un Téléviseur (Code Du Périphérique)
Programmation de la Périphérique sélectionné Ce que commande la télécommande télécommande pour un téléviseur (témoin) (suite) (code du périphérique) Votre téléviseur. Le code par défaut est défini pour le téléviseur haute définition HP (code N’importe quel périphérique peut être programmé pour chaque de fabricant 1000), mais vous pouvez le témoin de télécommande, sauf le témoin du HP MediaSmart changer en n’importe quel code du... - Page 171 Étapes de la programmation Appuyez sur le bouton Device (Périphérique) de la télécommande et maintenez-le enfoncé pendant 5 secondes Suivez ces étapes pour programmer la télécommande pour le jusqu’à ce que le témoin lumineux clignote, puis relâchez-le. téléviseur. Le témoin du périphérique clignote alors encore une fois puis reste allumé, indiquant ainsi que votre télécommande est en Les étapes sont les mêmes pour les autres témoins du périphérique.
- Page 172 Entrez le premier code à quatre chiffres de votre fabricant issu de la liste. Si le code est accepté, le témoin lumineux du Si le périphérique n’est pas doté d’un bouton On/Off périphérique clignote deux fois. Si le code est refusé, le (Marche/Arrêt), appuyez sur Play (Lecture).
- Page 173 Pour le HP MediaSmart Connect et chaque périphérique (TV, CBL, Appuyez sur le bouton Device (Périphérique) de la DVD ou AUX) que vous programmez afin de les commander télécommande et maintenez-le enfoncé pendant 5 secondes avec la télécommande, vous pouvez programmer un deuxième jusqu’à...
- Page 174 Orientez la télécommande vers le deuxième périphérique et Mettez le périphérique à programmer sous tension. appuyez sur le bouton Mute (Muet). Le son doit s’éteindre. Appuyez une ou plusieurs fois sur le bouton Device En l’absence de réponse, répétez les étapes 5 et 6 en (Périphérique) de la télécommande pour sélectionner le essayant chaque code pour votre marque jusqu’à...
- Page 175 Orientez la télécommande vers le périphérique, appuyez Une fois le périphérique éteint, appuyez sur la touche OK de une fois sur le bouton On/Off (Marche/Arrêt) de la la télécommande pour enregistrer le code. télécommande puis relâchez-le. Patientez jusqu’à ce que le témoin lumineux cesse de clignoter.
-
Page 176: Chapitre 4 : Profiter De La Musique, Des Photos Et Des Vidéos
Chapitre 4 : Profiter de la musique, des photos et des vidéos Utilisation du menu Media Appuyez sur le bouton Media (Média). Le menu Media (Média) apparaît à l’écran. (Média) Pour faire fonctionner et utiliser le menu Media (Média) : Si nécessaire, allumez le téléviseur puis sélectionnez la source d’entrée pour voir le HP MediaSmart Connect Si nécessaire, appuyez une ou plusieurs fois sur le bouton... - Page 177 Le menu Media (Média) affiche ces options (qui défilent) : Il y a en plus les options suivantes en bas de l’écran : Photos (icône représentant des images), pour accéder à What’s New? (Nouveautés) (icône représentant une vos photos. enveloppe), pour voir des messages comme une confirmation de fin de téléchargement du film.
-
Page 178: Utilisation Des Boutons Contextuels
Recherche Appuyer sur le bouton Info (Infos) pour afficher des informations sur une photo, une vidéo ou un fichier Vous pouvez rechercher selon ces critères : musical. Photos : Nom, Date, Mot-clé Utilisation des boutons contextuels Vidéos : Titre, Acteur, Date L’utilisation d’un bouton contextuel de la télécommande entraîne Musique : Artiste, Album, Chanson une action spécifique sur le menu ou l’élément Media (Média) -
Page 179: Utilisation Des Favoris
Pour utiliser le clavier virtuel : Le bouton HP MediaSmart Connect et le boutonMedia (Média) de la télécommande permettent de connecter simplement votre Appuyez sur les boutons fléchés de la télécommande téléviseur à votre ordinateur ou aux services en ligne. Vous pour sélectionner un élément ou une touche sur le clavier pouvez alors : virtuel puis appuyez sur OK pour entrer votre sélection. -
Page 180: Affichage De Photos
Affichage de photos Playlists (Listes de lecture) Folders (Dossiers) Utilisez cette fonction pour lire des photos ou pour écouter un fond Favorites (Favoris) musical lors de la lecture d’un diaporama de photos. Vos photos apparaissent à l’écran sous forme d’aperçus ou Lecture de photos ou d’un d’une liste. -
Page 181: Regarder Un Diaporama En Écoutant De La Musique
" Appuyez sur la touche Pause pour interrompre un " Appuyez sur le bouton contextuel jaune pour morceau, un diaporama ou un diaporama musical. effectuer un zoom sur la photo (agrandir). Appuyez de nouveau sur ce bouton pour parcourir les Appuyez sur Next (Suivant) pour passer à... -
Page 182: Modification Des Options De Diaporama
Modification des options de Downloaded (Téléchargé) (vidéos téléchargées sur votre ordinateur) diaporama Online (En ligne) (films disponibles sur les services Parmi les options du diaporama, il y a des intervalles, des Média en ligne) transitions, un ordre et de la musique automatique. Choisissez les Playlists (Listes de lecture) options de diaporama dans le menu Settings (Paramètres), Folders (Dossiers) - Page 183 Appuyer sur le bouton contextuel jaune pour afficher le Lors de la lecture de contenu protégé par DRM (gestion panneau de recherche. des droits numériques), l’acquisition d’une licence peut Appuyer sur le bouton contextuel vert pour afficher la retarder le processus de quelques secondes. liste sous sa forme initiale ou sous forme d’aperçus.
-
Page 184: Modification Des Options Vidéo
Modification des options vidéo Appuyez sur un bouton fléché pour sélectionner une option pour les listes musicales, puis appuyez sur OK. Les options Vous pouvez régler l’option de répétition pour les vidéos. disponibles sont : Choisissez les options vidéo dans le menu Settings (Paramètres). All Music (Toute la musique) Pour plus d’informations, reportez-vous à... - Page 185 Pour l’affichage All Music (Toute la musique) : Appuyez sur Fast-Forward (Avance rapide) pour accélérer la lecture de la musique. Appuyez sur le bouton contextuel rouge pour sélectionner l’option Repeat (Répéter). Appuyez sur Rewind (Rembobinage) pour revenir en arrière dans la lecture de la musique. Appuyez sur le bouton contextuel vert pour sélectionner l’option Shuffle (Lecture aléatoire).
-
Page 186: Écouter De La Musique En Regardant Un Diaporama
Écouter de la musique en Les médias ne peuvent être lus qu’à partir du périphérique de stockage de masse. HP MediaSmart Connect ne peut pas écrire regardant un diaporama sur le périphérique de stockage de masse ni le formater. Le HP MediaSmart Connect ne prend en charge que des Pour écouter votre musique préférée en regardant un diaporama, périphériques de stockage de masse USB avec un système de procédez comme suit :... - Page 187 Pour afficher les médias stockés sur le Appuyez sur un bouton fléché pour sélectionner un élément, puis appuyez sur OK. périphérique USB ou le HP PMD : Continuez en sélectionnant les éléments : Insérez le périphérique dans un connecteur USB sur le Appuyez sur l’un des boutons fléchés pour sélectionner HP MediaSmart Connect, ou insérez le HP PMD dans la un élément, puis appuyez sur le bouton OK.
-
Page 188: Sélection Des Serveurs
Sélection des serveurs Appuyez sur un bouton fléché pour sélectionner Serveurs, puis appuyez sur OK. Vous pouvez définir le type de serveurs de Media Services Faites de même pour sélectionner le type de serveurs (services Média) affichés, puis sélectionner et afficher le média (Tous les serveurs ou Serveurs approuvés HP), du serveur. -
Page 189: Modification Des Paramètres
Modification des paramètres Appuyez sur un bouton fléché pour sélectionner un serveur, puis appuyez sur OK. Les médias disponibles s’affichent sur le serveur de votre Appuyez sur le bouton Media (Média) de votre téléviseur. télécommande pour afficher le menu Media (Média). Vous pouvez sélectionner le média souhaité... - Page 190 Réinitialiser les options (pour redémarrer le Chacune de ces actions redémarre le HP MediaSmart HP MediaSmart Connect ou revenir aux paramètres Connect et maintient vos paramètres personnels. par défaut) Pour réinitialiser le HP MediaSmart Connect, sélectionnez Vous pouvez afficher cette option de menu en Restore to Factory Settings (Restaurer les sélectionnant Settings (Paramètres) dans le menu paramètres par défaut) dans le menu Reset Options...
-
Page 191: Chapitre 5 : Utilisation Du Menu Online Media (Média En Ligne)
Chapitre 5 : Utilisation du menu Online Media (Média en ligne) Le HP MediaSmart Connect propose un accès en ligne à des Enregistrez votre compte avec chacun des services pris en milliers de films disponibles à l’achat ou à la location ; grâce à charge en entrant le nom d’utilisateur et le mot de passe du l’interface simple à... -
Page 192: Utilisation Du Menu Online Media (Média En Ligne)
Les logiciels HP MediaSmart Services Gateway et CinemaNow Avant toute utilisation, le fournisseur de services de médias peut Media Manager, utilisés pour accéder aux médias en ligne, requérir l’acquisition d’un abonnement, d’un compte ou de toute s’installent automatiquement sur votre ordinateur à partir du CD autre configuration effectuée directement depuis votre ordinateur. -
Page 193: Configuration Du Compte Services Média En Ligne Hp
Appuyez sur un bouton fléché pour sélectionner un nom de Ensuite, procédez aux trois étapes suivantes : service, puis appuyez sur OK. Lorsque vous y êtes invité, Étape 1 : Créez votre compte d’utilisateur sur le site entrez les nom et mot de passe du compte d’utilisateur Web des services de média en ligne HP. - Page 194 Cliquez sur Ajouter des services de Étape 3 : accédez à vos services de médias en ligne sur votre divertissement. HP MediaSmart Connect. Au cours de cette étape, vous vous connectez à votre compte de services Média en ligne HP et accédez à...
-
Page 195: Utilisation Du Logiciel Hp Mediasmart Services Gateway
Utilisation du logiciel Le logiciel est chargé sur votre ordinateur par le CD d’installation du HP MediaSmart Connect. Recherchez HP MediaSmart Services l’icône sur le bureau Windows. Gateway IMPORTANT : Le logiciel HP MediaSmart Service Gateway requiert un système d'exploitation Windows, Le logiciel HP MediaSmart Services Gateway (également appelé... -
Page 196: Utilisation Du Logiciel Hp Server
Utilisation du logiciel HP Server À partir du menu HP Server, vous pouvez : Afficher la version actuelle du logiciel en sélectionnant Lorsque le logiciel est lancé sur l’ordinateur, l’icône l’option About (À propos de). HP Server apparaît sur la barre des tâches Windows. Dans le cas contraire, double-cliquez sur l’icône Afficher des messages, vérifiez la progression du HP Server du bureau. -
Page 197: Utilisation Du Menu Principal De Hp Server
Utilisation du Menu principal de HP Server Pour afficher le menu principal de HP Server , sur l’ordinateur, cliquez avec le bouton droit de la souris sur l’icône HP Server sur la barre des tâches, puis sélectionnez HP Server Main Menu (Menu principal de HP Server). - Page 198 What’s New (Nouveautés) Download Queue (File d’attente de téléchargement) Cette option affiche les messages, par exemple pour indiquer que le téléchargement de votre film est terminé. Cliquez sur l’option Cliquez sur l’option Download Queue (File d’attente de What’s New (Nouveautés) pour ouvrir une fenêtre qui téléchargement) pour ouvrir une fenêtre qui affiche la liste de affiche les messages actuels tels que : films en attente de téléchargement vers l’ordinateur.
- Page 199 HP Online Media Services Pour plus d’informations concernant la configuration de vos comptes de service ou l’utilisation des services Média en ligne, (Services Média en ligne HP) reportez-vous à la section « Chapitre 5 : Utilisation du menu Online Media (Média en ligne) » à la page 69, ou visitez le site Cliquez sur l’option HP Online Media Services Web HP à...
-
Page 200: Utilisation De Cinemanow Media Manager
Utilisation de CinemaNow CNMM est toujours ouvert, et son icône est visible sur la barre des tâches Windows. Si CNMM n’est pas ouvert sur l’ordinateur, vous Media Manager ne pouvez pas accéder à certaines fonctions de CinemaNow à partir du HP MediaSmart Connect. Le logiciel CinemaNow Media Manager (également appelé... -
Page 201: Sélections Dans Le Menu Des Icônes De La Barre Des Tâches
Sélections dans le menu des icônes À partir du menu CinemaNow Media Manager, vous pouvez : de la barre des tâches Afficher le menu principal de CinemaNow Media Manager en sélectionnant l’option Open Media Manager (Ouvrir Utilisez le logiciel CinemaNow Media Manager sur l’ordinateur Media Manager). -
Page 202: Utilisation De Cinemanow Media Manager
Utilisation de CinemaNow Les films loués qui ont été visionnés affichent un statut Expiré. Les films restent sur le disque dur jusqu’à ce que Media Manager vous les supprimiez. CinemaNow Media Manager s’affiche dans une fenêtre sur votre Supprimez les films expirés pour libérer de l’espace sur ordinateur une fois que vous avez sélectionné... -
Page 203: Utilisation Des Options De Cinemanow Media Manager
Utilisation des options de CinemaNow Media Manager Pour afficher le menu Options, sélectionnez Options dans le menu des icônes de la barre des tâches ou dans le menu Outils de la fenêtre principale de CNMM. Le menu Options de CinemaNow Media Manager présente des écrans pour chaque type de paramètre : Général Stockage... -
Page 204: Chapitre 6 : Utilisation De L'extender Pour Windows Media Center
Chapitre 6 : Utilisation de l’Extender pour Windows Media Center La configuration de l’Extender pour Windows Media Center, si vous avez le système d’exploitation Windows Vista Édition Un ordinateur Windows Vista peut prendre en charge Familiale Premium ou Édition Intégrale, se fait au cours de jusqu’à... -
Page 205: Utilisation Des Médias Numériques : Mediasmart Par Rapport À Extender Pour Windows Media Center
Utilisation des médias numériques : vous étiez devant votre ordinateur. L’interface Extender pour Windows Media Center a été conçue par Microsoft, elle est MediaSmart par rapport à Extender semblable à l’interface Media Center de Microsoft que vous pour Windows Media Center voyez sur l’ordinateur. - Page 206 Le tableau ci-dessous présente certaines fonctions d’utilisation des médias numériques à partir de votre HP MediaSmart Connect pour le mode MediaSmart et le mode Extender pour Windows Media Center. Fonction mode MediaSmart mode Extender Compatibilité Ordinateur équipé de : Ordinateur équipé d’un système d’exploitation Media Center Édition 2005 Windows Vista Édition...
- Page 207 Compatibilité Transmission de photos, de musique et de vidéos numériques à votre téléviseur Pour utiliser le mode Extender pour Windows Media Center, il vous faut un ordinateur exécutant Windows Vista Édition Les modes MediaSmart et Extender pour Windows Media Center Familiale Premium ou Édition Intégrale.
-
Page 208: Première Configuration
Première configuration Accès aux médias en ligne Les modes MediaSmart et Extender pour Windows Media Center Si vous avez sauté la configuration pendant l’installation, suivez vous permettent d’accéder directement au contenu en ligne à ces étapes : partir de votre téléviseur. Avec le mode MediaSmart, vous accédez à... -
Page 209: Utilisation De L'extender Pour Windows Media Center
Utilisation de l’Extender pour Allez à l’ordinateur. L’ordinateur peut détecter automatiquement le HP MediaSmart Connect et vous Windows Media Center inviter à le brancher en tant qu’Extender. Si c’est le cas, poursuivez avec l’étape 4. Après la configuration sur l’ordinateur de l’Extender pour Si ce n’est pas le cas, ouvrez Windows Media Center Windows Media Center, lorsque vous appuyez sur le bouton vert sur votre ordinateur, sélectionnez Tasks (Tâches),... -
Page 210: Contrôle De La Télévision En Direct
Contrôle de la télévision en direct Appuyez sur Record (Enregistrement) pour commencer l’enregistrement d’un programme que vous êtes en train de Si votre ordinateur a un tuner TV et qu’il est branché à une source regarder, ou pour sélectionner le programme à enregistrer d’entrée TV, vous pouvez également contrôler des émissions de dans le Guide des programmes du Windows Media Center. -
Page 211: Réinitialisation De L'extender Ou Changement D'ordinateur
Réinitialisation de l’Extender ou Sélectionnez Windows Media Center, puis appuyez sur OK. changement d’ordinateur Pour réinitialiser l’Extender, sélectionnez Setup Suivez ces étapes pour réinitialiser l’Extender pour Windows Extender (Configurer l’Extender), puis appuyez Media Center ou changer l’ordinateur hôte. Après la configuration sur OK. -
Page 212: Fonctions Non Disponibles
Fonctions non disponibles Menu Media Non disponible dans l’Extender Center (suite) pour Windows Media Center Certaines des fonctions d’expérience des médias dans Windows CD ou DVD Graver sur un CD Media Center ne sont pas disponibles lorsque vous utilisez Graver sur un DVD l’Extender pour Windows Media Center : Regarder des DVD insérés dans Menu Media... - Page 213 Menu Media Non disponible dans l’Extender Menu Media Non disponible dans l’Extender Center (suite) pour Windows Media Center Center (suite) pour Windows Media Center Paramètres Musique Paramètres généraux Accès aux informations de médias et de protection/ concernant les CD et DVD sur Internet Normes de Jeu de couleurs protection...
-
Page 214: Chapitre 7 : Utilisation Du Lecteur Windows Media
Chapitre 7 : Utilisation du Lecteur Windows Media Permettre et sélectionner les Vous pouvez utiliser n’importe quel programme de serveur compatible UPnP pour transmettre des médias au HP MediaSmart dossiers à partager Connect. HP recommande et prend en charge le Lecteur Windows Media 11. - Page 215 En haut de la fenêtre du Lecteur Windows Media, S’il n’y a pas d’onglet Bibliothèque dans la fenêtre du Lecteur cliquez sur Bibliothèque, puis sur Partage des fichiers Windows Media 11, suivez ces étapes : multimédias. Appuyez sur la touche ALT pour afficher le menu Fichier, cliquez sur Outils, puis sur Options.
- Page 216 Exemple de fenêtre Partage de fichiers multimédias sous Lorsque votre HP MediaSmart Connect est connecté à votre Windows Vista réseau domestique, il s’affiche dans la fenêtre Partage des fichiers multimédias. Cliquez sur l’icône Périphérique, puis sur Permettre. Cela permet au programme de transmettre les médias au HP MediaSmart Connect.
- Page 217 Pour modifier les options de partage par défaut, cliquez sur Cliquez sur OK pour fermer la fenêtre Partage des fichiers le bouton Paramètres dans la fenêtre. Dans la fenêtre multimédias. Partage des fichiers multimédias-Paramètres par défaut, vous En haut de la fenêtre du Lecteur Windows Media, pouvez spécifier la façon dont votre ordinateur est répertorié...
- Page 218 Exemple de fenêtre Options avancées 10 Cliquez sur OK. Attendez pendant que le Lecteur Windows Media ajoute automatiquement à votre bibliothèque les fichiers de médias issus des dossiers sélectionnés. Le Lecteur Windows Media ne copie pas les fichiers de médias, il crée un lien vers eux. La bibliothèque surveille automatiquement les dossiers sélectionnés, et met à...
-
Page 219: Chapitre 8 : Dépannage
Chapitre 8 : Dépannage Reportez-vous à cette section si vous rencontrez des problèmes de Le son est-il coupé ? Appuyez sur le bouton Mute (Muet) ou sur le démarrage, de télécommande ou de médias. bouton du volume. Avez-vous programmé un deuxième périphérique pour le Questions sur le démarrage mappage de volume ? Mettez le périphérique sous tension. - Page 220 Questions sur la télécommande Il n’y a aucune lumière de résolution. L’adaptateur d’alimentation CA est-il débranché ? Assurez-vous La télécommande ne fonctionne pas. que les deux extrémités de l’adaptateur d’alimentation sont Vérifiez que les piles sont correctement insérées et que la polarité branchées.
- Page 221 La télécommande ne fait pas clignoter le bouton du Pour une connexion sans fil, assurez-vous que le périphérique sélectionné (HP MediaSmart Connect, TV, HP MediaSmart Connect est doté des bons paramètres CBL, etc.) lorsque j’appuie sur le bouton. de sécurité. Vérifiez vos paramètres IP.
- Page 222 Vérifiez votre connexion réseau en ouvrant un navigateur sur Mon HP MediaSmart Connect peut voir mon votre ordinateur et en affichant une page Web sur Internet. ordinateur Windows Vista, mais je ne peux Si aucune page Web ne s’affiche, vérifiez votre connexion transmettre aucun contenu.
- Page 223 Je ne parviens pas à trouver les fichiers multimédias Si nécessaire, redémarrez le serveur à partir de votre ordinateur, du HP MediaSmart Connect qui se trouvent dans les reportez-vous à la section « Utilisation du logiciel HP Server » à la dossiers partagés de mon ordinateur.
- Page 224 Lors de la lecture d’une vidéo d’un film téléchargé, J’essaie de regarder un film téléchargé sur les boutons Pause (Pause), Fast-Forward (Avance CinemaNow mais le message Échec de la lecture du rapide) ainsi que d’autres boutons de lecture du média apparaît. périphérique ne fonctionnent pas.
- Page 225 J’essaie de lire un film protégé par DRM (gestion des Mon périphérique de stockage de masse USB n’est pas droits numériques) (comme un film téléchargé sur reconnu. CinemaNow), mais un message Format non pris en Le HP MediaSmart Connect ne prend en charge que des charge apparaît même s’il s’agit d’un format pris en périphériques de stockage de masse USB avec un système de charge.
-
Page 226: Chapitre 9 : Caractéristiques Techniques
Chapitre 9 : Caractéristiques techniques Connectivité (suite) Connectivité Réseau local câblé Ethernet 10/100 (802.3) duplex intégral Sortie vidéo résolution 720p et 1080i sur le téléviseur (EthernetRJ-45) 10/100 Mbps (résolution de l’écran) Antennes internes de Accès au réseau sans fil IEEE 802.11n Sortie HDMI Connecteur HDMI réseau local sans fil... - Page 227 Général IMPORTANT: Certaines fonctionnalités de produit Dimensions en pouces (mm) D : 8,5 pouces (215,9 mm), Windows Vista nécessitent du matériel avancé ou L : 8,5 pouces (215,9 mm), supplémentaire. H : 1,8 pouces (45,7 mm) Pour plus de détails, visitez les sites Web Microsoft Poids 3,5 livres (1,6 kg) suivants :...
-
Page 228: Configuration Requise
Configuration requise Configuration requise (suite) Système d’exploitation Media Center Édition 2005 avec Serveurs de médias Serveurs de médias compatibles UPnP et Windows Rollup 2 DLNA-comme les serveurs HP Media Vault et HP MediaSmart Windows XP Édition familiale (32 bits uniquement) avec Service Pack 2 ou Sont également requis Un réseau domestique version supérieure... -
Page 229: Types De Fichiers Multimédias Pris En Charge
Prise en charge de médias numériques (suite) Accessoires (suite) Extender pour Oui, cela nécessite un ordinateur équipé Certification et UL, C-UL, FCC, Dolby Digital, CERTIFIÉ Windows Media d’un système d’exploitation Windows conformité Wi-Fi 802.11n basé sur Draft 2.0 Center de Microsoft Vista Édition Familiale Premium ou Édition Intégrale. -
Page 230: Formats De Médias Numériques : Codecs Contre Conteneurs De Fichiers
Formats de médias numériques : VC-1 : codec vidéo développé par Microsoft. Dolby Digital : codec audio utilisé dans les films en DVD et la codecs contre conteneurs de transmission haute définition. fichiers Le conteneur de fichiers correspond au type de fichier qui conserve le train de bits numériques, quel que soit le codec utilisé. - Page 231 Codecs courants Avec MPEG-2, MPEG a introduit en premier le concept de profils et de niveaux. Les profils et les niveaux définissent les Codecs MPEG. Le Motion Pictures Experts Group (MPEG) conditions de traitement minimales requises pour un a développé une variété de codecs audio/vidéo, parmi décodeur conforme.
- Page 232 Dolby Digital : Dolby Digital constitue la base du codage Divx est un conteneur de fichiers développé par DivX audio multicanaux pour la télévision haute définition et les Corporation. Il prend en charge les codecs vidéo Divx films DVD. (versions 3.0 à 6) basés sur le codec vidéo MPEG-4 Part 2, ainsi qu’une variété...
-
Page 233: Médias Pris En Charge
Médias pris en charge La lecture de contenus protégés par DRM (gestion des droits numériques) stockés sur un périphérique de stockage de masse (USB ou disque HP Pocket Media Drive) n’est pas prise en charge Votre HP MediaSmart Connect ne prend pas en charge tous les par le HP MediaSmart Connect. - Page 234 Tableau des médias pris en charge (mode MediaSmart Media) Extension de fichier Vidéo Codecs audio Prise en charge DRM Photos uniquement .jpg JPEG .png .bmp .gif Musique uniquement .m4a Pas de Fairplay .mp3 .wma WMA, WMA Pro .wav LPCM .ogg Vorbis OGG Chapitre 9 : Caractéristiques techniques...
- Page 235 Tableau des médias pris en charge (mode MediaSmart Media) (suite) Extension de fichier Vidéo Codecs audio Prise en charge DRM Audio/vidéo .avi Divx, xvid (MPEG-4, ASP) MP2, MP3, Dolby Digital Divx DRM (2ch, 5.1ch) .divx Jusqu’à rev. 6.0 (MPEG-4 ASP) MP2, MP3, Dolby Digital (2ch, 5.1ch) Divx DRM .dvr-ms Vidéo MPEG-2...
-
Page 236: Codes Tv De Fabricants
Codes TV de fabricants Akai 1002, 1209, 1227, 1233, 1234, Bradford, 1024, 1122 1236, 1451, 1452, 1456, 1499, 1546, Brillian 1241, 1242, 1243 La liste suivante présente les codes 1562, 1575, 1580, 1581, 1585 Brockwood 1004 de fabricants à quatre chiffres pour Albatron 1164 Broksonic 1122, 1221, 1232, 1546 les périphériques, destinés à... - Page 237 C (codes TV de fabricants, Dumont 1004, 1095, 1208 Fisher 1027, 1028, 1029, 1043, 1113, 1230, 1334 Durabrand 1122, 1191, 1217, suite) 1218, 1221 Fujitsu 1026, 1160, 1170, 1181, 1475, 1476, 1477, 1478, 1480 Dwin 1215 Craig 1024, 1122 Funai 1024, 1026, 1122, 1217, 1308, Electroband 1002, 1207 Crosley 1213 1497, 1606...
- Page 238 Havermy 1215 1502, 1558 JBL 1037, 1213 Hello Kitty 1220 Lloyd’s 1606 JC Penney 1004, 1005, 1006, 1007, Hewlett-Packard 1000, 1257, 1415, 1465, Loewe 1037 1009, 1014, 1030, 1031, 1033, 1034, 1474, 1544 Logik 1001 1042, 1049, 1063, 1064, 1107, 1108,...
- Page 239 M (codes TV de fabri- Montgomery Ward 1001 Orion 1023, 1121, 1221, 1232 Motorola 1003, 1109, 1215 Panasonic 1003, 1031, 1037, 1106, cants, suite) 1129, 1140, 1202, 1211, 1219, 1277, MTC 1004, 1005, 1006, 1064, 1279, 1288, 1299, 1304, 1306, 1309, 1209, 1227 Matsushita 1219 1312, 1317, 1325, 1330, 1349, 1350,...
- Page 240 P (codes TV de fabricants, Pulsar 1004, 1095, 1208 Samsung 1004, 1005, 1006, 1008, 1013, 1063, 1064, 1065, 1107, 1108, 1127, Quasar 1003, 1031, 1040, 1129, 1211, su-ite) 1147, 1166, 1172, 1193, 1209, 1218, 1219, 1601, 1603, 1614 1227, 1234, 1236, 1255, 1300, 1302, Radio Shack 1028, 1043, 1122, 1143, Pioneer 1004, 1006, 1052, 1053, 1054, 1346, 1367, 1386, 1388, 1390, 1412,...
- Page 241 S (codes TV de fabricants, Squareview 1119, 1217 Teknika 1001, 1004, 1005, 1006, 1007, 1008, 1009, 1010, 1011, 1024, 1026, SSS 1004, 1024, 1122 su-ite) 1045, 1064, 1106, 1107, 1122, 1129, Starlite 1024, 1122 1140, 1213, 1214, 1227, 1229 Superscan 1215, 1266, 1584, 1593 Sharp 1004, 1006, 1008, 1017, 1020, Telecaption 1073 Supre-Macy 1110...
- Page 242 V (codes TV de fabri- Viking 1110 White Westinghouse 1158, 1221, 1283 Viore 1453 Yamaha 1004, 1005, 1006, 1013, 1167, cants, suite) 1176, 1179, 1209 Vizio 1004, 1240, 1260 Zenith 1001, 1004, 1095, 1096, 1097, Wards 1001, 1004, 1005, 1006, 1013, Vector Research 1209 1098, 1208, 1214, 1218, 1221, 1254, 1015, 1021, 1026, 1030, 1037, 1044,...
-
Page 243: Index
Index ........97 Numériques Alimentation Aucun son ........ 13 .......104 adapteur Audio analogique ....3 802.11n (norme sans fil IEEE) ..44 ......18 bouton de la télécommande branchements ......22 ...44 branchements AUX, témoin du périphérique ......43 ..15 connecteur Avant de commencer l’installation ........70 Abonnement .........3... - Page 244 ........41 ......45 Bouton Media (Média) Bouton d’éjection pour le ......42 disque PMD ........46 ........46 Arrêt Muet ......45 ......46 ........45 Bouton de volume Avance rapide Bouton Device Menu ......45 ..... 44 Back (Retour) On/Off (Marche/Arrêt) ....46 (Menu Périphérique) ........46 ........
- Page 245 ..46 ......47 Bouton Record (Enregistrement) Chaîne précédente ...17 Bouton Recorded TV Choix d’un bon emplacement Câble .....45 (Enregistrement(s)) ..78 CinemaNow Media Manager ..14 audio analogique (style RCA) ....68 Bouton Reset (Réinitialiser) ......70 logiciel ..14 câble audio numérique (optique) ..46 Bouton Rewind (Rembobinage) .......79...
- Page 246 .....104 Composantes vidéo Consommation, alimentation Download Queue (File d’attente de ......105 électrique téléchargement) ........43 audio ....63 ......20 Contenu protégé par DRM logiciel CinemaNow Media branchements ......80 Manager Correctifs hôtes de l’Extender pour branchements avec système audio ..... 29 .......21 Windows Media Center logiciel HP MediaSmart Services...
- Page 247 État ........42 témoin ..16 ..103 FAI (fournisseur d’accès à Internet) Gestion des droits numériques ......21 Ethernet Gestion des droits numériques Fermeture de la fenêtre Windows ......104 Ethernet 10/100 ........106 (DRM) ......88 Media Center Extender pour Windows Fichier ....
- Page 248 ..55 HP Server Icône représentant une pellicule Installation ........74 ....15 icône Icônes avant de commencer ......75 ........29 menu principal CinemaNow Media Manager sur ....78 la barre des tâches ..73 ....15 HP Server sur la barre des tâches durée de la configuration ........107 CinemaNow Media Manager, sur ......17...
- Page 249 Liste de lecture Menu principal, menu Media Mode de configuration automatique ......... 55 (Média) pour la programmation de la ....57 utilisation des favoris ......52 télécommande ......45 Message live TV (TV en direct) ....67 Modification des paramètres échec d’exécution du contenu ......70 Logiciel Gateway ......
- Page 250 ......67 Option de langue Optique périphérique ...67 ........43 ........48 Option de paramètres réseau audio témoin ...67 ......18 Option de Windows Media Center branchements Périphérique de stockage de ........64 masse ...67 ....14 Option Demo (Démo) (menu) câble audio numérique ....
- Page 251 ....113 prise en charge dvr-ms réinitialisation de l’Extender pour ..... 89 Windows Media Center Programmation de la ......47 Saisie de caractères ......49 ......... 43 télécommande Réinitialiser Sans fil ....68 Programmes logiciels Réinitialiser les options .........44 antennes ......28 MediaSmart ........3 Remarque ......30 configuration...
- Page 252 Services Média en ligne HP télécommande ....69 compte d’utilisateur codes de fabricants de ..41 Télécapteur pour la télécommande ......114 téléviseurs HP MediaSmart Services ......47 Télécommande ......77 Gateway Téléviseur ....56 boutons contextuels Settings (Paramètres) codes de fabricants de téléviseurs .......
- Page 253 ......47 Touches numériques Utilisation TV (Téléviseur) Extender pour Windows Media ....... 87 ......18 Center branchements contrôle de l’Extender pour ..88 Windows Media Center ......24 résolution Vérification TV (téléviseur) ....77 connexion Internet ........77 en direct en Extender pour réseau ..45 Windows Media Center...