Sanyo mpr-214f - Commercial Solutions Refrigerator Instruction Manual
Pharmaceutical refrigerator with freezer
Hide thumbs
Also See for mpr-214f - Commercial Solutions Refrigerator:
- Specifications (2 pages) ,
- Brochure (4 pages) ,
- Manual (40 pages)
Table of Contents
Chapters
Table of Contents

Related Manuals for Sanyo mpr-214f - Commercial Solutions Refrigerator


Summary of Contents for Sanyo mpr-214f - Commercial Solutions Refrigerator
- Page 1 INSTRUCTION MANUAL MPR-214F Pharmaceutical Refrigerator with Freezer...
-
Page 2: Table Of Contents
1. No part of this manual may be reproduced in any form without the expressed written permission of SANYO. 2. The contents of this manual are subject to change without notice. 3. Please contact SANYO if any point in this manual is unclear or if there are any inaccuracies. SANYO Electric Biomedical Co., Ltd. -
Page 3: Precautions For Safe Operation
PRECAUTIONS FOR SAFE OPERATION It is imperative that the user complies with this manual as it contains important safety advice. Items and procedures are described so that you can use this unit correctly and safely. If the precautions advised are followed, this will prevent possible injury to the user and any other person. - Page 4 PRECAUTIONS FOR SAFE OPERATION WARNING Do not use the unit outdoors. Current leakage or electric shock may result if the unit is exposed to rain water. Only qualified engineers or service personnel should install the unit. The installation by unqualified personnel may cause electric shock or fire. Be sure to install the unit on a sturdy floor.
- Page 5 PRECAUTIONS FOR SAFE OPERATION WARNING Always disconnect the power supply to the unit prior to any repair or maintenance of the unit in order to prevent electric shock or injury. Ensure you do not inhale or consume medication or aerosols from around the unit at the time of maintenance.
- Page 6 PRECAUTIONS FOR SAFE OPERATION CAUTION Select a level and sturdy floor for installation. This precaution will prevent the unit from tipping. Improper installation may result in water spillage or injury from the unit tipping over. Connect the unit to a power source as indicated on the rating label attached to the unit. Use of any other voltage or frequency other than that on the rating label may cause fire or electric shock.
-
Page 7: Cautions For Usage
CAUTIONS FOR USAGE • If the unit is unplugged or the power to the unit is interrupted, do not restart the unit for at least 5 minutes. This protects the compressor. • This inner cabinet is refrigerated by the forced circulation of cooled air inside the chamber. Ensure that the intake and exhaust vents are not blocked. - Page 8 CAUTIONS FOR USAGE • For the cleaning of the unit, use a cloth containing diluted neutral dishwashing detergent (Undiluted detergent may break the plastic parts. For the dilution, follow the instruction enclosed with the detergent). When a diluted neutral dishwashing detergent is used to clean the unit, wipe the unit thoroughly with a cloth soaked in clean water.
-
Page 9: Environmental Conditions
ENVIRONMENTAL CONDITIONS This equipment is designed to be safe at least under the following conditions (based on the IEC 1010-1): 1. Indoor use; 2. Altitude up to 2000 m; 3. Ambient temperature 5 C to 40 4. Maximum relative humidity 80% for temperature up to 31 C decreasing linearly to 50% relative humidity at 40 5. -
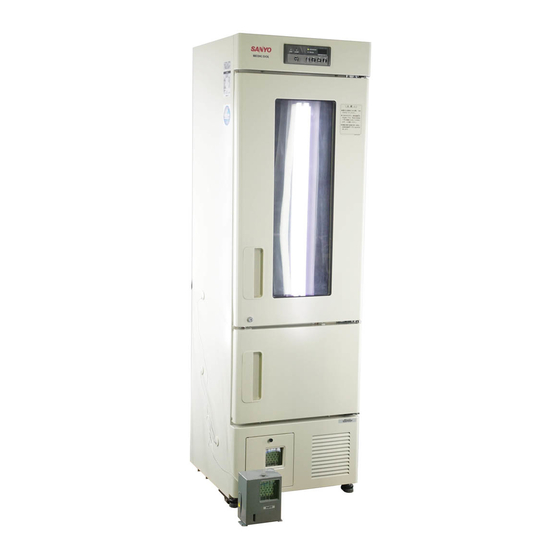
Page 10: Refrigerator Components
REFRIGERATOR COMPONENTS Refrigerator Freezer MPR-214F... - Page 11 REFRIGERATOR COMPONENTS 1. Glass window: Water can sometimes condense on the glass in areas of high humidity. Wipe off the condensation with a dry soft cloth. 2. Magnetic door gasket: This prevents the cool air from escaping. Always keep clean. 3.
-
Page 12: Control Panel
REFRIGERATOR COMPONENTS Control panel 1. Alarm buzzer stop key (BZ): Press this key to silence the buzzer in the event that the alarm operates and buzzer sounds. See page 18 for the details. 2. Display select key (REF./FREEZ.): By pressing this key, chamber temperature display of refrigerator or freezer and each setting is selected. -
Page 13: Installaiton
INSTALLATION Installation site To operate this unit properly and to obtain maximum performance, install the unit in a location with the following conditions: 1. A location not subjected to direct sunlight Installation in a location subjected to direct sunlight may lead to inadequate cooling. 2. -
Page 14: Start-Up Of Unit
INSTALLATION Installation 1. Remove the packaging materials and tapes Remove all transportation packaging materials and tapes. Open the doors and ventilate the unit. If the outside panels are dirty, clean them with a diluted neutral dishwashing detergent. (Undiluted detergent can damage the plastic components. For the dilution, refer to the instruction of the detergent.) After the cleaning with the diluted detergent, always wipe it off... -
Page 15: Operating Instructions
OPERATING INSTRUCTIONS Temperature setting Table 1 shows the basic operation method. Perform key operation in the sequence indicated in the table. The example in the table is based on the assumption that the refrigerator temperature is 4 C and the freezer temperature is -25 Note: The unit is set at the factory so that the refrigerator temperature is 5... - Page 16 OPERATING INSTRUCTIONS Key lock operation This unit incorporates a key lock feature which can inhibit the tampering using the keys on the control panel. The key lock is set to OFF at the factory. Display Mode Function Key lock OFF Temperature change enabled Key lock ON Temperature change disabled...
-
Page 17: Alarm Temperature Setting
OPERATING INSTRUCTIONS Alarm temperature setting The high temperature and low temperature at which the alarm will be activated are effective for freezer and refrigerator. The following shows the outline of the alarm temperature setting. Display Mode Application Settable range High temp. alarm setting +2 to +14 Refrigerator Low temp. - Page 18 OPERATING INSTRUCTIONS Table 5 Operation Key operated Indication after operation The current refrigerator temperature ----- is displayed. Press and hold the numerical value The first digit of the temperature shift key for about 5 seconds. display blinks. Set the first digit to 2 with the The first digit of the temperature numerical value shift key.
-
Page 19: Alarms And Safety Functions
ALARMS AND SAFETY FUNCTIONS This unit has the alarm and safety functions shown in Table 6, and also a self diagnostic function. Table 6 Alarms and safety functions Kind of alarm Situation Indication Buzzer Safety operation or safety • Refrigerator If the chamber temperature High Alarm lamp flashes. -
Page 20: Remote Alarm Terminal
SETTING OF ALARM RESUME TIME The alarm buzzer and remote alarm are silenced by pressing BUZZER key on the control panel during alarm condition. The buzzer and remote alarm will be activated again after certain suspension if the alarm condition is continued. The suspension time can be set by following the procedure shown in the Table 6 below. -
Page 21: Defrosting
DEFROSTING Refrigerator The following 2 kinds of defrost methods are adopted for the refrigerator, which control defrosting automatically. 1. Cycle defrost To keep the temperature stable inside the chamber, the refrigeration compressor is cycled on and off. During “off” periods any frost which has accumulated on the evaporator is melted by energizing a heater. This will not have any discernible effect on the chamber temperature. -
Page 22: Maintenance
MAINTENANCE WARNING Always disconnect the power supply to the unit prior to any repair or maintenance of the unit in order to prevent electric shock or injury. Ensure you do not inhale or consume medication or aerosols from around the unit at the time of maintenance. -
Page 23: Automatic Temperature Recorder
AUTOMATIC TEMPERATURE RECORDER To record the chamber temperature, an optional automatic temperature recorder is available. Please consult with our sales department or agency for recorder installation. For the proper usage of temperature recorder, refer to an instruction manual included with the recorder. The available recorder and its attachment location are as follows: Recorder Application... -
Page 24: Installation Of Temperature Recorder
INSTALLATION OF TEMPERATURE RECORDER Installation of recorder MTR-0620LH (1) 1. Attach the fixture to the temperature recorder (MTR-0620LH) by referring to the instruction manual enclosed with the recorder. (Fig. 1) 2. Remove 2 (outside) of 4 screws on the front left of the top panel. Fix the recorder to the top panel by using the 2 screws as shown in Fig. - Page 25 INSTALLATION OF TEMPERATURE RECORDER Installation of recorder MTR-0620LH (2) 1. Remove a cap for the fixing screw on the panel cover for mounting space of temperature recorder. Remove the fixing screw and open the panel cover. Remove the panel cover by pushing the shaft on both sides outward.
- Page 26 INSTALLATION OF TEMPERATURE RECORDER 4. Remove the caps (both outside and inside) covering the access port for refrigerator and take out the thermal insulation in the port. Pass the recorder sensor to the chamber through the port. Then replace the thermal insulation and caps (both outside and inside). Replace the cap on the port for taking out the recorder sensor.
-
Page 27: Fixing Screw Fig
INSTALLATION OF TEMPERATURE RECORDER Installation of recorder MTR-4014LH 1. Remove a cap for the fixing screw on the panel cover for mounting space of temperature recorder. Remove the fixing screw and open the panel cover. Remove the panel cover by pushing the shaft on both sides outward. -
Page 28: Fig. 13
INSTALLATION OF TEMPERATURE RECORDER 4. Remove the caps (both outside and inside) covering the access port for freezer and take out the thermal insulation in the port. Pass the recorder sensor to the chamber through the port. Then replace the thermal insulation and caps (both outside and inside). (Fig.13) Note: Make a cut on the caps for access port to pass the capillary tube as shown in the figure below. - Page 29 INSTALLATION OF TEMPERATURE RECORDER Installation of recorder MTR-G3504 1. Remove a cap for the fixing screw on the panel cover for mounting space of temperature recorder. Remove the fixing screw and open the panel cover. Remove the panel cover by pushing the shaft on both sides outward.
- Page 30 INSTALLATION OF TEMPERATURE RECORDER 5. Remove the caps (both outside and inside) covering the access port for refrigerator and freezer and take out the thermal insulation in the port. Pass the recorder sensor to the chamber through each port. Then replace the thermal insulation and caps (both outside and inside). Replace the cap on the port for taking out the recorder sensor.
-
Page 31: Troubleshooting
TROUBLESHOOTING If the unit malfunctions, check out the following before calling for service. In the case of no refrigeration or poor refrigeration, transfer the stored items to another refrigerator or freezer before checking out. If nothing operates even when plug in 1. -
Page 32: Specifications
SPECIFICATIONS Name Pharmaceutical Refrigerator with Freezer Model MPR-214F External dimensions W540 x D557 (+ 45)* x H1794 (mm) Internal dimensions W455 x D466 x H917 (mm) (Refrigerator) W420 x D342 x H267 (mm) (Freezer) Effective capacity 176 L (Refrigerator), 39 L (Freezer) Exterior Zinc galvanized steel, Polyester resin baked finish Interior... -
Page 33: Performance
PERFORMANCE Control range Refrigerator: 2 C to 14 C (Ambient temp.; -5 C to +35 C, No load) Freezer: -20 C to -30 C (Ambient temp.; -5 C to +30 C, No load) Noise level 38 dB (A scale) Maximum pressure 1.3 MPa (Refrigerator), 1.7 MPa (Freezer) Rated voltage AC 110 V... -
Page 34: Safety Check Sheet
CAUTION Please fill in this form before servicing. Hand over this form to the service engineer to keep for his and your safety. Safety check sheet 1. Refrigerator contents : Risk of infection: Risk of toxicity: Risk from radioactive sources: (List all potentially hazardous materials that have been stored in this unit.) Notes : 2. - Page 35 7FB6P101349001 SANYO Electric Biomedical Co., Ltd. (1 Oct. 2003) 10-15, Hongo 3-Chome Recycled paper Bunkyoku, Tokyo 113-8434 Japan Printed in Japan...