Table of Contents
Available languages
Available languages
Quick Links
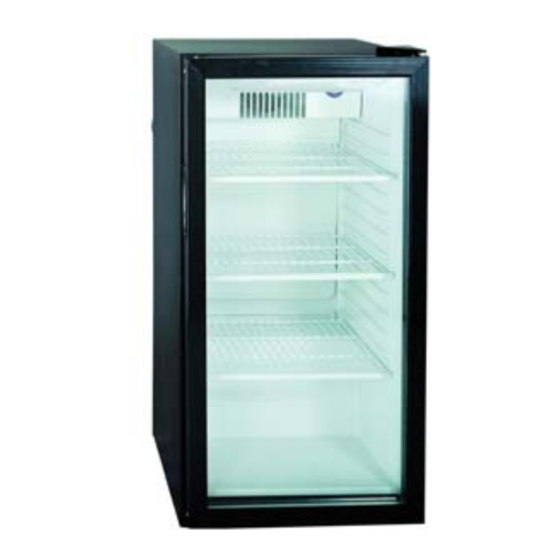
Beverage Cabinet
User's Manual
Safety precautions
When using this appliance, always exercise the following basic safety precautions.
1.
Read all of the instructions before using this appliance.
2.
Use this appliance only for its intended purpose as described in this User's Manual.
3.
This cabinet must be properly installed in accordance with the installation instructions before
it is used. See grounding instructions in the installation section.
4.
Never unplug your cabinet by pulling on the power cord. Always grasp the plug firmly and
pull straight out from the outlet.
5.
Unplug your cabinet before cleaning or making any repairs.
Note: If for any reason this product requires service, we strongly recommend that a certified
technician performs the service.
6.
Repair or replace immediately all electric service cords that have become frayed or otherwise
damaged. Do not use a cord that shows cracks or abrasion damage along its length, the plug
or the connector end.
7.
This cabinet should not be recessed or built-in an enclosed cabinet. It is designed for
freestanding installation only.
8.
If your cabinet is to be discarded, we recommend that you remove the door and leave the
shelves in place. This will reduce the possibility of danger to children.
9.
Do not operate your cabinet in the presence of explosive fumes.
10. Do not load the freezer with the food before desired temperature has not been reached to
avoid bacteria reproduction.
Risk of child entrapment. Before you discard your old cabinet, take off the doors so that children
may not easily climb inside.
Thank you for using our product. This manual
will guide you in getting the best use of your
cabinet.
Remember to record the model and serial
number. They are on a label in back of the
cabinet.
Staple your receipt to your manual. You will need it to obtain warranty service.
Please save these instructions.
Danger!
Model number
Serial number
Date of purchase
Table of Contents

Related Manuals for Haier BC-100G


Summary of Contents for Haier BC-100G
- Page 1 Beverage Cabinet User’s Manual Safety precautions When using this appliance, always exercise the following basic safety precautions. Read all of the instructions before using this appliance. Use this appliance only for its intended purpose as described in this User’s Manual. This cabinet must be properly installed in accordance with the installation instructions before it is used.
- Page 2 Table of contents Safety precautions Parts Installation Unpacking Leveling Proper air circulation Electrical requirements Features and use Initial set up Temperature adjustment Shelving Interior light Normal operating sounds Proper care and cleaning Cleaning and maintenance Power interruptions Vacation and moving care Lamp replacement Troubleshooting Parts...
- Page 3 Installation Unpacking Remove all packaging material, including the foam base and all adhesive tape holding the cabinet accessories inside and outside. Slide out and remove plastic or foam guard used to secure the compressor from shipping damage due to vibration and shock. Inspect and remove any remains of packing, tape or printed materials before powering on the cabinet.
- Page 4 Features and use Temperature adjustments The temperature in the cabinet is controlled by the thermostat according to the ambient temperature and condition of the food in storage. The thermostat knob can be rotated clockwise or counter-clockwise between the scale of “0” and “6” (The numerals do not represent temperature degree, but temperature changes.
- Page 5 General: Prepare a cleaning solution of 3-4 tablespoons of baking soda mixed with warm water. Use sponge or soft cloth dampened with the cleaning solution to wipe your cabinet. Rinse with clean arm water and dry with a soft cloth. Do not use harsh chemicals, abrasives, ammonia, chlorine bleach, concentrated detergents, solvents or metal scouring pads.
-
Page 6: Troubleshooting
Loosen the lug slightly and remove the lampshade. (Step 1) Remove the U lamp tube from the holder. (Step 2) Place a new lamp tube to the holder. (Step 3) Replace the lampshade. (Step 4) Troubleshooting Cabinet does not operate. Verify if the cabinet is properly plugged in. - Page 7 à place de manière ce que les enfants ne puissent pas grimper facilement à l’intérieur. Modèle —————— Merci d’avoir fait l’acquisition de ce matériel Haier. Cette notice d’utilisation vous permet Numéro de série —————— une utilisation optimum de l’appareil. Date d’achat ————...
-
Page 8: Table Of Contents
Table des matières Précautions de sécurité Noms des composants Installation Désemballage Mise à niveau Circulation d’air adéquate Caractéristiques électriques Caractéristiques et opération Réglage Ajustements de température Clayettes Eclairage interne Bruits de fonctionnement normals Entretien et nettoyage Nettoyage et maintenance Coupures de courant Vacances et déménagement Remplacement de la lampe Dépannage... -
Page 9: Circulation D'air Adéquate
Tourner les pieds ajustables dans le sens des aiguilles d’une montre afin de surélever l’appareil et dans le sens inverse pour l’abaisser. La porte de l’armoire se ferme plus facilement lorsque les pieds sont correctement réglés. Circulation d’air adéquate Pour être sûr que l’appareil fonctionne à son maximum d’efficacité, l’installer dans un endroit favorable à... -
Page 10: Clayettes
Vérifier que le thermostat est correctement positioné avant l’utilisation. Il est conseillé de ne pas régler le thermostat à moins qu’il soit nécessaire. (Figure 1) Clayettes Les clayettes ajustables ayant une belle apparence sont faciles à nettoyer. Elles peuvent être enlevées et replacées selon votre demandes. -
Page 11: Coupures De Courant
Joints de porte : Nettoyer les joints de porte tous les trois mois en suivant les instructions générales fournies. Les joints doivent rester propres et flexibles afin d’assurer une bonne étanchéité. Coupures de courant Des pannes d’alimentation occasionnelles peuvent survenir à cause d’une tempête ou de causes autres. - Page 12 Dépannage L’appareil ne fonctionne pas: Vérifier si la fiche de l’appareil est branché. Vérifier si la prise de courant est alimentée. La température interne est très élevée: La porte est ouverte trop fréquemment. Les aliments sont récemment introduits. Vérifier l’étanchéité des joints. Nettoyer la conduite de condenseur.
- Page 13 Alte Gerätetür vor dem Wegschmeißen abnehmen um zu verhindern, daß spielende Kinder sich selbst einsperren und damit in Lebensgefahr kommen. Modell Nr. —————— Vielen Dank für Ihre Wahl von Haier Produkt. Diese Bedienungsanleitung sorgfältig lessen und befolgen, um Serien Nr. ——————...
-
Page 14: Installation
Inhaltsübersicht Sicherheitsregeln Bauteile Installation Auspacken Nivellieren Richtige Be- und Entlüftung Elektrische Anforderungen Eigenschaften und Verwendung Anfangseinstellung Temperatureinstellung Absteller Innere Beleuchtung Normales Betriebsgeräusch Richtige Wartung und Reinigung Wartung und Reinigung Stromausfall Ausser Betrieb und Hinweise bei der Bewegung Auswechseln der Beleuchtung Störungen beheben Bauteile 1.... - Page 15 hinteren Ecke des Getränkeschranks befinden. Den Getränkeschrank nach dem endgültigen Aufstellen nivellieren. Die Ausrichtungsfüße in die Uhrzeigerrichtung drehen und den Getränkeschrank dadurch erhöhen; die Ausrichtungsfüße in die Gegenuhrzeigerrichtung drehen und den Getränkeschrank dadurch versenken. Die Tür läßt sich leichter zumachen, wenn sich die Ausrichtungsfüße erstreckt haben.
- Page 16 (Abbildung 1) Absteller Die Absteller sind so entworfen, daß sie gutes Aussehen besitzen und sich leicht reinigen läßt. Die Absteller können aufwärts oder abwärts in jede Schiene geschiebt werden. Es ist zu bemerken, daß das Design der Absteller einen Zwischenraum unter den Flaschen ermöglicht, welches die direkte Berührung der Flaschen vermeidet und bessere Be- und Entlüftung sicherstellt.
- Page 17 Alle drei Monate nach den allgemeinen Hinweisen die Türdichtungen reinigen, um sie leicht beeinflußen und richtig versiegeln zu lassen. Stromausfall Das Anschlußkabel aus der Steckdose ziehen im Fall von Stromausfall durch Gewitter oder andere Ursachen. Das Kabel wieder zurück stellten, wenn Strom wiedergegeben wird. Außer Betrieb und Hinweise beim Bewegen Den Netzstecker herausziehen und den Getränkeschrank sowie die Türdichtungen nach den Vorschriften im Teil “Allgemeine Reinigung”...
- Page 18 Getränkeschrank läuft nicht: Prüfen, ob der Stecker eingesteckt wird. Prüfen, ob die AC Steckdose Strom hat. Temperatur nicht niedrig genug: Häufiges Öffnen der Gerätetür. Neue Einlegung braucht Zeit, um die gewünschte Temperatur zu erreichen. Die Verschließung der Türdichtung prüfen. Kondensatorspulen Reinigen. Temperatur niedriger einstellen.