
Related Manuals for Dell Remote Access Controller 4 Firmware Version 1.30


Summary of Contents for Dell Remote Access Controller 4 Firmware Version 1.30
-
Page 1: Firmware Version
Dell™ Remote Access Controller 4 Firmware Version 1.30 User’s Guide w w w . d e l l . c o m | s u p p o r t . d e l l . c o m... - Page 2 Reproduction in any manner whatsoever without the written permission of Dell Inc. is strictly forbidden. Trademarks used in this text: Dell, the DELL logo, Dell OpenManage, PowerEdge, and PowerVault are trademarks of Dell Inc.; Windows Server is a trademark, and Microsoft, Windows, and MS-DOS are registered trademarks of Microsoft Corporation; Novell and NetWare are registered trademarks of Novell Corporation;...
-
Page 3: Table Of Contents
Contents DRAC 4 Overview What’s New in DRAC 4 in this Release? DRAC 4 Hardware Features Hardware Specifications Power Requirements ....... . . Connectors . - Page 4 Configuring a Supported Web Browser Configuring Internet Explorer to Connect to the Web-Based Interface Viewing Localized Versions of the Web-Based Interface Installing the Sun Java Plug-In Installing the Sun Java Plug-In to Use Console Redirection Installing the Sun Java Plug-In to Use Mozilla Configuring DRAC 4 Properties Configuring the DRAC 4 Network Settings Configuring the DRAC 4 Network Settings Using the Option ROM...
- Page 5 Connecting to the Managed System Through the Local Serial Port or Telnet Management Station (Client System) ......Connecting the DB-9 Cable Configuring the Management Station Terminal Emulation Software Configuring Red Hat Enterprise Linux Minicom for...
- Page 6 Configuring Active Directory to Access Your DRAC 4 Extending the Active Directory Schema Using the Dell Schema Extender Installing the Dell Extension to the Active Directory Users and Computers Snap-In Opening the Active Directory Users and Computers Snap-In Adding DRAC 4 Users and Privileges to Active Directory...
- Page 7 Configuring and Using Virtual Media ........Overview Operating System Requirements on the Managed System Installing the Virtual Media Plug-In...
- Page 8 Configuring Multiple DRAC 4s Configuration File Overview Creating a DRAC 4 Configuration File Configuration File Example Using the racadm Utility to Configure the DRAC 4 Before Adding a DRAC 4 User Adding a DRAC 4 User Without Alert Capabilities Adding a DRAC 4 User With Alerting Capabilities Adding a DRAC 4 User With Permissions Configuring DRAC 4 Network Properties Frequently Asked Questions...
- Page 9 config/getconfig ..............Synopsis config Subcommand Description getconfig Subcommand Description...
- Page 10 ifconfig ............... Synopsis .
- Page 11 clrraclog ..............Synopsis Description .
- Page 12 sslcertview ..............Synopsis Options .
- Page 13 cfgCurrentLanNetworking ......cfgNicCurrentIpAddress (Read Only) cfgNicCurrentNetmask (Read Only) cfgNicCurrentGateway (Read Only) cfgNicCurrentDhcpWasUsed (Read Only) cfgDNSCurrentDomainName (Read Only) cfgDNSCurrentServer1 (Read Only) cfgDNSCurrentServer2 (Read Only)
- Page 14 cfgSerial ........cfgSerialBaudRate (Read/Write) cfgSerialConsoleEnable (Read/Write) cfgSerialConsoleQuitKey (Read/Write) cfgSerialConsoleIdleTimeout (Read/Write) cfgSerialConsoleShellType (Read/Write)
- Page 15 cfgRacTuneHostCom2BaudRate (Read/Write) cfgRacTuneConRedirPort (Read/Write) ......ifcRacManagedNodeOs ifcRacMnOsHostname (Read/Write) ifcRacMnOsOsName (Read/Write) ifcRacMnOsOsType (Read Only) cfgRacSecurity .
- Page 16 Glossary ........Index ........Figures Figure 1-1.
- Page 17 Table 4-2. User Group Permissions Table 4-3. Enable email Alert Properties Table 4-4. email Alert Severity Table 4-5. DRAC 4 Network Configuration Page Settings Table 4-6. DRAC 4 Network Configuration Page Buttons Table 4-7. Alert Properties Table 4-8. Severity Options Table 4-9.
- Page 18 Table 4-29. Table 4-30. Table 4-31. Table 4-32. Table 5-1. Table 5-2. Table 5-3. Table 5-4. Table 5-5. Table 5-6. Table 5-7. Table 5-8. Table 6-1. Table 6-2. Table 6-3. Table 6-4. Table 7-1. Table 8-1. Table 8-2. Table 8-3. Table 8-4.
- Page 19 Table A-1. Help Command ....Table A-2. arp Command Table A-3. clearasrscreen Table A-4. config/getconfig Table A-5. config Subcommand Options and Descriptions Table A-6.
- Page 20 Table A-27. Table A-28. Table A-29. Table A-30. Table A-31. Table A-32. Table A-33. Table A-34. Table A-35. Table A-36. Table A-37. Table A-38. Table A-39. Table A-40. Table A-41. Table A-42. Table A-43. Table A-44. Table A-45. Table A-46. Table B-1.
-
Page 21: Drac 4 Overview
DRAC 4 Overview The Dell™ Remote Access Controller 4 (DRAC 4) is a systems management hardware and software solution designed to provide remote management capabilities, crashed system recovery, and power control functions for Dell PowerEdge™ systems. By communicating with the system’s baseboard management controller (BMC), the DRAC 4 can be configured to send you email alerts for warnings or errors related to voltages, temperatures, and fan speeds. -
Page 22: Drac 4 Hardware Features
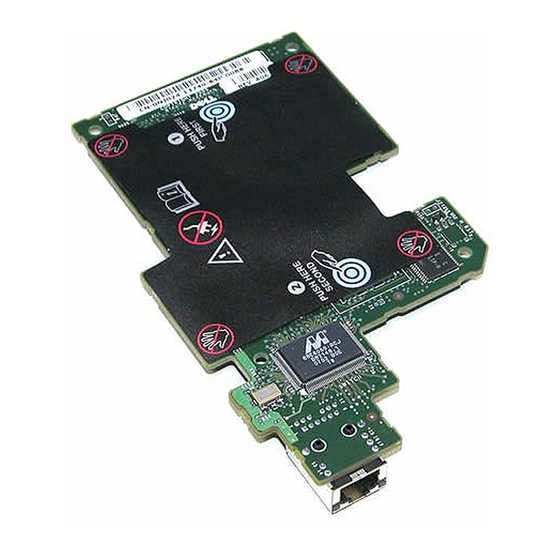
DRAC 4 Hardware Features Figure 1-1 shows the DRAC 4/I hardware and Figure 1-2 shows the DRAC 4/P hardware. Figure 1-1. DRAC 4/I Hardware Features RJ-45 Connector Figure 1-2. DRAC 4/P Hardware Features Video Connector RJ-45 Connector Management Connector DRAC 4 Overview... -
Page 23: Hardware Specifications
Hardware Specifications Power Requirements Table 1-1 lists the power requirements for the DRAC 4. Table 1-1. DRAC 4 Power Requirements System Power 1.2 A on +3.3 V AUX (maximum) 550 mA on +3.3 V main (maximum) 0 mA on+5V main (maximum) Connectors NOTE: Installation instructions for the DRAC 4 hardware can be found in the Installing a Remote Access Card... -
Page 24: Supported Remote Access Connections
Table 1-2. DRAC 4 Port Numbers (continued) DRAC 4 Port Number Used For Ports that DRAC 4 uses as a client: SMTP (not configurable) TFTP (not configurable) SNMP trap (not configurable) DNS (not configurable) LDAP (not configurable) 3269 LDAP for global catalog (GC) (not configurable) Supported Remote Access Connections Table 1-3 lists the features of each type of connection. -
Page 25: Supported Platforms
The Console Redirection feature requires that you have installed a supported Java Virtual Machine (JVM). For a list of the supported JVM plug-ins, see the DRAC 4 readme on the Dell Support website at support.dell.com on the Systems Management documentation Web page. -
Page 26: Features
Access to the system event log (SEL) and DRAC 4 logs and last crash screen (of the crashed or unresponsive system) independent of the operating system state. • Integrated launch of the DRAC 4 interface from Dell OpenManage™ Server Administrator and Dell OpenManage IT Assistant. •... -
Page 27: Other Documents You May Need
See your DRAC 4 readme for more information about the DRAC 4. This readme is available on the Dell Support website at support.dell.com along with this guide on the Systems Management documentation Web page. - Page 28 DRAC 4 Overview...
-
Page 29: Installing And Setting Up The Drac 4
• DRAC 4 hardware (already installed or in the optional kit) • The instructions for installing DRAC 4 in this chapter • Dell PowerEdge Installation and Server Management CD • Dell Systems Management Consoles CD • Dell PowerEdge Documentation CD... -
Page 30: Installing The Software On The Managed System
CLI locally, and for the system to capture the last crash screen. To install the managed system software, install the software on the managed system using the Dell Systems Management Consoles CD. For instructions about how to install this software, see your Quick Installation Guide or Server Administrator User's Guide. -
Page 31: Configuring The Managed System To Capture The Last Crash Screen
Depending on the operating system, the DRAC 4 agent consists of either Microsoft ® ® Windows services, Novell NLMs, or Red Hat Enterprise Linux agents. The DRAC 4 agent automatically starts when you boot the managed system. If you install only the DRAC 4 agent, you will not have the ability to view the system’s last crash screen or use the Watchdog feature. -
Page 32: Installing The Software On The Management Station
The racadm CLI utility is installed automatically for all other supported operating systems when you install the Dell Systems Management Consoles CD. To install the racadm CLI utility, insert the Dell Systems Management Consoles CD in the management station's CD drive and type the following commands from a command prompt:... -
Page 33: Viewing Localized Versions Of The Web-Based Interface
For a list of the latest supported Java Virtual Machine (JVM) plug-ins, see the racread.txt file on your Dell Systems Management Consoles CD or at the Dell™ Support website at support.dell.com. You must install the Java plug-in 1.4.2 or later to use the DRAC 4 Virtual KVM feature with the Mozilla Web browser. -
Page 34: Configuring Drac 4 Properties
3 Run the following rpm command to install the packages. This command installs the packages comprising the Java 2 Runtime Environment (J2RE): rpm -iv j2re-1_4< version number >-linux-i586.rpm Only one Java plug-in can be registered at a time. If you have never registered a Java plug-in, go to the next step;... -
Page 35: Configuring The Drac 4 Network Settings
Configuring the DRAC 4 Network Settings NOTICE: Changing your DRAC 4 Network settings may disconnect your current network connection. Configure the DRAC 4 network settings using one of the following tools: • Option ROM — See "Configuring the DRAC 4 Network Settings Using the Option ROM." •... -
Page 36: Drac 4 Ide Option Rom Utility Properties
Table 2-1. DRAC 4 IDE Option ROM Utility Properties Properties NIC Current TCP/IP Configuration DNS Current Configuration NIC TCP/IP Configuration Options Use DHCP is: Static IP-Addr Static Netmask Static Gateway Ethernet Configuration Options NIC is: Auto-Negotiate is: LAN Speed Setting Indicates the speed at which the DRAC 4 NIC is set to communicate. The LAN Duplex Setting Indicates the duplex setting of the DRAC 4 NIC. - Page 37 The default setting is Disabled. The default RAC name is RAC-service tag, where service tag is the service tag number of the Dell server (for example, RAC- EK00002). When this option is selected, the RAC name is displayed. You can modify the RAC name only when toggling from the Disabled setting.
-
Page 38: Adding And Configuring Drac 4 Users
3 After you have made the changes you want, you can pressto save the changes and reboot the DRAC 4, or you can press to cancel all changes and exit the setup menu. If you decide to save your changes, the following message appears: IMPORTANT: In order for your changes to take effect, they need to be saved. -
Page 39: Updating The Drac 4 Firmware
• Repair utility (diskette-based update): This update restores all DRAC 4 configurations back to factory defaults. Go to the Dell Support website at support.dell.com, download the appropriate DRAC 4 firmware image file, and follow the instructions to create two diskettes. -
Page 40: Accessing The Drac 4 Through A Network
Accessing the DRAC 4 Through a Network This section provides information about how to access the DRAC 4 after the hardware is installed and the software is configured. After you configure the DRAC 4, you can remotely access the managed system using one of four remote access interfaces. -
Page 41: Drac 4 Software Basics For Red Hat Enterprise Linux
To access the DRAC 4 remote access interface using Server Administrator, first launch Server Administrator. From the system tree on the left pane of the Server Administrator home page, click System Main System Chassis using Server Administrator remote access features, see your Server Administrator User’s Guide. For information about accessing the DRAC 4 using the racadm CLI, see "Using the serial and racadm Commands."... -
Page 42: Additional Information
Additional Information Removing the DRAC 4 The removal of expansion cards, such as the DRAC 4, is documented in the Installation and Troubleshooting Guide that came with your system. Removing DRAC 4-Related Applications and Drivers You must uninstall Server Administrator to remove the RAC module that was installed with Server Administrator. -
Page 43: Configuring The Drac 4 To Use A Serial Or Telnet Text Console
Configuring the DRAC 4 to Use a Serial or Telnet Text Console The DRAC 4 provides serial and telnet command interfaces designed to perform all of the configuration and systems management functions using the DRAC 4 Web-based interface or racadm CLI. The following section provides information about the serial/telnet text console features, and explains how to set up your system so you can perform systems management actions through a serial/telnet console. -
Page 44: Enabling And Configuring The Managed System To Use A Serial Or Telnet Console
• Menu-based VT-100 block screen interface that provides easy operation of commonly used commands including reset, power-on, and power-off NOTE: Because the racadm command does not have access to a file system on a serial or telnet console, several options (such as reading or writing a file) are not supported by the racadm command through a serial or telnet console. -
Page 45: Configuring Red Hat Enterprise Linux For Serial Redirection During Boot
Configuring Red Hat Enterprise Linux for Serial Redirection During Boot NOTE: The following instructions are specific to the Red Hat Enterprise Linux GRand Unified Bootloader (GRUB). Similar changes would be necessary for using a different boot loader. NOTE: In configuring the client VT100 emulation window, you must set the window or application that is displaying the redirected console to 25 rows x 80 columns to ensure proper text display;... -
Page 46: Enabling Login To The Console After Boot
Additional information for editing the grub.conf: 1 You may need to disable GRUB's graphical interface and use the text-based interface instead; otherwise, the GRUB screen will not be displayed in RAC console redirection. To do so, comment out the line starting with splashimage. 2 If you have multiple options in GRUB and you want all of them to start a console session through the RAC serial connection, you need to add console=ttyS1,57600 to all options. - Page 47 Table 3-2. Sample File: /etc/innitab (continued) l0:0:wait:/etc/rc.d/rc 0 l1:1:wait:/etc/rc.d/rc 1 l2:2:wait:/etc/rc.d/rc 2 l3:3:wait:/etc/rc.d/rc 3 l4:4:wait:/etc/rc.d/rc 4 l5:5:wait:/etc/rc.d/rc 5 l6:6:wait:/etc/rc.d/rc 6 # Things to run in every runlevel. ud::once:/sbin/update # Trap CTRL-ALT-DELETE ca::ctrlaltdel:/sbin/shutdown -t3 -r now # When our UPS tells us power has failed, assume we have a few # minutes of power left.
-
Page 48: Enabling The Serial/Telnet Console On The Drac 4
Table 3-3. Sample File: /etc/securetty vc/1 vc/2 vc/3 vc/4 vc/5 vc/6 vc/7 vc/8 vc/9 vc/10 vc/11 tty1 tty2 tty3 tty4 tty5 tty6 tty7 tty8 tty9 tty10 tty11 ttyS0 Enabling the Serial/Telnet Console on the DRAC 4 You can enable the serial/telnet console locally or remotely. Enabling the Serial/Telnet Console Locally NOTE: You (the current user) must have Configure DRAC 4 permission in order to perform the steps in... -
Page 49: Using The Racadm Command To Configure The Settings For The Serial And Telnet Console
Enabling the Serial/Telnet Console Remotely To enable the serial/telnet console remotely, type the following remote racadm commands from a command prompt: racadm -u < username > -p < password > -r < DRAC 4 IP address > config -g cfgSerial cfgSerialConsoleEnable 1 racadm -u <... -
Page 50: Using The Secure Shell (Ssh)
For example, to display a list of all of the settings for the cfgSerial group, type the following: racadm getconfig -g cfgSerial To display the current settings for a particular group remotely, type the following from a remote command prompt: racadm -u <... -
Page 51: Connecting To The Managed System Through The Local Serial Port Or Telnet Management Station (Client System)
You can change the SSH port with the command: racadm config -g cfgRacTuning -o cfgRacTuneSshPort 0xFor more information on cfgSerialSshEnable and cfgRacTuneSshPort objects, see "DRAC 4 Property Database Group and Object Definitions." The DRAC 4 SSH implementation supports multiple cryptography schemes: •... -
Page 52: Connecting The Db-9 Cable
The telnet and SSH consoles are available on the DRAC 4 through the DRAC 4 NIC. Up to four telnet client systems and one SSH client may connect at any given time. The management station connection to the managed system serial or telnet console requires the use of management station terminal emulation software (see "Configuring the Management Station Terminal Emulation Software"... -
Page 53: Configuring The Management Station Terminal Emulation Software
Configuring Minicom Version 1.8 for Serial Console Emulation NOTE: To ensure that the text displays properly, Dell™ recommends that you use an Xterm window to display the telnet console instead of the default window provided by the Red Hat Enterprise Linux installation. -
Page 54: Configuring Hyperterminal For Serial Console Redirection
12 To save each blank value, press. 13 When all specified fields are clear, press to exit the Modem Dialing and Parameter Setup menu. 14 Select Save setup as config_name and press . 15 Select Exit From Minicom and press . 16 At the command shell prompt, type minicom <... -
Page 55: Configuring Red Hat Enterprise Linux Xterm For Telnet Console Redirection
When running telnet with Red Hat Enterprise Linux, perform the following steps: NOTE: To ensure that the text is properly displayed, Dell recommends that you use an Xterm window to display the telnet console instead of the default window provided by the Red Hat Enterprise Linux installation. -
Page 56: Enabling Microsoft Telnet For Telnet Console Redirection
Enabling Microsoft Telnet for Telnet Console Redirection NOTE: Some telnet clients on Microsoft operating systems may not display the BIOS setup screen correctly when BIOS console redirection is set for VT100 emulation. If this issue occurs, you can correct the display by changing BIOS console redirection to ANSI mode. From the BIOS setup menu, select Console Redirection Microsoft telnet requires that you first enable Telnet in Windows Component Services. -
Page 57: Managing And Recovering A Remote System
@ . The DRAC 4 user name for local users is case sensitive; the Active Directory user name is not case sensitive. Examples of an Active Directory user name are: dell.com\john_doe or [email protected]. 2 In the Password field, enter your DRAC 4 user password or Active Directory user password. -
Page 58: Adding And Configuring Drac 4 Users And Alerts
Logging Out Click Log Out in the upper-right corner of the main window. NOTE: The Log Out button does not appear until you log in. Adding and Configuring DRAC 4 Users and Alerts To manage your system with the DRAC 4, you may want to create unique users with specific administrative permissions (role-based authority). -
Page 59: Table
Table 4-2. User Group Permissions User Group Permissions Granted Administrator Login to DRAC 4, Configure DRAC 4, Configure Users, Clear Logs, Execute Server Control Commands, Access Console Redirection, Access Virtual Media, Test Alerts, Execute Diagnostic Commands, and receive email alerts (if Enabled) Power User Login to DRAC 4, Clear Logs, Execute Server Control Commands, Access... -
Page 60: Email Alert Severity
Table 4-4. email Alert Severity Severity Informational Warning Severe Alert Description Apply Changes Go Back To User Configuration Page Printing the Page Click the Print button in the top-right corner of the page if you want to print the Add/Configure DRAC 4 User page. Managing and Recovering a Remote System Description Select the check boxes in this column to cause the DRAC 4 to send an... -
Page 61: Configuring The Drac 4 Nic
Configuring the DRAC 4 NIC 1 Click the Configuration tab and select Network. 2 Use the Network Configuration page to configure the DRAC 4 NIC settings and configure email alert settings. Table 4-5 describes each setting on the Network Configuration page. Table 4-6 describes the Network Configuration page buttons. -
Page 62: Drac 4 Network Configuration Page Buttons
Displays the DRAC 4 name only when Register DRAC 4 on DNS is selected. The default DRAC 4 name is RAC-service tag, where service tag is the service tag number of the Dell™ server (for example, RAC-EK00002). When the check box is not selected and the Register DRAC 4 on DNS option is selected, you can modify the DNS domain name in the DNS Domain Name field. -
Page 63: Adding And Configuring Snmp Alerts
Adding and Configuring SNMP Alerts NOTE: You must have Configure DRAC 4 permission to add or delete an SNMP alert; otherwise, these options will not be available. 1 Click the Configuration tab and select Alerts. 2 Use the Add/Configure SNMP Alerts page to add, delete, configure, and test SNMP alerts. NOTE: The DRAC 4 supports three severity levels: Informational, Warning, and Severe. -
Page 64: Severity Options
Table 4-8. Severity Options Option Informational Warning Severe Alert Description Viewing Information About Existing Alerts Click an alert in the SNMP Alert List to display the properties for existing SNMP alerts. See Table 4-9 for descriptions. NOTE: During the first 40 seconds after a DRAC 4 reset, the DRAC 4 is synchronizing with the system BMC and the managed system service. -
Page 65: Managing A Remote System
Table 4-9. SNMP Alert Properties Property Description Enabled? Displays (Yes or No) whether you have enabled SNMP alerts on the Add/Configure SNMP Alerts page. Destination IP Address If the Available link appears under Destination IP Address, click the link to open the Add/Configure SNMP Alerts page, which enables you to configure a new alert. -
Page 66: Updating The Drac 4 Firmware
Updating the DRAC 4 Firmware Use the Firmware Update page to update the DRAC 4 firmware to the latest revision. The following data is included in the DRAC 4 firmware package: • Compiled DRAC 4 firmware code and data • Expansion ROM image •... -
Page 67: Server Certificate Information
Viewing a Server Certificate Use the Server Certificate Information page to view a server certificate for your DRAC 4. Table 4-11 provides information about the server certificate. Table 4-11. Server Certificate Information Field Description Attribute Value Type Type of certificate; server certificate Serial Certificate serial number Key Size... -
Page 68: Certificate Management Page Options
Table 4-13. Certificate Management Page Options Option Generate a New CSR Upload Certificate View Server Certificate Generating a Certificate Signing Request 1 Type a value in the field for each CSR attribute. Table 4-14 describes what values are valid for each required field. -
Page 69: Certificate Signing Request Generation Page Buttons
Table 4-14. Required CSR Fields (continued) Properties Description Locality (L) The city or other location of the entity being certified (for example, Round Rock). Only alphanumeric characters and spaces are valid. Do not separate words using an underscore or some other character. State (S) The state or province where the entity who is applying for a certification is located (for example, Texas). -
Page 70: Viewing System Information
Viewing System Information The System Summary page displays system information (see Table 4-17 through Table 4-20) and DRAC 4 session information (see Table 4-21). System Information This section provides information about the types of system information. Table 4-17. Types of System Information Field DRAC 4 Information System Information... -
Page 71: System Information Fields
Table 4-18. DRAC 4 Information Fields (continued) Field Description Static Preferred DNS If Use DHCP to Obtain DNS Server Addresses is FALSE, the IP address of the Server Address primary DNS server is used. Static Alternate DNS If Use DHCP to Obtain DNS Server Addresses is FALSE, IP address of the Server Address secondary DNS server is used. -
Page 72: Recovering And Troubleshooting The Managed System
Session Information This section provides information about DRAC 4 sessions. NOTE: Closing the browser without gracefully logging out causes the session to remain open until it times out. It is strongly recommended that you click the logout button to end the session; otherwise, the session remains active until the session time-out is reached. -
Page 73: First Steps To Troubleshoot A Remote System
To use the Operating System Shutdown option, you must first install the DRAC 4 managed system software, otherwise this option will be unavailable. For more information, see your Dell OpenManage Server Administrator’s User’s Guide. 2 Select one of the following Server Control Actions. -
Page 74: Using The Sel
Other Options The Server Control page provides buttons (see Table 4-22) in the top-right corner of the page. Table 4-22. Server Control Page Buttons (Top Right) Button Print Refresh Using the SEL The System Event Log (SEL) page displays system-critical events that occur on the managed system. -
Page 75: Using The Drac 4 Log Page Buttons
Using the DRAC 4 Log The DRAC 4 Log is a persistent log maintained in the DRAC 4 firmware. The log contains a list of user actions (such as log in and log out) and alerts issued by the DRAC 4. The oldest entries are overwritten when the log becomes full. -
Page 76: Viewing The Last System Crash Screen
Viewing the Last System Crash Screen NOTICE: To capture the last crash screen, you must have managed system software installed. Use the Last Crash Screen page to view the most recent crash screen, which allows you to obtain information about events leading up to the system crash. Last system crash information is saved in DRAC 4 memory and is remotely accessible. -
Page 77: Diagnostic Commands
Table 4-28. Diagnostic Commands Command Description Displays the contents of the Address Resolution Protocol (ARP) table. ARP entries may not be added or deleted. ifconfig Displays the contents of the network interface table. netstat Prints the content of the routing table. If the optional interface number is provided in the text field to the right of the netstat option, then netstat prints additional information regarding the traffic across the interface, buffer usage, and other network interface information. -
Page 78: Troubleshooting Network Problems
Troubleshooting Network Problems The internal DRAC 4 Trace Log can be used by administrators to debug alerting or networking from the DRAC 4. The Trace Log can be accessed from the DRAC 4 Web-based interface by clicking the Diagnostics tab, and typing the gettracelog command. The Trace Log will appear and tracks the following information: •... -
Page 79: Troubleshooting Alerting Problems
Table 4-30. DRAC 4 Network Error Codes (continued) Error Code Description 0x5030 EADDRINUSE: Address is already in use. 0x5031 EADDRNOTAVAIL: Address not available. 0x5033 ENETUNREACH: Network is unreachable. 0x5035 ECONNABORTED: The connection has been aborted by the peer. 0x5036 ECONNRESET: The connection has been reset by the peer. 0x5037 ENOBUFS: An internal buffer is required but cannot be allocated. -
Page 80: Table 4-31. Drac 4 Log Messages
Table 4-31. DRAC 4 Log Messages Message ID Description RAC186W DHCP: no response from server, need LAN address. The NIC cannot be enabled until a response is received from the DHCP server. RAC188W DHCP: no response from server, warm starting with. RAC189A Email page successful. -
Page 81
Table 4-31. DRAC 4 Log Messages (continued) Message ID Description RAC065A DRAC 4 hard reset, delay
was initiated. RAC066A DRAC 4 soft reset, delay was initiated. RAC067A DRAC 4 graceful reset, delay was initiated. RAC068A DRAC 4 cfg2default reset, delay ... -
Page 82: Frequently Asked Questions
Frequently Asked Questions Table 4-32 lists frequently asked questions and answers. Table 4-32. Managing and Recovering a Remote System: Frequently Asked Questions Question The following message is displayed for unknown reasons: Remote Access: SNMP Authentication Failure Why does this happen? Why are the remote racadm and Web-based services unavailable after a property change? Managing and Recovering a Remote System... - Page 83 Table 4-32. Managing and Recovering a Remote System: Frequently Asked Questions (continued) Question When accessing the DRAC 4 Web-based interface, I get a security warning stating the hostname of the SSL certificate does not match the hostname of the DRAC 4. When accessing the DRAC 4 Web-based interface, I get a security warning stating the SSL certificate was issued by a certificate...
- Page 84 Managing and Recovering a Remote System...
-
Page 85: Using The Drac 4 With Microsoft ® Active Directory
Companies can extend the Active Directory database by adding their own unique Attributes and Classes to solve environment-specific needs. Dell™ has extended the schema to include the necessary changes to support remote management Authentication and Authorization. -
Page 86: Overview Of The Rac Schema Extensions
To provide the greatest flexibility in the multitude of customer environments, Dell provides a group of objects that can be configured by the user depending on the desired results. Dell has extended the schema to include an Association, Device, and Privilege object. The Association object is used to link together the users or groups with a specific set of privileges to one or more RAC devices. -
Page 87: Typical Setup For Active Directory Objects
Figure 5-1. Typical Setup for Active Directory Objects Association Object User(s) Group(s) Privilege Object RAC Device Object(s) RAC4 Privilege Object You can create as many or as few association objects as you want or need. However, you must create at least one Association Object, and you must have one RAC Device Object for each RAC (DRAC 4) on the network that you want to integrate with Active Directory for Authentication and Authorization with the RAC (DRAC 4). -
Page 88: Setting Up Active Directory Objects In A Single Domain
Figure 5-2. Setting Up Active Directory Objects in a Single Domain User1 User2 To set up the objects for the single domain scenario, perform the following tasks: 1 Create two Association Objects. 2 Create two RAC Device Objects, RAC1 and RAC2, to represent the two DRAC 4 cards. 3 Create two Privilege Objects, Priv1 and Priv2, in which Priv1 has all privileges (administrator) and Priv2 has login privileges. -
Page 89: Setting Up Active Directory Objects In Multiple Domains
Figure 5-3. Setting Up Active Directory Objects in Multiple Domains Domain1 Domain2 User1 User2 To set up the objects for the multiple domain scenario, perform the following tasks: 1 Ensure that the domain forest function is in Native or Windows 2003 mode. 2 Create two Association Objects, AO1 (of Universal scope) and AO2, in any domain. -
Page 90: Configuring Active Directory To Access Your Drac 4
CD drive:\support\OMActiveDirectory Tools\RAC4\Schema Extender To use the LDIF files, see the instructions in the readme that is in the LDIF files directory. To use the Dell Schema Extender to extend the Active Directory Schema, perform the steps in "Using the Dell Schema Extender."... -
Page 91: Table 5-1. Class Definitions For Classes Added To The Active Directory Schema
1.2.840.113556.1.8000.1280.1.1.1.5 dellProduct Table 5-2. dellRacDevice Class 1.2.840.113556.1.8000.1280.1.1.1.1 This class represents the Dell RAC device. The RAC device must be Description configured as dellRacDevice in Active Directory. This configuration enables the DRAC 4 to send Lightweight Directory Access Protocol (LDAP) queries to Active Directory. -
Page 92: Table 5-4. Dellrac4Privileges Class
Table 5-5. dellPrivileges Class 1.2.840.113556.1.8000.1280.1.1.1.4 This class is used as a container Class for the Dell Privileges Description (Authorization Rights). Structural Class Class Type User SuperClasses dellRAC4Privileges Attributes Table 5-6. dellProduct Class 1.2.840.113556.1.8000.1280.1.1.1.5... -
Page 93: Table 5-7. List Of Attributes Added To The Active Directory Schema
Table 5-7. List of Attributes Added to the Active Directory Schema Attribute Name/Description dellPrivilegeMember List of dellPrivilege Objects that belong to this Attribute. dellProductMembers List of dellRacDevices Objects that belong to this role. This attribute is the forward link to the dellAssociationMembers backward link. -
Page 94: Installing The Dell Extension To The Active Directory Users And Computers Snap-In
Users and Computers snap-in so that the administrator can manage RAC (DRAC 4) devices, Users and User Groups, RAC Associations, and RAC Privileges. The Dell Extension to the Active Directory User’s and Computers Snap-In is an option that can be installed when you install your systems management software using the Dell Systems Management Consoles CD. -
Page 95: Opening The Active Directory Users And Computers Snap-In
5 Click Close and click OK. Adding DRAC 4 Users and Privileges to Active Directory The Dell-extended Active Directory Users and Computers snap-in allows you to add DRAC 4 users and privileges by creating RAC, Association, and Privilege objects. To add each type of object, perform the steps in each subsections. -
Page 96: Creating An Association Object
When using Windows 2000 mode or higher, you must use Universal Groups to span domains with your users or RAC objects. You can add groups of Users and RAC devices. Creating Dell-related groups is done the same way you create other groups. -
Page 97: Enabling Ssl On A Domain Controller
To add a privilege: 1 Select the Privileges Object tab and click Add. 2 Type the Privilege Object name and click OK. Click the Products tab to add one or more RAC devices to the association. The associated devices specify the RAC devices connected to the network that are available for the defined users or user groups. -
Page 98: Exporting The Domain Controller Root Ca Certificate
Exporting the Domain Controller Root CA Certificate NOTE: The following steps may vary slightly if you are using Windows 2000. 1 Go to the domain controller on which you installed the Microsoft Enterprise CA service. 2 Click Start Run. 3 Type mmc and click OK. 4 In the Console 1 (MMC) window, click File (or Console on Windows 2000 systems) and select Add/Remove Snap-in. -
Page 99: Configuring The Drac 4
4 Click Next and browse to the SSL certificate file. 5 Install the RAC SSL Certificate in each domain controller’s Trusted Root Certification Authority. If you have installed your own certificate, ensure that the CA signing your certificate is in the Trusted Root Certification Authority list. -
Page 100: Configuring The Drac 4 Active Directory Settings Using The Racadm Cli
Configuring the DRAC 4 Active Directory Settings Using the racadm CLI Using the following commands to configure the DRAC 4 Active Directory Feature using the racadm CLI instead of the Web-based interface. 1 Open a command prompt and type the following racadm commands: racadm config -g cfgActiveDirectory -o cfgADEnable 1 racadm config -g cfgActiveDirectory -o cfgADRacDomain <... -
Page 101: Frequently Asked Questions
RAC Device Objects (including Association Object) must be universal groups. The Association Object and the Privilege Object must be in the same domain. The Dell-extended Active Directory Users and Computers snap-in forces you to create these two objects in the same domain. - Page 102 Table 5-8. Using the DRAC 4 With Active Directory: Frequently Asked Questions (continued) Question I created and uploaded a new RAC certificate and now the Web-based interface does not launch. What can I do if I cannot log into the DRAC 4 using Active Directory authentication? How do I troubleshoot the issue? Using the DRAC 4 With Microsoft...
-
Page 103: Using Console Redirection
Using Console Redirection Overview The DRAC 4 console redirection feature allows you to access the local server console remotely in either graphic or text mode. Today with the power of networking and the Internet, you do not have to sit in front of each server to perform all the routine maintenance. -
Page 104: Table 6-1. Console Redirection Page Information
To open a console redirection session, perform the following steps: 1 Open a Web browser on your management station. Connect and log into the DRAC 4. 2 Click Console in the left pane to bring you to the Console Redirection page. Read and follow the instructions on this page for starting a console redirection session. -
Page 105: Table 6-2. Console Redirection Page Buttons
Table 6-2. Console Redirection Page Buttons Button Action Keyboard Macros Enables you to select and type one of the following keystroke combinations that cannot be typed using your local keyboard without affecting your local system.... -
Page 106: Table 6-3. Other Console Redirection Page Buttons
Table 6-3. Other Console Redirection Page Buttons Button Print Refresh Frequently Asked Questions Table 6-4 lists frequently asked questions and answers. Table 6-4. Using Console Redirection: Frequently Asked Questions Question I have just installed the Sun Java Runtime Environment on a management station running ®... - Page 107 Why does the managed system The managed system does not have the correct ATI video driver. You console screen go blank when must update the video driver by using the Dell PowerEdge Installation Windows has a blue screen? and Server Management CD.
- Page 108 Then, go back to the original operating system to initialize the USB mouse device. The Dell™ BIOS is emulating the mouse driver as a PS/2 mouse. By design, the PS/2 mouse uses relative position for the mouse pointer, which causes the lag in syncing.
- Page 109 To use mouseconfig to enable RAC mouse control for XWindows: To use mouseconfig to re-enable local mouse control: Is there a vKVM mouse sync Use the Dell PowerEdge Installation and Server Management CD to issue in Novell NetWare 6.5 install the NetWare operating system. The default screen resolution is operating system with 800x600 1024x768 so you won’t have the issue with mouse sync.
- Page 110 Table 6-4. Using Console Redirection: Frequently Asked Questions (continued) Question Why can't I use a keyboard or mouse while installing a Microsoft operating system remotely by using DRAC 4 console redirection? I manually selected Other Display as Primary from the vKVM window and now I cannot remotely control the system.
-
Page 111: Configuring And Using Virtual Media
Configuring and Using Virtual Media Overview The Virtual Media feature provides the managed system with a virtual floppy diskette drive and a virtual CD drive, which can use standard media from anywhere on the network. (Figure 7-1 shows the overall architecture of virtual media.) With this feature, administrators can remotely boot their managed systems, install applications, update drivers, or even install new operating systems remotely from the virtual CD/floppy diskette drives. -
Page 112: Operating System Requirements On The Managed System
The managed system has a DRAC 4 card installed. The virtual CD and floppy drives are two electronic devices embedded in the DRAC 4 and are controlled by the DRAC 4 firmware. NOTE: These two devices are present on the managed system’s operating system and BIOS at all times, whether virtual media is connected or not. -
Page 113: Installing The Virtual Media Plug-In
Installing the Virtual Media Plug-In To use the virtual media feature, you must successfully install the browser plug-in. After you have launched the virtual media page from within the DRAC 4 user interface, the browser automatically attempts to download the plug-in if it was not previously installed. If the plug-in is successfully installed, the virtual media page displays a list of floppy and CDs that the virtual drive can connect to. -
Page 114: Booting From The Virtual Media
Booting From the Virtual Media On supported systems, the system BIOS allows you boot from virtual CD or virtual floppy drives. You need to enter the BIOS setup window to ensure that the virtual drives are enabled in the boot sequence menu and that bootable devices are in the correct order. To change the BIOS setting, perform the following steps: 1 Boot the managed system. -
Page 115: Using Virtual Media When The Server's Operating System Is Running
Using Virtual Media When the Server’s Operating System Is Running On Windows systems, the virtual media drives are mounted and given a drive letter. Using the virtual drives from within Windows is similar to using your physical drives. Once connected to the media at a management station, then the media is available at the system by simply clicking the drive and browsing its content. -
Page 116: Configuring The Virtual Floppy Feature For Your Operating System
NOTE: In the Windows Control Panel, Dell VSF and Dell Virtual VCD identify the Virtual Floppy and Virtual CD-ROM, respectively. Configuring the Virtual Floppy Feature as a Super Floppy To configure your operating system to identify your virtual floppy as a super floppy starting with drive letter A, change the cfgFloppyEmulation object setting to 1. -
Page 117: Racvmcli
racvmcli The major capabilities of the Virtual Media command line interface (VM-CLI) utility are: • Support for removable media devices or image files, consistent with the VM plugins. • Support for command line option(s) to control/interact with the VM-CLI utility. •... -
Page 118: Interfaces And Apis
Administrator level access (or VM-CLI group membership) is required to successfully run the VM-CLI utility where the operating system defines and supports it. The client system’s administrator specifies the name of the VM-CLI group required for nonadministrator access to the utility. The client system’s administrator can create this group specifically for VM-CLI access, or it can be the name of an existing user group. - Page 119 < RAC-IP-address > is a valid IP address, in standard numbers-and-dots notation, or (if DRAC 4 support for DDNS is available and active) the DRAC 4 DDNS name. If an invalid value is detected, an error message displays and the command terminates. DRAC 4 User Name -u <...
- Page 120 CD/DVD Device or Image File -c < device-name > | < image-file > This parameter specifies the device or file to supply the virtual CD/DVD-ROM media: • < image-file > is the filename (including path) of a valid ISO-9660 image file Example: Windows operating system: -c c:\temp\mydvd.img Linux operating system: -c /tmp/mydvd.img...
- Page 121 VM-CLI Operating System Shell Options Features of the operating system shell can be used on the VM-CLI command line: • stderr/stdout redirection: Redirects any printed output of the utility to a file. For example, the greater-than character (>), followed by a filename, overwrites the specified file with the printed output of the VM-CLI utility.
-
Page 122: Table 7-1. Using Virtual Media Frequently Asked Questions
Windows operating system. This type of device is enumerated by Windows as drive letter C or higher. The Dell Virtual Media Floppy device can be configured to appear as a super-floppy drive using the command. - Page 123 How can another user remove this connection? Why do error messages like the following display on the console when Red Hat Enterprise Linux boots a Dell server with a DRAC 4 present? ... other console startup messages ... Apr 16 14:48:27 localhost...
- Page 124 Table 7-1. Using Virtual Media: Frequently Asked Questions (continued) Question When I have a floppy drive or USB key open through Windows Explorer and I try to establish a Virtual Media connection on Windows for the same drives, I get a connection failure and I am asked to retry.
- Page 125 Dell provides a Windows utility for formatting its USB Solid State devices as bootable devices on the Dell Resource CD that ships with a Dell system. You can use this utility to make the Memory Key bootable. You can also use the utility to format the Memory Key, to add an active partition, and to transfer basic ®...
- Page 126 Table 7-1. Using Virtual Media: Frequently Asked Questions (continued) Question How do I find my device names on Red Hat Enterprise Linux systems so I can mount them? What do I need to install on the client side for the Virtual Media feature to work? Do I need to install this plug-in every time I use the Virtual Media feature?
-
Page 127: Using The Serial And Racadm Commands
The racadm CLI allows you to locally or remotely configure and manage your DRAC 4. The racadm CLI runs on the management station and the managed system, and is available on the Dell Systems Management Consoles CD. You can use the racadm CLI to write scripts to automatically configure multiple DRAC 4s. For more information about configuring multiple DRAC 4s, see "Configuring Multiple DRAC 4s."... -
Page 128: Viewing A List Of Serial/Telnet Commands
To connect to the managed system text console, type connect com2 from the DRAC 4 command prompt (displayed through Minicom or HyperTerminal). NOTE: When accessing a DOS console through connect com2, characters in the output may be dropped during the output of large amounts of data (for example, the dump of large files greater than 30 lines). This can cause incorrect displays in connect com2 over telnet sessions. -
Page 129: Using The Racadm Cli
Table 8-1. Serial/Telnet Commands (continued) Command Description getsysinfo Displays general DRAC 4 and system information. serveraction Executes a graceful hard server reset, or power-on, power-off, or power-cycle. getraclog Displays DRAC 4 log entries. clrraclog Clears the DRAC 4 log entries. gettracelog Displays Trace Log entries. -
Page 130: Racadm Synopsis
Using the racadm CLI Remotely NOTICE: Configure the IP address on your DRAC 4 before using the racadm remote capability. For more information about initially configuring your DRAC 4, including a list of other documents you may need, see "Installing and Setting Up the DRAC 4." The racadm CLI provides a remote capability option ( system and execute racadm subcommands from a remote console or management station. -
Page 131: Table 8-4. Log/Verbose Level Options
Table 8-3. racadm Command Options (continued) Option Description -lSpecifies the log level for debug. NOTE: default log file named racadm.log is created in the current working directory. -v Specifies the verbose level for screen output. -L Specifies a debug log file. -
Page 132: Racadm Subcommand Descriptions
racadm Subcommand Descriptions The following subsections provide descriptions of subcommands that you can run under the racadm CLI. Table 8-5 briefly describes each racadm subcommand. For a detailed listing of every racadm subcommand including syntax and valid entries, see the "racadm Subcommand Man Pages." Table 8-5. -
Page 133: Racadm Error Messages
racadm Error Messages For information about racadm CLI error messages, see "Frequently Asked Questions" in this chapter. Configuring Multiple DRAC 4s One of the major features of the racadm CLI is the ability to configure a DRAC 4 using a configuration file. -
Page 134: Creating A Drac 4 Configuration File
The initial configuration file, racadm.cfg, is named by the user. In the following example, the configuration file is named myfile.cfg. To obtain this file, type the following command at the command prompt: racadm getconfig -f myfile.cfg NOTICE: It is recommended that you edit this file with a simple text editor; the racadm utility uses an ASCII text parser, and any formatting confuses the parser and might corrupt the racadm database. - Page 135 • Use the racresetcfg subcommand to keep all DRAC 4s the same. To keep all DRAC 4s the same, use the racresetcfg subcommand to reset the DRAC 4 to original defaults, and then run the racadm config the .cfg file has all the desired objects, users, indexes, and other parameters. NOTICE: Use the racresetcfg subcommand to reset the database and the DRAC 4 NIC settings to the original default settings and remove all users and user configurations.
-
Page 136: Configuration File Example
• An indexed object entry is ignored by the .cfg parser. The user cannot specify which index is used. If the index already exists, it is used, or else the new entry is created in the first available index for that group. The racadm getconfig -f.cfg command places a comment in front of index objects, which allows the user to see which comments are being used. -
Page 137: Using The Racadm Utility To Configure The Drac 4
The file contents are as follows: Object Group "cfgLanNetworking" [cfgLanNetworking] cfgNicIpAddress=10.35.10.110 cfgNicGateway=10.35.10.1 This file will be updated as follows: Object Group "cfgLanNetworking" [cfgLanNetworking] cfgNicIpAddress=10.35.9.143 # comment, the rest of this line is ignored cfgNicGateway=10.35.9.1 The command racadm config -f myfile.cfg parses this file and identifies any errors by line number. -
Page 138: Before Adding A Drac 4 User
Before Adding a DRAC 4 User The DRAC 4 allows up to 16 users to be configured into the DRAC 4 property database. Before manually adding the DRAC 4 user, you need to know which, if any, users exist. If the DRAC 4 is new, or the racadm racresetcfg command has been run, then the only user is root with the password calvin. -
Page 139: Adding A Drac 4 User With Alerting Capabilities
Example: racadm config -g cfgUserAdmin -o cfgUserAdminUserName -i 2 john racadm config -g cfgUserAdmin -o cfgUserAdminPassword -i 2 123456 A user name "john" with the password of "123456" is created. This user name and password can now be used to log into the Web-based remote access interface. You can verify this using either of the following two commands: racadm getconfig -u john racadm getconfig -g cfgUserAdmin -i 2... -
Page 140: Adding A Drac 4 User With Permissions
racadm config -g cfgTraps -o cfgTrapsSnmpCommunity -i 2 public racadm config -g cfgTraps -o cfgTrapsEnable -i 2 1 racadm config -g cfgTraps -o cfgTrapsFilterRacEventMask -i 2 0x0 racadm config -g cfgTraps -o cfgTrapsFilterSysEventMask -i 2 0x0 racadm config -g cfgTraps -o cfgTrapsDestIpAddr -i 2 < SNMP trap destination >... -
Page 141: Configuring Drac 4 Network Properties
Configuring DRAC 4 Network Properties Type the following command to get a list of the available network properties: racadm getconfig -g cfgLanNetworking If you want to use DHCP to obtain an IP address, you can use the command to write the object cfgNicUseDhcp to enable it. -
Page 142: Table 8-6. Using The Serial And Racadm Commands Frequently Asked Questions
Frequently Asked Questions Table 8-6 lists frequently asked questions and answers. Table 8-6. Using the serial and racadm Commands: Frequently Asked Questions Question After performing a DRAC 4 reset (using the racadm racreset command), I issue a command and the following message is displayed: racadm... -
Page 143: Operating System Deployment Using The Drac 4 Virtual Media Cli Feature
For occasional, one-time operating system deployments, interactive methods of performing the installation are typically used. A Dell™ technical publication describing how this procedure can be accomplished remotely with the use of DRAC 4 Virtual Media features is available on the Dell website at: http://www.dell.com/downloads/global/power/ps1q05-20040170-Gujarathi.pdf... -
Page 144: Tasks
1 Configure each target server’s DRAC 4 network interface. NOTE: Dell’s CFI is available for this item. 2 Configure each target server’s BIOS boot order to include the virtual devices at the top. NOTE: Dell’s CFI is available for this item. -
Page 145: Vmdeploy
4 Create a bootable deployment image file that performs the steps necessary to deploy the operating system. This bootable image file includes programs or scripts that understand the target deployment infrastructure, and use standard network-based installation methods to achieve the installation. For example, to deploy a Microsoft may include programs that utilize Microsoft Systems Management Server (SMS) methods to deploy the operating system to the target server. -
Page 146: Creating Bootable Deployment Image Files
Creating Bootable Deployment Image Files Observe the following guidelines when creating the bootable deployment image files. NOTE: Regardless of the particular method used to create image files, it is recommended that you test the image file by ensuring that you can successfully boot to it before starting a mass deployment. A simple way to test the image file is to use the image file with the DRAC 4 interactive Web interface, which allows you to connect the image to a target server, and then reboot. -
Page 147: Troubleshooting
Troubleshooting Troubleshooting the DRAC 4 See the following tables for help with troubleshooting the DRAC 4 and the racadm CLI: Table 4-30, "DRAC 4 Network Error Codes" Table 4-32, "Managing and Recovering a Remote System: Frequently Asked Questions" Table 5-8, "Using the DRAC 4 With Active Directory: Frequently Asked Questions" Table 6-4, "Using Console Redirection: Frequently Asked Questions"... - Page 148 Troubleshooting...
-
Page 149: Help
racadm Subcommand Man Pages This section provides descriptions of the subcommands that you can run in the racadm CLI. help NOTE: To use this command, you must have Log In DRAC 4 permission. Table A-1 describes the help command. Table A-1. Help Command Command help Synopsis... -
Page 150: Arp
NOTE: To use this command, you must have Execute Diagnostic Commands permission. Table A-2 describes the arp command. Table A-2. arp Command Command Synopsis racadm arp clearasrscreen NOTE: To use this command, you must have Execute Debug Commands permission. Table A-3 describes the clearasrscreen subcommand. Table A-3. -
Page 151: Synopsis
Synopsis racadm config [ -p -c] -f < filename > racadm config -g < groupName > -o < objectName > [-i < index >] < Value > racadm getconfig [-p] -f < filename > racadm getconfig -g < groupName > [-i < index >] racadm getconfig -u <... -
Page 152: Getconfig Subcommand Description
Output This subcommand generates error output upon encountering either of the following: • Invalid syntax, group name, object name, index, or other invalid database members • racadm CLI transport failures If errors are not encountered, this subcommand returns an indication of how many configuration objects that were written out of how many total objects were in the .cfg file. -
Page 153: Examples
Output This subcommand generates error output upon encountering either of the following: • Invalid syntax, group name, object name, index, or other invalid database members • racadm CLI transport failures If errors are not encountered, this subcommand displays the contents of the specified configuration. Examples •... -
Page 154: Description
Description The coredump subcommand displays detailed information, including register values, recorded when the most recent bus error occurred, or the message No CORE dump available (if a previous bus error has not occurred, or if the data has been cleared). This bus error information is persistent across power cycles of the DRAC 4—the data remains in the flash memory of the DRAC 4 until either: •... -
Page 155: Coredumpdelete
< binary data > SWI stack < binary data > Enter stack < binary data > Current task stack: 'IPEV' -#005e0000 < binary data > where < binary data > is the binary information that was generated by the DRAC 4 firmware. Example output (when data is not available): FW d_cmdCoreDump: No CORE dump available. -
Page 156: Synopsis
Table A-9. fwupdate Subcommand fwupdate Synopsis racadm fwupdate -u [-w] [-D] racadm fwupdate -s racadm fwupdate -g [-u ] [-w][-D] [-a < IP address >] [-f < path/file >] racadm fwupdate -c racadm fwupdate -p -f < update filename > [-u] [-w] [-D] Description The fwupdate subcommand allows the caller to update the firmware on the DRAC 4. -
Page 157: Table A-
Table A-10. fwupdate Subcommand Options Option Description The update option performs a checksum of the firmware update file and starts the actual update process. If this option is typed by itself, it is assumed that a firmware update file has already been loaded into the RAMdisk using the -g or -p options. This option may also be used along with the -g or -p options. -
Page 158: Output
Output Displays a message indicating which operation is being performed. Examples • racadm fwupdate -g - a 143.166.154.143 -f firmimg.dm1 In this example, the -g option tells the firmware to download the firmware update file from a location (specified by the -f option) on the TFTP server at a specific IP address (specified by the -a option). -
Page 159: Getssninfo
getssninfo NOTE: To use this command, you must have Log In To DRAC 4 permission. Table A-11 describes the getssinfo subcommand. Table A-11. getssinfo Subcommand Subcommand Definition getssninfo Retrieves session information for one or more currently active or pending sessions from the Session Manager's session table. Synopsis racadm getssninfo [-A] [-u <... -
Page 160: Examples
Examples • racadm getssninfo Session table summary status: 1 VALID 3 AVAILABLE Table A-13 provides an example of output from the racadm getssninfo command. Table A-13. getssninfo Subcommand Output Example Type User DRAC 4 • racadm getssninfo -A "Web" "RAC\root" 143.166.174.19 "Thu, 06 Mar 2004 10:32:39 GMT- 06:00"... -
Page 161: Getsysinfo Subcommand Options
Description The getsysinfo command returns information about watchdog status, depending on the command options. Input Table A-15 describes the getsysinfo subcommand options. Table A-15. getsysinfo Subcommand Options Option Description Displays DRAC 4 information Displays system information Displays watchdog information Eliminates the printing of headers/labels Displays DRAC 4 information If the -w option is not specified, then the other options are used as defaults. -
Page 162: Examples
Examples • racadm getsysinfo -A -w -s "123456" "PowerEdge 2800" "A08" "EF23VQ-0023" "" 0x100 "Server1" "Microsoft Windows 2000 version 5.0, Build Number 2195, Service Pack 2" "1.60" "Watchdog Info:" 2 39 40 • racadm getsysinfo -w -s System Information: System ID System Model BIOS Version Asset Tag... -
Page 163: Getractime
getractime NOTE: To use this command, you must have Log In DRAC 4 permission. Table A-17 describes the getractime subcommand. Table A-17. getractime Subcommand getractime Synopsis racadm getractime [-u] [-d] Description The getractime subcommand displays the time in one of the following two formats: •... -
Page 164: Netstat
netstat NOTE: To use this command, you must have Execute Diagnostic Commands permission. Table A-19 describes the netstat subcommand. Table A-19. netstat Subcommand Definition netstat Prints the contents of the routing table. If the optional interface number is provided, then netstat prints additional information regarding the traffic across the interface, buffer usage, and other network interface information. -
Page 165: Synopsis
Table A-21. setniccfg/getniccfg Subcommand Definition setniccfg Sets the IP configuration for the controller. getniccfg Displays the current IP configuration for the controller. NOTE: The terms NIC and Ethernet management port may be used interchangeably. Synopsis racadm setniccfg -d racadm setniccfg -s [< ipAddress > < netmask > < gateway >] racadm setniccfg -o racadm getniccfg Description for setniccfg... -
Page 166: Getsvctag
getsvctag NOTE: To use this command, you must have Log In To DRAC 4 permission. Table A-22 describes the getsvctag subcommand. Table A-22. getsvctag Subcommand getsvctag Synopsis racadm getsvctag Description The getsvctag subcommand displays the Service Tag for the system. Example Type getsvctag at the command prompt. -
Page 167: Description
Description The racdump subcommand provides a single command to get dump, status, and general DRAC 4 board information. The following commands are executed as a result of the single racdump subcommand: • getsysinfo • coredump • memmap • netstat • getssninfo Output The output of the individual commands are displayed. -
Page 168: Examples
Table A-25 describes the racreset subcommand options. Table A-25. racreset Subcommand Options Option Description hard A hard reset resets the entire DRAC 4 and is as close to a power-on reset as can be achieved using software. The DRAC 4 log, database, and selected daemons are shut down gracefully prior to the reset. -
Page 169: Description
After issuing a racresetcfg subcommand, stop and then restart the following services: Server Agent, Server Agent Event Monitor, and SNMP. See the Dell OpenManage Server Administrator’s User’s Guide for information on stopping and restarting the services in your operating system. -
Page 170: Output
Output The serveraction command returns without output if successful. getraclog NOTE: To use this command, you must have Log In DRAC 4 permission. Table A-29 describes the getraclog command. Table A-29. getraclog Command getraclog -i getraclog Synopsis racadm getraclog -i racadm getraclog [-A] [-c count ] [ delay-seconds ]\[-s start- record ] [-v] [-V] [-m] Description... -
Page 171: Restrictions
Restrictions The output buffer size is too big for execution across IPMI transport. clrraclog NOTE: To use this command, you must have Clear Logs permission. Synopsis racadm clrraclog Description NOTE: The command name and the racadm subcommand names may be different. This is normal. The clrraclog command completely clears the DRAC 4 log. -
Page 172: Output
-s — Provides the number of records to skip before returning entries (default=0). -v — Provides "verbose" output. -V — Provides "Very verbose" output. -E — Places the 16 bytes of raw SEL at the end of each line of output as a sequence of hex values. -R —... -
Page 173: Description
Description The gettracelog -i command displays the number of entries in the DRAC 4 trace log. The gettracelog (without the -i option) command reads entries. The -m option displays 24 rows at a time, and queries for more (such as the UNIX more command). Output One line of output is displayed for each trace log entry. -
Page 174: Output
Table A-33. setrac Subcommand Options (continued) Gets the OS type from the managed system and writes it to the DRAC 4. This parameter is available for viewing using the getsysinfo command and under the object ID interface using config/getconfig as [ifcRacManagedNodeOs] ifcRacMnOsOsType. The -d, or display option, allows the user to get the Hostname, OS name, and OS type from the managed system and display these items only. -
Page 175: Options
Options NOTE: The -u and -f options are not supported for the serial/telnet console. Table A-35 describes the sslcsrgen subcommand options. Table A-35. sslcsrgen Subcommand Options Option Description Generates a new CSR. Returns the status of a CSR generation process (generation in progress, active, or none). Uploads the CSR to the filename specified by the -f option. -
Page 176: Sslcertupload
sslcertupload NOTE: To use this command, you must have Configure DRAC 4 permission. Table A-36 describes the sslcertupload subcommand. Table A-36. sslcertupload Subcommand sslcertupload Synopsis racadm sslcertupload -t < type > [-f < filename >] Options Table A-37 describes the sslcertupload subcommand options. Table A-37. -
Page 177: Sslcertdownload
sslcertdownload NOTE: To use this command, you must have Configure DRAC 4 permission. Table A-38 describes the sslcertdownload subcommand. Table A-38. sslcertdownload Subcommand Description sslcertupload Downloads a CA certificate to the DRAC 4. Synopsis racadm sslcertdownload -t < type > [-f < filename >] Options Table A-39 describes the sslcertdownload subcommand options. -
Page 178: Sslcertview
L is the locality, S is the state, and E is the email address: certificate type=1 serial number=00 key size=1024 valid from=DSU+12:34:31 valid to=DSU+15:34:31 subject.C=US subject.CN=RMC Default Certificate subject.O=Dell Inc. subject.OU=BVS subject.L=Round Rock subject.S=Texas [email protected] racadm Subcommand Man Pages Description Displays a CA certificate or server certificate... -
Page 179: Testemail
Default Certificate issuer.O=Dell Inc. issuer.OU=BVS issuer.L=Round Rock issuer.S=Texas [email protected] For the racadm sslcertview -t 1 -A subcommand, you receive output similar to the following example: 1024 DSU+12:34:31 DSU+15:34:31 RMC Default Certificate Dell Inc. Round Rock Texas [email protected] RMC Default Certificate Dell Inc. -
Page 180: Description
Description The testemail subcommand forces the DRAC 4 to send an email over the DRAC 4 network adapter. Options Table A-43 describes the testemail subcommand options. Table A-43. testemail Subcommand Options Option Description Specifies the user who receives the email. The necessary properties must be set up to correctly send email messages. -
Page 181: Vmdisconnect
vmdisconnect NOTE: To use this command, you must have Access Virtual Media permission. Table A-46 describes the vmdisconnect subcommand. Table A-46. vmdisconnect Subcommand Description vmdisconnect Forces a virtual media connection to close. Synopsis racadm vmdisconnect Description The vmdisconnect subcommand allows a user to forcibly disconnect another user's virtual media session. - Page 182 racadm Subcommand Man Pages...
-
Page 183: Idracinfo
DRAC 4 Property Database Group and Object Definitions The DRAC 4 property database contains the configuration information for the DRAC 4. Data is organized by associated object, and objects are organized by object group. The IDs for the groups and objects that the property database supports are listed in this section. Use the group and object IDs with the racadm utility to configure the DRAC 4. -
Page 184: Idracversioninfo (Read Only)
Description A text description of the RAC type. idRacVersionInfo (Read Only) Legal Values String of up to 63 ASCII characters. Default RAC Firmware Version x.x Description A string containing the current firmware version of the product, where x is the current revision. idRacName (Read/Write) NOTE: To modify this property, you must have Configure DRAC 4 permission. -
Page 185: Idractype (Read)
idRacType (Read) Default Description Identifies the remote access controller type as the DRAC 4. cfgLanNetworking This group contains parameters to configure the DRAC 4 NIC. One instance of the group is allowed. All objects in this group will require the DRAC 4 NIC to be reset, which may cause a brief loss in connectivity. -
Page 186: Cfgdnsracname (Read/Write)
Default MYDOMAIN Description The DNS domain name. This parameter is only valid if cfgDNSRegisterRac is set to 1 (TRUE) and if cfgDNSDomainNameFromDHCP is set to 0 (FALSE). When cfgDNSRacName is not the default name and the firmware repair utility diskettes are used to update the DRAC 4, two RAC names (the original and the default) with the same IP address may be seen on the DNS server. -
Page 187: Cfgdnsserversfromdhcp (Read/Write)
cfgDNSServersFromDHCP (Read/Write) NOTE: To modify this property, you must have Configure DRAC 4 permission. Legal Values Boolean, either 1 or 0 (TRUE or FALSE). Default Description Retrieves DNS server addresses from the DHCP server. cfgDNSServer1 (Read/Write) NOTE: To modify this property, you must have Configure DRAC 4 permission. Legal Values Any legal IP address. -
Page 188: Cfgnicenable (Read/Write)
Description Retrieves the IP address for DNS server 2. This parameter is only valid if cfgDNSServersFromDHCP is set to 0 (FALSE). NOTE: cfgDNSServer1 and cfgDNSServer2 may be set to identical values while swapping addresses. cfgNicEnable (Read/Write) NOTE: To modify this property, you must have Configure DRAC 4 permission. Legal Values Boolean, either 1 or 0 (TRUE or FALSE). -
Page 189: Cfgnicgateway (Read/Write)
Description The network mask used by the DRAC 4 NIC. cfgNicGateway (Read/Write) NOTE: To modify this property, you must have Configure DRAC 4 permission. Legal Values A string of "." separated numeric fields containing the static gateway. Default 192.168.0.120 Description The gateway used by the DRAC 4 NIC. -
Page 190: Cfgniccurrentipaddress (Read Only)
cfgNicCurrentIpAddress (Read Only) Legal Values A string of "." separated numeric fields containing the IP address Default None Description The current IP address of the DRAC 4 NIC. cfgNicCurrentNetmask (Read Only) Legal Values A string of "." separated numeric fields containing the network mask. Default None Description... -
Page 191: Cfgdnscurrentdomainname (Read Only)
Description Indicates whether or not DHCP was used to configure the NIC. 0 = IP address is static 1 = IP address was obtained from a DHCP server. cfgDNSCurrentDomainName (Read Only) Description Current DNS domain name. cfgDNSCurrentServer1 (Read Only) Description Current IP address used for DNS Server 1. -
Page 192: Cfgrhostssmtpserveripaddr (Read/Write)
cfgRhostsSmtpServerIpAddr (Read/Write) NOTE: To modify this property, you must have Configure DRAC 4 permission. Legal Values A string of "." separated numeric fields containing the IP address. Default 127.0.0.1 Description The IP address of the server used in email alerts. cfgRhostsFwUpdateTftpEnable (Read/Write) NOTE: To modify this property, you must have Configure DRAC 4 permission. -
Page 193: Cfgrhostsfwupdatepath (Read/Write)
cfgRhostsFwUpdatePath (Read/Write) NOTE: To modify this property, you must have Configure DRAC 4 permission. Legal Values String of up to 255 ASCII characters that designate a valid path name. Default "" Description The path name pointing to the firmware update binary file. If this is a file name only, then the path needs to be specified in the TFTP server. -
Page 194: Cfguseradminusername (Read/Write)
Table B-1. Bit Masks for User Privileges User Privilege Log In To DRAC 4 Configure DRAC 4 Configure Users Clear Logs Execute Server Control Commands Access Console Redirection Access Virtual Media Test Alerts Execute Debug Commands cfgUserAdminUserName (Read/Write) NOTE: To modify this property, you must have Configure Users permission. Legal Values A string of up to 19 ASCII characters. -
Page 195: Cfguseradminalertfilterraceventmask (Read/Write)
Description The password for this user. The user passwords are encrypted and cannot be seen or displayed after this property is written. cfgUserAdminAlertFilterRacEventMask (Read/Write) NOTE: To modify this property, you must have Configure Users permission. Legal Values See "DRAC 4-Generated Event Mask Definitions." Default 0x777777 Description... -
Page 196: Cfguseradminemailaddress (Read/Write)
cfgUserAdminEmailAddress (Read/Write) NOTE: To modify this property, you must have Configure Users permission. Legal Values A string of up to 63 ASCII characters. Default "" Description Standard email address, such as [email protected]. cfgUserAdminEmailCustomMsg (Read/Write) NOTE: To modify this property, you must have Configure Users permission. Legal Values A string of up to 31 ASCII characters. -
Page 197: Cfgtrapsenable (Read/Write)
Legal Values A string of "." separated numeric fields containing the IP . Default "" Description IP address of an SNMP trap daemon. NOTE: This object is the anchor for this indexed group. cfgTrapsEnable (Read/Write) NOTE: To modify this property, you must have Configure DRAC 4 permission. Legal Values Boolean, either 1 or 0 (TRUE or FALSE). -
Page 198: Cfgtrapsfiltersyseventmask (Read/Write)
Legal Values See "DRAC 4-Generated Event Mask Definitions." Default 0x300000 Description See "DRAC 4-Generated Event Mask Definitions." (Type hexadecimal values.) cfgTrapsFilterSysEventMask (Read/Write) NOTE: To modify this property, you must have Configure DRAC 4 permission. Legal Values See "DRAC 4-Generated Event Mask Definitions." Default 0x77777 Description... -
Page 199: Cfgssnmgtmaxsessions (Read/Write)
cfgSsnMgtMaxSessions (Read/Write) NOTE: To modify this property, you must have Configure DRAC 4 permission. Legal Values 0x1 through 0x4 Default Description The maximum number of simultaneous sessions that are allowed at one time from the DRAC 4 Web-based remote access interface. (Type hexadecimal values.) cfgSsnMgtMaxSessionsPerUser (Read/Write) NOTE: To modify this property, you must have Configure DRAC 4 permission. -
Page 200: Cfgserial
One instance of the group is allowed. The following subsections describe the objects in this group. cfgSerialBaudRate (Read/Write) NOTE: To modify this property, you must have Configure DRAC 4 permission. NOTE: For best results redirecting BIOS System Setup screens, Dell recommends using 115200. Legal Values 9600, 28800, 57600, 115200 Default 115200 Description Sets the baud rate on the external serial port. -
Page 201: Cfgserialconsolequitkey (Read/Write)
cfgSerialConsoleQuitKey (Read/Write) NOTE: To modify this property, you must have Configure DRAC 4 permission. Legal Values A string of 3 or less characters. Default The<~><.> key combination The key represents a carriage return; press as a substitute for . Description This key sequence terminates text console redirection when using VT-100. -
Page 202: Cfgserialconsolenoauth (Read/Write)
cfgSerialConsoleNoAuth (Read/Write) NOTE: To modify this property, you must have Configure DRAC 4 permission. Legal Values 0 – Login prompt is Enabled on the serial shell. 1 – Login prompt is Disabled on serial shell. Default Description Allows you to disable authentication on the serial shell. cfgSerialConsoleCommand (Read/Write) NOTE: To modify this property, you must have Configure DRAC 4 permission. -
Page 203: Cfgserialsshenable (Read/Write)
cfgSerialSshEnable (Read/Write) NOTE: To modify this property, you must have Configure DRAC 4 permission. Legal Values 0=disabled, 1=enabled Default 1=enabled Description Enables/disables secure shell on the DRAC 4. cfgSerialTelnetEnable (Read/Write) NOTE: To modify this property, you must have Configure DRAC 4 permission. Description Enables/disables telnet console Default... -
Page 204: Cfgserialtelnet7Flsbackspace (Read/Write)
cfgSerialTelnet7flsBackspace (Read/Write) NOTE: To modify this property, you must have Configure DRAC 4 permission. Description When enabled, the DRAC 4 will interpret 0x7f characters as backspaces from a telnet session. Some telnet clients send 0x7f characters when you press. Normally, when you press , 0x08 characters are sent. -
Page 205: Cfgnettuningnicfullduplex (Read/Write)
Default Description Sets the DRAC 4 link speed to 100 Mbit (1) or 10 Mbit (0). cfgNetTuningNicFullDuplex (Read/Write) NOTE: To modify this property, you must have Configure DRAC 4 permission. Legal Values 1 or 0 Default Description Sets the duplex to full duplex(1) or half duplex (0). cfgNetTuningNicMtu (Read/Write) NOTE: To modify this property, you must have Configure DRAC 4 permission. -
Page 206: Cfgnettuningipreassttl (Read/Write)
Description The maximum IP packet time to live in seconds. (Type hexadecimal values.) cfgNetTuningIpReassTtl (Read/Write) NOTE: To modify this property, you must have Configure DRAC 4 permission. Legal Values Integer from 60 to 240. Default 0x3c (60) Description The maximum IP packet fragment reassembly time in ½ second units. (Type hexadecimal values.) cfgNetTuningTcpSrttBase (Read/Write) NOTE: To modify this property, you must have Configure DRAC 4 permission. -
Page 207: Cfgnettuningtcprexmtmin (Read/Write)
Description The smoothed round trip time-out base default value for TCP retransmission round trip time in ½ second units. (Type hexadecimal values.) cfgNetTuningTcpReXmtMin (Read/Write) NOTE: To modify this property, you must have Configure DRAC 4 permission. Legal Values Integer from 2 to 1024. Default 0x2 (2) Description... -
Page 208: Cfgnettuningipsubnetsarelocal (Read/Write)
cfgNetTuningIpSubnetsAreLocal (Read/Write) NOTE: To modify this property, you must have Configure DRAC 4 permission. Legal Values 1 or 0 Default Description Packets addressed to subnets of the local net do not go to the gateway. Tuning the DRAC 4 for Satellite Connectivity The racadm CLI may be used to modify the network tuning properties of the DRAC 4. -
Page 209: Cfgoobsnmp
Table B-2. DRAC 4 Properties for Satellite Connectivity (continued) Property Normal Value cfgNetTuningTcpReXmtMin 0 cfgNetTuningTcpReXmtMax 0x80 cfgNetTuningTcpMsl 0x3c NOTICE: Although you can configure these parameters, it is recommended that you only use the settings described here. Other settings may adversely effect the DRAC 4's ability to communicate with other network nodes. -
Page 210: Cfgoobsnmpagentenable (Read/Write)
Description 0=Disable, 1=Enable transmission of SNMP traps. cfgOobSnmpAgentEnable (Read/Write) NOTE: To modify this property, you must have Configure DRAC 4 permission. This object requires a DRAC 4 reset before it becomes active. Legal Values Boolean either 1 or 0 (TRUE or FALSE). Default Description =Disable, 1=Enable the DRAC 4 SNMP agent. -
Page 211: Cfgractunehttpsport (Read/Write)
cfgRacTuneHttpsPort (Read/Write) NOTE: To modify this property, you must have Configure DRAC 4 permission. Legal Values 0 – 65535 Default Description Use this property to configure the DRAC 4 HTTPS port. (Type hexadecimal values.) cfgRacTuneSshPort (Read/Write) NOTE: To modify this property, you must have Configure DRAC 4 permission. Legal Values 0 –... -
Page 212: Cfgractunefwupdateresetdelay (Read/Write)
To modify this property, you must have Configure DRAC 4 permission. Legal Values 115200, 57600, 19200, and 9600 Default 57600 NOTE: For best results when redirecting BIOS System Setup screens, Dell recommends setting this baud rate to 57600. DRAC 4 Property Database Group and Object Definitions... -
Page 213: Cfgractuneconredirport (Read/Write)
cfgRacTuneConRedirPort (Read/Write) NOTE: To modify this property, you must have Configure DRAC 4 permission. Legal Values 0-65535 Default 5900 (0x170c) Description Determines the port used during vKVM sessions with the Console Redirection window. After changing this property, the RAC must be reset prior to opening any new Console Redirection sessions. -
Page 214: Ifcracmnosostype (Read Only)
Default "" Description The operating system name of the managed system. ifcRacMnOsOsType (Read Only) Legal Values Not user-writable. Default Description Manage system operating system type. cfgRacSecurity This group contains parameters to configure the DRAC 4 SSL (Secure Sockets Layer) security features. cfgRacSecCsrCommonName (Read/Write) NOTE: To modify this property, you must have Configure DRAC 4 permission. -
Page 215: Cfgracseccsrorganizationunit (Read/Write)
Default "" Description The CSR organization name. cfgRacSecCsrOrganizationUnit (Read/Write) NOTE: To modify this property, you must have Configure DRAC 4 permission. Legal Values A string of any ASCII characters. Default "" Description The CSR organization unit. cfgRacSecCsrLocalityName (Read/Write) NOTE: To modify this property, you must have Configure DRAC 4 permission. Legal Values A string of any ASCII characters. -
Page 216: Cfgracseccsrcountrycode (Read/Write)
Description The CSR state. cfgRacSecCsrCountryCode (Read/Write) NOTE: To modify this property, you must have Configure DRAC 4 permission. Legal Values The two-letter country code. Default "" Description The CSR country code. cfgRacSecCsrEmailAddr (Read/Write) NOTE: To modify this property, you must have Configure DRAC 4 permission. Legal Values A string of any ASCII characters. -
Page 217: Cfgracvirtual
Legal Values 1 or 0 (True or False) Default Description 0 (False) is the default setting, causing the DRAC 4 IDE Option ROM utility to display DELL VIRTUALS-120 instead of VIRTUALFLOPPY DRIVE. Operating systems, such as ® Microsoft Windows , assign drive letters A or B to the RAC Virtual Floppy drive and configure the drive as a floppy drive. -
Page 218: Cfgviratapisrvport (Read/Write)
cfgVirAtapiSrvPort (Read/Write) NOTE: To modify this property, you must have Access Virtual Media permission. Legal Values Any unused port number between 0 and 65535 decimal. Default 0E54 in hexadecimal(3668 in decimal) Description Sets the port number or virtual media connection. (Type hexadecimal values). cfgVirtualBootOnce (Read/Write) NOTE: To modify this property, you must have Configure DRAC 4 permission. -
Page 219: Cfgadracname (Read/Write)
Description Active Directory Domain in which the DRAC resides. cfgADRacName (Read/Write) NOTE: To modify this property, you must have Configure DRAC 4 permission. Legal Values Any printable text string with no white space. Length is limited to 254 characters. Default (blank) Description Name of DRAC as recorded in the Active Directory forest. -
Page 220: Cfgadrootdomain (Read/Write)
cfgADRootDomain (Read/Write) NOTE: To modify this property, you must have Configure DRAC 4 permission. Legal Values Any printable text string with no white space. The length is limited to 254 characters. Default (blank) Description Root domain of the Domain Forest. Event Filter Operation and Event Mask Properties The DRAC 4 alert filter scans the alert enable database properties before it scans the event masks. -
Page 221: System-Generated Alert Mask Definitions
Table B-3. DRAC 4-Generated Event Mask Bit Definitions Bits Data 28–31 DRAC 4 undefined 24–27 DRAC 4 miscellaneous alerts 20–23 DRAC 4 BMC communication alerts wherehas the following bit definitions: • Bit-0: 1 = Send alert for DRAC 4 communication with BMC and lost or restored communication between the DRAC 4 and BMC. -
Page 222: Alert Filter Properties
Table B-4. System-Generated Alert Mask Bit Definitions Bits Data 28–31 System undefined 24–27 System undefined 20–23 System undefined 16–19 System status alerts 12–15 System miscellaneous sensor 8–11 System fan sensors 4–7 System voltage sensors 0–3 System temperature sensors wherehas the following bit definitions: •... -
Page 223: Alert Test Commands
BMC version. The following is an example test email (fields shown are examples only and may not reflect actual observed output for your environment): Subject: Alert from Dell Remote Access Card: 10.35.10.108 Message: TEST PAGE Event: Email paging test to user 1... -
Page 224: Trap Test Command
System ID: Bbn Model: Dell PowerEdge 2800 BIOS version: A00 Asset tag: 181676 Service tag: 6X713 Hostname: P2-750-08 OS Name: Linux 7.1 for the Itanium Processor BMC Version: 1.3 Trap Test Command Synopsis racadm testtrap -t -i < trap index >... - Page 225 Glossary Abbreviation for accelerated graphics port, which is a bus specification that allows graphics cards faster access to main system memory. Acronym for application programming interface. Acronym for Address Resolution Protocol, which is a method for finding a host’s Ethernet address from its Internet address.
- Page 226 DLL program (or file). DDNS Abbreviation for Dynamic Domain Naming System. Abbreviation for Domain Name System. DRAC 4 Abbreviation for Dell™ Remote Access Controller 4. Abbreviation for disk storage unit. Abbreviation for digital versatile disc (also known as digital video disc). FQDN Acronym for Fully Qualified Domain Names.
- Page 227 Abbreviation for international standards organization. Abbreviation for Java Virtual Machine, which is a system-independent execution environment that converts compiled Java code (byte code) for a system processor so that it can perform a Java program instructions. Kbps Abbreviation for kilobits per second, which is a data transfer rate.
- Page 228 RAM disk A memory-resident program which emulates a hard drive. The DRAC 4 maintains a RAM disk in its memory. Abbreviation for remote access controller. Acronym for read-only memory, which is memory from which data may be read, but to which data cannot be written.
- Page 229 137 console redirection, 103, 106 console, configure, 43 DB-9 cable, 52 dell extension, installation, 94 dell product class, 92 dell schema extender, 90 dellAssociationObject class, 91 dellPrivileges class, 92 dellProduct, 92 dellRAC4Privileges class, 92 dellracdevice class, 91...
- Page 230 DRAC 4 security, 24 DRAC 4 users, add, 38 DRAC 4, active directory, 85 drac 4, configuration, 99 DRAC 4, features, 26 DRAC 4, hardware features, 22 DRAC 4, installation and setup, 29 DRAC 4, overview, 21 DRAC 4, properties, 34 DRAC 4, removing related applications and drivers, 42 DRAC4 network error codes, 147...
- Page 231 messages, DRAC 4 log, 79 microsoft, telnet, 56 minicom, red hat linux, 53 mozilla, 32 network, 35 network error codes, 78, 147 network properties, configuration, 141 network, security, 66 network, troubleshooting, 78 nic, 61 object overview, active directory, 86 object setup, active directory, 87 os deployment, VM-CLI, 143 OS shell options, vm-cli, 121...
- Page 232 serial redirection, red hat linux, 45 serial/telnet commands, 128 settings, 35 setup, active directory objects, 87 snmp alerts, configure, 38 software basics, red hat linux, 41 software, configuration, 29 software, installation, managed system, 30 specifications hardware, 23 SSH, 50 ssl, 97 sun java, 33 super floppy, 116 system information, 70...