Table of Contents
Quick Links
Table of Contents

Related Manuals for Yamaha 01V96i


Summary of Contents for Yamaha 01V96i
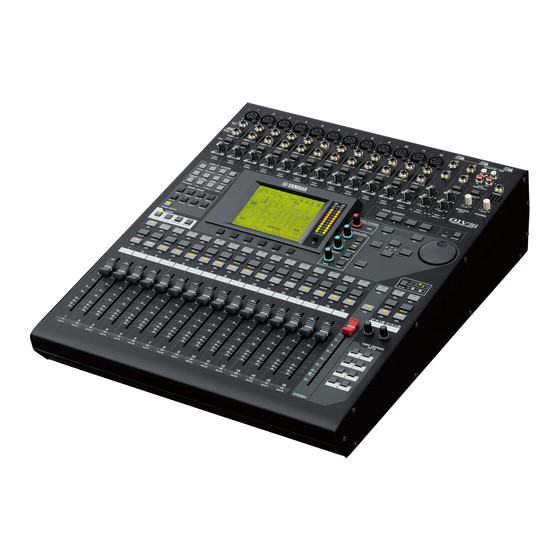
- Page 1 Owner’s Manual Keep This Manual For Future Reference.
-
Page 2: Table Of Contents
Contents Contents Creating a Custom Layer by Combining Channels (User Assignable Layer) ..44 Using the Oscillator ........45 Using the User Defined Keys ....46 PRECAUTIONS ........5 Using Operation Lock ....... 47 Initializing ..........48 Welcome .......... 7 Package Contents ......... 7 Troubleshooting ...... -
Page 3: Important Safety Instructions
The above warning is located on the rear of the unit. IMPORTANT SAFETY INSTRUCTIONS Read these instructions. 10 Protect the power cord from being walked on or pinched particularly at plugs, convenience Keep these instructions. receptacles, and the point where they exit from Heed all warnings. - Page 4 This product contains a battery that contains perchlorate material. The wire which is coloured GREEN-and-YELLOW must be connected Perchlorate Material—special handling may apply, to the terminal in the plug which is marked by the letter E or by the See www.dtsc.ca.gov/hazardouswaste/perchlorate. safety earth symbol or colored GREEN or GREEN-and-YELLOW.
-
Page 5: Precautions
Yamaha service personnel. CAUTION Always follow the basic precautions listed below to avoid the possibility of physical injury to you or others, or damage to the device or other property. These precautions include, but are not limited to, the following: Power supply/Power cord •... - Page 6 Yamaha service personnel. • Remove the power plug from the AC outlet when cleaning the device. • Do not rest your weight on the device or place heavy objects on it, and avoid use excessive force on the buttons, switches or connectors.
-
Page 7: Welcome
• The included disc is not an audio disc. Do not use it in a conventional audio player. About the included DAW... -
Page 8: Firmware Updates
” to view this file on your com- puter, you’ll be able to rapidly search for terms, print only the pages you require, or click a link to access a relevant section. In particular, searching for terms and clicking links are conveniences available only in an electronic file, and we hope you take advantage of these possibilities. -
Page 9: Control Surface & Rear Panel
Note: Screw holes for attaching a cover are located at both sides of the AD input section of the 01V96i. (Size M3, horizontal spacing 417 mm, vertical spacing 36 mm.) You may wish to fabricate your own cover and attach it to the front panel to prevent the controls from being operated inadvertently. -
Page 10: Ad Input Section
These controls adjust input sensitivity for each AD 2 (hot) Input. Input sensitivity is –16 dB to –60 dB when the Pad is off, and +4 dB to –40 dB when the Pad is Tip (hot) PEAK indicators 1/4" TRS phone plug... -
Page 11: Channel Strip Section
( ) is turned on (pushed in), the signals input These buttons turn the selected at the 2TR IN connectors are routed to AD Input channels on or off. The [ON] Channels 15 and 16. When the Monitor Source... -
Page 12: Display Access Section
This button selects an ST IN channel pair (ST IN [DIO/SETUP] button Channels 1 & 2 or 3 & 4) which you can control using the buttons and controls in the ST IN section. This button displays a DIO/Setup page, enabling... -
Page 13: Display Section
LAYER Section LAYER Display 1-16 17-32 MASTER REMOTE This is a 320 x 240 dot LCD display with a backlight. Stereo meters These 12-segment level meters display the final out- put level of the Stereo Bus. [1–16]/[17–32] buttons Contrast control These buttons select an Input Channel layer as the This control adjusts the display contrast. -
Page 14: Selected Channel Section
Scene Up [ ] / Down [ ] buttons [PAN] control These buttons select a Scene to store or recall. Press- ing the Scene Up [ ] button increments the selec- This control adjusts the pan of the channel selected tion;... -
Page 15: Data Entry Section
This control adjusts the parameter values shown on the display. Turning it clockwise increases the value; turning it counterclockwise decreases the value. This wheel also enables you to scroll a displayed list and select a character for entry (see page 21). [ENTER] button... -
Page 16: Rear Panel
When the switches are on, +48V phantom power is supplied to the INPUT A connectors. Sleeve (ground) Note: • Make sure that this switch is turned off if phan- These balanced TRS phone-type connectors output tom power is not required. monitoring signals or 2TR IN signals. The nominal •... - Page 17 TO HOST USB port, please take the following mea- sures. WORD CLOCK OUT connector If you fail to take these measures, your computer or the 01V96i may stop operating (hang up), or data This BNC connector outputs a wordclock signal may be lost or damaged.
-
Page 18: Installing An Optional Card
AES/EBU, ADAT, and Tascam. Keep the cover and fixing screws in a safe place for Input signals from an I/O card can be patched to future use. -
Page 19: Operating Basics
Operating Basics MIDI indicator This indicator appears when the 01V96i is receiving MIDI data via the MIDI IN port, USB port, or an installed card. This chapter describes basic operations on the 01V96i, including how to use the display and operate the con- Surround mode indicator trols on the top panel. -
Page 20: Selecting Display Pages
Right or of two options or to execute certain functions. Left [ ] Tab Scroll button. You can also select a page from a page group as fol- lows: Parameter Boxes • Selecting the next page in a page group: The parameter boxes enable Press the button you selected in Step 1 repeatedly. -
Page 21: Selecting Layers
Title Edit Window Remote Layer Master Layer The Title Edit window enables you to enter titles for Scene and library memories. You can enter 4, 12, or 16 characters, depending on the item. The currently-selected LAYER The figure on the left shows uppercase characters and layer determines the various punctuation marks. -
Page 22: Selecting Channels
No operation buttons Note: You cannot select the [AUX1]–[AUX8] buttons while the Master layer is selected. If you switch to the Mas- ter layer while one of the [AUX1]–[AUX8] button indica- tors is lit, the indicator automatically turns off and the [HOME] button indicator lights up. -
Page 23: Metering
This page enables you to set the metering position for Input and Output Channels. • ST IN page This page displays the left and right ST IN Channel 1–4 levels separately. INPUT section This section enables you to select the metering position for Input Channel and ST IN Channel sig- nals. - Page 24 PEAK HOLD button, then press [ENTER]. The PEAK HOLD button turns on, and the peak level is held on the meters on the page. To cancel the Peak Hold function, turn the PEAK HOLD button off.
-
Page 25: Connections And Setup
If an optional AD card (such as the MY8-AD or MY8-AD96) is installed in the slot, up to 24 analog channels can be mixed. Tip: You can adjust the gain of the AD card channels by setting the DIP switches on the card. For more information, see your AD card documentation. - Page 26 In this system, the 01V96i is connected to a computer-based DAW (Digital Audio Workstation). This allows the 01V96i to be used as an audio interface with 16-channel input and output. The 01V96i’s remote functionality can also be used to perform locate and transport operations on the DAW, and to edit its parameters.
-
Page 27: Wordclock Connections And Settings
The 01V96i can be used as the wordclock master running at either 44.1 kHz, 48 kHz, 88.2 kHz, or 96 kHz, or slaved to an Digital audio signal external wordclock source. - Page 28 Tip: If wordclock transfer is interrupted while the 01V96i input, but it is out of sync with the current (being used as a slave unit) is receiving the clock signal, the 01V96i internal clock. unit will automatically switch to an internal clock (INT This input is the currently-selected wordclock 44.1k/ INT 48k/INT 88.2k/INT 96k) that is closest to the...
-
Page 29: Input And Output Patching
Tip: If the data from a connected instrument fails to be Use the cursor buttons to move the cur- input, or if you are unable to monitor the signal at the sor to a patch parameter ( 1 ) for which... - Page 30 • USB OUT1–8 ..Bus Out 1–8 signals • AUX1–AUX8 ....Aux Out 1–8 Signals • USB OUT9–16... Bus Out 1–8 signals • ST L/R........Stereo Out signals If you want to change or verify this patching, proceed as • INS CH1–INS CH32..Input Channels 1–32 follows. Insert Outs Press [PATCH] repeatedly until the fol- •...
-
Page 31: Tutorial
This chapter describes operations on the 01V96i, orga- [ENTER], and make a selection in the “PATCH nized according to their purpose. SELECT” box. In this case, select the desired input con- nector and channel number, and press [INC] to con- firm the change. -
Page 32: Setting The Input Levels
Note: If you set the POSITION parameter to “PRE Press the LAYER [1–16] button. EQ, ” the pre-EQ input levels are metered. If you set the parameter to “PRE FADER, ” the post-EQ and Input Channel Layer 1–16 is now available for con- pre-fader input levels are metered. -
Page 33: Pairing Channels
INPUT connector 1 CH 1 If you try to operate the faders for both channels in the Input Channels 1 pair, an excessive load will be applied to the fader... - Page 34 Pan/Route | Rout1-16 page. In this example, Input Channels 1–4 are assigned to This page enables you to select a Bus Out as the sig- Buses 1 and 2, and Input Channels 5–8 are assigned nal destination for each channel.
-
Page 35: Eq'ing The Input Signals
Direct Outs, then specify the output con- The 01V96i’s Input Channels feature 4-band full para- nectors or channels. metric EQ. This section describes how to use the EQ of an Input Channel to adjust the tonal character. In this example, Input Channel 9–12 signals are routed to ADAT OUT channels 5–8. -
Page 36: Using The Eq Library
The selected program is recalled. all the way to set it to “LPF” (low-pass filter). • By default, the LOW band is set to “L. SHELF, ” and Press the [F1] button to display the EQ | the HIGH band is set to “H. SHELF. ”... -
Page 37: Compressing The Input Signals
A compressor is an effect used to make the volume level more consistent, or to restrain the maximum level in order to raise the overall volume. Here we describe how to use a compressor to process an input signal. Press the LAYER [1–16] button. -
Page 38: Using The Internal Effects
Effect | FX1 Lib page appears. The 01V96i features four internal multi-effects proces- sors that can be used via Aux Sends and Returns or by inserting them into specific channels. This section describes how to use internal Effects processor 1 via Aux Send 1, and apply reverb to the track signals. -
Page 39: Recording To Daw Software Via The Usb Port
USB to a stereo track of your DAW. Tip: The Input Channels that you want to record must be assigned to Bus Outs 1/2. For details on how to do this, refer to “Setting the Routing” on page 33. Use a USB cable to connect your com- puter to the 01V96i. -
Page 40: Recording Direct Outputs
In this method, each Input Channel is recorded directly will be Mono In 1–16). to your DAW. Use this method if you want to record the signals of multiple Input Channels each to their own Enable recording for all of the tracks that track. -
Page 41: Adjusting The Monitor Levels From The Daw
01V96i’s Input Channels and moni- tored via the MONITOR OUT jacks or PHONES jack. Normally, the signal of the DAW’s stereo bus is sent to an 01V96i Input Channel for monitoring. However when overdubbing, you might need to monitor with a balance that’s different than the mix balance of the... -
Page 42: Using Scene Memories
Here’s how to use the top panel keys to recall a Scene. Adjust the mix parameters on the 01V96i to the conditions you wish to store as a Scene. -
Page 43: Changing The Channel Names
ACCESS [PATCH] button repeatedly until the Patch | Out Name page appears. Channel IDs, Short names, and Long names are listed from left to right on the page. You can specify Short names in the parameter boxes ( ) in the... -
Page 44: Creating A Custom Layer By Combining Channels (User Assignable Layer)
(User Assignable Layer) If you set the Remote Layer target to “USER ASSIGN- ABLE, ” you can create a custom layer by combining any 01V96i channels (excluding the Stereo Out). This cus- tom layer is called “User Assignable layer. ”... -
Page 45: Using The Oscillator
Press the DISPLAY ACCESS [UTILITY] but- damage the speakers. When you use the Oscillator, be ton repeatedly until the Utility | Oscillator sure to set the level to minimum, then raise the level page appears. gradually. Move the cursor to the OSCILLATOR... -
Page 46: Using The User Defined Keys
1–8 parameter boxes. USER DEFINED KEYS [1]–[8] buttons. If you assign to one of the buttons (or “keys”) a function Tip: When you select a function that is executed based on specified numbers (for example, a function that... -
Page 47: Using Operation Lock
Using Operation Lock Using Operation Lock Tip: The 01V96i’s settings can be saved on the hard disk of your computer by using Studio Manager soft- ware. We strongly recommend that you back up The 01V96i features an Operation Lock function that important data. -
Page 48: Initializing
• If you initialize the 01V96i to the factory-preset values, all Scene, library and other data you stored previously will be erased. Proceed with caution. • If you want to keep the current internal data, be sure to first back up the data using the Studio Manager soft- ware. -
Page 49: Troubleshooting
❍ Are the LCD contrast and panel brightness set appropriately? ❍ Is the POWER switch turned on? Power won’t turn on, panel LEDs or ❍ If the power still does not turn on, contact a Yamaha service center listed at the LCD won’t light end of the manual. - Page 50 Troubleshooting ❍ Could the EQ gain be excessively low? ❍ Routing a signal through GEQ or an effect will delay it relative to other signals. If Signal level is low at a specific frequency a signal is mixed with the same signal routed differently, a comb filter effect will decrease the level at specific frequencies.
-
Page 51: Error Messages
The battery is dead. Replace the battery. Replace Battery ! Communication issues This will appear if you attempt to execute a bulk dump with the MIDI PORT MIDI port is not selected! unspecified. Port Busy occurred while executing a MIDI bulk dump. - Page 52 You cannot Paste because the channel module is different. For example, this mes- Can’t Paste to a Different Channel Type. sage will appear if you copy INPUT Channel 1 and attempt to paste it to AUX1. This effect type can be used only with EFFECT 1 and 2. This message will appear For Effect 1,2 Only.
- Page 53 Direct Out while using Direct Out. Sound will not be output because an invalid Direct Out Patch has been specified. This message will appear if you turn on a Direct Out that is patched to an output This Routing is Ineffective! port corresponding to the even-numbered channel of a double channel when operating at 88.2 kHz or 96 kHz.
-
Page 54: Contents Of The Reference Manual
Machine Control Function ............. 98 Bus Out 1–8 ..................29 MIDI ..............100 Setting the Stereo Out and Bus Out 1–8 from the Display ..30 MIDI & the 01V96i ................ 100 Setting the Stereo Out and Bus Out 1–8 from the Control MIDI Port Setup ................ -
Page 55: Specifications
Pad switch 0/20 dB attenuation Gain control 44 dB (–60 to –16), detented LED (red) turns on when post HA level reaches 3 dB below clipping at dig- Peak indicator AD Input (1–12) ital domain LED (green) turns on when post HA level reaches 20 dB below nominal at... - Page 56 Specifications Gain control 30 dB (–26 to +4), detented LED (red) turns on when post HA level reaches 3 dB below clipping at dig- Peak indicator ital domain LED (green) turns on when post HA level reaches 20 dB below nominal at AD Input (13–16)
- Page 57 0 to –96 dB (1 dB step) On/off — OSCILLATOR Waveform Sine 100 Hz, sine 1 kHz, sine 10 kHz, pink noise, burst noise Routing BUS1–8, AUX1–8, STEREO L/R 24-bit linear, 128-times oversampling (@fs=44.1, 48 kHz), 64-times over- STEREO OUT DA converter sampling (@fs=88.2, 96 kHz)
- Page 58 RACK MOUNT KIT: RK1 1. Total harmonic distortion is measured with a 6 dB/octave filter @ 80 kHz. 2. Hum & Noise are measured with a 6 dB/octave filter @ 12.7 kHz; equivalent to a 20 kHz filter with infinite dB/octave attenuation.
- Page 59 Range –70 dB–0 dB (1 dB step) Attack 0 ms–120 ms (1 ms step) 0.02 ms–1.96 s (216 points) @ 48 kHz 0.02 ms–2.13 s (216 points) @ 44.1 kHz Hold Gate 0.01 ms–981 ms (216 points) @ 96 kHz 0.01 ms–1.06 s (216 points) @ 88.2 kHz...
-
Page 60: Libraries
Comp Parameters Threshold –54 dB–0 dB (0.1 dB step) x=1, 1.1, 1.3, 1.5, 1.7, 2, 2.5, 3, 3.5, 4, 5, 6, 8, 10, 20, (16 points) Ratio (x :1) Out gain 0 dB to +18 dB (0.1 dB step) -
Page 61: Analog Input Spec
(3.16 V) (Unbalanced) 1. Sensitivity is the lowest level that will produce an output of +4 dB (1.23 V) or the nominal output level when the unit is set to maximum gain. (All faders and level controls are maximum position.) 2. -
Page 62: Digital Input Spec
2TR IN DIGITAL IEC 60958 24-bit RCA pin jack ADAT IN 24-bit — OPTICAL ADAT 1. ALESIS proprietary multichannel optical digital interface format Digital Output Spec Output Format Data length Level Connector IEC 60958 0.5V pp/75 Ω 2TR OUT DIGITAL... -
Page 63: I/O Slot Spec
I/O SLOT Spec I/O SLOT Spec The I/O SLOT accepts a mini YGDAI card. The SLOT has a serial interface. Reso- The number of Maker Model Function Input Format Frequency Note Output lution Available cards MY8-AT ADAT MY16-AT MY8-TD TASCAM MY16-TD 44.1/48 kHz... -
Page 64: Midi/Usb/Word Clock I/O Spec
Specifications and descriptions in this owner’s manual are for information purposes only. Yamaha Corp. reserves the right to change or modify products or specifications at any time with- out prior notice. Since specifications, equipment or options may not be the same in every locale, please check with your Yamaha dealer. -
Page 65: Options
Hold one of the brackets against one side of the 01V96i so that the bracket ear projects to the side, and align three holes on the bracket with the holes on the side of the 01V96i, as shown in the illustration below. -
Page 66: Index
AD15/16 selector ........10 ADAT IN/OUT connectors ....17 F (Frequency) ......... 36 ASSIGN section ........45 F1–F4 buttons ........13 Name Input Auto Copy check box ..43 ATT............36 Factory default password ..... 47 Attaching a cover ........9 Factory-preset ........48 AUX 1–AUX 8 buttons ....... - Page 67 Q (slope) ..........35 USB 2.0 port ...........17 Q control ..........14 USB OUT ..........30 User Assignable Layer ......44 User Define Select window ....46 User Defined Keys .........46 RECALL button ........14 USER DEFINED KEYS Section ..14 Recording system ........26 UTILITY button ........12 Recording to DAW Software ....39...
-
Page 68: 01V96I Block Diagram
01V96i Block Diagram... -
Page 69: 01V96I Level Diagram
-120 -100 -100 -130 -110 -110 -140 -120 -120 -150 -130 -130 -160 -140 -140 -170 -150 -150 -180 -160 -160 -190 -170 -170 DSP Noise Floor -200 -180 -180 -210 -190 -190 [0dBu = 0.775Vrms] [0dBFS = Full Scale]... - Page 70 Niederlassung und bei Yamaha Vertragshändlern in den jeweiligen Bestimmungsländern erhältlich. Pour plus de détails sur les produits, veuillez-vous adresser à Yamaha ou au distributeur le plus proche de vous figurant dans la liste suivante. Para detalles sobre productos, contacte su tienda Yamaha más cercana o el distribuidor autorizado que se lista debajo.
- Page 71 Yamaha Pro Audio Global Web Site http://www.yamahaproaudio.com/ Yamaha Manual Library http://www.yamaha.co.jp/manual/ C.S.G., Pro Audio Division © 2011 Yamaha Corporation 110IPTO-A0 Printed in Japan WZ74200...