Table of Contents
Table of Contents

Related Manuals for Sharp Mobilon HC-4000


Summary of Contents for Sharp Mobilon HC-4000
- Page 1 MODEL OPERATION MANUAL...
- Page 2 Safety Warning on Internal Fax/Modem Never install telephone wiring during a lightning storm. Never install a modular jack in a wet location unless the jack is specifically designed for wet locations. Never touch uninsulated telephone wires or terminals unless the telephone line has been disconnected at the network interface.
-
Page 3: License Agreement
SALES RECEIPT TO YOUR VENDOR. LIMITED USE SOFTWARE LICENSE In consideration of the license fee, which is a part of the price you paid for this product, Sharp Corporation, as Licensor, grants you, the Licensee, a non-exclusive software license to use the software("the Software") and related documentation supplied with the product. - Page 4 8. This license is effective until terminated. This license will terminate automatically without notice from the Licensor if you fail to comply with any provision of this Agreement. Upon termination you will destroy the Software together with all copies and modifications in any form.
- Page 5 + Unless otherwise specified, the information in this manual applies to all three models. + One of the models or certain accessories described in this manual may not be available in your country when you purchase this product. Check with your local SHARP dealer concerning availability.
-
Page 6: Table Of Contents
Contents INTRODUCTION ...6 What the HC-4000/HC-4100/HC-4500 can do ... 6 Checking the contents... 6 About this manual ... 7 Conventions used... 7 Caring for your unit... 8 GETTING STARTED ...10 Part names and functions... 10 Installing the batteries ... 13 Setting up the unit ... - Page 7 COMMON QUESTIONS & ANSWERS ...53 TROUBLESHOOTING ...57 APPENDIX ...59 Hardware specifications ... 59 Character conversion tables ... 61 INDEX...65...
-
Page 8: Introduction
Windows CE Services 2.0 Pocket Internet Explorer Pocket Outlook (Contacts/Calendar/Tasks/Inbox) Additional applications from SHARP in this unit make your mobile life even more comfortable: Image Editor (to edit images) Voice Recorder (to record audio notes) IR Data exchange with SHARP ZR series units Checking the contents Please check the contents carefully. -
Page 9: About This Manual
Quickly walks you through setting up the unit. HARDWARE Explains the hardware features of this unit and its general operation. SOFTWARE Describes the bundled software applications from SHARP. COMMON QUESTIONS AND ANSWERS Lists common questions you may have, and the answers. TROUBLESHOOTING Covers possible remedies to problems you may encounter while setting up and using the unit. -
Page 10: Caring For Your Unit
Do not use extreme force when pressing the display or keys. Do not use sharp objects or your fingernails to touch the display screen. We recommend you use only the supplied stylus to tap or write... - Page 11 Hard, sharp objects can scratch your unit, so ensure it is closed and/or protected when carried with other objects. Do not use solvents to clean your unit. Use only a soft dry cloth. Do not carry your unit in your back pocket as it may break when you sit down.
-
Page 12: Getting Started
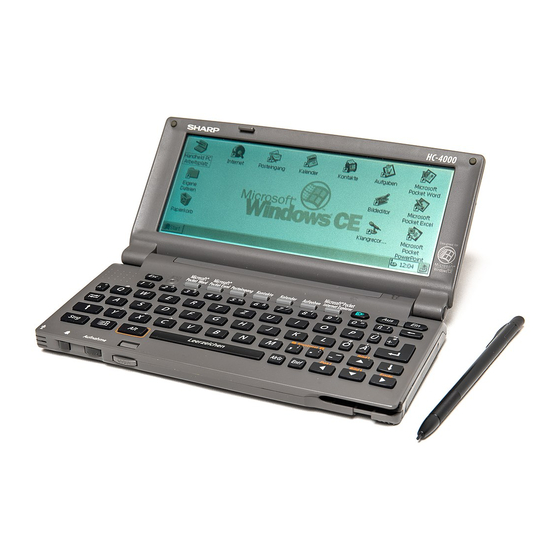
GETTING STARTED This section helps you get started the first time you use the unit. Part names and functions... - Page 13 RESET button Press to reset and initialize the unit. Application keys Press to start the indicated application. Display Shows information and also functions as a “touch panel” for selecting operations, data entry, etc. Backlight key (HC-4000/HC-4100) Press to turn the backlight on or off. Backlight Control Key (HC-4500) Press to adjust the backlight.
- Page 14 Holds two AA (LR6) alkaline batteries, or can be replaced with the optional Ni-MH Rechargeable Battery Pack. Ni-MH Rechargeable Battery Pack (HC-4500) Infrared port For wireless communication with other handheld PCs, SHARP ZR series unit and infrared-capable notebook and desktop PCs, and printing to infrared-capable printers. DC power jack For connecting to the AC adaptor included in HC-4500 package or the optional Docking Station Kit.
-
Page 15: Installing The Batteries
Installing the batteries For HC-4000/HC-4100 users: Before starting to use the unit, you must install the main batteries as well as the backup battery. Caution: Use only AA (LR6) alkaline batteries or the optional Ni-MH Rechargeable Battery Pack for the main batteries, and a CR2032 lithium battery for the backup battery. - Page 16 Insert the supplied AA (LR6) alkaline batteries into the battery holder, noting the directions indicated by the plus (+) and minus (-) signs inside the holder. Caution: If you need to place the main battery holder containing batteries on a table made of metal, make sure the batteries are not in direct contact with the table;...
- Page 17 Insert the supplied CR2032 lithium battery with the plus (+) sign facing up. Put the backup battery cover back in place and slide the battery replacement switch to the NORMAL OPERATION position. Note: You cannot slide the battery replacement switch to the NORMAL OPERATION position if the main battery holder is not completely inserted.
- Page 18 For HC-4500 users: You can use the supplied Ni-MH Rechargeable Battery Pack(HC-BN01) as the main battery, together with the supplied AC adaptor (EA-58A): Note: When shipped, the Ni-MH Rechargeable Battery Pack is not charged; therefore, you must charge it before use. The charging process takes about 3 hours. Caution: Use only the Ni-MH Rechargeable Battery Pack(HC-BN01) for the main battery and a CR2032 lithium battery for the backup battery.
- Page 19 3. Slide the battery replacement switch to the NORMAL OPERATION position. If this proves difficult, check to make sure the battery pack is completely inserted. 4. Plug the supplied AC adaptor into an AC outlet, and then connect the AC adaptor plug to your unit.
- Page 20 Insert the supplied CR2032 lithium battery with the plus (+) sign facing up. Put the backup battery cover back in place and slide the battery replacement switch to the NORMAL OPERATION position. Note: You cannot slide the battery replacement switch to the NORMAL OPERATION position if the battery pack is not completely inserted.
-
Page 21: Setting Up The Unit
Setting up the unit Press the release button and open the unit. Press the ON key to turn on the unit. Note: The first time you use the unit after purchase, it may take approx. 8 seconds for the display to come on after pressing the ON key. Adjust the display contrast. - Page 22 Remove the stylus from the unit. When the H/PC Setup Wizard Introduction appears, follow the instructions and adjust the screen calibration, time zone setting, time and date, and your name and address. About the backlight illumination (For HC-4000/HC-4100 users) If necessary, press the Backlight key to turn on the backlight for better viewing. The backlight feature turns off automatically after a certain amount of time of inactivity (which by default is 1 minute for battery power or 2 minutes for external power source).
-
Page 23: Hardware
HARDWARE This section describes how to use the various hardware features of the unit. Replacing the batteries When the batteries are low, your unit displays warning messages prompting you to replace the batteries as soon as possible. You can also check the battery power by double-tapping the power status icon if it appears on the task bar. - Page 24 Slide the battery replacement switch to the REPLACE MAIN BATTERIES position. Pull out the battery holder and remove the old batteries. Discard them properly. Insert two new AA (LR6) alkaline batteries into the battery holder, noting the directions indicated by the plus (+) and minus (-) signs inside the holder. Caution: If you need to place the main battery holder containing batteries on a table made of metal, make sure the batteries are not in direct contact with the table;...
- Page 25 Reattach the battery holder to the unit, noting the position of the projecting part on the battery holder. Slide the battery replacement switch back to the NORMAL OPERATION position. If this proves difficult, check to make sure the main battery holder is completely inserted.
- Page 26 Replacing the backup battery Turn off the unit. Slide the battery replacement switch to the REPLACE BACKUP BATTERY position. When the battery replacement switch is set to the REPLACE BACKUP BATTERY position, pull gently on the main battery holder to see if it is securely attached.
- Page 27 Insert a new CR2032 lithium battery with the plus (+) sign facing up. Put the backup battery cover back in place and slide the battery replacement switch to the NORMAL OPERATION position. Note: The unit operates only when the battery replacement switch is in the NORMAL OPERATION position.
-
Page 28: Charging The Battery Pack (For Hc-4500 Users)
Charging the battery pack (For HC-4500 users) Turn off the unit. Note: You cannot charge the installed battery pack while the unit is turned on. 2. Plug the supplied AC adaptor into an AC outlet, and then connect the AC adaptor plug to your unit. - Page 29 Discharging the Main Battery (For HC-4500 users) In order to maintain the optimum performance of the main battery, we recommend you to recharge the battery after the display of the message saying that you should replace the main battery. Since repeatedly recharging the battery except the above condition will reduce the battery’s capacity, discharge the main battery once a month by the following steps to maintain the optimum performance.
- Page 30 ON THE ADAPTOR. USING THE ADAPTOR AT A HIGHER THAN SPECIFIED VOLTAGE IS DANGEROUS AND MAY RESULT IN A FIRE OR OTHER TYPE OF ACCIDENT, THUS DAMAGING THE ADAPTOR. SHARP TAKES NO RESPONSIBILITY FOR ANY DAMAGE RESULTING FROM USE THE ADAPTOR AT VOLTAGES OTHER THAN THAT SPECIFIED.
-
Page 31: Resetting The Unit
Resetting the unit If the unit stops responding while you are using it, you can reset the unit. Make sure the unit is turned on, and then press the RESET button with the stylus. Caution: The reset function will not work if the unit is turned off when you press the RESET button. -
Page 32: Connecting The Unit To Your Pc
Connecting the unit to your PC You can connect the unit to your desktop PC to backup data, synchronize activities, transfer files, etc. Installing the Windows CE Services software Before connecting the unit to a PC, you need to install the Windows CE Services software on your PC and specify a serial port for use with the unit. - Page 33 Insert the 18-pin end of the supplied serial cable into the serial port on the unit. Insert the other end of the cable into the serial port on your PC that you specified during the Windows CE Services installation.
-
Page 34: Using The Infrared Port For File Transfer
Using the infrared port for file transfer You can use the built-in infrared port to transfer files with other handheld PCs compliant with the IrDA (115.2 kbps) standards. Make sure both handheld PCs are turned on, then take the following steps: Align the two handheld PCs so that their infrared ports are facing each other. -
Page 35: Using The Internal Fax/Modem
Using the internal fax/modem You can use the internal fax/modem to perform fax and data transmission (9.6 kbps for fax and 33.6 kbps for data). Connect the internal fax/modem to an analog telephone line as follows: Use a finger to gently open the modem port. Insert one end of the supplied modular phone cable into the modem jack. -
Page 36: Using A Pc Card
Using a PC Card Caution: Not all PC Cards will work with the unit. Be sure to use only recommended PC Cards. Using non-recommended PC Cards may cause problems such as damage to the unit or the PC Card. Contact your local dealer for more information on recommended PC Cards. Some PC Cards such as the optional Digital Camera Card may consume a lot of battery power. - Page 37 Removing a PC Card Close all applications accessing, or otherwise utilizing, data on the inserted PC Card. Turn off the unit. Slide the eject switch to release the PC Card, and remove it by hand.
-
Page 38: Software
Sizes of files you can open and edit can be up to 640 × 480 dots (VGA). To start Image Editor, double-tap the Image Editor icon on the desktop, or tap the Start button and select Programs, SHARP Applications, and then Image Editor. À Â... - Page 39 Editing images Tap New on the File menu to create a new file, or tap Open to select an existing file and tap the Edit icon ( Use the image editing tools to edit the image. to save the image. Note: You can open JPEG, BMP, 2BP and GIF files, but you can only save to the JPEG, BMP or 2BP file formats.
- Page 40 Image Editing tools Stamp (adds any of 64 “stamps” to an image) Ellipse with fill (draws ellipses with fill) Ellipse (draws ellipses) Rectangle with fill (draws rectangular shapes with fill) Rectangle (draws rectangular shapes) Eraser (erases unwanted part of an image) Line tool 2 (draws straight lines) Line tool 1 (draws lines at 45 degree increments) Pen tool (allows freehand drawing)
- Page 41 Running a mini slide show You can use Image Editor to run a mini slide show, as follows: Gather all image files for the slide show into a folder. If necessary, rename the files so that, when alphabetically sorted, they are arranged in the correct order for the slide show.
-
Page 42: Voice Recorder
Voice Recorder Voice Recorder allows you to record and playback voice and other sounds. Data is stored in the following format: .WAV File type 11.025 kHz Sampling rate 8 bits Sample size Tracks Monaural Quick recording With the unit either open or closed, press and keep holding the Record button. When you hear the beep sound, start speaking into the microphone. - Page 43 Note: If you use up all the available memory while recording, you will hear the error sound and recording cannot continue. Each recording is stored in a separate file located in My Handheld PC\My Documents\Voice Recorder. If desired, you can change the default location from the Options menu of Voice Recorder.
- Page 44 Recording from the Voice Recorder application screen To start Voice Recorder, double-tap the Voice Recorder icon on the desktop, or tap the Start button and select Programs, SHARP Applications, and then Voice Recorder. The initial screen appears as follows: Playback selected file...
- Page 45 Recording starts and the following dialog appears. Pause recording Resume recording Note: When using the icon to start recording, be sure to speak at a distance of 20 cm (8 inches) from the microphone. Tap the button to stop recording. Cancel recording Stop recording...
- Page 46 Appending a new recording to an existing voice file Select a file and tap the icon (or Record on the File menu). The following dialog appears: Tap Append and the new recording will be appended to the selected file.
- Page 47 Playback Follow the steps below to playback a voice recording: Adjust the Play Volume. The new level will remain effective until changed again. Select a file, and then tap the Return to Rewind Pause Play beginning by 3 of file seconds Note: In addition to the method described in step 2 above, you can also use one of the...
- Page 48 Changing the default file location When you use the Record button for quick recording, files are created and saved, by default, in My Handheld PC\My Documents\Voice Recorder folder. If desired, you can change the default file location, as follows: On the Options menu, tap Default Folder. Enter a new location, or tap Browse to select one.
-
Page 49: Data Exchange With Other Device Via Ir
Align your unit and the receiving unit so that their infrared ports are facing each other. On your unit, highlight the desired data. Set the receiving unit to the receiving mode. In the case of SHARP ZR Series unit, press the GET key. How much data... - Page 50 On your unit, tap Send from the File menu, then select ZR Series. Note: For Explorer files, select a file in step 2. In step 4, tap File, Send To, and Infrared Recipient to send the file.
- Page 51 Notes on field mapping when sending data to a ZR Series unit PC files are sent as they are without any conversion. For Contacts data, the following rules apply: Contacts data on the unit is converted to Contact1 data on the ZR Series unit. Restrictions on data sizes differ between the two units.
- Page 52 On the sending unit, highlight the desired data. On your unit, tap Receive from the File menu, then select ZR Series. Set the sending unit to the sending mode. In case of SHARP ZR Series unit, press SEND key, then start receiving the data.
- Page 53 Notes on field mapping when receiving data from ZR Series unit PC files are received as they are without any conversion. For Contacts data, the following rules apply: Contact1 data on the ZR Series unit is converted to Contacts data on the handheld PC.
- Page 54 The handheld PC uses more fields for storing address information than the ZR Series unit. Therefore the fields are mapped as follows: ZR Series unit Street[CR] City,[SP]State[LAST SP]ZIP[CR] Country Your unit Street City State Country...
-
Page 55: Common Questions & Answers
COMMON QUESTIONS & ANSWERS Tell me more about the batteries. (HC-4000/HC-4100) You must install both the two main batteries (alkaline) as well as the lithium backup battery. The main batteries drive the unit while the backup battery serves as the backup in case the main batteries become depleted. You can also use the AC adaptor included in the optional Docking Station Kit for AC power (which will not work if the main batteries are depleted). - Page 56 Personal Computer Memory Card Industry Association and these cards are now being referred to as “PC Cards”. Many popular PC Cards available on the market are compatible with your unit. Check with your SHARP dealer for more information. Warning: Use only recommended PC Cards.
- Page 57 How do I backup my information? It is important to always have a back-up of your electronic information. Here are some suggestions: You can connect the unit to your desktop PC and backup your data to the PC using the Windows CE Services. You can copy your files to a PCMCIA SRAM Memory Card or a PCMCIA Flash Memory Card.
-
Page 59: Troubleshooting
TROUBLESHOOTING Use the following list for troubleshooting when the unit is not functioning properly. If the problem persists, contact your local SHARP dealer. Problem The display remains blank after you press the ON key. The display is completely black. (HC-4000/HC-4100) The display appears dim or too bright. - Page 60 The backup battery is low message appears. You cannot hear any sound. Communication with your desktop PC does not function properly. Cannot access the inserted PC Card. Pressing the RESET button does not reset the unit. The unit does not operate even though it is connected to an AC power source.
-
Page 61: Appendix
APPENDIX Hardware specifications Model HC-4000/HC-4100 Display 640 × 240 dots 16 grayscale high contrast with backlight, DFSTN LCD Memory 4 MB (HC-4000) 8 MB (HC-4100) 16 MB Interfaces Serial port RJ-11 Infrared port (IrDA compliant), IR send distance: 50cm(20 inch), IR distance may change depending on the system used. - Page 62 Accessories Serial cable, Modular phone cable, CD-ROM from Microsoft, CD-ROM from SHARP, Two AA (LR6) alkaline batteries, CR2032 lithium battery, Operation Manual Battery life when using the Digital Camera Card: The optional Digital Camera Card can be used for about 25 minutes of continuous monitoring of a subject at the brightest backlight setting, at an ambient temperature of 25 C (77 F).
-
Page 63: Character Conversion Tables
Character conversion tables SHARP ZR Series unit to your unit (H/PC) - Page 64 Characters shown in parenthese ( ) appear as “ “ within the CONTACTS application, but appear as shown in the table when copied and pasted into another application (such as Pocket Word).
- Page 65 Your unit (H/PC) to SHARP ZR Series unit...
- Page 66 When CONTACTS data is sent from the H/PC to the ZR, character other than those listed above are converted to “?” (0x3F).
-
Page 67: Index
INDEX About this manual ... 7 AC power ... 27 Alarm stop button ... 11 Backlight... 20 Backlight Control key ... 20 Backup battery... 14,24 Battery alkaline... 13,22 backup ... 14,24 rechargeable ... 27 Battery holder ... 14 Battery replacement switch ... 12,13 Bundled software Image Editor... - Page 68 Data exchange Handheld PCs ... 32 ZR Series unit... 47 DC power jack... 12 Discharging battery ... 27 Display ... 11 Fax/modem ... 33 Features ... 6 Field mapping... 49,51 File transfer ... 32,47 Image Editor drawing tools ... 38 editing ...
- Page 69 PC Card eject switch... 12,35 inserting ... 34 removing ... 35 slot ... 11,34 Port infrared... 12,32 serial ... 12,30 Power source... 27 Re-setup... 29 Replacing backup battery ... 24 main batteries... 21 Release button... 11,19 Resetting... 29 Serial port ... 12,30 Service and support ...
- Page 70 Repairs to this equipment should be performed by Sharp Electronics Corporation or an authorized representative of Sharp. Should you experience trouble with the equipment, or for information on obtaining service or repairs, please contact: Sharp Electronics Corporation P.O.
- Page 71 (2) this device must accept any interference received, including interference that may cause undesired operation. Responsible Party: SHARP ELECTRONICS CORPORATION Sharp Plaza, Mahwah, New Jersey 07430 TEL: 1-800-BE-SHARP WARNING - FCC Regulations state that any unauthorized changes or modifications to this equipment not expressly approved by the manufacturer could void the user's authority to operate this equipment.
- Page 72 In Canada: "NOTICE: The Industry Canada label identifies certified equipment. This certification means that the equipment meets telecommunications network protective, operational and safety requirements as prescribed in the appropriate Terminal Equipment Technical Requirements document(s). The Department does not guarantee the equipment will operate to the user's satisfaction. Before installing this equipment, users should ensure that it is permissible to be connected to the facilities of the local telecommunications company.
- Page 73 Au Canada: "AVIS: L'étiquette d'Industrie Canada identifie le matériel homologué. Cette étiquette certifie que le matériel est conforme aux normes de protection, d'exploitation et de sécurité des réseaux de télécommunications, comme le prescrivent les documents concernant les exigences techniques relatives au matériel terminal.
-
Page 74: Service And Support
If your product needs to be serviced, you will have to mail your product to an authorized SHARP service center. For the phone number of the service center nearest to you, repair cost and turn around time estimates, please call:... - Page 75 Customer Support: If you have read the operation manual but are still having difficulty using your unit, you can call a Sharp Representative at: (in Canada:) Sharp Electronics of Canada Ltd. Phone: 1-800-56-SHARP (in Hong Kong:) Sharp-Roxy (Hong Kong) Limited...
- Page 76 In no event shall Sharp be liable, or in any way responsible, for any damages or defects in the Product which were caused by repairs or attempted repairs performed by anyone other than an authorized servicer.
- Page 77 At a Sharp Authorized Servicer located in the United States. To find out the location of the nearest Sharp Authorized Servicer, call Sharp toll free at 800- BE-SHARP. Ship (prepaid) or carry in your Product to a Sharp Authorized Servicer. Be sure to have proof of purchase available.
- Page 78 Sharp Electronics of Canada Ltd. (hereinafter called "Sharp") gives the following express warranty to the first consumer purchaser for this Sharp brand product, when shipped in its original container and sold or distributed in Canada by Sharp or by an Authorized Sharp Dealer: Sharp warrants that this product is free, under normal use and maintenance, from any defects in material and workmanship.
- Page 79 Sharp product or the loss of information. The purchaser will be responsible for any removal, reinstallation, transportation and insurance costs incurred.
- Page 80 Aux produits Sharp altérés, modifiés, réglés ou réparés ailleurs qu'aux bureaux de Sharp, à un Centre agréé de service Sharp ou à un Détaillant autorisé au service Sharp; (c) Au dommage causé ou réparation requise à la suite de l'utilisation avec des articles non désignés ou approuvés par Sharp, y compris, mais non limité...
- Page 81 à la perte de temps ou d'utilisation de ce produit Sharp. L'acheteur doit assumer les coûts de démontage, de réinstallation, de transport et d'assurance de l'appareil. La réparation des défectuosités, selon la manière et durant la période de temps ci-haut décrites, constitue l'exécution...
- Page 82 SHARP CORPORATION PRINTED IN JAPAN / IMPRIMÉ AU JAPON 97LT.7T(TINSE1143YCZZ)