Table of Contents
I
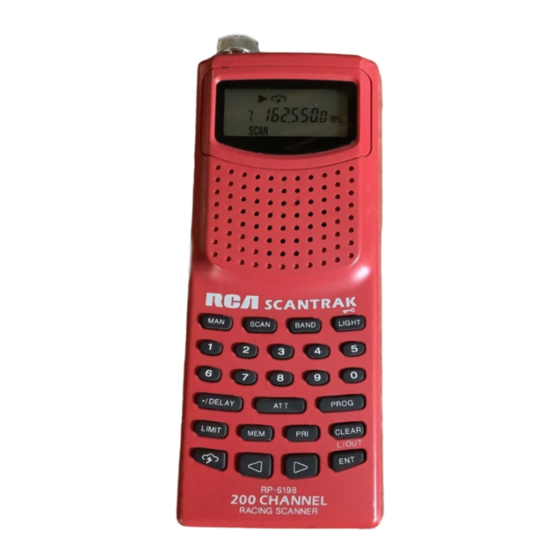
RP-6 I98
Please rutain this
OHNER' S
MANUAL
ADDENDUM
addendum and Insert
inside the
front cover
of
your owcrw' s
manual.
Pags I3 to 14 "Changing Faquency at Channel
Memory"
paragraph
I m
4 as follows;
I.
2.
3.
4.
5.
4,
.
Press
MAN.
Use
the number
pad
to
enter
the cw
number conainlng the
Craquency. II your
scanner displays a
frequency other than
the
one you want ta change ar the same car
number, press
one
of
the search arrows ( 4 or
b
)
until the frquwq
you want to
change Is
shown in the display,
Press 0,
then press ENT-L/OUT
Tha frequency is
delatec%
Press PROG.
Enter tie frequmcy m~mbec
Press ENTI UOUr.
Enter car
number.
7.
Press ENT,UCWC
l
PLEASE
SEE REVERSE SIDE FOR SUPPLEMENTARY NOTES
TO
"USING THE SCANNER" SEmION.
c
Table of Contents

Related Manuals for RCA RP-6198

Summary of Contents for RCA RP-6198
- Page 1 RP-6 I98 OHNER’ S addendum and Insert Please rutain this your owcrw’ s manual. Pags I3 to 14 “Changing Faquency at Channel paragraph 4 as follows; MAN. Press the number scanner displays a Craquency. II your one you want ta change ar the same car the search arrows ( 4 or shown in the display, change Is...
- Page 2 To scan the preprogrammed manually tune through the press ( reputedly Then repeatedly press > bo select higher channels af c co select charm A. Cower USING THE ATTENUATOR To mciuce interference reduce the scanner’ s appears on the display to Note: IC you turn on &is weak signals.
- Page 3 200 Channel scantrak racing scanner RP-6198...
- Page 4 FCC I NFORMATION This device complies with Part 15 of the FCC Rules. Operation is subject to the following two conditions: (1) This device may not cause harmful interference, and (2) this device must accept any interference received, including interference that may cause undesired operation.
- Page 5 With the capacity to scan more than 31,000 frequencies at 25 channels per second; your new RCA ScanTrak Racing Scanner allows you to be more than just a mere spectator of the sport.
-
Page 6: Table Of Contents
ABLE OF ONTENTS ... 4 IRST HINGS IRST ... 5 OWERING ONNECTING THE UTTONS AND ONTROLS ... 9 ISPLAY ... 10 SING THE CANNER DJUSTING OLUME AND ROGRAMMING REQUENCIES ... 11 EARCH CANNING TORED ... 12 EARCHING ... 12 IMIT EARCH ELECTING HANNELS... - Page 7 CANNER BATT CAR # 888.888 SRCH SCAN PRI DLY MAN PROG SC A SCAN BAND • / DELAY LIMIT RP-6198 200 CHANNEL RACING SCANNER LIGHT PROG CLEAR L/OUT...
-
Page 8: First Things First
IRST HINGS There are basically two ways to power your scanner - by batteries or adapters. However, you can use different types of batteries and different kinds of adapters, so pay close attention to the procedures and precautions written below for the method you choose. - Page 9 IRST HINGS ICKEL ADMIUM ATTERIES This unit is equipped with battery recharging circuitry, enabling you to use NiCad batteries and recharge them while they are still in the battery comaprtment. It is always a good idea to let nickel- cadmium batteries run all the way down before charging them.
-
Page 10: Connecting The Antennas
IRST HINGS ONNECTING THE Your scanner comes with two flexible antennas for better reception. To attach an antenna: 1. Line up the slots on the antenna with the knobs of the antenna receptor on the scanner. 2. Slip the antenna over the knobs and twist until you feel the antenna locks into place. - Page 11 IRST HINGS Some headphone/earphones allow you to hear background noise while listening to your scanner at a normal volume setting. Regardless, wearing headphones or an earphone while riding a bike or operating a vehicle cannot only impair your concentra- tion, it is also dangerous and/or illegal.
-
Page 12: Buttons And Controls
UTTONS AND The following list is presented in alphabetical order and provides general information about each button and control on your scanner: SC A SCAN • / DELAY LIMIT ATT - Activates the Attenuation feature, which blocks strong signals. BAND - Accesses the preprogrammed frequency ranges. -
Page 13: The Display
ISPLAY The display lets you know what your unit is doing. The following is a list of display messages you will encounter and what they mean. appears when you activate the A T T A T T A T T A T T A T T Attenuate feature. -
Page 14: Using The Scanner
SING THE DJUSTING OLUME AND QUELCH 1. Turn the SQUELCH knob com- pletely clockwise. 2. Turn the VOLUME knob halfway. The scanner turns on and off via the VOLUME knob. 3. Turn the SQULECH knob counter- clockwise until there is a perceptible static sound. -
Page 15: Band Search
SING THE EARCH You can search for and store active frequencies by using BAND SEARCH. 1. Press BAND and the display shows the last selected band number and the frequency search range. 2. To select a different band, either enter the desired band number or press BAND repeatedly until the desired number is displayed. -
Page 16: Scanning Stored Channels
SING THE CANNING TORED To scan through all the stored, unlocked channels, press SCAN. To change scanning direction, press the button. Adjust the SQUELCH knob to resume scan if the scanner stays on a frequency after the transmission has ended. Car numbers and their corresponding frequencies appear in the display in ascending order, starting from the... -
Page 17: Deleting A Frequency From A Channel
SING THE • If the scanner is scanning and you know the channel you wnat to monitor, press the MAN button to stop the scan. Enter the channel number and press the MAN button again. • If the scanner is not scanning, enter the number for the channel you want to monitor an press the MAN button again. -
Page 18: Using Priority Scan
SING THE 1. Press MAN. Use the number pad to enter the car number containing the frequency. If your scanner displays a frequency other than the one you want to change at the same car number, press one of the search arrows ( ) until the frequency you want to change is shown in the display. -
Page 19: Locking Out
SING THE STORE THE MONITOR MEMORY FREQUENCY IN A PERMANENT CHANNEL 1. Press the PROG button. 2. Press the MEM button. 3. Press the number of the monitor memory that has the frequency you want to store. 4. Press the MEM button again. 5. -
Page 20: Using The Carrying Case
SING THE SING THE ARRYING WITH The carrying case with belt has two purposes: carrying the scanner on your shoulder or strapping the scanner around your thigh. To carry the scanner on your shoulder, follow the diagram below: CANNER To strap the scanner around your thigh for hands-free listening, first adjust the belt as follows: Now, follow the diagram illustrated... -
Page 21: Troubleshooting Tips
ROUBLESHOOTING ESETTING THE CANNER In a few instances, it may be necessary to reset your scanner: • no display, or • the display may lock up after the installation of new batteries or the connection to an external power source, or •... -
Page 22: Equipment Specifications
QUIPMENT Operational Channels ... 200 channels plus 50 monitor memories Sensitivity ... FM: (S+N)/N = 20dB, Dev = 3kHz at 1 kHz 29-54 MHz ... 1uV (FM) 108-139.975 MHz ... 2uV (AM) 137-174 MHz ... 1 uV (FM) 380 - 512 MHz ... 1 uV (FM) 806- 960 MHz ... -
Page 23: Care And Maintenance
ARE AND • This unit is to be kept dry at all times. Should the unit become wet, dry immediately with a soft cloth. Electronic circuits may corrode should they come in contact with liquids containing minerals. • Do not drop the unit. Circuit boards may be damaged and cause the scanner to malfunction if it is dropped. -
Page 24: Index
NDEX Symbols •/DELAY 3, 8 Adjusting volume & squelch 10 Antennas 6 Buttons and controls 8 Care and maintenance 19 Clear 3, 8 Clearing a channel 13 DELAY 3, 8 ENTER 8 Equipment specifications 18 L/O 3 L-OUT 9 Limit Search 12 Locking out channels 8, 15 MANUAL 3, 8 Powering Up 4... -
Page 25: Limited Warranty
If you purchased your product outside the USA: • This warranty does not apply. Contact your dealer for warranty information. If you need any help with this product, please contact our Scanner Customer Service Line at: 1-888-SCAN-4-RCA. Model RP-6198 15307830 (Rev. 0, E/S)