KitchenAid KSMPRA 3-Piece Pasta Roller & Cutter Set Manual
- User manual (45 pages) ,
- User manual (105 pages)
PARTS AND FEATURES
PARTS AND ACCESSORIES

MODEL/ROLLER CHART
Use this chart to quickly identify which rollers and/or cutters are included with your KitchenAid product.
| MODEL # | ATTACHMENT(S) INCLUDED |
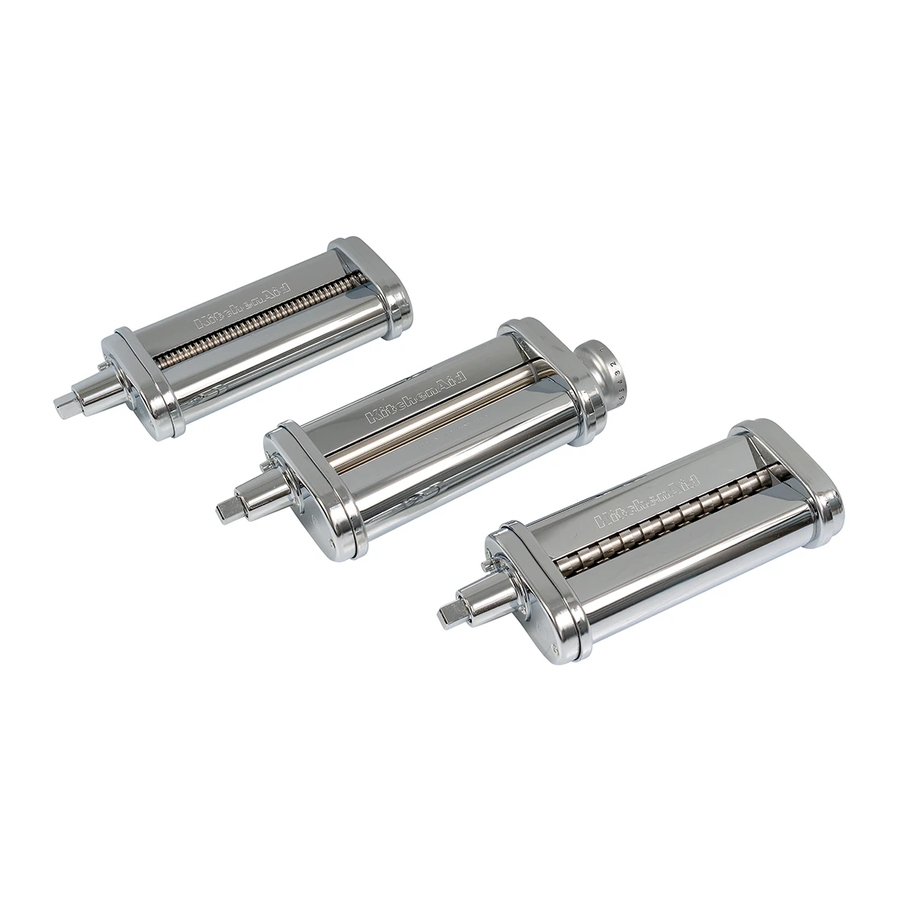
| KSMPRA | Pasta roller, Spaghetti cutter, Fettuccine cutter |
| KSMPSA | Pasta roller |
| KSMPCA | Capellini cutter, Lasagnette cutter |
PASTA ROLLER AND CUTTERS SAFETY
Your safety and the safety of others are very important.
We have provided many important safety messages in this manual and on your appliance Always read and obey all safety messages.
 This is the safety alert symbol.
This symbol alerts you to potential hazards that can kill or hurt you and others.
All safety messages will follow the safety alert symbol and either the word "DANGER" or "WARNING." These words mean:

You can be killed or seriously injured if you don't immediately follow instructions.

You can be killed or seriously injured if you don't follow instructions.
All safety messages will te you wnat the potential hazard is, tell you how to reduce the chance of injury, and tell you what can happen if the instructions are not followed.
State of California Proposition 65 Warnings:
This product contains one or more chemicals known to the State of
California to cause cancer.
This product contains one or more chemicals known to the
State of California to cause birth defects or other reproductive harm.
IMPORTANT SAFEGUARDS
When using electrical appliances, basic safety precautions should always be followed, including the following:
SAVE THESE INSTRUCTIONS
USING THE PASTA ROLLER AND CUTTERS
SPEED SETTINGS CHART
| ATTACHMENT | SPEED | NOODLE WIDTH | SUGGESTED USES |
PASTA ROLLER | 2 | up to 140 mm | See "Roller settings chart" |
LASAGNETTE CUTTER | 3 | 12 mm | Thick Noodles |
FETTUCCINE CUTTER | 5 | 6.5 mm | Egg Noodles Fettuccine |
SPAGHETTI CUTTER | 7 | 2 mm | Spaghetti Thin Fettuccine Linguine Fini |
CAPELLINI CUTTER | 7 | 1.5 mm | Very Thin Angel Hair-Type Pasta Capellini Very Fine Linguine |
ROLLER SETTINGS CHART
| ATTACHMENT | ROLLER SETTING | SUGGESTED USES |
| PASTA ROLLER | 1 or 2 | Kneading and thinning dough |
| 3 | Thick "kluski"-type noodles | |
| 4 | Egg noodles | |
| 4 or 5 | Lasagna noodles, fettuccine, spaghetti, and ravioli | |
| 6 or 7 | Tortellini, thin fettuccine, and linguini fini | |
| 7 or 8 | Very thin "angel-hair"-type pasta/capellini or very fine linguine |
ATTACHING THE PASTA ROLLER AND CUTTERS
Before first use
Before using your attachments, remove the "Do not immerse in water" label. To avoid damage, do not wash or immerse attachments in water or other liquid. Do not wash in dishwasher.
NOTE: These attachments are designed to be used with pasta dough only. To avoid damaging your Pasta Roller and Cutters, do not cut or roll anything other than pasta.
- Turn Stand Mixer off and unplug.

- For Stand Mixers with a hinged attachment hub cover: Flip up to open. For Stand Mixers with a removable attachment hub cover: Turn the attachment knob counterclockwise to remove attachment hub cover.

- Insert attachment shaft housing into the attachment hub, making certain the power shaft fits into the square hub socket. If necessary, rotate the Pasta Roller or Cutter back and forth. The pin on the attachment housing fits into the notch of the hub rim when in the proper position.

- Tighten the Stand Mixer attachment hub knob until the attachment is completely secured to the Stand Mixer.


MAKING PASTA

When using the Pasta Roller and Cutters, do not wear ties, scarves, loose clothing or long necklaces; gather long hair with a clasp.
- Prepare pasta dough (see "Recipe" section). Cut dough into sections that fit in the Pasta Roller.

- Pull the roller adjustment knob straight out and turn to setting 1. Release the knob, making certain the pin on the roller housing engages the opening on the back of the adjustment knob, allowing the knob to fit flush against the roller housing.

- Turn Stand Mixer to speed 2. Feed flattened dough into rollers to knead. Fold dough in half and roll again. Repeat until dough is smooth and pliable and covers the width of the roller. Lightly dust pasta with flour while rolling and cutting to aid in drying and separation.

- Feed dough through rollers to further flatten the sheet of dough. Change the roller to setting 3, and repeat the rolling process. Continue to increase roller setting until desired thickness is reached. Do not fold the dough during this step.

- To make noodles, exchange the Pasta Roller for the Cutter of your choice. Feed the flattened sheets of 5 dough through the cutter. See the "Roller settings chart" to determine the correct thickness for each type of pasta.


DISASSEMBLING THE PASTA ROLLER AND CUTTERS
- Turn Stand Mixer off and unplug.

- Remove the Pasta Roller or Cutter from the Stand Mixer.

![]()
After removing the Pasta Roller or Cutter from the Stand Mixer, be sure to clean any dried dough. See "Care and Cleaning" for details.
OPTIONAL: If desired, attach the next Pasta Roller or Cutter, using the directions in the "Attaching the Pasta Roller and Cutters" section.

- After finishing with the Pasta Roller and Cutters replace the hub cover 3 and tighten the attachment knob on the Stand Mixer.


RECIPE
COOKING PASTA
Food Poisoning Hazard Do not let foods that contain perishable ingredients such as eggs, dairy products, and meats remain unrefrigerated for more than one hour. Doing so can result in food poisoning or sickness. |
Add 2 tsp (10 mL) salt and 1 tbs. (15 mL) oil (optional) to 6 qt (5.7 L) boiling water. Gradually add pasta and continue to cook at a boil until pasta is "al dente" or slightly firm to the bite. Pasta floats to the top of the water while cooking, so stir occasionally to keep it cooking evenly. Use a colander to drain.
Dry Pasta — 7 minutes
Fresh Pasta — 2-5 minutes, depending on noodle thickness.
BASIC EGG NOODLE PASTA
4 large eggs
3½ cups (830 mL) sifted all-purpose flour
1 tbs (15 mL) water
1 tsp (2 mL) salt
Break eggs into a glass measuring cup.
Check to see that the eggs measure 7/8 cup (207 mL). If less than 7/8 cup (207 mL), add water, 1 tsp (2 mL) at a time, until measurement is reached.
Place flour and salt in Stand Mixer bowl.
Attach bowl and flat beater. Turn to Speed 2 and gradually add eggs and 1 tbs (15 mL) water. Mix for 30 seconds. Stop the Stand Mixer and exchange the flat beater for the dough hook. Turn to Speed 2 and knead for 2 minutes.
Let dough rest for 20 minutes.
Divide dough into 4 pieces before processing with Pasta Roller attachment.
Follow cooking instructions above.
Yield: About 1 ¼ pounds (579 g) dough
FOR DETAILED INFORMATION ON USING THE PASTA ROLLER AND CUTTERS:
Visit kitchenaid.com/quickstart for additional Instructions with videos, inspiring recipes, and tips on how to use your Pasta Roller and Cutters.
CARE AND CLEANING
CLEANING THE PASTA ROLLER AND CUTTERS
These accessories are designed to be used with pasta dough only. To avoid damaging your Pasta Roller and Cutters, do not insert anything other than pasta dough.
Do not use metal objects to clean out the Pasta Roller and Cutters. Do not wash the Pasta Roller and Cutters in the dishwasher, or immerse in water or other liquids. The Pasta Roller and Cutters should be hand washed.
- Turn Stand Mixer off and unplug.

- Completely disassemble Pasta Roller and Cutters. Use the directions from 2 the "Disassembling the Pasta Roller and Cutters" section.

- After cutting pasta, let Pasta Roller and Cutters air dry for one hour, then remove any dried dough using the Cleaning brush. If dried dough is difficult to remove, try tapping the attachment with your hand. Use a toothpick if necessary.

- After cleaning out all remaining dried dough, polish the Pasta Roller and Cutters with a soft, dry cloth and store in a dry place at room temperature. Do not wash the Pasta Roller and Cutters in the dishwasher.


NOTE: Never use a knife or any other sharp object to remove excess dough.
Do not run a dish towel or any other cloth through the rollers to clean them.
FOR DETAILED INFORMATION ON CLEANING THE PASTA ROLLER AND CUTTERS
Visit kitchenaid.com/quickstart for additional Instructions with videos, inspiring recipes, and tips on how to use your Pasta Roller and Cutters.
MAINTENANCE
 |
| To maintain properly (annually or after 50 uses) we recommend using a light mineral oil to lubricate the gears. Add a drop of mineral oil to each of the 4 corners of the Pasta Roller and Cutters. |
TROUBLESHOOTING
 |
Plug into a grounded 3 prong outlet. |

If your Stand Mixer should malfunction or fail to operate while using the Pasta Roller and Cutter attachment, please check the following:
If the problem is not due to one of the above items, see the "Arranging for Service" section in the "Warranty".
Do not return the Pasta Roller and Cutter attachments or the Stand Mixer to the retailer, as they do not provide service.
WARRANTY AND SERVICE
KITCHENAID® PASTA ROLLER AND CUTTERS WARRANTY FOR THE 50 UNITED STATES, THE DISTRICT OF COLUMBIA, PUERTO RICO, AND CANADA
This warranty extends to the purchaser and any succeeding owner for Pasta Roller and Cutters operated in the 50 United States, the District of Columbia, Puerto Rico, and Canada.
| Length of Warranty: | One Year Full Warranty from date of purchase. |
KitchenAid Will Pay for Your Choice of:  | Hassle-Free Replacement of your Metal Food Grinder attachment. See the next page for details on how to arrange for service, or call the Customer eXperience Center toll-free at 1-800-541-6390. OR The replacement parts and repair labor costs to correct defects in materials and workmanship. Service must be provided by an Authorized KitchenAid Service Center. |
| KitchenAid Will Not Pay for: | |
| DISCLAIMER OF IMPLIED WARRANTIES; LIMITATION OF REMEDIES IF THIS PRODUCT FAILS TO WORK AS WARRANTED, CUSTOMER'S SOLE AND EXCLUSIVE REMEDY SHALL BE REPAIR OR REPLACEMENT ACCORDING TO THE TERMS OF THIS LIMITED WARRANTY. KITCHENAID AND KITCHENAID CANADA DO NOT ASSUME ANY RESPONSIBILITY FOR INCIDENTAL OR CONSEQUENTIAL DAMAGES. This warranty gives you specific legal rights and you may also have other rights which vary from state to state or province to province. | |

Documents / Resources
References
Download manual
Here you can download full pdf version of manual, it may contain additional safety instructions, warranty information, FCC rules, etc.
Thank you! Your question has been received!


Need Assistance?
Do you have a question about the KSMPRA that isn't answered in the manual? Leave your question here.