Table of Contents
User's Guide
vf15/vf17, FP15/FP17, L1502/L1702,
L1502m/L1702m, f1523/f1723,
FP5315/FP7317 Flat Panel Monitors
Document Part Number: 322638-003
May 2003
This guide provides information on setting up the monitor,
installing drivers, using the on-screen display menu,
troubleshooting and technical specifications.
Table of Contents

Related Manuals for HP f1523

Summary of Contents for HP f1523
- Page 1 User’s Guide vf15/vf17, FP15/FP17, L1502/L1702, L1502m/L1702m, f1523/f1723, FP5315/FP7317 Flat Panel Monitors Document Part Number: 322638-003 May 2003 This guide provides information on setting up the monitor, installing drivers, using the on-screen display menu, troubleshooting and technical specifications.
- Page 2 HP, Hewlett Packard, and the Hewlett-Packard logo are trademarks of Hewlett-Packard Company in the U.S. and other countries. Compaq and the Compaq logo are trademarks of Hewlett-Packard Development Company, L.P. in the U.S. and other countries. Microsoft, Windows, and the Windows logo are trademarks of Microsoft Corporation in the U.S.
-
Page 3: Table Of Contents
1 Product Features 2 Safety and Maintenance Guidelines Important Safety Information..... . 2–1 Maintenance Guidelines......2–2 Cleaning the Monitor. - Page 4 Windows ME, Windows 2000 and Windows XP . . 4–12 A Troubleshooting Solving Common Problems ..... . . A–1 Using the Worldwide Web......A–2 Preparing to call Technical Support.
-
Page 5: Product Features
The Flat Panel Display has an active matrix, thin-film transistor (TFT), liquid crystal display (LCD). The monitor features include: vf15, FP15, L1502, L1502m, f1523, and FP5315 Models ■ 15-inch (38.1 cm) viewable area display. ■ 1024 x 768 resolution, plus full-screen support for lower resolutions. - Page 6 Product Features ■ AssetControl ■ Speakers included on the front panel of the multimedia models only ■ Compliant with the following regulated specifications: ❏ EPA ENERGY STAR ❏ European Union CE Directives ❏ Swedish MPR II 1990 ❏ Swedish TCO Display Requirements vf17, FP17, L1702, L1702m, f1723, and FP7317 Models ■...
- Page 7 ■ Speakers included on the front panels of multimedia models only ■ Compliant with the following regulated specifications: ❏ EPA ENERGY STAR ❏ European Union CE Directives ❏ Swedish MPR II 1990 ❏ Swedish TCO Display Requirements User’s Guide Product Features 1–3...
-
Page 8: Safety And Maintenance Guidelines
Safety and Maintenance Important Safety Information A power cord is included with your monitor. If another cord is used, use only a power source and connection appropriate for this monitor. For information on the correct power cord set to use with your monitor, refer to the “Power Cord Set Requirements”... -
Page 9: Maintenance Guidelines
Safety and Maintenance Guidelines Ä CAUTION: For the protection of your monitor, as well as your computer, connect all power cords for your computer and its peripheral devices (such as a monitor, printer, scanner) to some form of surge protection device such as a power strip or Uninterruptible Power Supply (UPS). - Page 10 ■ Unplug your monitor from the wall outlet before cleaning. Do not use liquid cleaners or aerosol cleaners. Use a damp cloth for cleaning. If the screen requires additional cleaning, use an antistatic screen cleaner. Ä CAUTION: Do not use benzene, thinner, ammonia, or any other volatile substances to clean your monitor or the screen.
-
Page 11: Cleaning The Monitor
Safety and Maintenance Guidelines Cleaning the Monitor To clean the monitor, follow these steps: 1. Turn off the monitor and the computer. 2. Dust the monitor by wiping the screen and the cabinet with a soft, clean cloth. If the screen requires additional cleaning, use a clean cloth dampened with isopropyl alcohol. -
Page 12: Setting Up The Monitor
Setting Up the Monitor To set up the monitor, ensure that the power is turned off to the monitor, computer system, and other attached devices, then follow the steps below. Installing the Monitor Pedestal To install the monitor pedestal: 1. Place the pedestal plate on your desktop or table and check to be sure the arrow on the underside of the plate is facing forward. - Page 13 Setting Up the Monitor 2. Using both hands, position the monitor over the pedestal base and press down firmly to lock the pedestal base in place. When the base locks, it will make a clicking sound. Make sure the pedestal base is securely locked before continuing with the setup.
- Page 14 Setting Up the Monitor If you need to remove the pedestal base, lay the monitor down on a soft protected surface. On the bottom side of the pedestal base, press together the two tabs as shown in the following illustration. This will release the pedestal from the base.
-
Page 15: Connecting The Monitor
Setting Up the Monitor Connecting the Monitor 1. Place the monitor in a convenient, well-ventilated location near your computer. 2. Connect the monitor signal cable on the back of the monitor to the video connector on the rear panel of the computer. 3. - Page 16 Setting Up the Monitor 4. If your monitor is a multimedia model, connect one end of the audio cable to the back of the monitor, and the other end to the audio connector on the back of the computer. Connecting the Audio Cable User’s Guide 3–5...
- Page 17 Setting Up the Monitor 5. Adjust the monitor as needed for your comfort using the monitor’s tilt adjustment capability. Tilting the Monitor Ä CAUTION: Burn-in image damage may occur on monitors that display the same static image on screen for a prolonged period of time.
-
Page 18: Removing The Monitor Base
Å WARNING: To reduce the risk of electric shock or damage to your equipment: ■ Do not disable the power cord grounding plug. The grounding plug is an important safety feature. ■ Plug the power cord into a grounded (earthed) electrical outlet that is easily accessible at all times. - Page 19 Setting Up the Monitor 1. Disconnect and remove the signal and power cables from the back of the monitor. 2. Remove the two screws 1 as shown in the following illustration. Removing the Monitor Base Ä CAUTION: Ensure that the bottom of the monitor base is positioned over a table or desktop before removing the base from the monitor.
-
Page 20: Mounting The Monitor
Mounting the Monitor 1. Remove the monitor base. Refer to “Removing the Monior Base” steps in the previous section. After the base is removed from the monitor, four threaded mounting holes are exposed on the monitor back panel to be used for mounting purposes. -
Page 21: Operating The Monitor
Installing the Information Files The CD-ROM included with this monitor contains two information files to be installed onto your computer; an .INF file and an .ICM file. ■ The .INF file defines monitor resources and provides specifications used by most operating systems to install support software for certain hardware devices. -
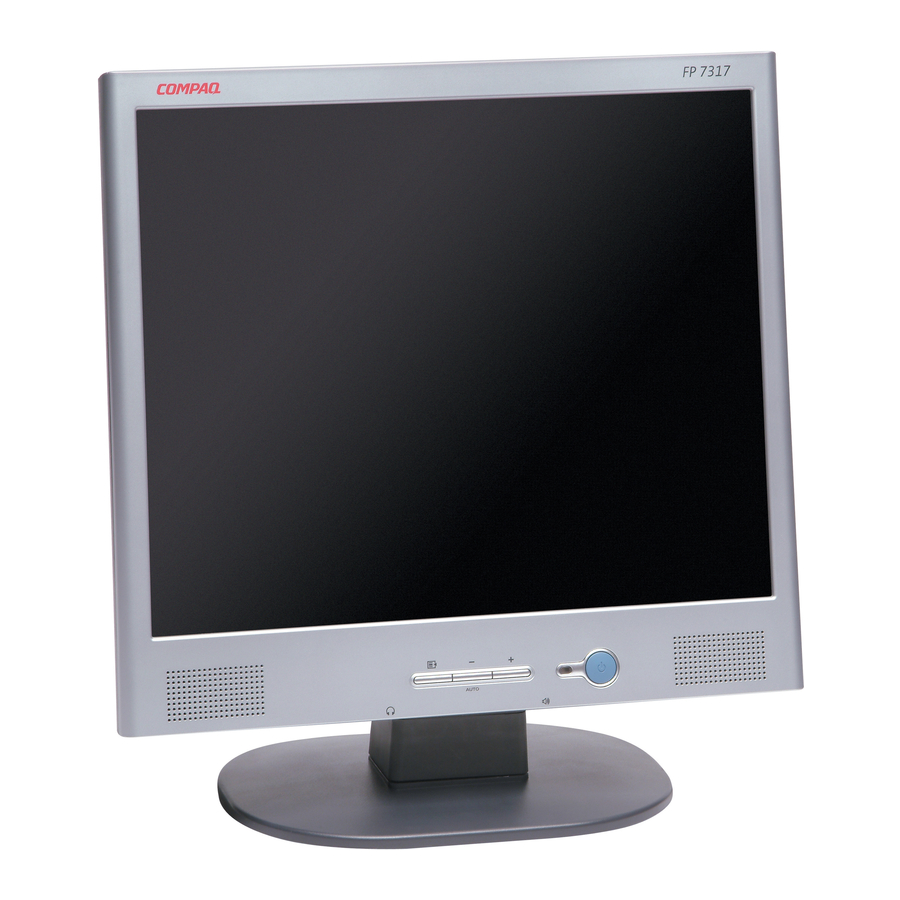
Page 22: Front Panel Components
Operating the Monitor Front Panel Components L1502m, L1702m, f1523, f1723, FP5315, and FP7317 Monitors ‘ No. Control Speakers (Headphone jack) Menu button – ( Minus button) Plus button) 4–2 Function Audio feature for music, alarms, etc. (multimedia models only) Connects a headphone set to the monitor. - Page 23 No. Control (Volume control) Power LED Power Switch FP15, FP17, L1502, L1702, vf15, and vf17 Monitors No. Control Menu button – ( Minus button) User’s Guide Function Controls the volume level of the monitor speakers. Fully powered = Green. Sleep mode = Amber. Sleep Timer mode = Flashing Amber.
-
Page 24: Adjusting Monitor Settings
Operating the Monitor No. Control Plus button) Power LED Power Switch Adjusting Monitor Settings Use the On-Screen Display (OSD) to adjust the screen image based on your viewing preferences. To access the OSD, do the following: 1. If the monitor is not already on, press the Power switch to turn on the monitor. -
Page 25: Using The On-Screen Display
3. To navigate through the OSD Menu, press the + (Plus) button on the monitor’s front panel to scroll up, or the – (Minus) button to scroll in reverse. 4. To select an item from the OSD Menu, use the + or – buttons to scroll to and highlight your selection, then press the Menu button to select that function. - Page 26 Operating the Monitor Menu Level 1 Advanced Menu Exit To access the Advanced OSD Menu, press the menu button again, or select Advanced Menu from the Basic OSD Menu. ✎ After selecting the Advanced Menu from the Basic Menu, the Advanced Menu remains the default OSD on subsequent power-ups of the monitor until the Basic Menu is selected or Factory Reset is applied.
- Page 27 On / Off Selection On / Off Selection On / Off Selection Timer Menu Adjustment Scale Adjustment Scale Adjustment Scale Operating the Monitor Factory Reset (FP5315, FP7317, FP15, FP17, f1523, f1723, vf15, vf17 models) (L1502, L1702, L1502m, L1702m models) 4–7...
-
Page 28: Adjusting Screen Quality
Operating the Monitor Advanced OSD Menu Levels (Continued) Level 1 Cancel Save and Return Factory Reset Exit Adjusting Screen Quality Allow the monitor to warm up for 20 minutes before performing the following procedures. The Auto-adjustment feature automatically fine-tunes the image quality each time a new video mode is displayed. -
Page 29: Identifying Monitor Conditions
■ Clock—Increase/decrease the value to minimize any vertical bars or stripes visible on the screen background. ■ Clock Phase—Increase/decrease the value to minimize video distortion or video jitter. ✎ When using the controls, you will obtain the best results by using the Auto-Adjustment software. -
Page 30: Sleep Timer Mode
Operating the Monitor ❏ If the OSD is locked, press and hold the Menu button for 10 seconds to unlock the OSD. ❏ If the OSD is unlocked, press and hold the Menu button for 10 seconds to lock the OSD. Sleep Timer Mode The Sleep Timer mode is an energy-saving feature that enables you to set a time for the monitor to power on and off at the same... -
Page 31: Srgb Support
6. Press the - (Minus) or + (Plus) buttons to adjust the hour. 7. Press the Menu button again to enter the time for minutes. 8. Press the - (Minus) or + (Plus) buttons to adjust the minutes. 9. Press the Menu button to lock in the time chosen. 10. -
Page 32: Changing The Color Temperature
Operating the Monitor Changing the Color Temperature ✎ These steps are not necessary for the L1502, L1502m, L1702 and L1702m models. When the color temperature is changed to 6500 K - sRGB, there will be a small reduction in brightness. 1. - Page 33 4. Select the “sRGB Color Space Profile.icm” file, then click the Add button 5. To activate a color profile for your monitor, you must set it as the Default Monitor Profile. Select “sRGB Color Space Profile,” then click Set as Default button. 6.
-
Page 34: Solving Common Problems
Solving Common Problems The following table lists possible problems, the possible cause of each problem, and the recommended solutions. Problem Screen is blank. User’s Guide Troubleshooting Possible Cause Power cord is disconnected. Power switch is turned off. Video cable is improperly connected. -
Page 35: Using The Worldwide Web
Troubleshooting Problem Image appears blurred, indistinct, or too dark. Image is not centered. “Check Video Cable” is displayed on screen. “Input Signal Out of Range” is displayed on screen. Using the Worldwide Web Before contacting customer services, refer to the support Web site http://www.hp.com/go/support A–2 Possible Cause... -
Page 36: Preparing To Call Technical Support
Preparing to call Technical Support If you cannot solve a problem using the troubleshooting tips in this section, you may need to call technical support. Have the following information available when you call: ■ The monitor ■ Monitor model number (on front and back panel) ■... -
Page 37: Technical Specifications
Technical Specifications vf15, FP15, L1502, L1502m, f1523, and FP5315 Models 15-inch Flat Panel Monitors Display Type Viewable Image Size Tilt Maximum Weight (Unpacked) Dimensions (includes pedestal) Height Depth Width Preferred Mode Text Mode Dot Pitch Horizontal Frequency Vertical Refresh Rate User’s Guide... - Page 38 Technical Specifications vf15, FP15, L1502, L1502m, f1523, and FP5315 Models 15-inch Flat Panel Monitors (Continued) Environmental Requirements Temperature: Operating Temperature Non-operating Temperature Relative Humidity Altitude: Operating Non-operating Power Source Power Consumption Input Terminals B–2 41to 95 --4 to 140 20 to 80%...
- Page 39 vf17, FP17, L1702, L1702m, f1723, and FP7317 Models 17-inch Flat Panel Monitors Display Type Viewable Image Size Tilt Maximum Weight (Unpacked) Dimensions (include pedestal) Height Depth Width Preferred Mode Text Mode Dot Pitch Horizontal Frequency Vertical Refresh Rate Environmental Requirements Temperature: Operating Temperature Non-operating Temperature...
-
Page 40: Entering User Modes
Technical Specifications vf17, FP17, L1702, L1702m, f1723, and FP7317 Models 17-inch Flat Panel Monitors (Continued) Altitude: Operating Non-operating Power Consumption Input Terminal Entering User Modes The video controller signal may occasionally call for a mode that is not preset if: ■... - Page 41 Technical Specifications When the monitor is in the reduced power state, the monitor utilizes less than 2 watts of power. There is a brief warm up period before the monitor returns to its normal operating mode. Refer to your computer manual for instructions on setting energy saver features (sometimes called power management features).
-
Page 42: C Agency Regulatory Notices
Agency Regulatory Notices Federal Communications Commission Notice This equipment has been tested and found to comply with the limits for a Class B digital device, pursuant to Part 15 of the FCC Rules. These limits are designed to provide reasonable protection against harmful interference in a residential installation. -
Page 43: Cables
Agency Regulatory Notices Cables Connections to this device must be made with shielded cables with metallic RFI/EMI connector hoods to maintain compliance with FCC Rules and Regulations. Declaration of Conformity for Products Marked with FCC Logo, United States Only This device complies with Part 15 of the FCC Rules. Operation is subject to the following two conditions: (1) this device may not cause harmful interference, and (2) this device must accept any interference received, including interference that may cause... -
Page 44: Canadian Notice
Canadian Notice This Class B digital apparatus meets all requirements of the Canadian Interference-Causing Equipment Regulations. Avis Canadien Cet appareil numérique de la classe B respecte toutes les exigences du Règlement sur le matériel brouilleur du Canada. European Notice Products with the CE Marking comply with both the EMC Directive (89/336/EEC) and the Low Voltage Directive (73/23/EEC) issued by the Commission of the European Community. -
Page 45: Korean Notice
Agency Regulatory Notices Korean Notice EPA Energy Star Compliance Monitors that are marked with the Energy Star Logo meet the requirements of the EPA Energy Star program. As an Energy Star Partner, Hewlett Packard Company has determined that this product meets the Energy Star guidelines for energy efficiency. Specific details on using the Energy Saving features can be found in the energy saver or power management section of the computer manual. - Page 46 Agency Regulatory Notices or 18AWG, and the length of the cord must be between 6 feet (1.8 m) and 12 feet (3.6 m). If you have questions about the type of power cord to use, contact your HP authorized service provider.
- Page 47 The TFT monitor uses high-precision technology, manufactured according to HP standards, to guarantee trouble-free performance. Nevertheless, the display may have cosmetic imperfections that appear as small bright or dark spots. This is common to all LCD displays used in products supplied by all vendors and is not specific to the HP LCD.
- Page 48 LCD Monitor Quality and Pixel Policy To locate defective pixels, the monitor should be viewed under normal operating conditions, in normal operating mode at a supported resolution and refresh rate, from a distance of approximately 50 cm (16 in.). HP expects that, over time, the industry will continue to improve its ability to produce LCDs with fewer cosmetic imperfections and HP will adjust guidelines as improvements are made.