Panasonic RP-NJ300B - Digital Wireless Stereo Earphones Manual
- Operating instructions manual (12 pages)
- 1 Accessories
- 2 Part names
- 3 Charging
- 4 Turning the power on/off
- 5 Connecting a Bluetooth device
- 6 How to wear the earphones
- 7 Listening to music
- 8 Making a phone call
- 9 Useful functions
- 10 Restoring to the factory settings
- 11 Maintenance
- 12 Troubleshooting guide
- 13 Specifications
- 14 To remove the battery when disposing of this unit
- 15 Safety precautions
- 16 Documents / Resources
Accessories
Please check and identify the supplied accessories.
- 1 USB charging cord
![]()
- 1 Earpieces set (L, S)
![]()


M-size earpieces are attached at the time of purchase.
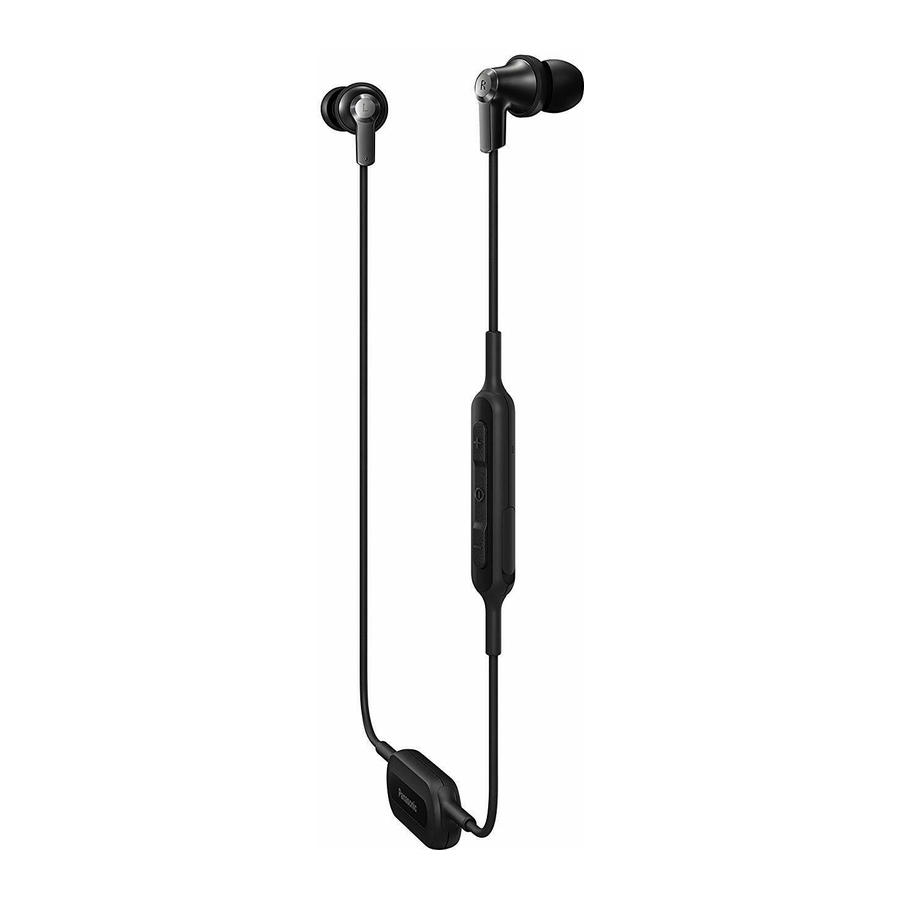
Part names

- LED indicator light*
- The number of blinks or color notifies the status of the unit. (* hereafter referred to as "LED")
- Charging terminal (DC IN)
- Open the USB lid and connect the USB charging cord (supplied) to this terminal when charging. (See "Charging")
- Volume + / Next
- Power / Pairing / Play / Pause /Call
![]()
- Volume – / Previous

Note
- Do not use any other USB charging cords except the supplied one.
- When using the unit, do not cover the remote controller with the palm of your hand. The Bluetooth ® connection may be blocked.
To avoid product damage, do not expose this product to rain, sweat, water or other liquids.
The product illustrations may differ from the actual product.
Charging
The rechargeable battery (installed in the unit) is not charged initially. Charge the battery before using the unit.
Connect this unit to a computer using the USB charging cord
- Charging will take approximately 1.5 hours from empty state to fully charged. (Quick charging time for 60 minutes operation: Approx. 20 minutes)


Close the charging terminal cover securely

Do not touch the charging terminal with wet hand
Note
- The Bluetooth® feature cannot be used when this unit is connected to a computer using the USB charging cord.
Turning the power on/off
In the power-off state, press and hold the power of this unit for approx. 3 seconds until the LED (blue) blinks

To turn the power off
- Press and hold
![]() for approximately 3 seconds. A beep will sound and the power will be turned off.
for approximately 3 seconds. A beep will sound and the power will be turned off.
A beep will sound and the power will be turned off.
Note
Connecting a Bluetooth® device
Preparation
- Place the Bluetooth ® device within approx. 1 m from the unit.
Pairing (Registration) this unit with the Bluetooth®device for connection
- In the power-off state, press and hold the power button of this unit until the LED blinks
When pairing a device for the first time: approx. 3 seconds
When pairing a second or subsequent devices: approx. 5 seconds
- The unit starts to search for the Bluetooth ® device for connection, and the LED will blink in blue and red alternately.
- Turn on the power of the Bluetooth® unit, and enable the Bluetooth® function
- Select "RP-NJ300B" from the Bluetooth® device's menu
- If prompted for a passkey, input the passkey "0000 (four zeros)" of this unit.


- Check the connection with the Bluetooth® device on the unit
Note
- You can pair up to 8 Bluetooth ® devices with this unit. If a 9th device is paired, the device with the oldest connection will be replaced. To use it, perform pairing again.
Connecting a paired Bluetooth® device
- Turn on the unit
- Perform steps 2 and 3 of "Pairing (Registration) this unit with the ® Bluetooth device for connection" (→ P. 5)
Note
- This unit remembers the device lastly connected. Connection may be automatically established after step 1 (see above).
How to wear the earphones

The left earphone has the marking point as shown in the illustration.
Attention
Listening to music
If the Bluetooth® compatible device supports the "A2DP" and "AVRCP" Bluetooth® profiles, music can be played back with remote control operations on the unit.
- A2DP (Advanced Audio Distribution Profile): Transmits audio to the unit.
- AVRCP (Audio/Video Remote Control Profile):
Allows remote control of the device using the unit.
- Connect the Bluetooth® device and the unit (→ P. 5)
- Select and play the music on the Bluetooth® device
Operating time of battery
| Battery type | Operating time |
| Rechargeable battery (installed in the unit) | Approx. 4 hours 20 minutes |
Operating time may be less depending on the operating conditions.
Attention
Remote controlling
You can control the Bluetooth® device using the unit.
- Depending on Bluetooth ® devices, some functions below do not work, or work differently via operation of the unit.
(Operation example)
| Play / Pause / Call | ||
 | Press | Play / Pause / Call |
| Press twice quickly | Reject the incoming call / Switch the calling device | |
| Previous / Next / Volume | ||
| + | Press | Increase the volume |
| Press and hold | Forward to the start of next track | |
| − | Press | Decrease the volume |
| Press and hold | Return to the start of current track | |

Remote Controller
Note
- The volume can be adjusted in 15 levels.
When the maximum or minimum volume is reached, a beep will sound.
Making a phone call
With Bluetooth® enabled phones (cell phones or smartphones) that support the "HSP" or "HFP" Bluetooth® profile, you can use the unit for phone calls.
- HSP (Headset Profile):
This profile can be used to receive monaural sounds and establish two-way communication using the microphone on the unit. - HFP (Hands-Free Profile):
In addition to the HSP functions, this profile has the incoming and outgoing calls function.
Connect the Bluetooth® enabled phone and unit
When answering an incoming call
Press  on the unit and answer the call
- During an incoming call, ringtone will sound from the earphones and the LED will blink.
- (HFP only) To reject the incoming call, press
![]() twice quickly until the ringtone stops.
twice quickly until the ringtone stops.

Remote Controller

When making an outgoing call
Make an outgoing call on the Bluetooth phone
- Also refer to the operating manual for the Bluetooth enabled phone.
(Checking and operation steps on the unit are explained below)
- During an outgoing call, ringtone will sound from the earphones and the LED will blink.
- To cancel the outgoing call, press
![]() . A beep will sound.
. A beep will sound.
Start talking
- The LED will repeatedly blink 2 times during a call.
- The volume can be adjusted during a phone call. For setting instructions, see "Remote controlling". (→ P. 6)
Press  to end the phone call
- A beep will sound.
Note
- There may be instances when hands free setting needs to be done on the Bluetooth® enabled phone.
- Depending on the Bluetooth ® enabled phone, you may hear incoming and outgoing call ringtones of the phone from the unit.
- ( HFP only) Press
![]() twice quickly on the unit. The calling device will be switched between the Bluetooth® enabled phone and the unit.
twice quickly on the unit. The calling device will be switched between the Bluetooth® enabled phone and the unit.
Useful functions
Resetting the unit
This unit can be reset when all operations are rejected. To reset the unit, push ![]() button for 10 seconds. All the previous operations will be cancelled. (The pairing device information will not be deleted.)
button for 10 seconds. All the previous operations will be cancelled. (The pairing device information will not be deleted.)
Auto power off
If the unit is silent for approximately 5 minutes and operations for Bluetooth® devices are idle during that period, a beep will sound and the power will be automatically turned off.
LED indicator light
When the battery level is low during use of the unit, the blue blinking LED on the remote controller will change to red. A beep will sound every 1 minute. When the battery runs out, the power will turn off.
Restoring to the factory settings
When you want to delete all pairing device information, etc., you can restore the unit to the factory settings (original settings upon purchase). Charge the battery before restoring the unit.
- Turn the power off, and press and hold
![]() for approximately 5 seconds
for approximately 5 seconds
- Start searching for Bluetooth® devices to connect.
- Press and hold + and − for 5 seconds or more simultaneously while searching
 Attention
- When pairing a device again, delete the registering information (Device: "RP-NJ300B") from the Bluetooth® device's menu, and register this unit with the Bluetooth® device again. (→ P. 5)
Maintenance
Clean this unit with a dry and soft cloth.
Keeping the battery performance
Copyright, etc.
- The Bluetooth® word mark and logos are registered trademarks owned by Bluetooth SIG, Inc. and any use of such marks by Panasonic Corporation is under license.
Other trademarks and trade names are those of their respective owners. - Other system names and product names appearing in this document are in general the registered trademarks or trademarks of the respective developer companies.
Note that the ™ mark and ® mark do not appear in this document.
Troubleshooting guide
Before requesting service, make the following checks. If you are in doubt about some of the check points, or if the remedies indicated do not solve the problem, consult your dealer for instructions.
General
The unit does not respond
- Push
![]() button for 10 seconds. The unit will be reset. (The pairing device information will not be deleted.)
button for 10 seconds. The unit will be reset. (The pairing device information will not be deleted.)
Power supply and charging
Cannot charge the unit
Charging takes longer
LED does not light during charging
The power does not turn on
Bluetooth device connection
The device cannot be connected
- Delete the pairing information for this unit from the Bluetooth ® device, then pair them again. (→ P. 5)
Sound and audio volume
No sound
- Make sure that the unit and the Bluetooth® device are connected correctly. (→ P. 5)
- Check if music is playing on the Bluetooth ® device.
- Pair and connect the Bluetooth® device and the unit again. (→ P. 5)
Low volume
- Increase the volume on the Bluetooth ® device.
Sound from the device is cut off / Sound quality is bad
Phone calls
You cannot hear the other person
- Make sure that the unit and the Bluetooth ® enabled phone are turned on.
- Check if the unit and the Bluetooth ® enabled phone are connected. (→ P. 5)
- Check the audio settings of the Bluetooth ® enabled phone. Switch the calling device to the unit if it is set to the Bluetooth® enabled phone. (→ P. 5)
- If the volume of the other person's voice is too low, increase the volume of both the unit and the Bluetooth® enabled phone.
Specifications
General
| Power supply | DC 5 V, 0.6 W (Internal battery: 3.7 V (Li-polymer 90 mAh)) |
| Operating time*1 | Approx. 4 hours 20 minutes |
| Charging time*2 (25 ºC) | Approx. 90 minutes |
| Charging temperature range | 10 ºC to 35 ºC |
| Operating temperature range | 0 ºC to 40 ºC |
| Operating humidity range | 35%RH to 80%RH (no condensation) |
| Mass | Approx. 13 g |
*1 It may be shorter depending on the operating conditions.
*2 Time taken to recharge from empty to full.
Bluetooth® section
| Bluetooth® system specification | Ver. 4.1 |
| Wireless equipment classification | Class 2 (2.5 mW) |
| Frequency band | 2402 MHz to 2480 MHz |
| Max RF power | 4 dBm (EIRP) |
| Supported profiles | A2DP, AVRCP, HSP, HFP |
| Supported codec | SBC |
| Operating distance | Up to 10 m |
Speaker section
| Driver units | 9 mm |
Terminal section
| DC IN | DC 5 V, 0.6 W |
Microphone section
| Type | Mono |
Accessory section
| USB charging cord | 0.1 m |
| Earpieces set | L, S |
- Specifications are subject to change without notice.
To remove the battery when disposing of this unit
The following instructions are not intended for repairing purposes but for the disposal of this unit. This unit is not restorable once disassembled.
When disposing of this unit, take out the battery installed in this unit and recycle it.

As the rechargeable battery is specifically for this product, do not use it for any other device.
Do not charge the removed battery.

Do not place the removed battery, and other items within reach of infants.
Accidental swallowing of such an item may have an adverse effect on the body.
In the event of fluid leaking from the battery, take the following measure, and do not touch the fluid with bare hands.
Fluid entering into an eye may cause loss of eyesight.
Fluid getting on your body or clothes may cause inflammation of the skin or injury.
A lithium-ion polymer rechargeable battery is built in to the battery case. Please discard according to local regulations.
When disposing this product, disassemble properly by following the procedure, and remove the internal rechargeable battery.
- Select a screwdriver to be large enough for a space under the joint part.


- Use the screwdriver for leverage, push and open the battery case
- Be careful not to touch the battery with the screwdriver.


- Hold the battery and remove it


- Do not damage or dismantle the battery.


Safety precautions
Unit
Earpieces
Allergies
Precautions for listening with the Earphones
This unit may receive radio interference caused by mobile telephones during use. If such interference occurs, please increase separation between this unit and the mobile telephone.
This unit is intended for use in moderate and tropical climates.
USB

Use only the supplied USB charging cord when connecting to a computer.

Documents / ResourcesDownload manual
Here you can download full pdf version of manual, it may contain additional safety instructions, warranty information, FCC rules, etc.


