Table of Contents
Quick Links
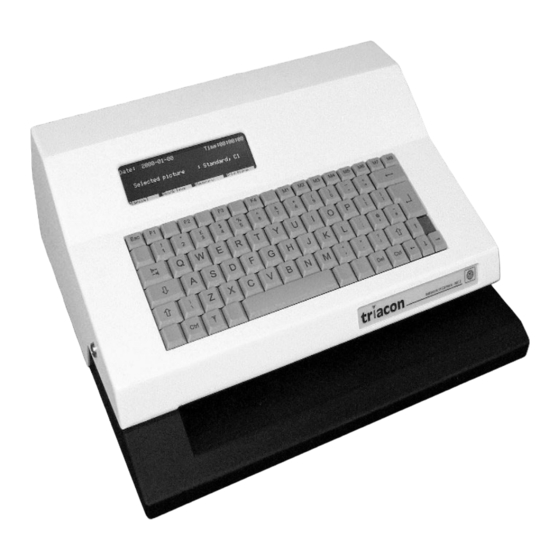
Network ID Camera
Installation and Startup
NIC2-2 (with DICOM)
Print No.: SP00-000.814.05.01.02
Replaces: n.a.
SP
© Siemens AG 2005
The reproduction, transmission or
use of this document or its contents
is not permitted without express
written authority. Offenders will be
liable for damages. All rights,
including rights created by patent
grant or registration of a utility
model
_or_ design,_are_
reserved.
English
Doc. Gen. Date: 10.05
Table of Contents

Related Manuals for Siemens NIC2-2


Summary of Contents for Siemens NIC2-2
- Page 1 Network ID Camera Installation and Startup NIC2-2 (with DICOM) © Siemens AG 2005 The reproduction, transmission or use of this document or its contents is not permitted without express written authority. Offenders will be liable for damages. All rights, including rights created by patent...
- Page 2 Installation and Setup Manual October 2005 Publication No. 201101 NIC2-2 Network ID Camera...
- Page 4 PLEASE NOTE The information contained herein is based on the experience and knowledge rela- ting to the subject matter gained by Triacon prior to publication. No patent license is granted by this information. Triacon reserves the right to change this information without notice, and makes no warranty, expressed or implied, with respect to this information.
-
Page 6: Table Of Contents
NIC2-2 · Installation and Set-up Manual Publication no. 201101 Contents 1 General 2 Installation 2.1 Unpacking ..................1 2.2 Installation Details................1 3 Setup 3.1 Getting into setup mode ..............3 3.1.1 Resetting to customer default ..............3 3.1.2 Main configuration window..............3 3.2 Picture settings ................ - Page 7 Communication parameters Channel: HOST ........13 3.4.1.1 Protocol set-up....................14 3.4.2 Communication parameters Channel: AUX1........14 3.4.2.1 Protocol set-up SIEMENS Mammomat® 3000 ..........15 3.4.2.2 Protocol set-up SIEMENS Mammomat® 300 ..........16 3.4.2.3 Protocol set-up SIEMENS Balance..............17 3.4.2.4 Protocol set-up PLANMED................17 3.4.2.5 Protocol set-up I-IMAGING ................
- Page 8 NIC2-2 · Installation and Set-up Manual Publication no. 201101 Contents 5 Error Messages 5.1 Illegal value ..................33 5.2 The adjustment may be max 32 ........... 33 5.3 Out of storage for FTEXT.............. 33 5.4 Length must be between 1 and 8..........33 5.5 Communication error..............
- Page 9 Publication no. 201101 NIC2-2 · Installation and Set-up Manual Contents Blank Page October 2005 Triacon AB Sweden...
-
Page 10: General
NIC2-2 · Installation and Set-up Manual Publication no. 201101 1. General This manual describes how to install and setup the Network ID Camera herein called NIC. This includes anything from installation to setting-up what the pic- ture printed on the film should look like, which language for the display, to how it should communicate with a booking system. - Page 11 Publication no. 201101 NIC2-2 · Installation and Set-up Manual Warning The Network ID Camera is classified as a Medical Device and fulfils EN 60950. According to European Safety Regulations for Medical Equip- ments, the following conditions must be fulfiled: if the camera is operated within a distance of 1.5 m from...
-
Page 12: Setup
NIC2-2 · Installation and Set-up Manual Publication no. 201101 3 Setup This section describes how the set-up of the camera is done. It assumes that the operator is familiar with the camera. 3.1 Getting into setup mode Make sure the camera displays the main window which is the window that comes up after the initial screen with the Triacon logo. -
Page 13: Picture Settings
Publication no. 201101 NIC2-2 · Installation and Set-up Manual Bookinglist configuration Here all settings for manual entry of data to bookinglist is configured. Communication param Here all settings regarding the communication between the Network ID Cam- era and the equipment connected to any of the four communication ports can be changed. -
Page 14: Some Frequently Used Words
NIC2-2 · Installation and Set-up Manual Publication no. 201101 3.2.1 Some frequently used words This is what a unit of information is called when it is displayed on the picture. Field A field contains, for example, the name of a patient or the current date or cur- rent time. -
Page 15: Editing A Field
Publication no. 201101 NIC2-2 · Installation and Set-up Manual 3.2.2.1 Editing a field To change a parameter of a field, place the cursor on the field and press the enter key. This will open a new window: Field definition Field:02... - Page 16 NIC2-2 · Installation and Set-up Manual Publication no. 201101 Time - Prints current time. Functions the same way as the DATE field. COMM - Communication. This field is used if the Network ID Camera is con- nected to other equipment that sends data to the Network ID Camera, for ex- ample an X-ray unit that can send information about kV and mAs.
-
Page 17: Settings Win1/Win2
Publication no. 201101 NIC2-2 · Installation and Set-up Manual 3.2.3 Settings Win1/Win2 If this entry is selected, the following will be displayed Settings Status Used Text : Normal Exposure: 100ms Location: Bottom Vert adj: Name: Def proj: AP Previous Next Save The cursor is located at "Status"... -
Page 18: Menus
NIC2-2 · Installation and Set-up Manual Publication no. 201101 3.2.4 Menus Menus can be defined here. A menu is a type of field where the user can select from a set of predefined texts. Five different menus can be defined. Each of them can have 16 different selections. - Page 19 Publication no. 201101 NIC2-2 · Installation and Set-up Manual Note that first item is ”Blank”, this because first item is default. No Proj Alternative “ “ “RCC “ “LCC “ “RMLO “ “LMLO “ AP/PA Previous Next Save Next step is to define the ”Technol” field as described in ”3.2.2 Picture, Win1/Win2” on page To define an auto sequence the NIC must be set in normal operation mode.
-
Page 20: Bookinglist Configuration
NIC2-2 · Installation and Set-up Manual Publication no. 201101 3.3 Bookinglist configuration Here the configuration of the internal bookinglist is made. Choosing this selection will present three new alternatives. Bookinglist configuration Settings Define input field Link field to patient window... -
Page 21: Define Input Fields
Publication no. 201101 NIC2-2 · Installation and Set-up Manual 3.3.2 Define input fields No Field Label 01:PID 11 “PID ” 02:NAME 20 “Name ” 03:B-DATE 10 “Birth ” 04:UNUSED 10 “ ” 05:UNUSED 10 “ Previous Next Save Maximum five entries can be defined. Field types available are; PID, NAME, B-DATE and TEXT. -
Page 22: Communication Parameters Channel: Host
NIC2-2 · Installation and Set-up Manual Publication no. 201101 from each channel configuration window by a function key. When the Communication pa- rameters window is open the channel selected is displayed in the upper right corner of the window. To select another channel, press the Channel (F1) soft-key. To configure a param- eter of the selected protocol press the Shift Protocol (Shift-F1) soft-key. -
Page 23: Protocol Set-Up
Publication no. 201101 NIC2-2 · Installation and Set-up Manual DOWNLOAD-Network ID Camera download protocol. SLP100 - Protocol for printout to a label printer. MAGNCARD -Protocol for magnetic card reader. For more information, please read Network Installation Manual. Only active for the Nordic countries. -
Page 24: Protocol Set-Up Siemens Mammomat® 3000
For more information, please refer to the ’Network Installation Manual’. 3.4.2.1 Protocol set-up SIEMENS Mammomat® 3000 Pressing Shift Protocol (Shift F1) when the MMAT3000 protocol is selected will bring up the protocol set-up for the SIEMENS Mammomat® 3000 protocol.. Define text for Mammomat 3000 Focus... -
Page 25: Protocol Set-Up Siemens Mammomat® 300
Publication no. 201101 NIC2-2 · Installation and Set-up Manual We want to create a COMM field that shall display the FOCUS. Create a new field and under fielddefinition select Type COMM. The Mammomat® 3000 is sending ether 0 or 1 as the FO- CUS parameter and the Network ID Camera is translating it to a text according to the proto- col set-up above. -
Page 26: Protocol Set-Up Siemens Balance
This means that we have to define the length of this COMM field to five. Select Comm kV will link the kV data to this field. NOTE! SIEMENS Mammomat® 300 is sending also the type together with the value, e.g. ’25 kV’.. -
Page 27: Protocol Set-Up I-Imaging
Publication no. 201101 NIC2-2 · Installation and Set-up Manual NOTE! The communication protocol has to be set before setting up the picture, otherwise the COMM field will display NONE. Example We want to create a COMM field that shall display the kV. Create a new field and under field- definition select Type COMM. -
Page 28: Protocol Set-Up Lorad
NIC2-2 · Installation and Set-up Manual Publication no. 201101 We want to create a COMM field that shall display the kV. Create a new field and under field- definition select Type COMM. According to the Instrumentarium protocol the length of the kV value is four. -
Page 29: Protocol Set-Up Ge Medical System Senographe
Publication no. 201101 NIC2-2 · Installation and Set-up Manual 3.4.2.7 Protocol set-up GE Medical System Senographe Select Protocol (Shift-F1) when the SENOGRAP or SENO800T protocol is selected. This will bring up the protocol set-up for the GE Medical System Senographe. -
Page 30: Protocol Set-Up Gxdp
NIC2-2 · Installation and Set-up Manual Publication no. 201101 These fielddefinitions will give us the text "Mode" followed by the "MODE"-value at the cen- ter bottom of the patient data window. 3.4.2.8 Protocol set-up GXDP Select GXDP-P or GXDP-NP protocol depending on whether the polling function is to be used or not, refer to the Network Installation Manual. -
Page 31: Communication Parameters Channel: Aux2
Publication no. 201101 NIC2-2 · Installation and Set-up Manual An appropriate text is entered under Fixed text, in this example "mAs". Fielddefinition Field:02 Type: F-text Row: Column:132 Fixed text: Font: Small Save These fielddefinitions will give us the "mAs"-value followed by its unit at the center bottom of the patient data window. -
Page 32: Niclan Configuration
NIC2-2 · Installation and Set-up Manual Publication no. 201101 3.5 NICLan configuration When entering this selection the ID Camrera will try to connect to the NICLan. Even if it is possible to change some settings without any NICLan Module con- nencted, it is not recommended. -
Page 33: Niclan Mode
Licence Licens key for DICOM. Filter. Name entered here will be compared with "GroupeName" in Download Group booking data string sent from the NICLan Module to the NIC2-2. Ref. "TCP/IP FTP Communication NICLan" specification. Activates the FTP function. Protocol Selects how to handle received patient data. For details, please refer to the Net- work Installation Manual. -
Page 34: Tcp/Ip
NIC2-2 · Installation and Set-up Manual Publication no. 201101 3.5.2 TCP/IP NICLan TCP/IP settings Use DHCP : Yes Name: NIC2-2 IP-number: 0.0.0.0 Mask : 0.0.0.0 Gateway : 0.0.0.0 : 0.0.0.0 Exit Move between the different settings by pressing up- and down arrow keys. Use the Previous (F2) and Next (F3) keys to toggle between the alternatives. -
Page 35: Dicom
Publication no. 201101 NIC2-2 · Installation and Set-up Manual 3.5.4 DICOM NICLan DICOM settings HOST IP : 0.0.0.0 Port CalledAE : - CallingAE: - StationAE: - Down Exit Press F1 ”Down” to open next page. NICLan DICOM settings Dicom Timeout : 10... -
Page 36: Dicom Tags
The prefix is used to build the name item for the query from the name fields 1 and 2 in the search window of the NIC2-2. Each digit is replaced by the content of the corre- sponding name field. All other characters are copied directly to the name item.The oth- er fields are used to build the name fields 1 to 4 from the reply. -
Page 37: Edit A Tag
Publication no. 201101 NIC2-2 · Installation and Set-up Manual Patient ID Birthdate These tags will be available to the window setup as field number 1 to 9. The value field will be used in the C-FIND REQUEST. Sequence. When receiving an item with this group, element the length part will be ig- nored since it otherwise would cause all included tags to be jumped over. -
Page 38: Settings
NIC2-2 · Installation and Set-up Manual Publication no. 201101 3.6 Settings Selecting this item will present a window where some configurations that do not fit within the other items are gathered. Settings Language ENGLAND Country ENGLAND Cursor LINE Erase bookinglist at power interrupt Yes... -
Page 39: Remote Control
Publication no. 201101 NIC2-2 · Installation and Set-up Manual 3.7 Remote control Selecting this item will present a window where the up- and download of a set-up is per- formed. Remote control NICLan not connected Connect to: AUX1 Speed: 38400... -
Page 40: Upgrading The Firmware
NIC2-2 · Network ID Camera Publication no. 201101 4. Upgrading the firmware The controlling firmware is stored in a FLASH memory. To update this firmware the following equipment are required: • A PC compatible computer with a standard RS232 serial interface. - Page 41 Publication no. 201101 NIC2-2 · Network ID Camera Blank Page October 2005 Triacon AB Sweden...
- Page 42 NIC2-2 · Installation and Set-up Manual Publication no. 201101 5. Error Messages Although all error messages are plain text and self explaining, some guidelines on how to react and handle on these will be appropriate. The error message will disappears when any key is pressed.
- Page 43 Publication no. 201101 NIC2-2 · Installation and Set-up Manual Blank Page October 2005 Triacon AB Sweden...
- Page 45 Triacon Scientific AB Betselgatan 6 213 77 Malmö Sweden Publication No. 201101 October 2005 KODAK and MIN-R are trademarks...